Gabe's Gazebo (Gabezo?) Project
excuse the lengthy intro...
I've been an amateur carpenter for a some time. Brock gave me plenty of learning opportunities when I was a teen-ager, and I apprenticed at A-1 Builders in Bellingham back in 1999. Since then, I've completed various little building projects, like the sauna at the Pharm, the wedding arch, and several other small projects. For years, I under-employed myself in Bellingham, doing odd construction jobs, picking up various skills. Since buying my house, I've found no end to carpentry projects, often unexpected and unwelcome. Rough carpentry has generally been my thing. I like to get a lot of work done, and fast. I've never been big on details and finish work, lacking the patience and generally wanting to see rapid progress. Recently, I've aspired to craftsmanship, which means slowing down (way down) and paying more attention to the details. I designed and built this gazebo with craftmanship in mind. I couldn't help rushing a bit, as my busy life makes all spare time very valuable. I did make a few mistakes, but overall the gazebo turned out symmetric, solid, and beautiful (if I do say so myself). This post tells the story of this fun project, as it stretched over the past 12 months. Check it out!June 2010
Cynthia and Morgan flew to California one week before I left for our summer roadtrip. With the place to myself, I was free to work on this project from dawn to dusk. I broke ground and got a lot of work done on the gazebo that week.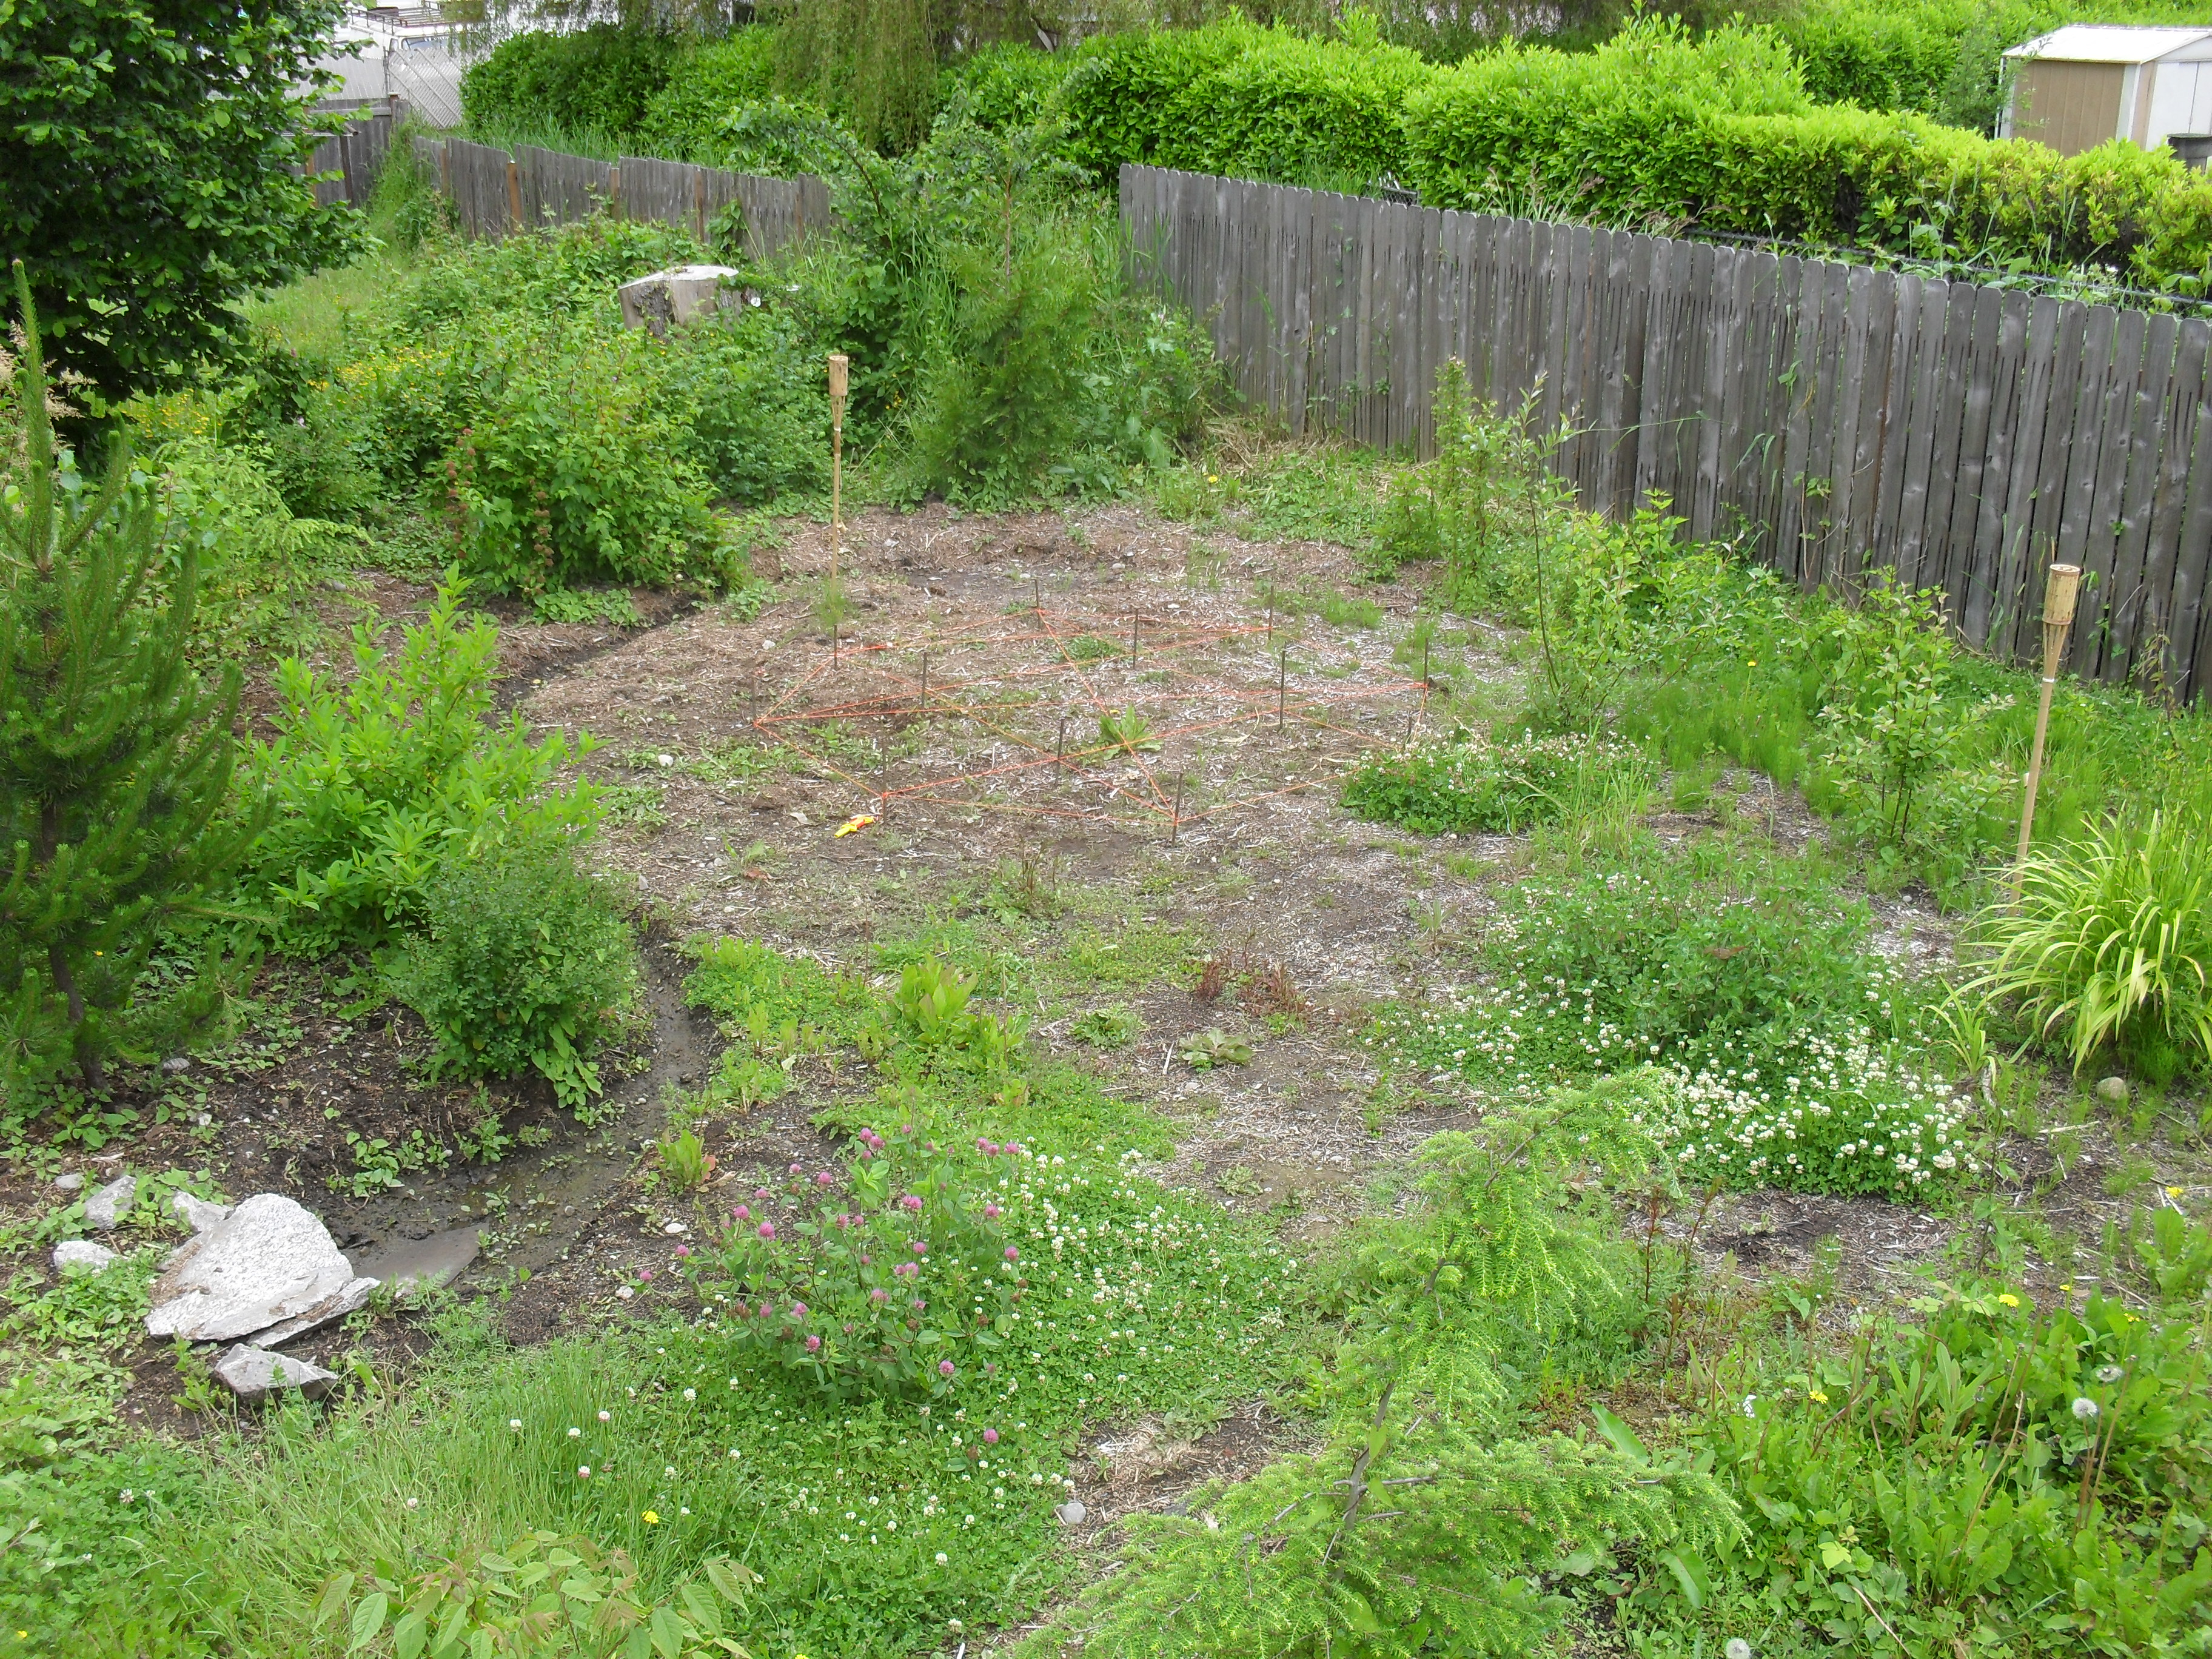 I had to move a little hemlock that I had planted in 2007, in order to make room for the gazebo.
Once the area was clear, I laid out the foundation plan with stakes and string.
You can't really see the layout in this little photo, so click and check out the larger version.
I had to move a little hemlock that I had planted in 2007, in order to make room for the gazebo.
Once the area was clear, I laid out the foundation plan with stakes and string.
You can't really see the layout in this little photo, so click and check out the larger version.
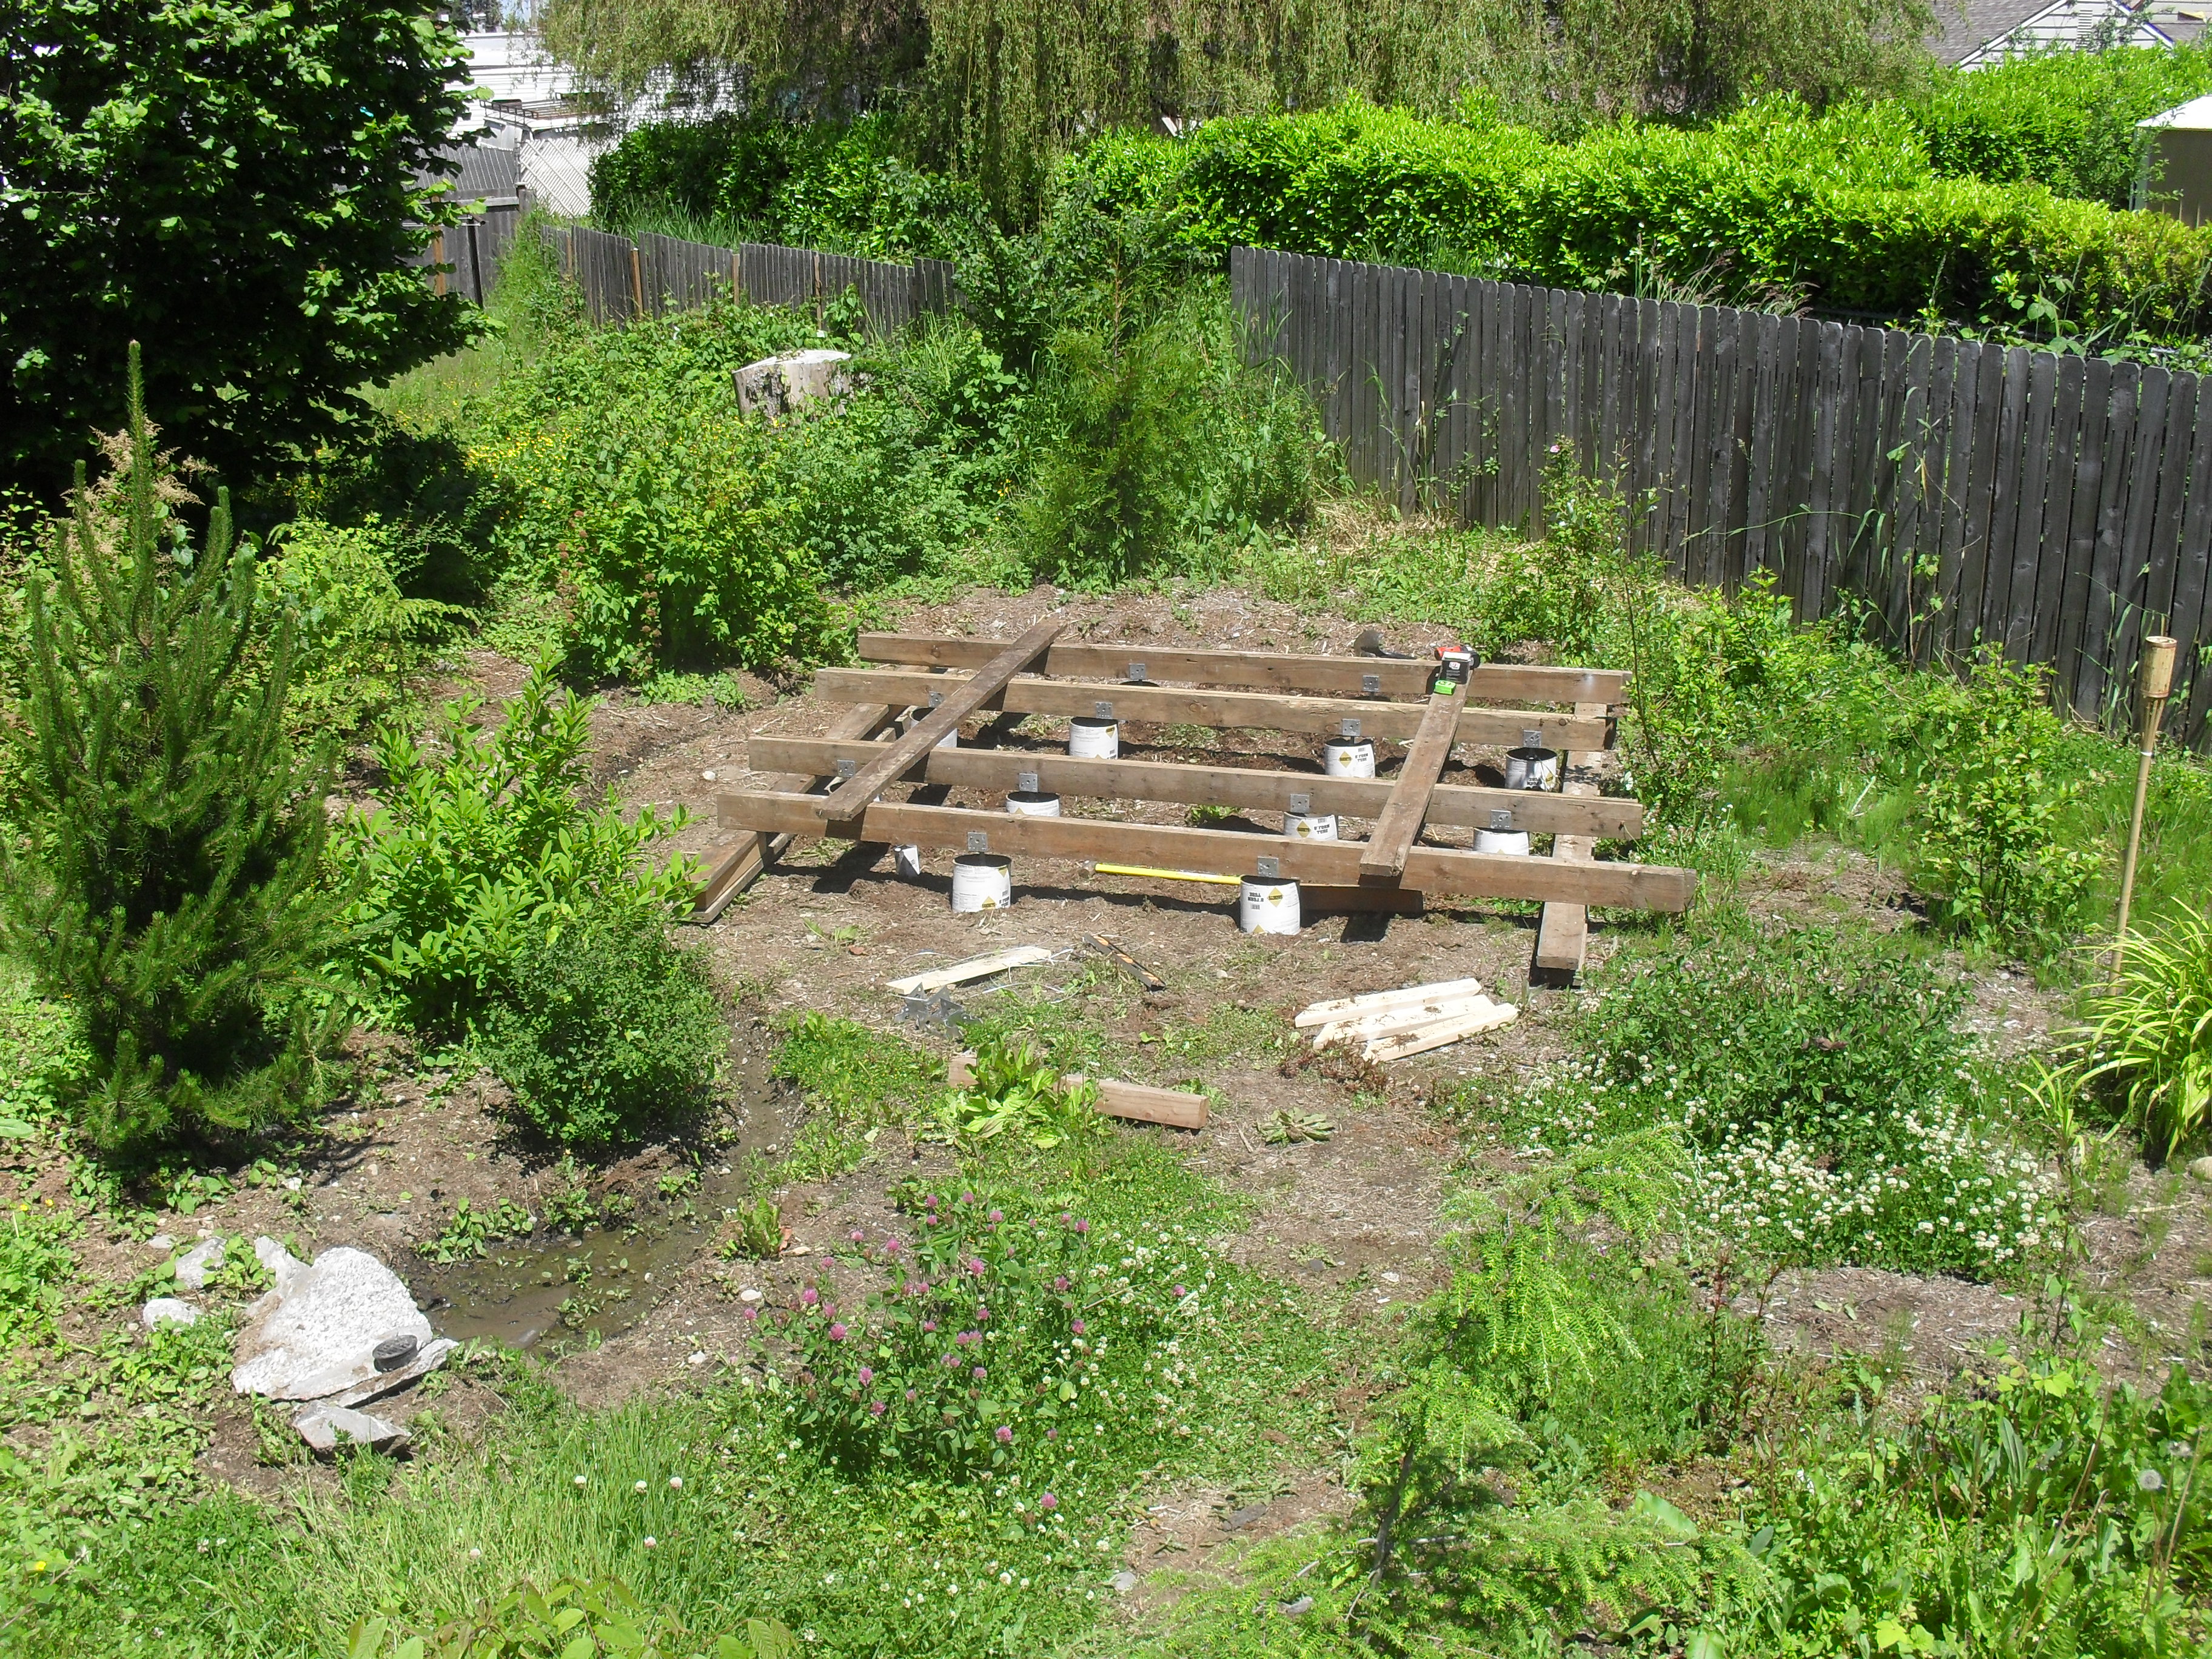
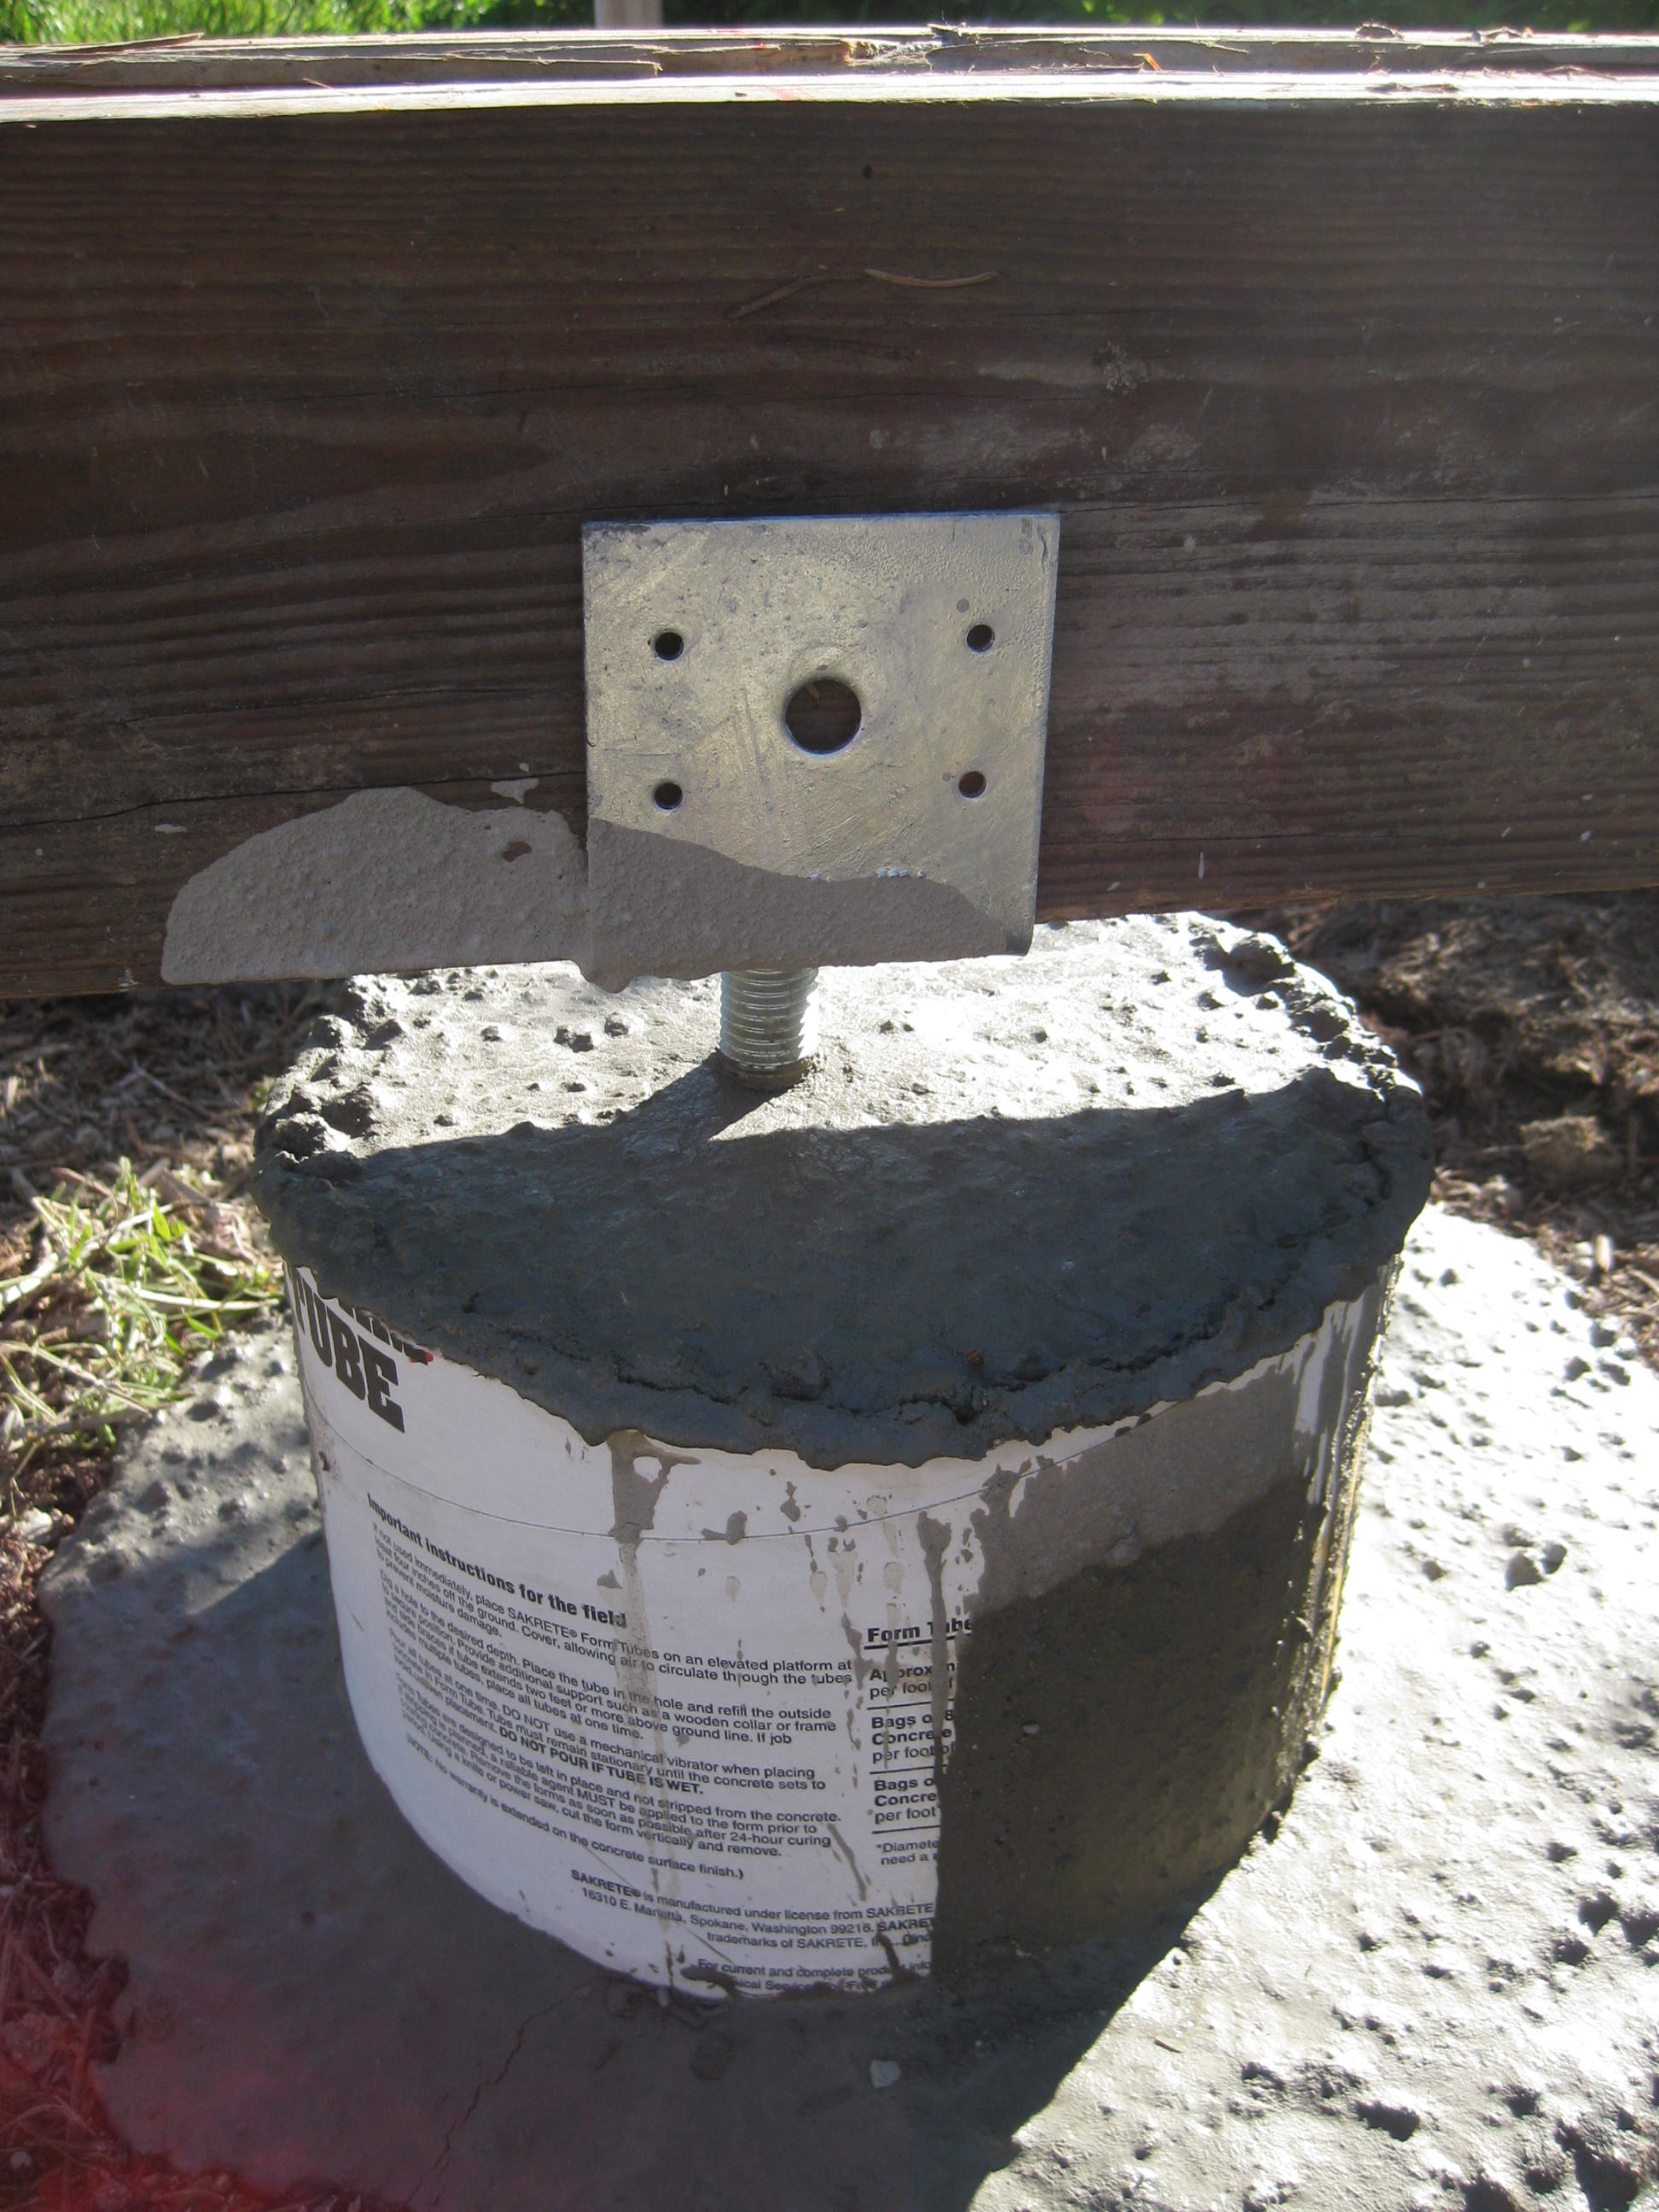
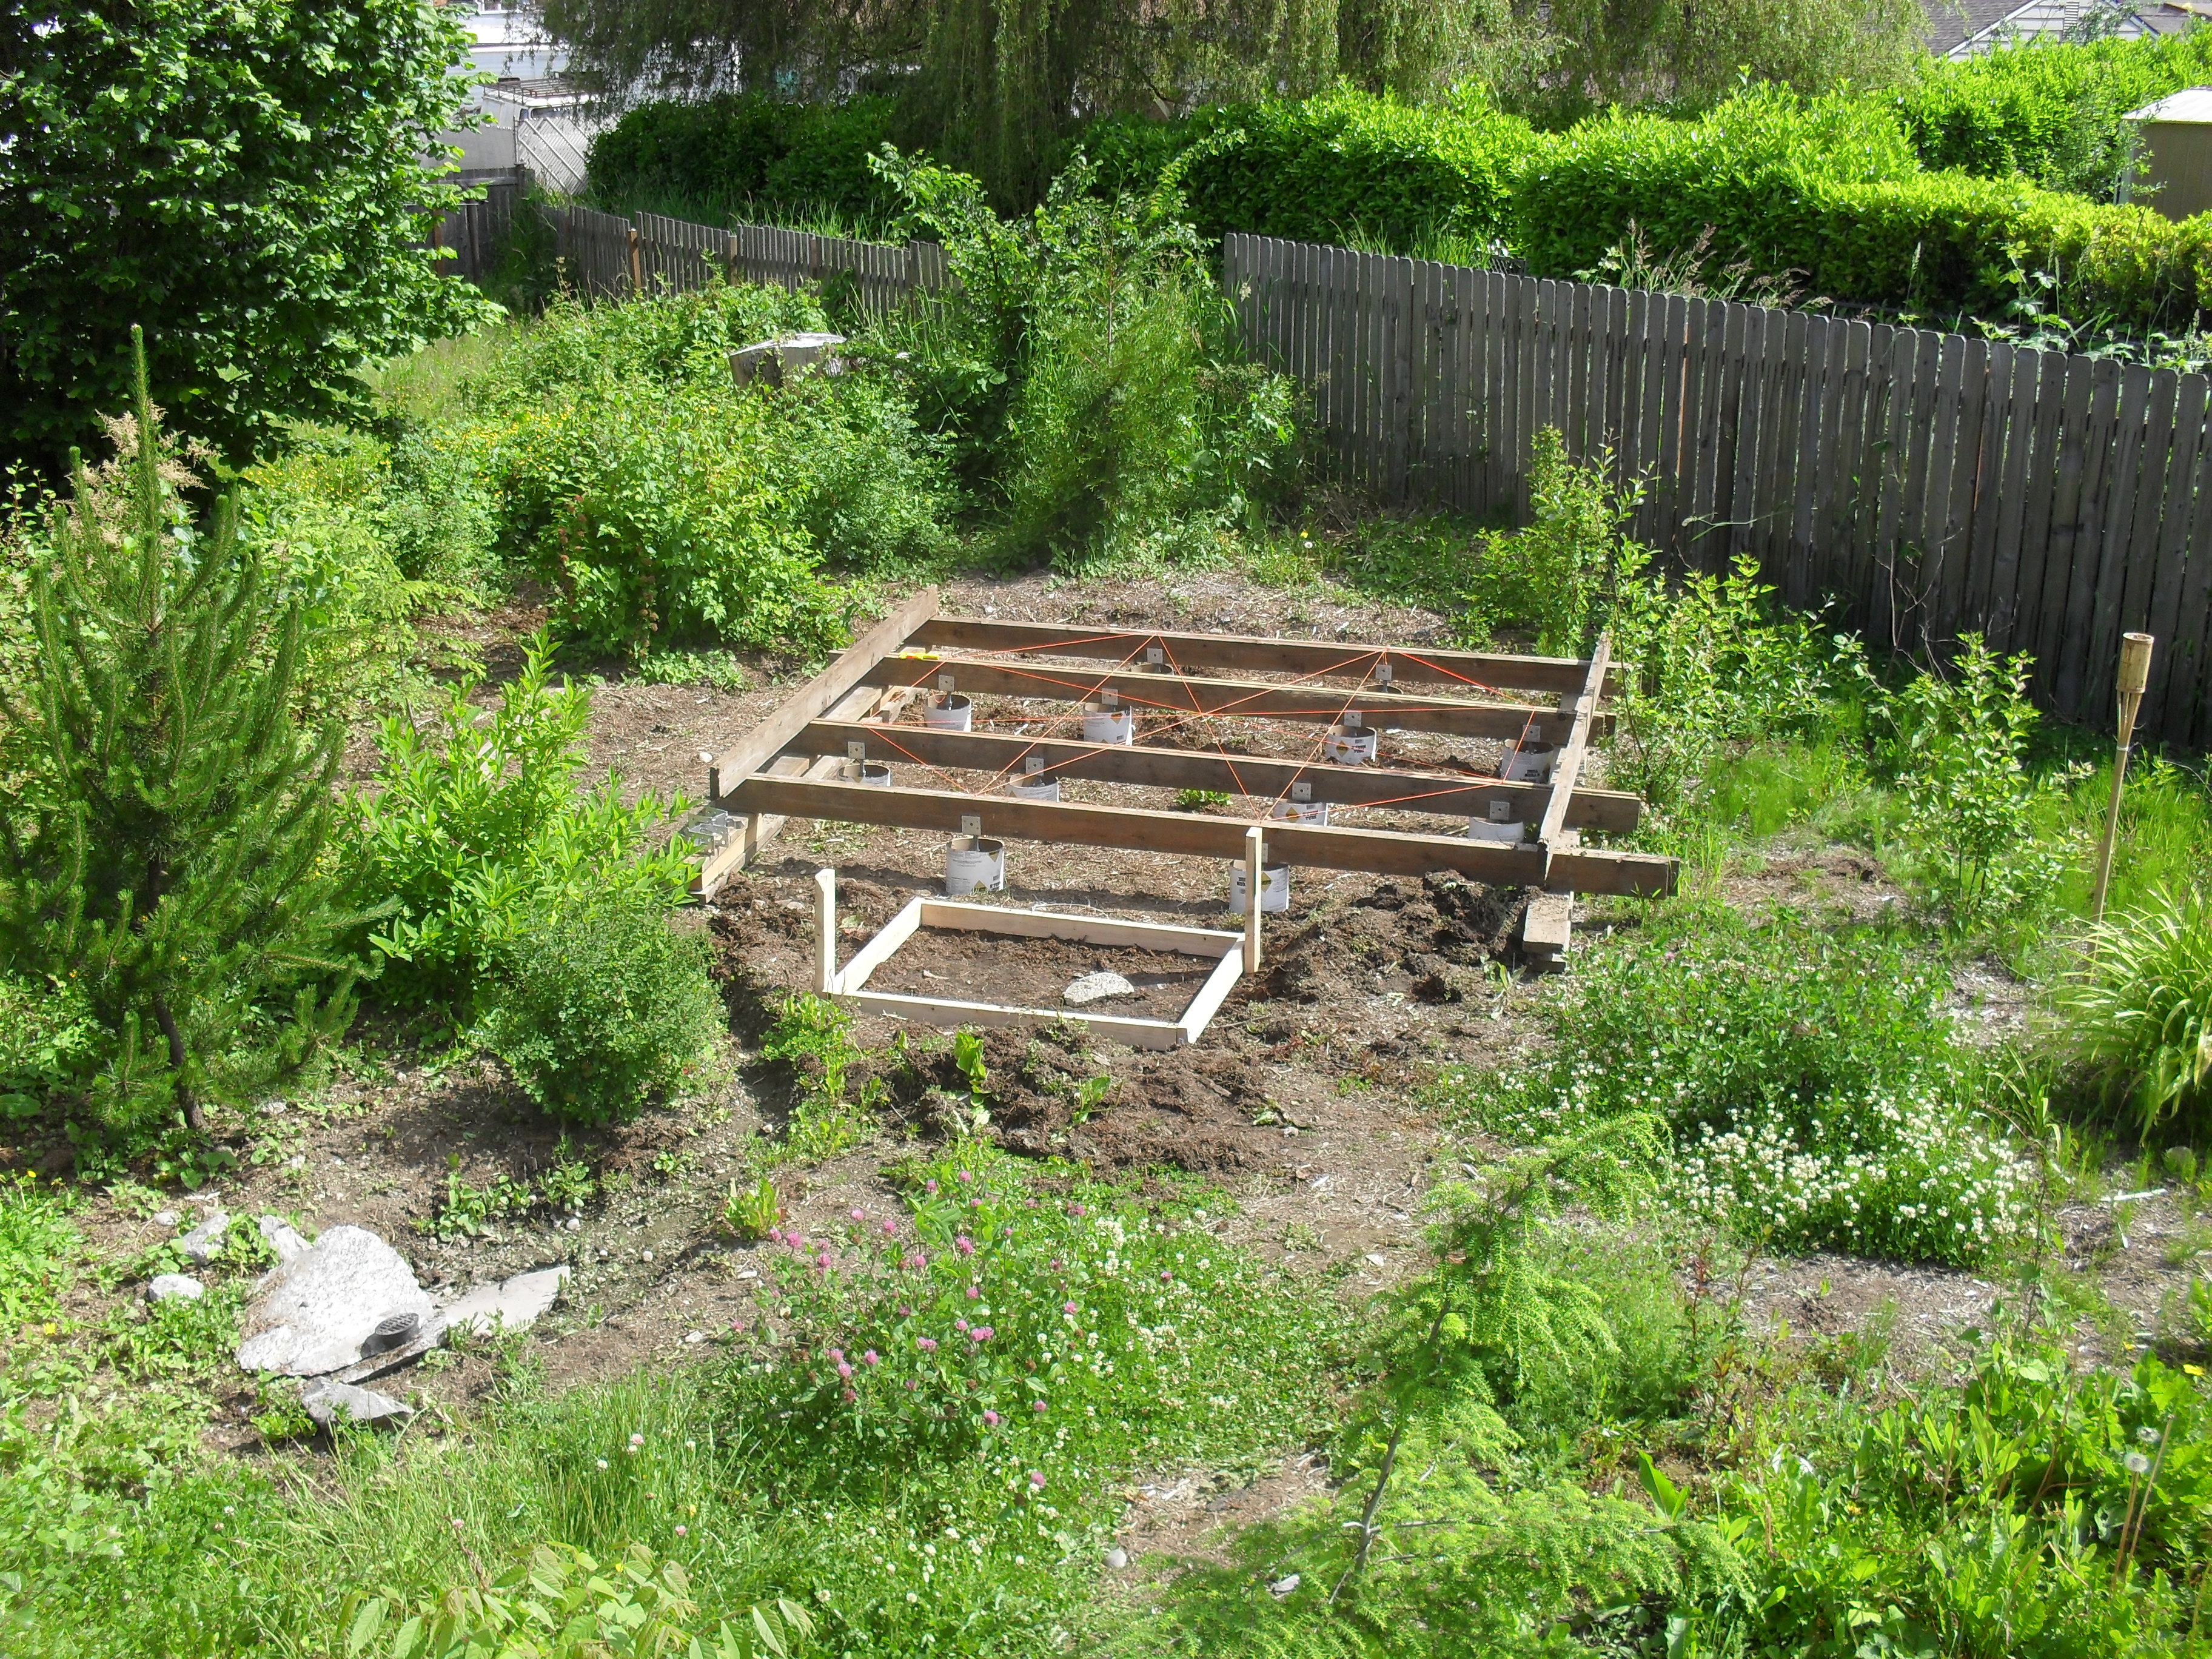 I sledged some rebar into the ground and set form tubes on top, triple checking all of the geometry.
I suspended steel brackets from a temporary frame into each of the form tubes, and leveled it all out.
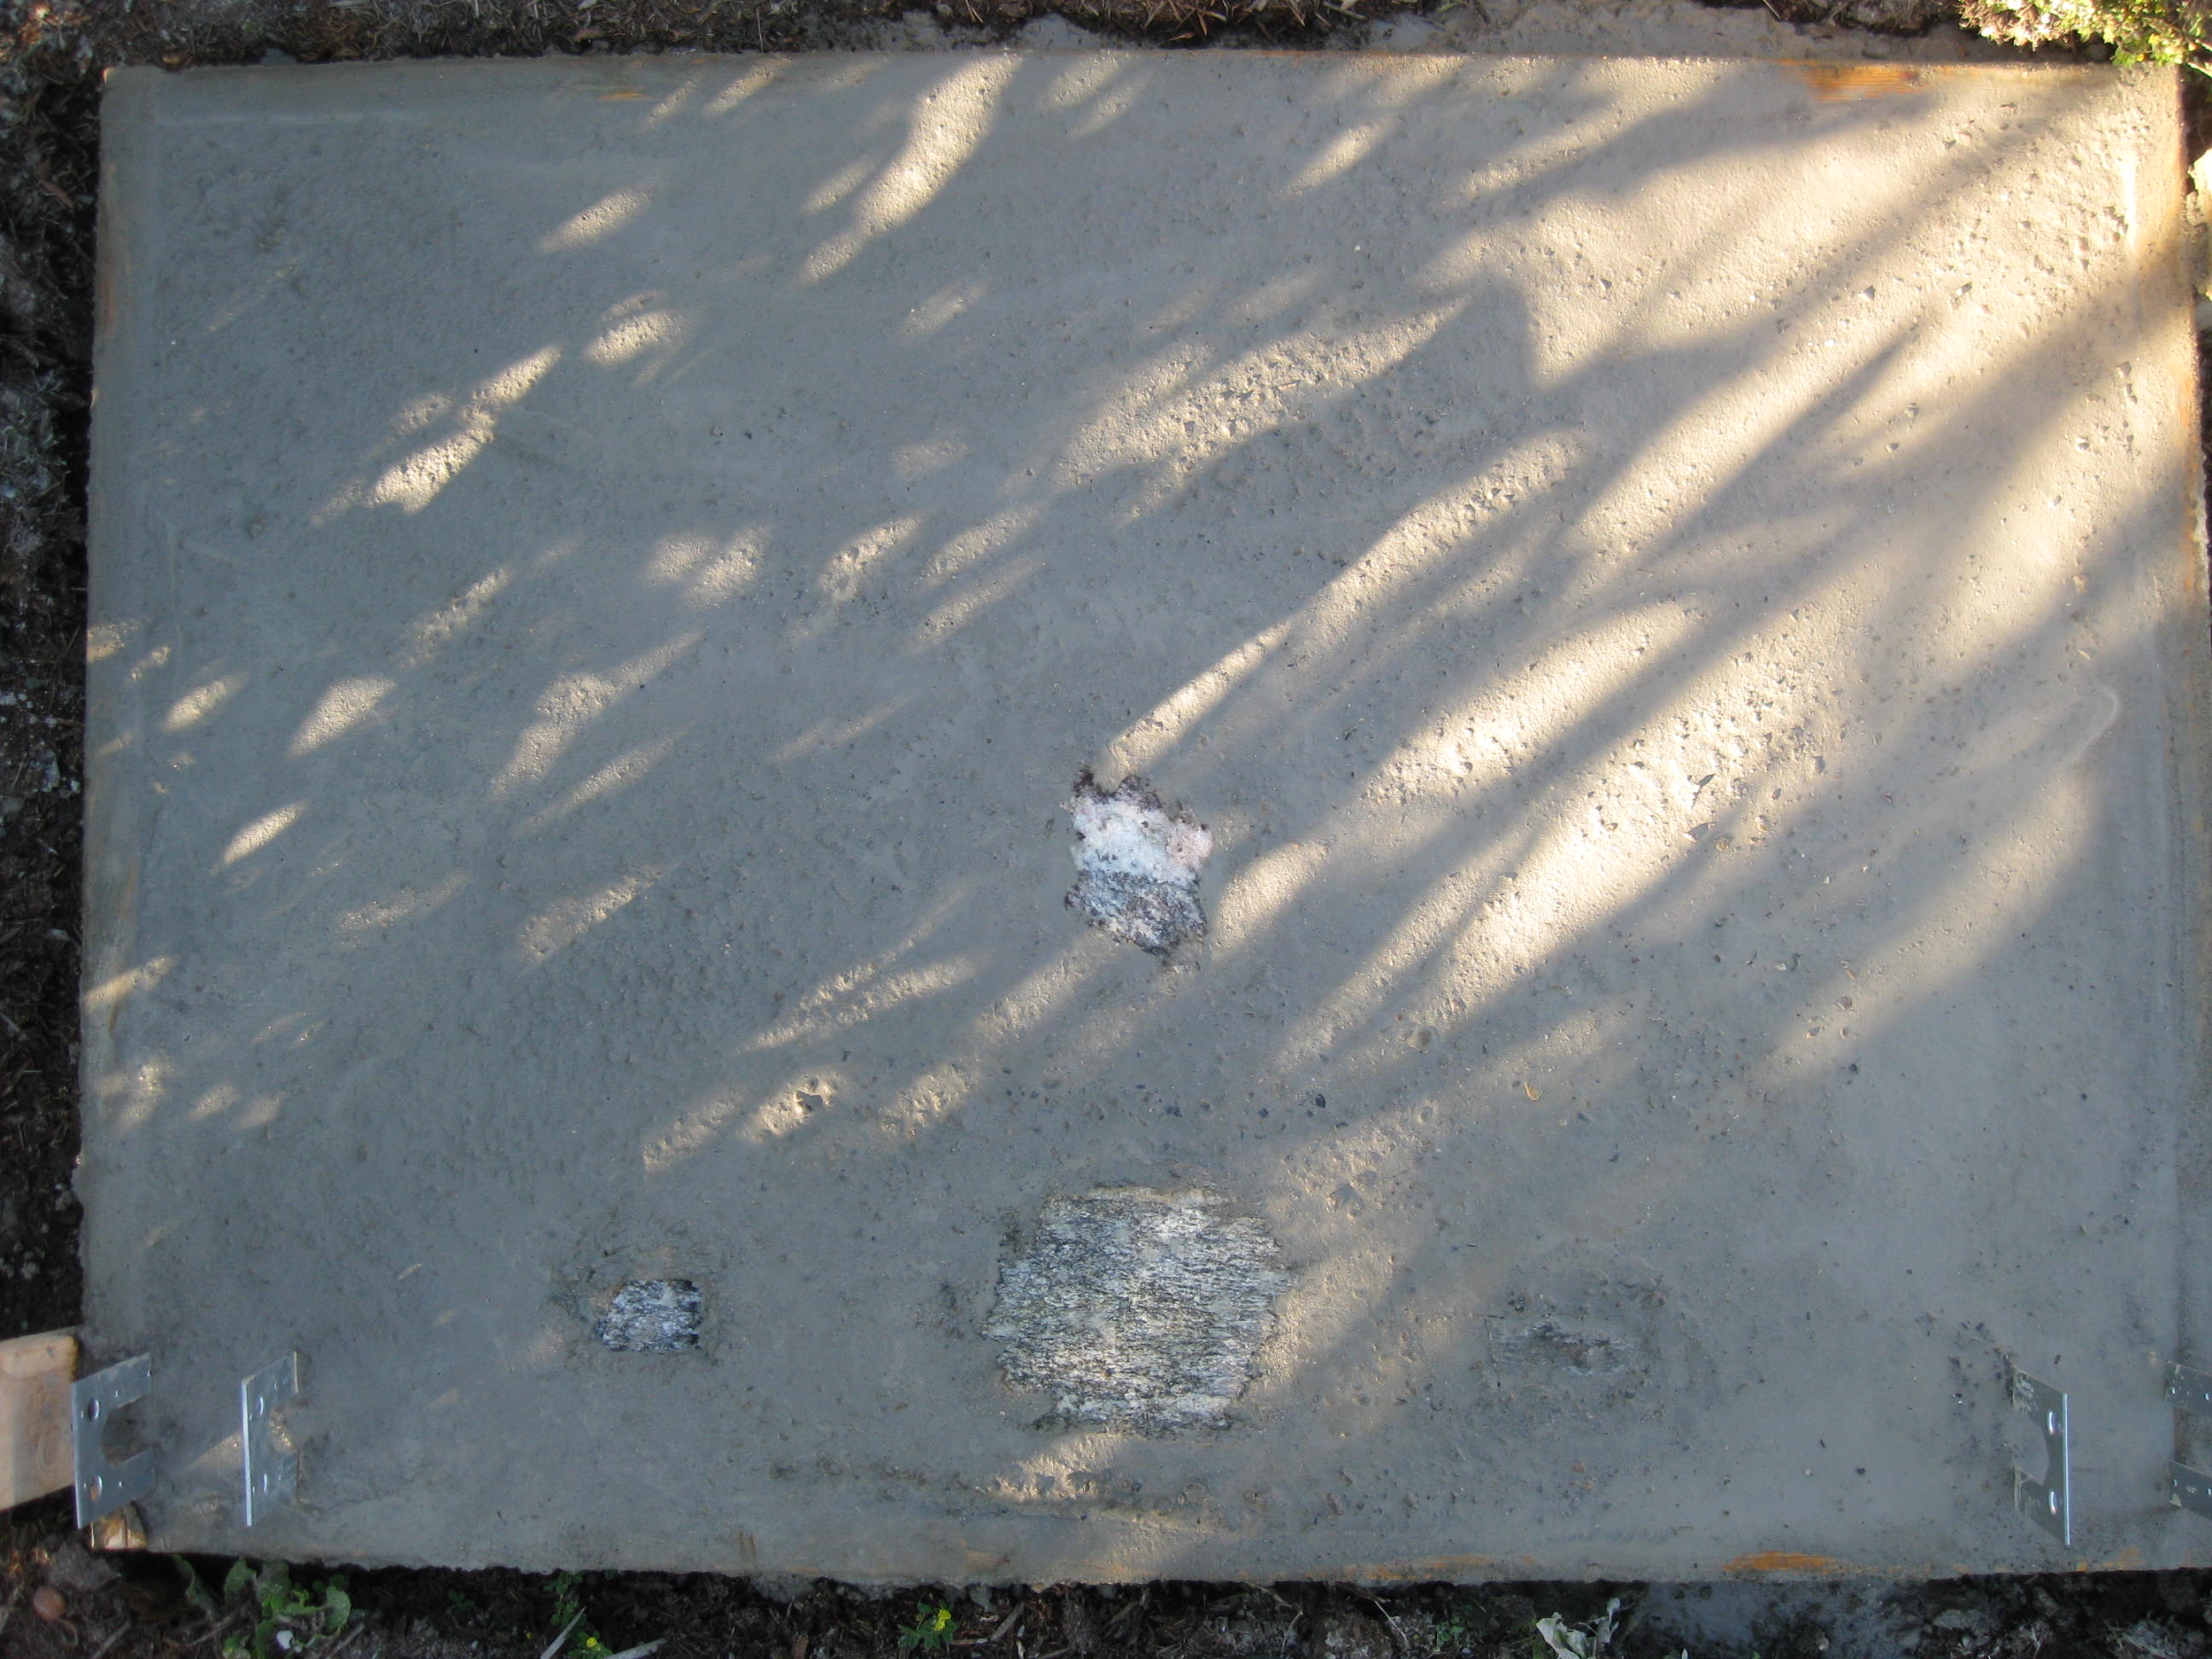
I built the form for a slab at the base of the future stairs and set some nice gniess into it (haha, stupid geo-jokes).
I sledged some rebar into the ground and set form tubes on top, triple checking all of the geometry.
I suspended steel brackets from a temporary frame into each of the form tubes, and leveled it all out.
I built the form for a slab at the base of the future stairs and set some nice gniess into it (haha, stupid geo-jokes).
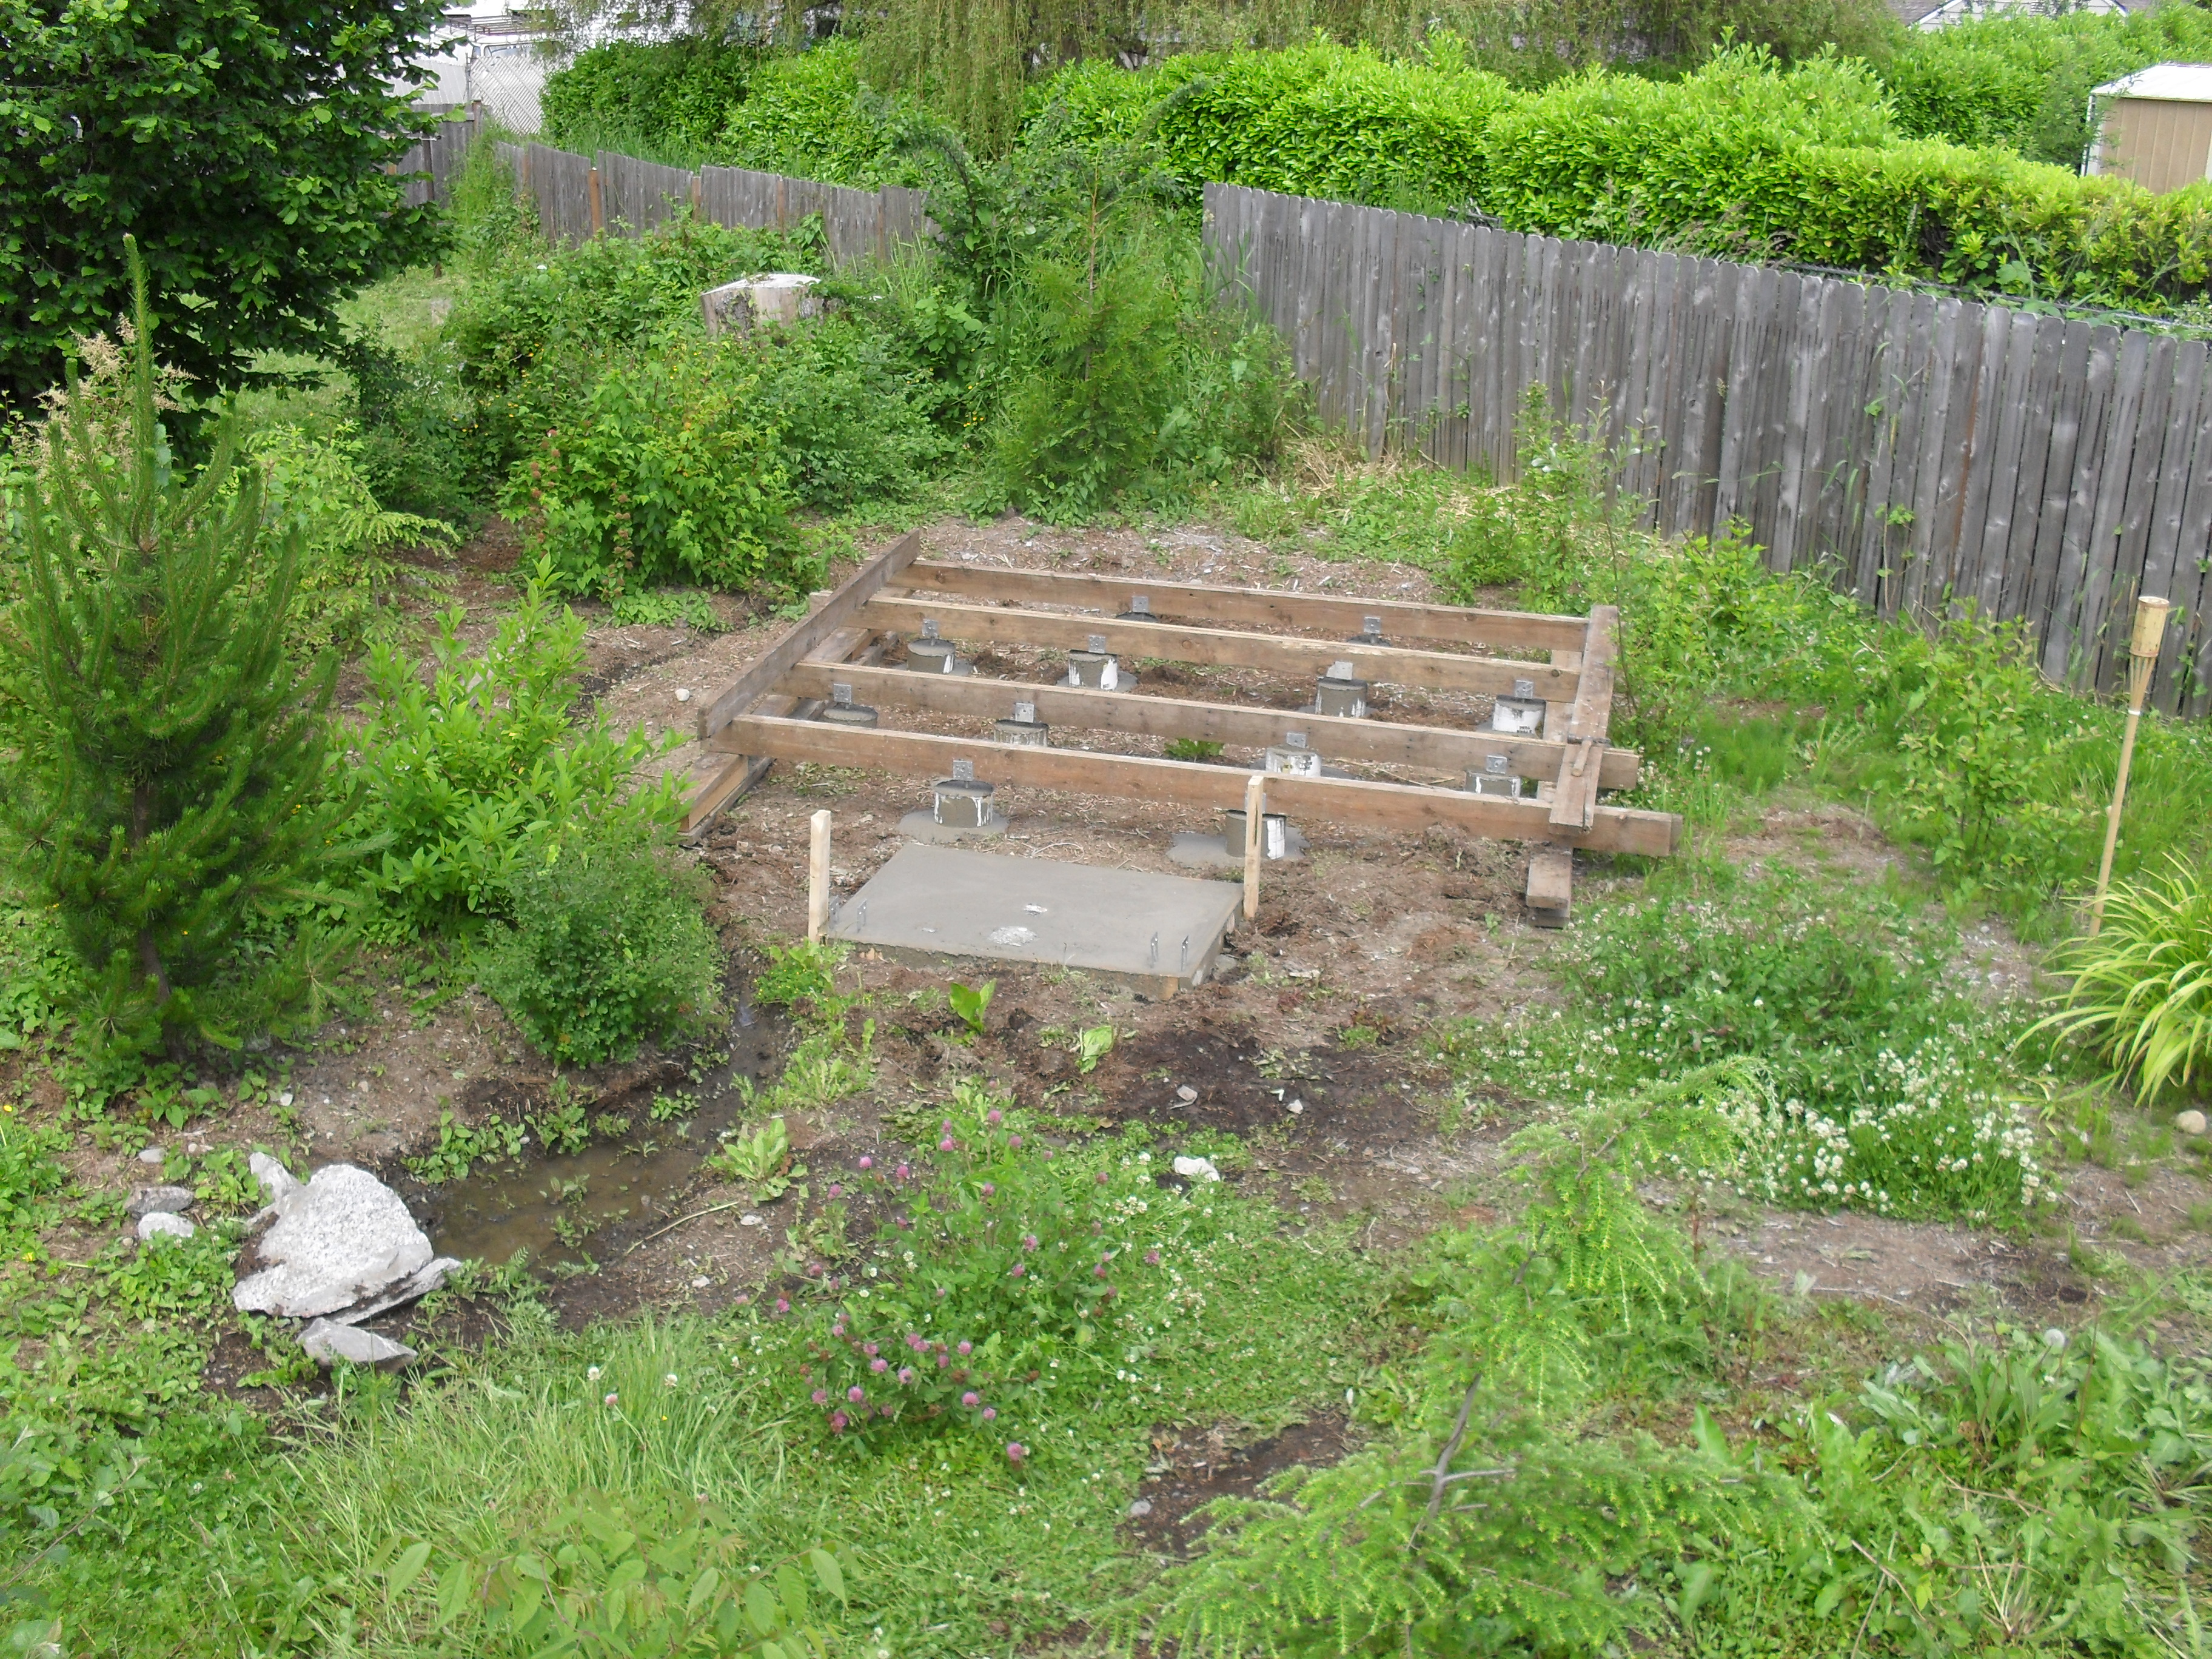 Then, with the ol' wheelbarrow-shovel-hose technique, I mixed and poured my concrete.
 Here's a shout-out to Dan and Kevin who helped me out that week.
(instead of burling through a three-day storm in the Glacier Peak Wilderness)
Here's a shout-out to Dan and Kevin who helped me out that week.
(instead of burling through a three-day storm in the Glacier Peak Wilderness)
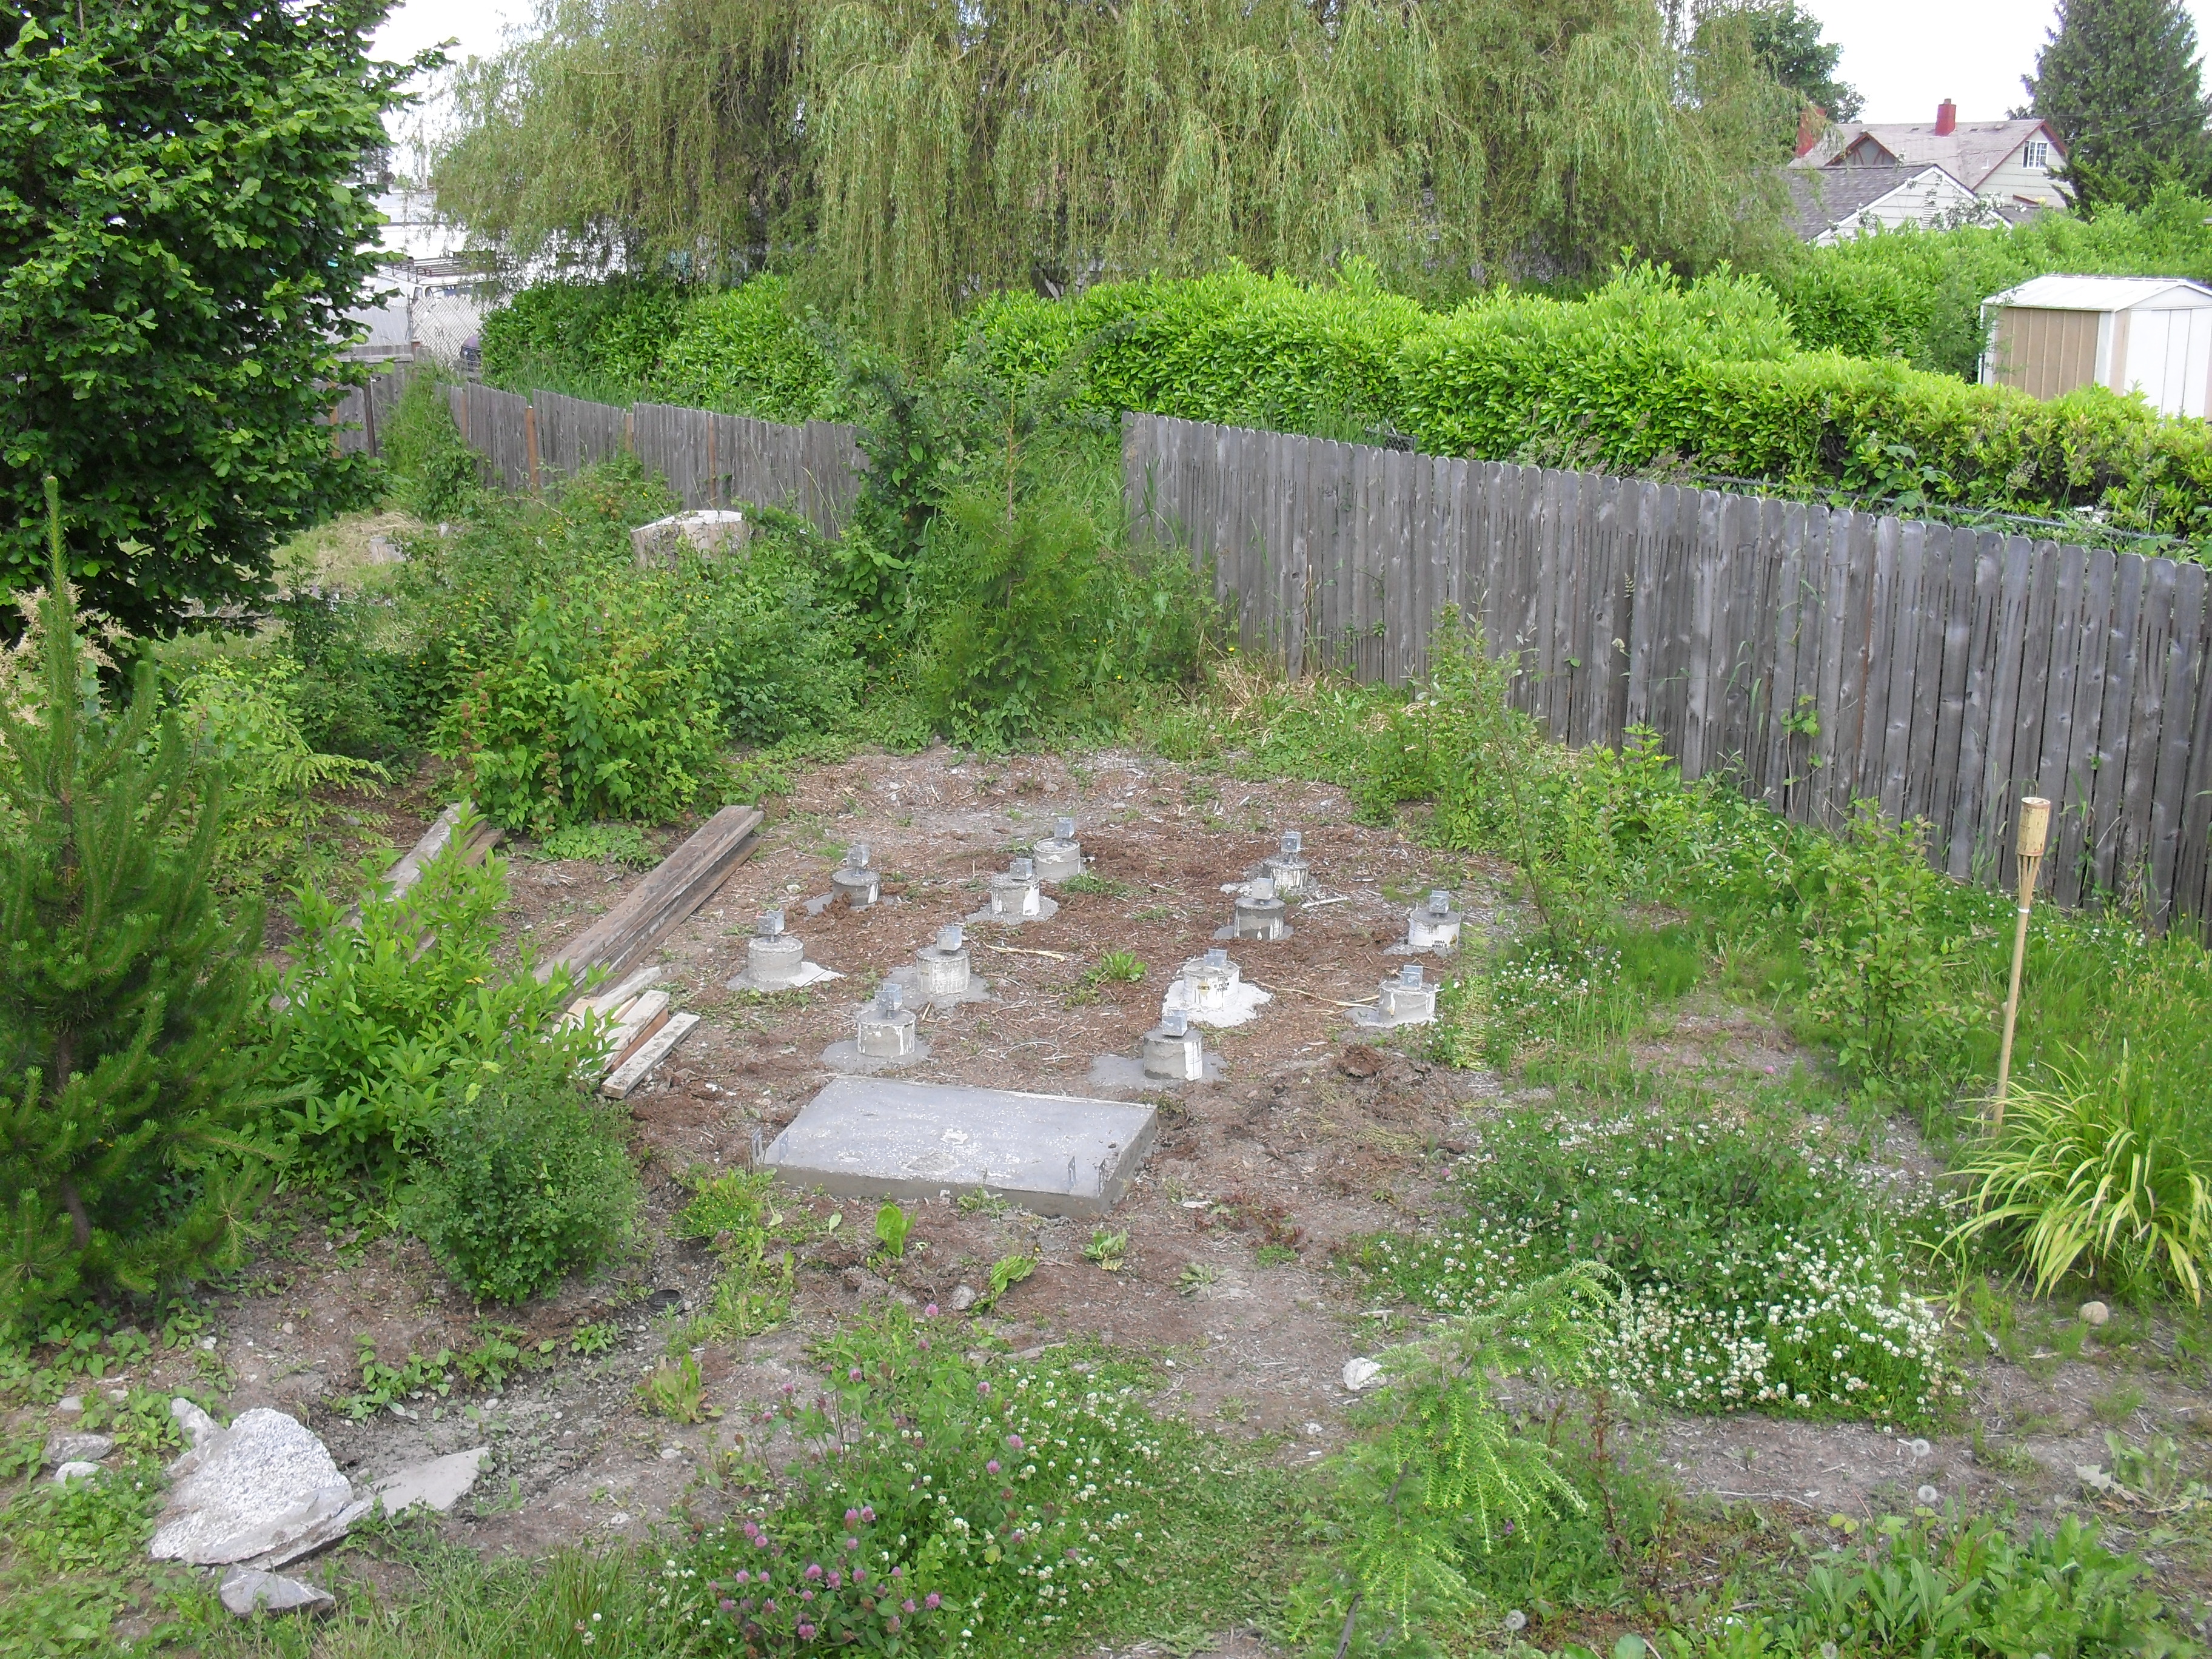 Removing the concrete forms can feel like a step backward, as you lose half of your erected materials.
On the other hand, its kind of like unwrapping a present. Mmmmm. Twelve nice level concrete pillars.
Removing the concrete forms can feel like a step backward, as you lose half of your erected materials.
On the other hand, its kind of like unwrapping a present. Mmmmm. Twelve nice level concrete pillars.
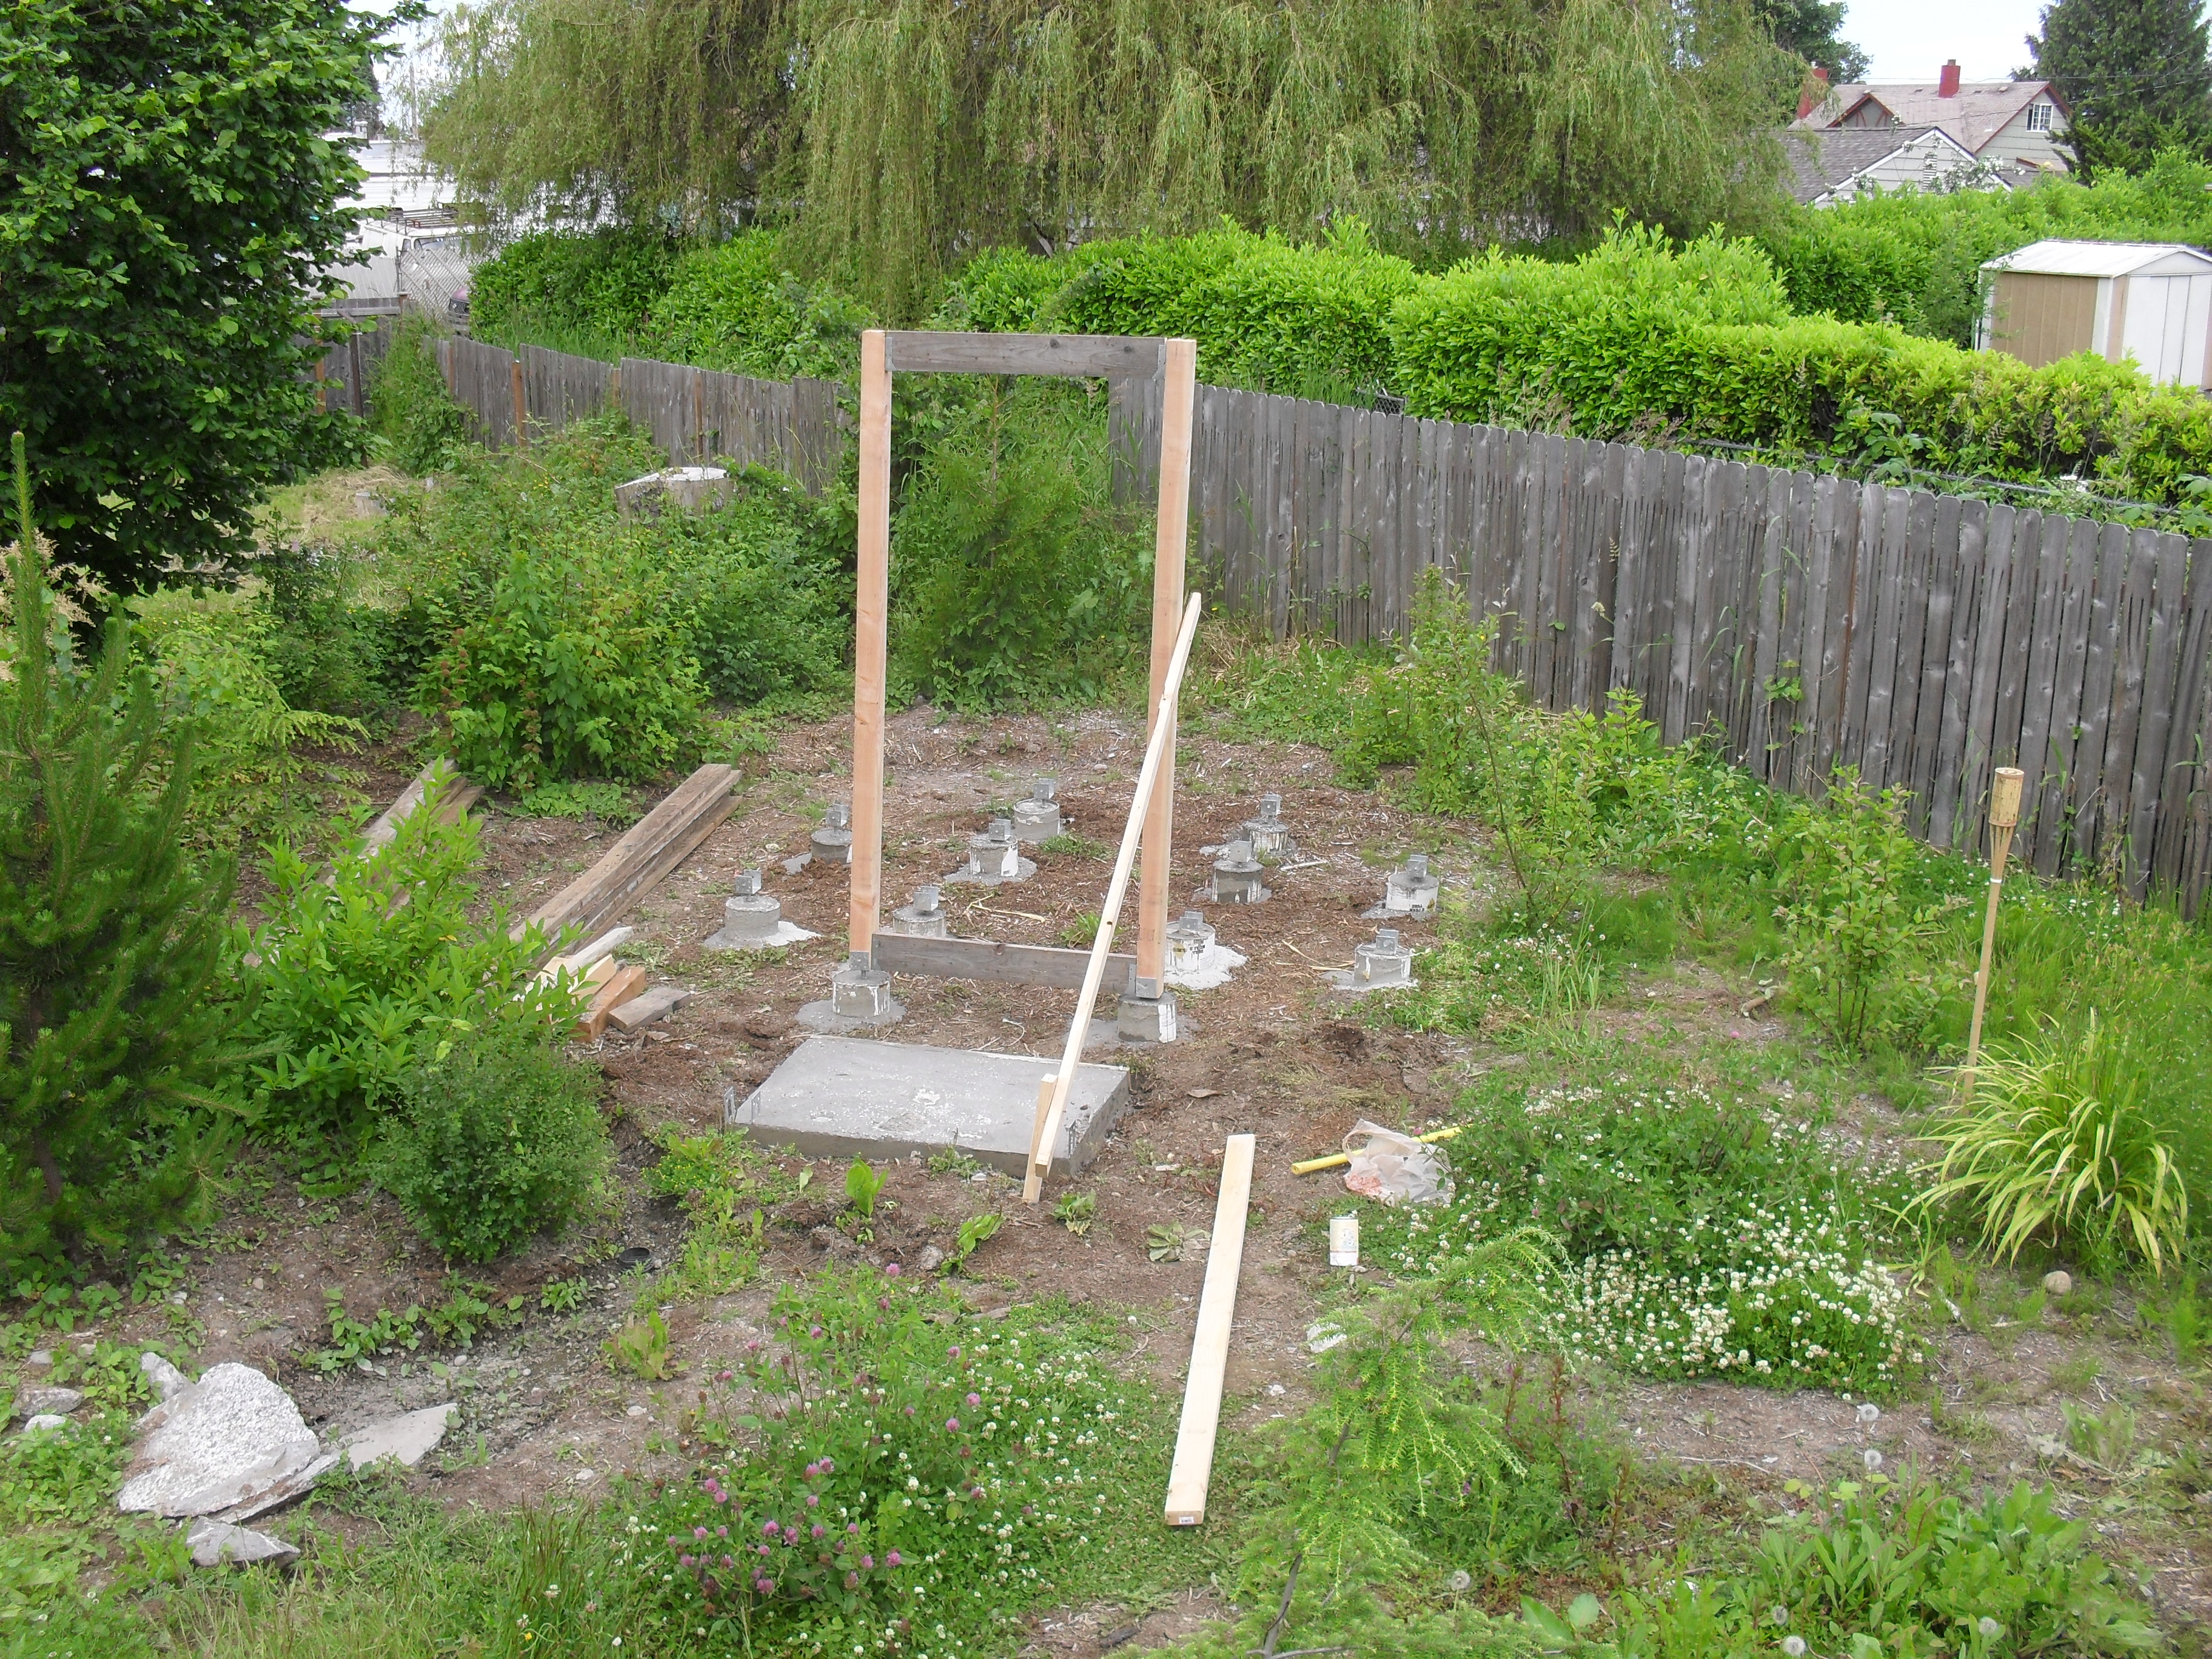
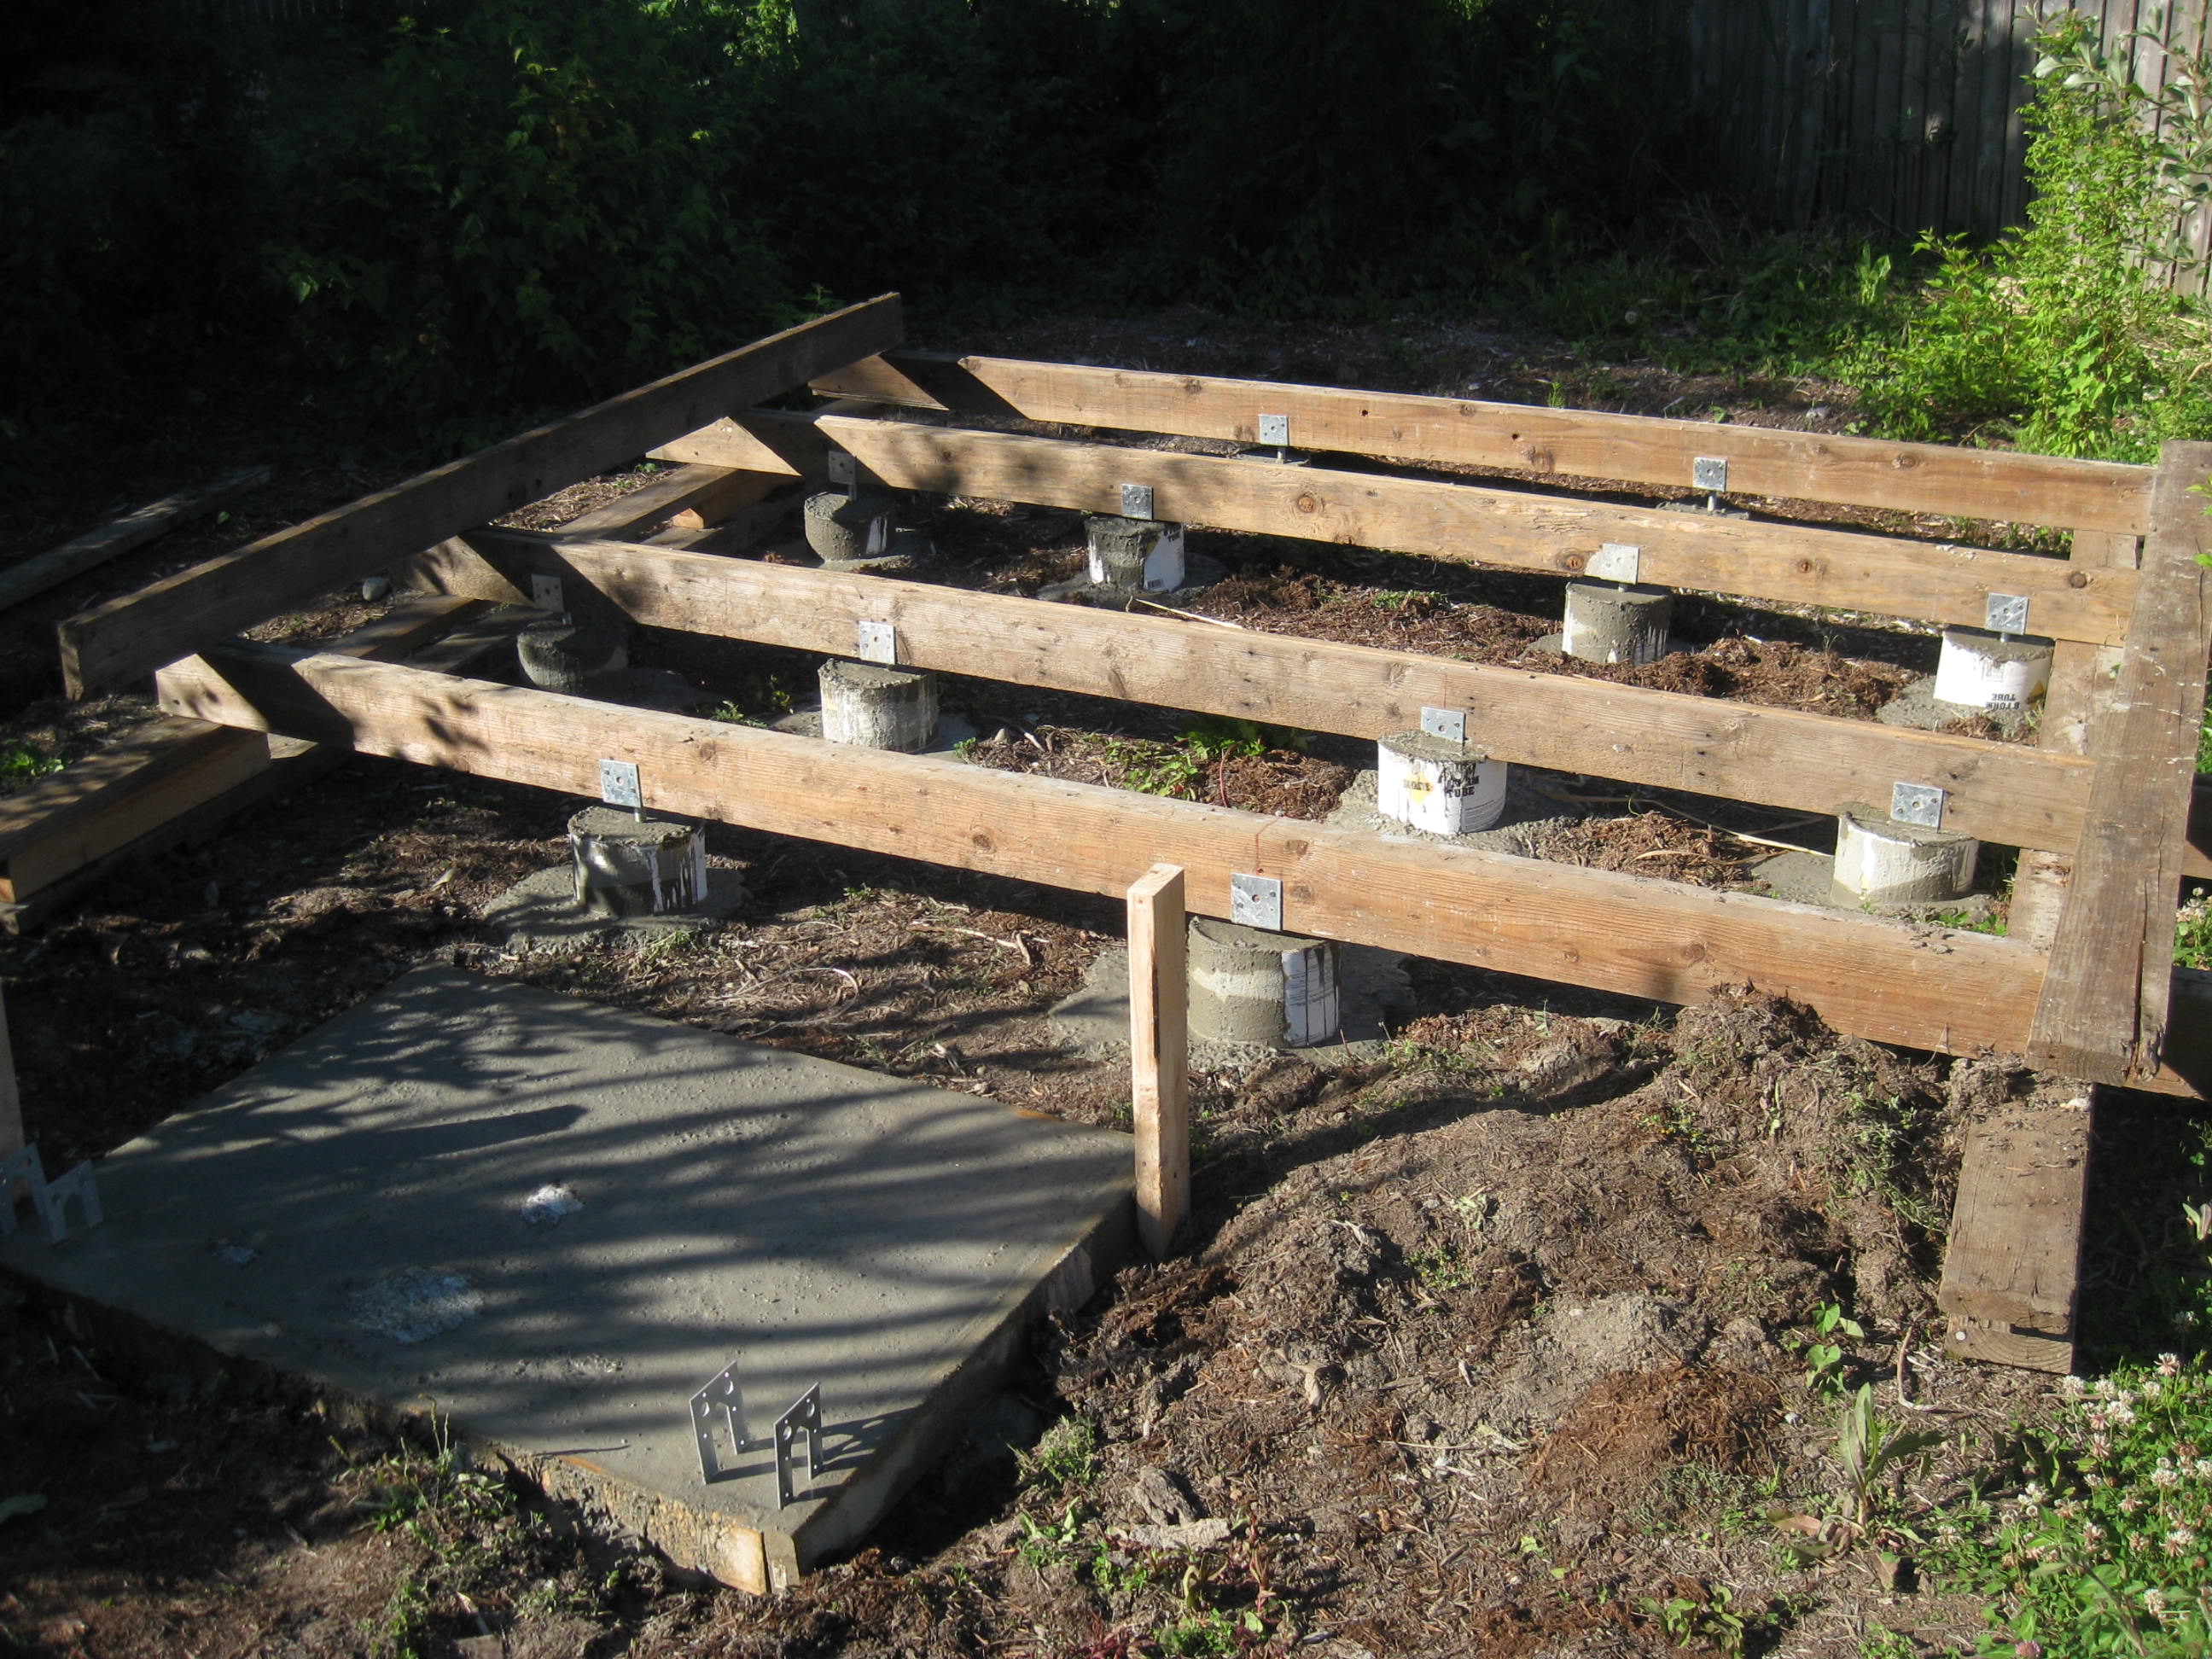
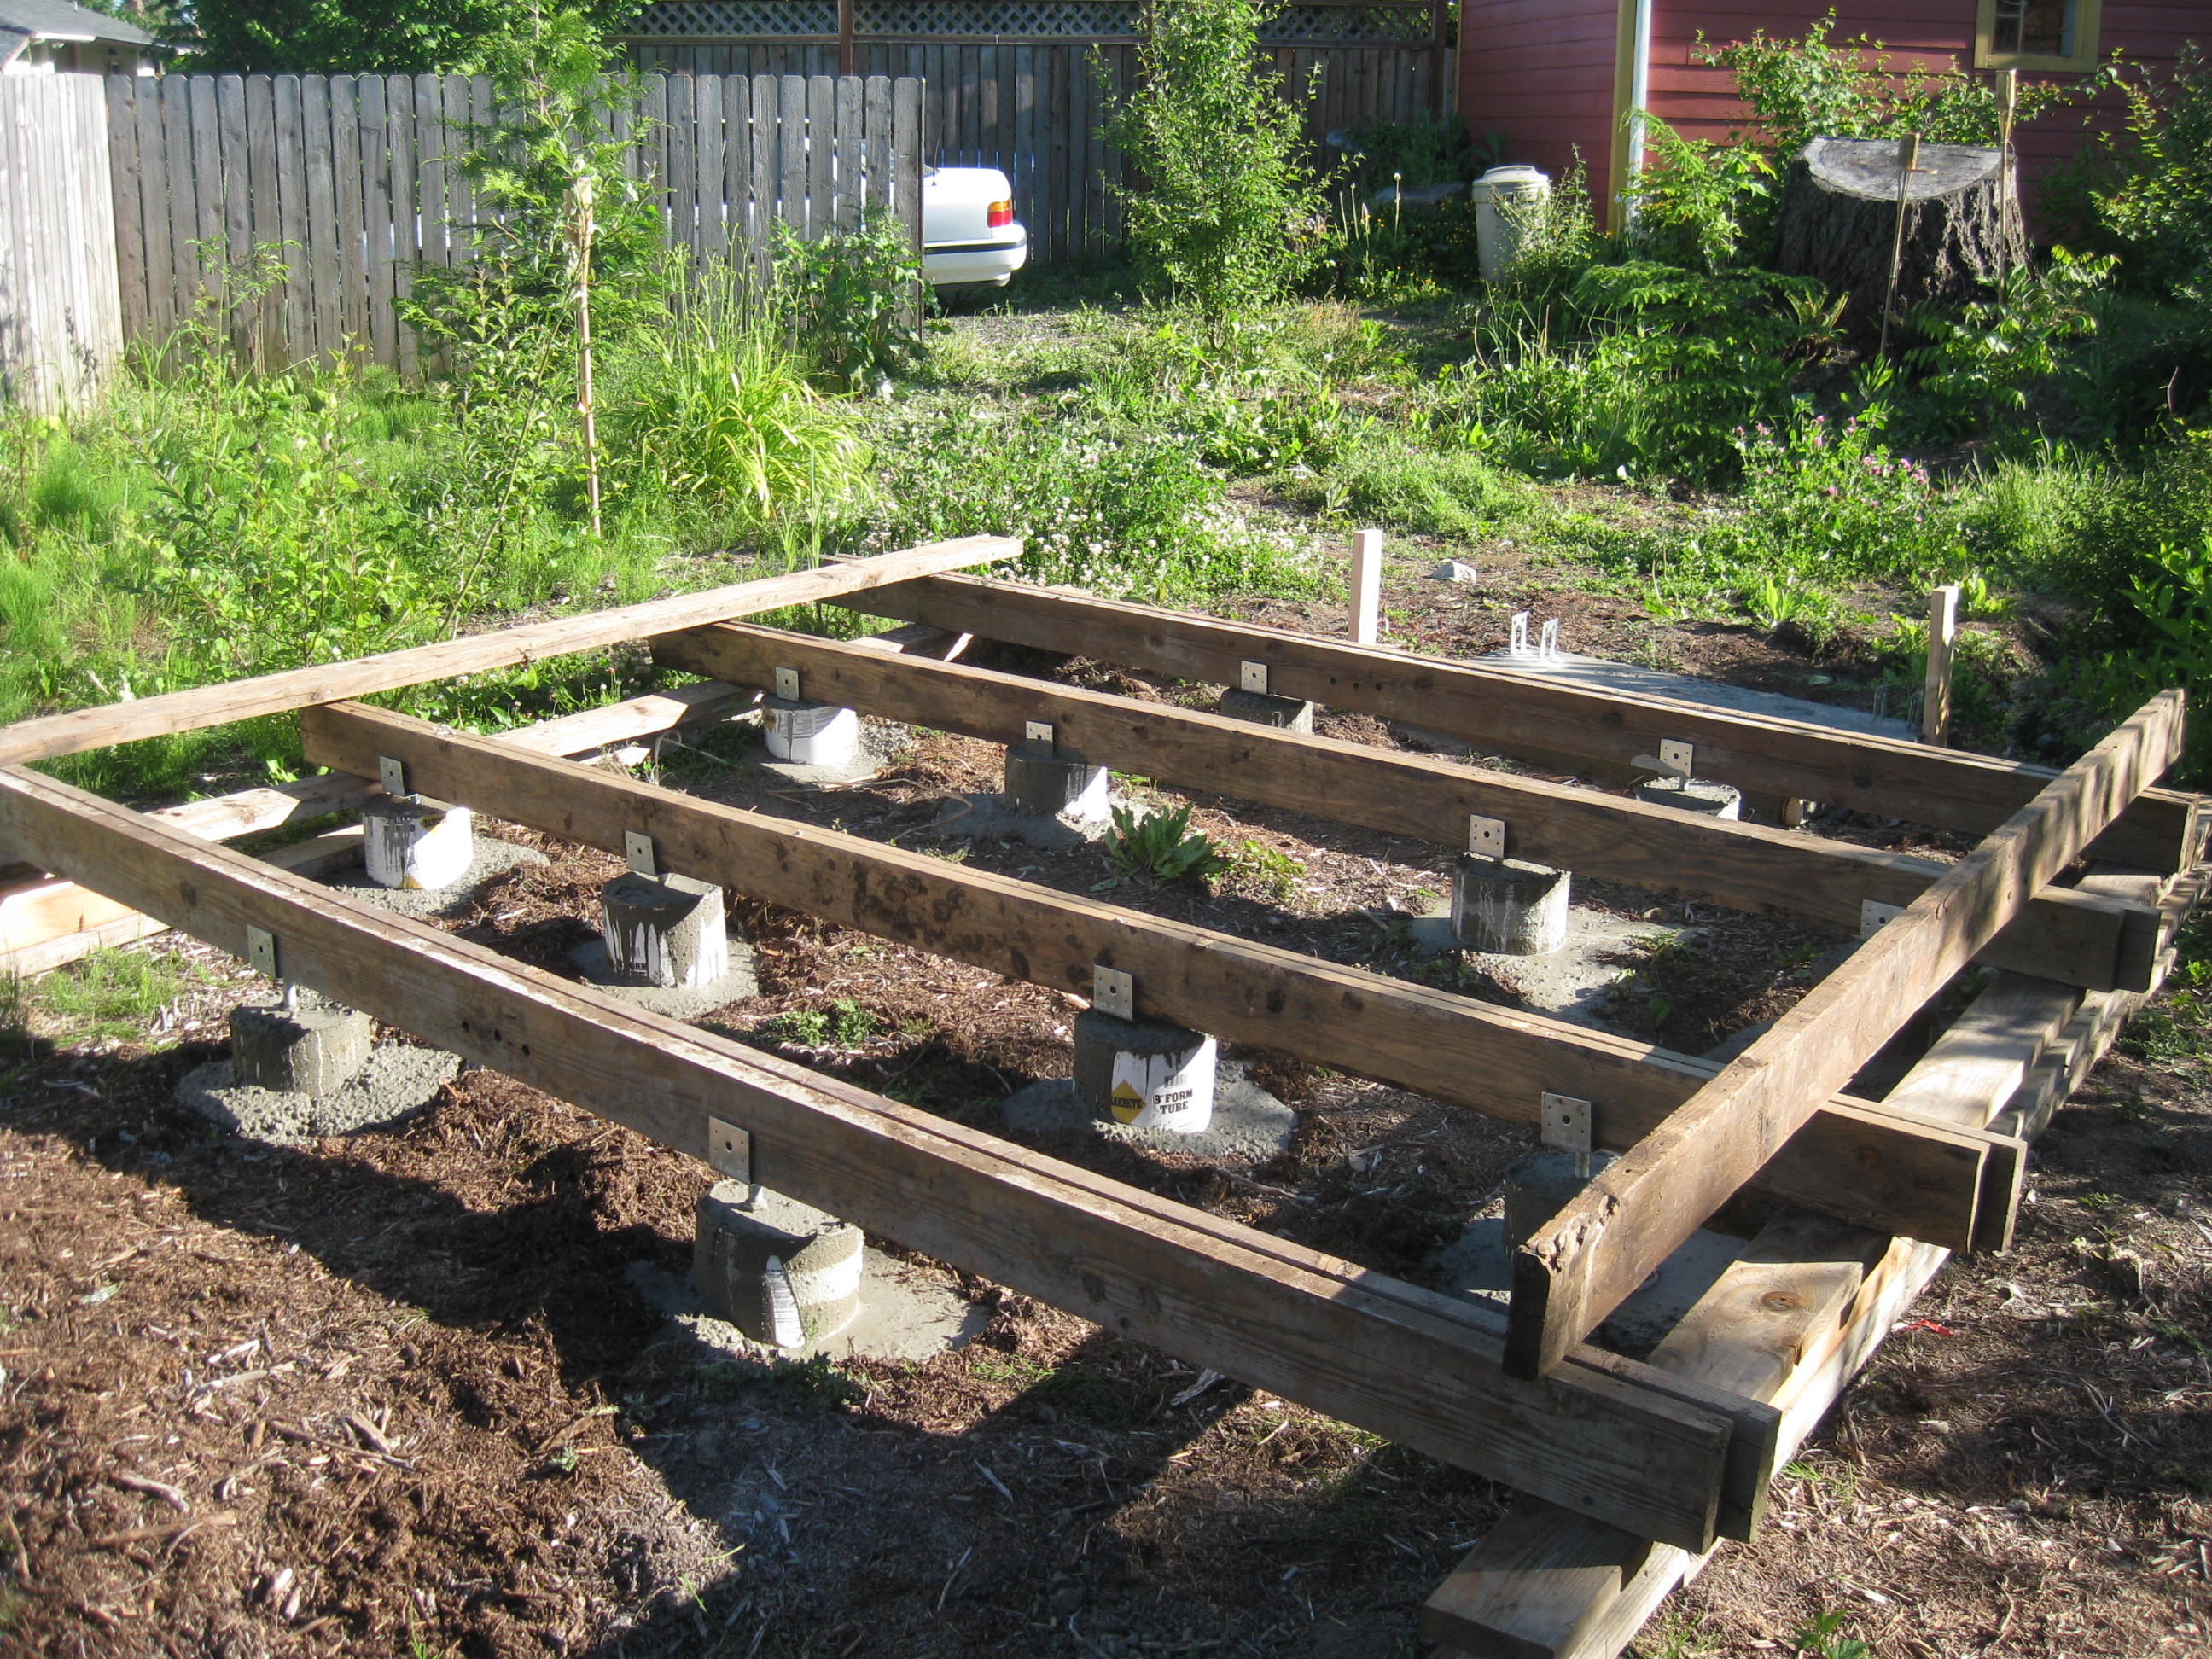
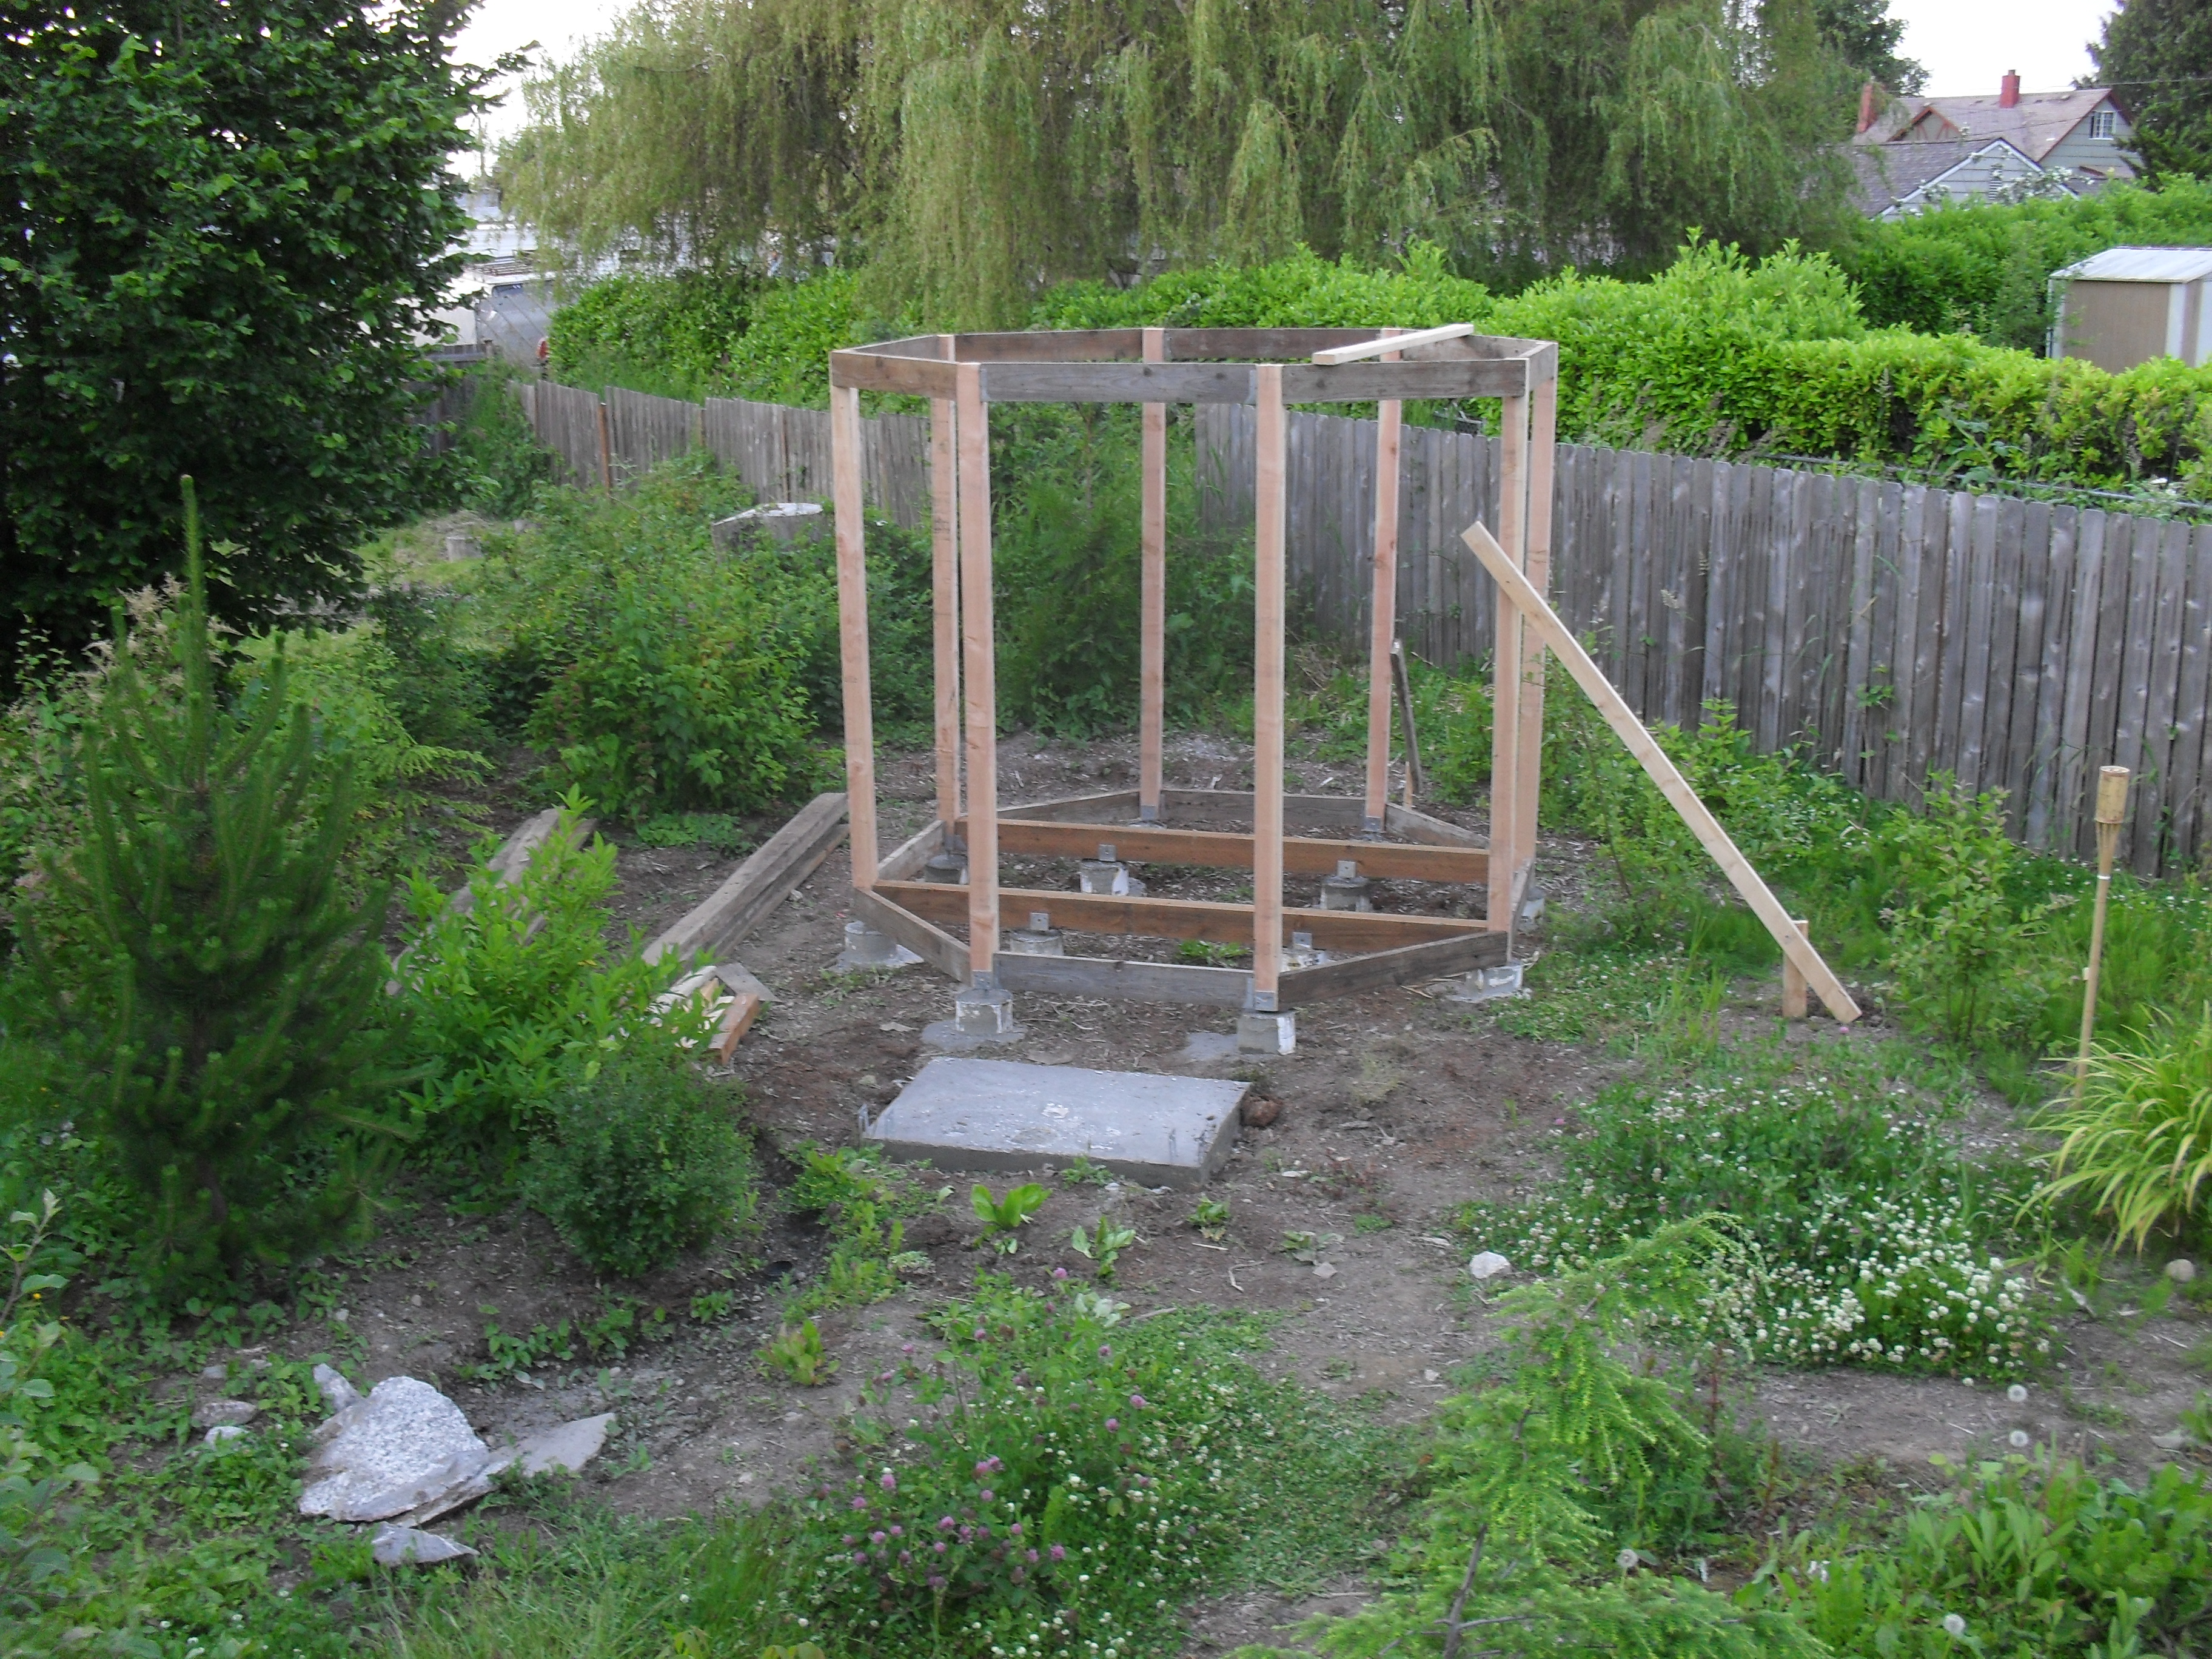
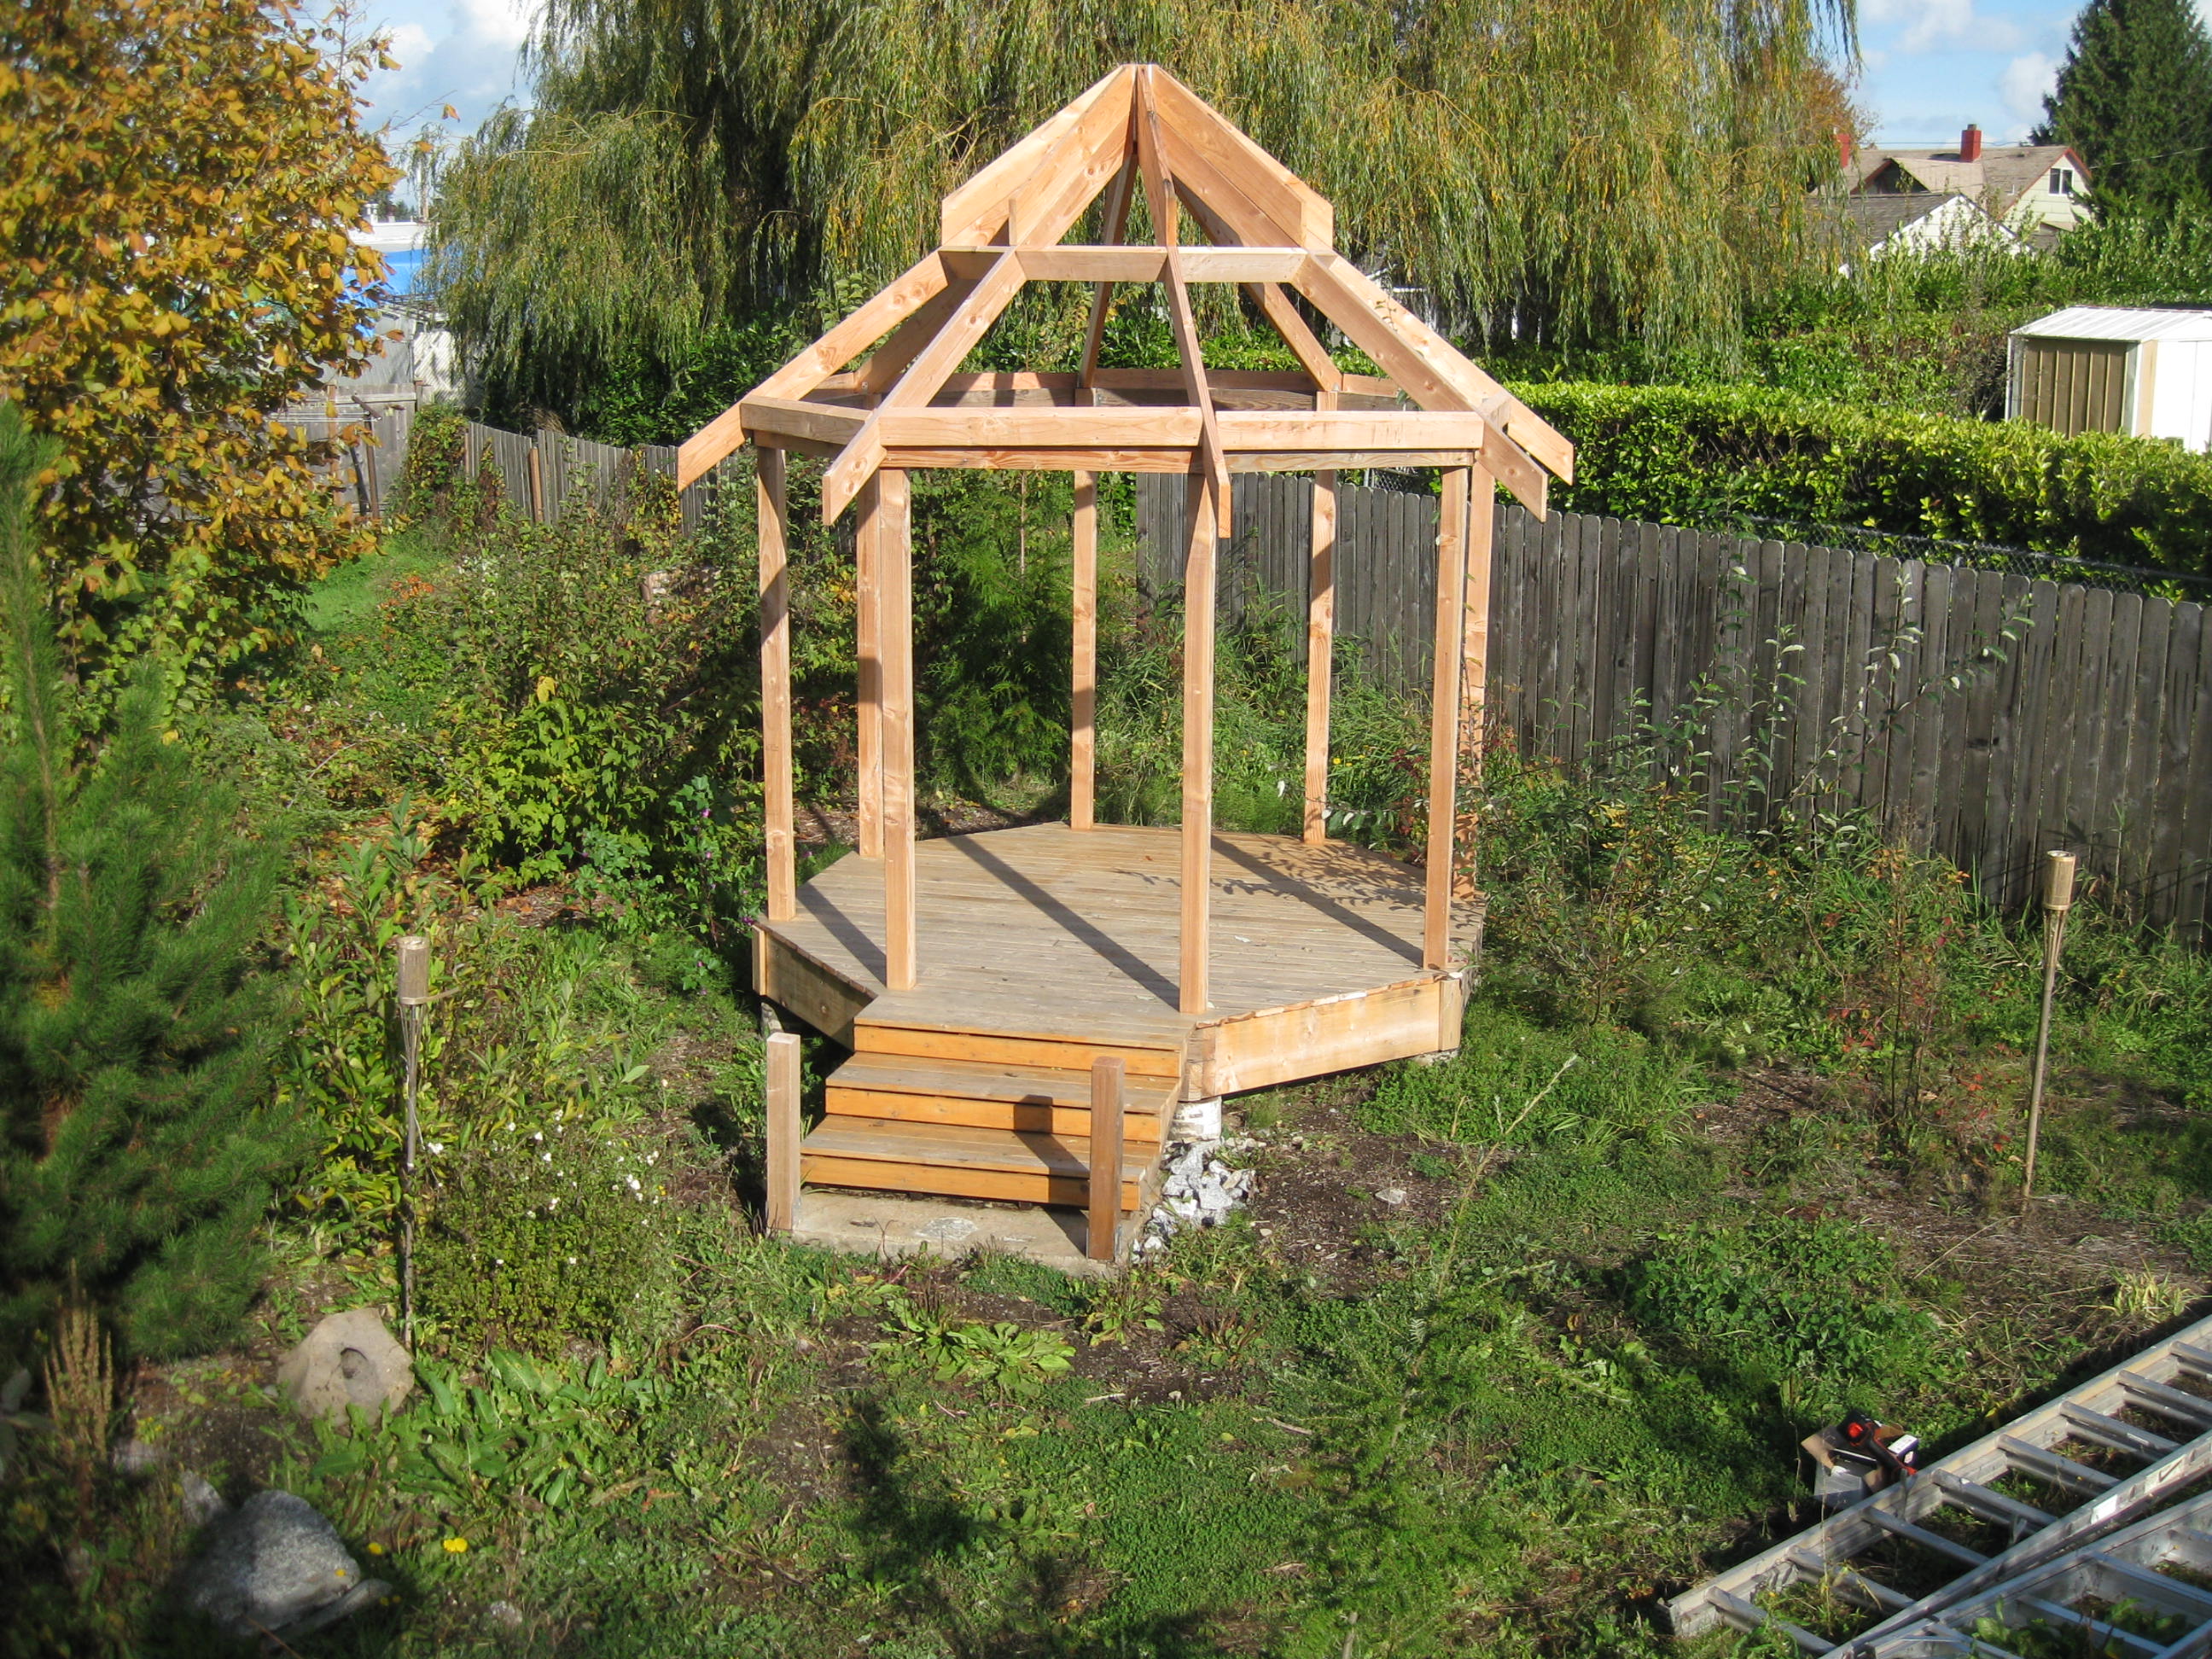
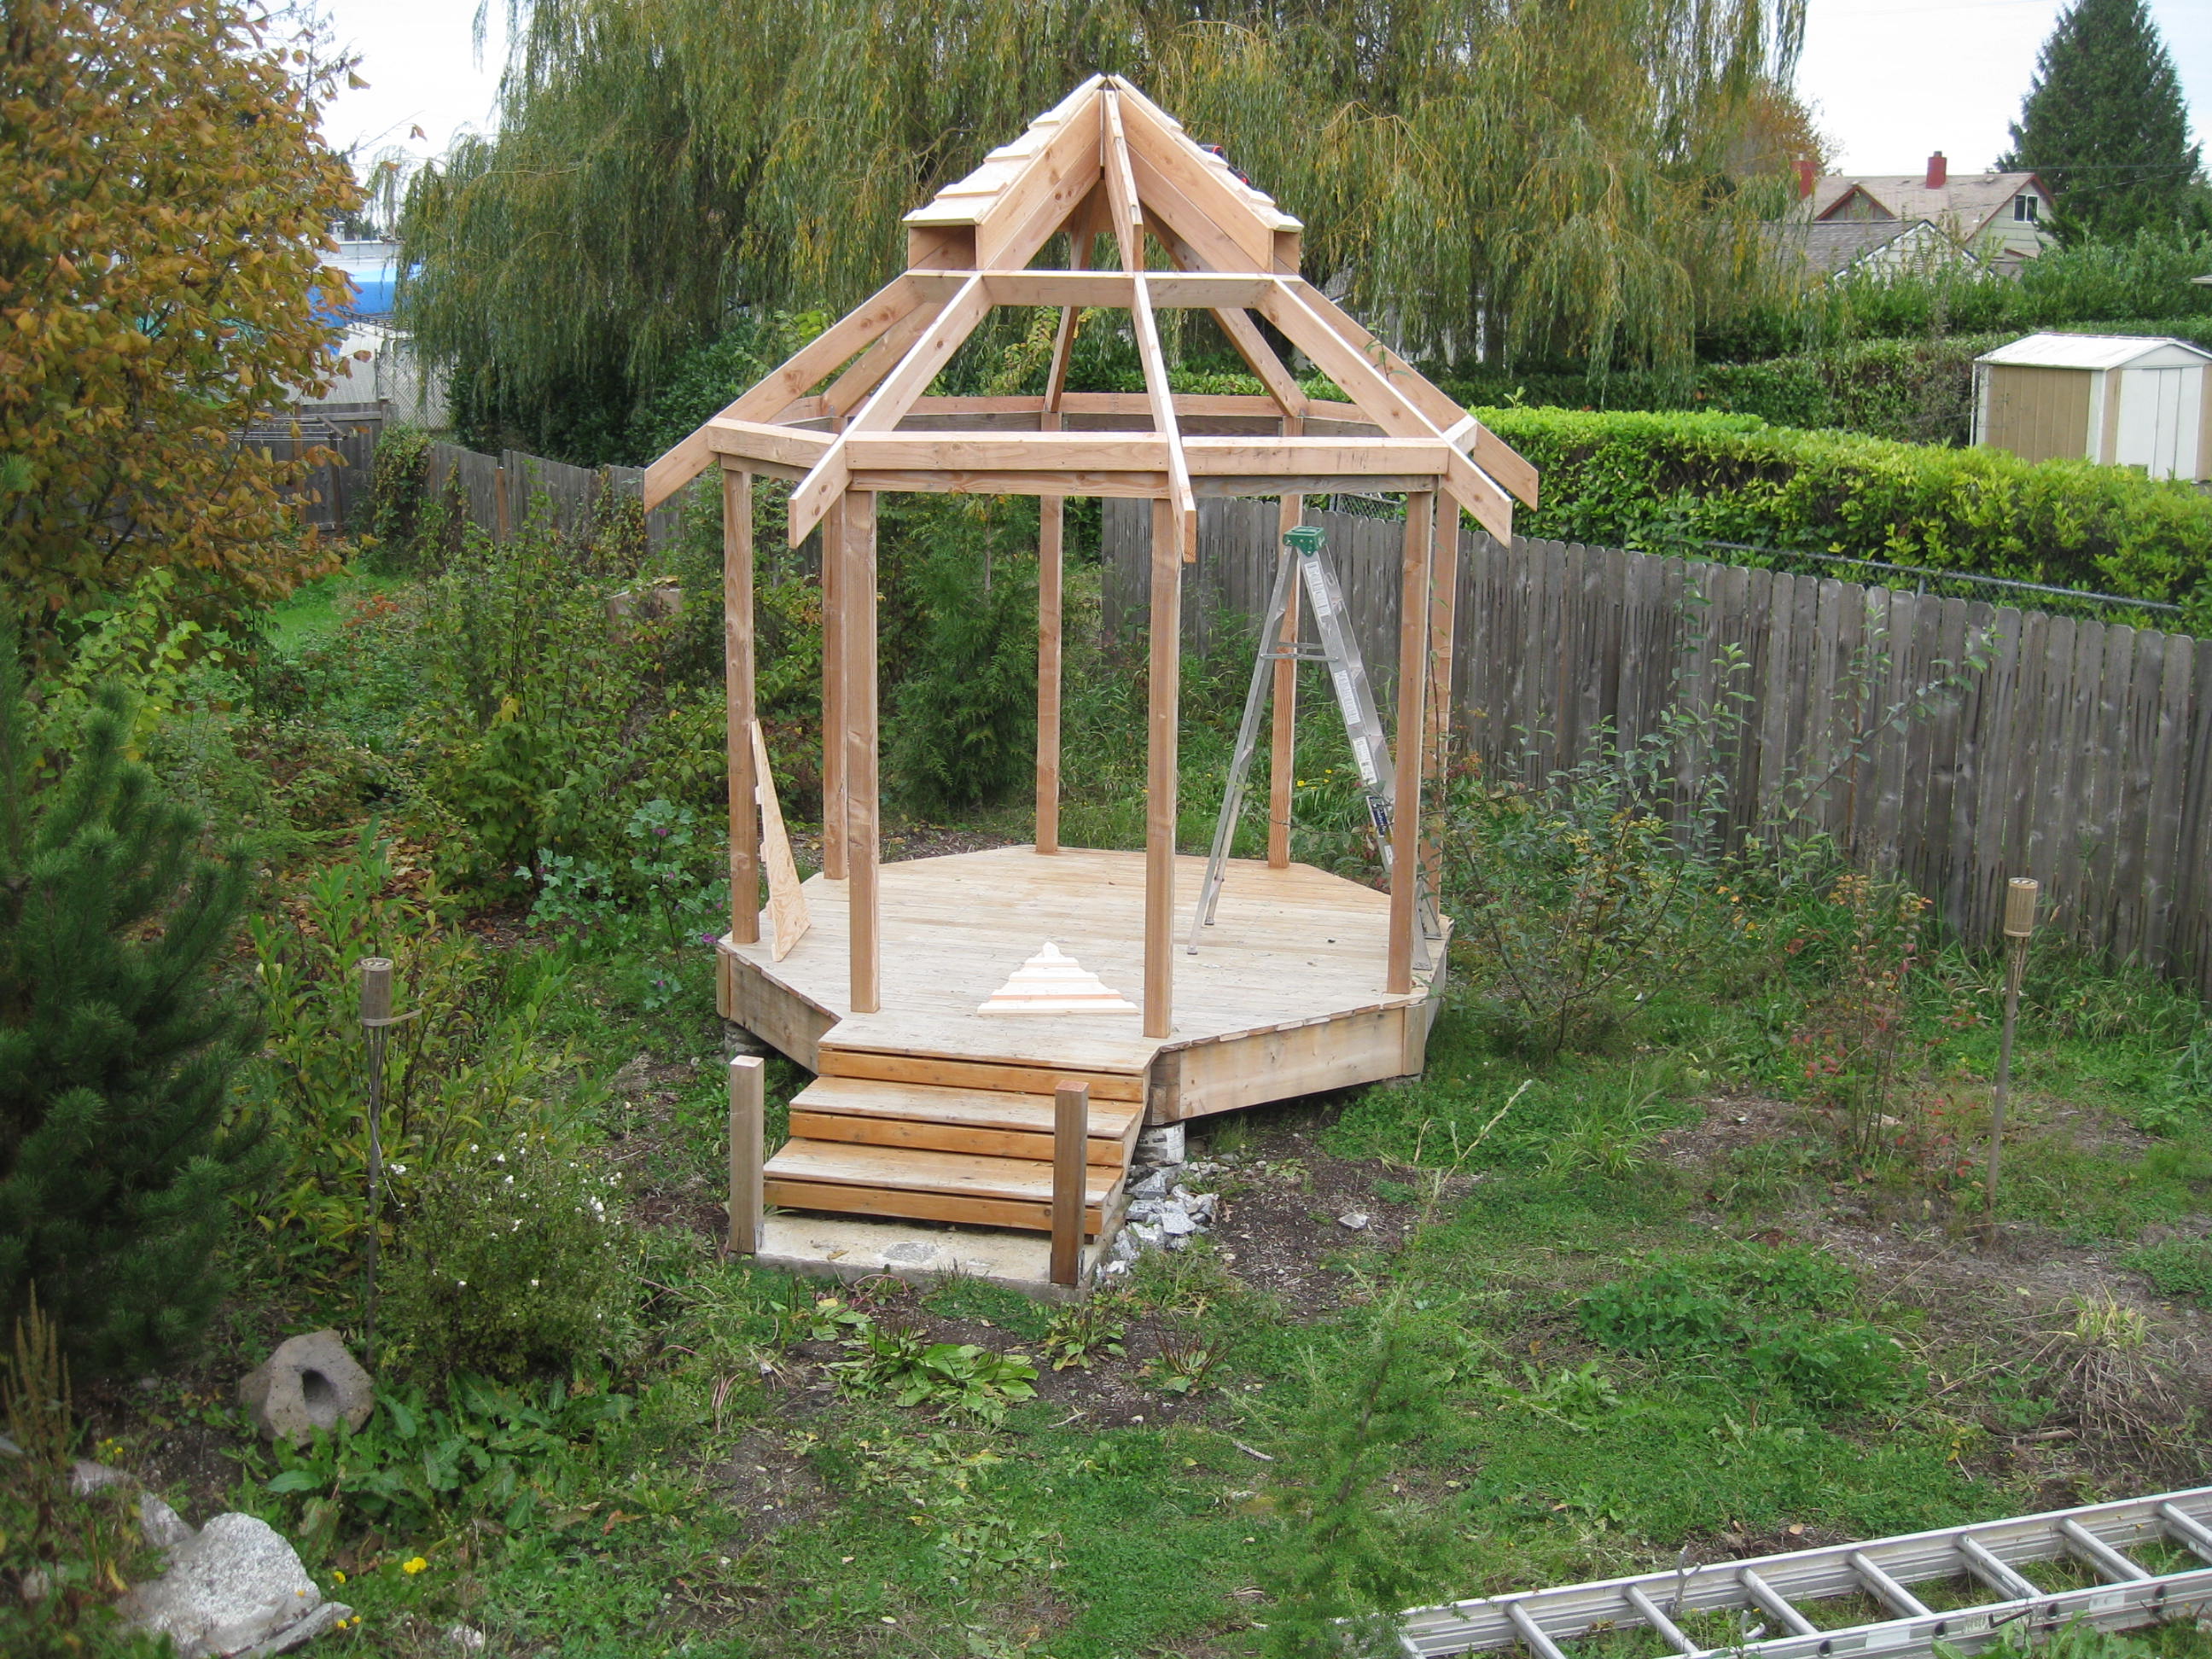
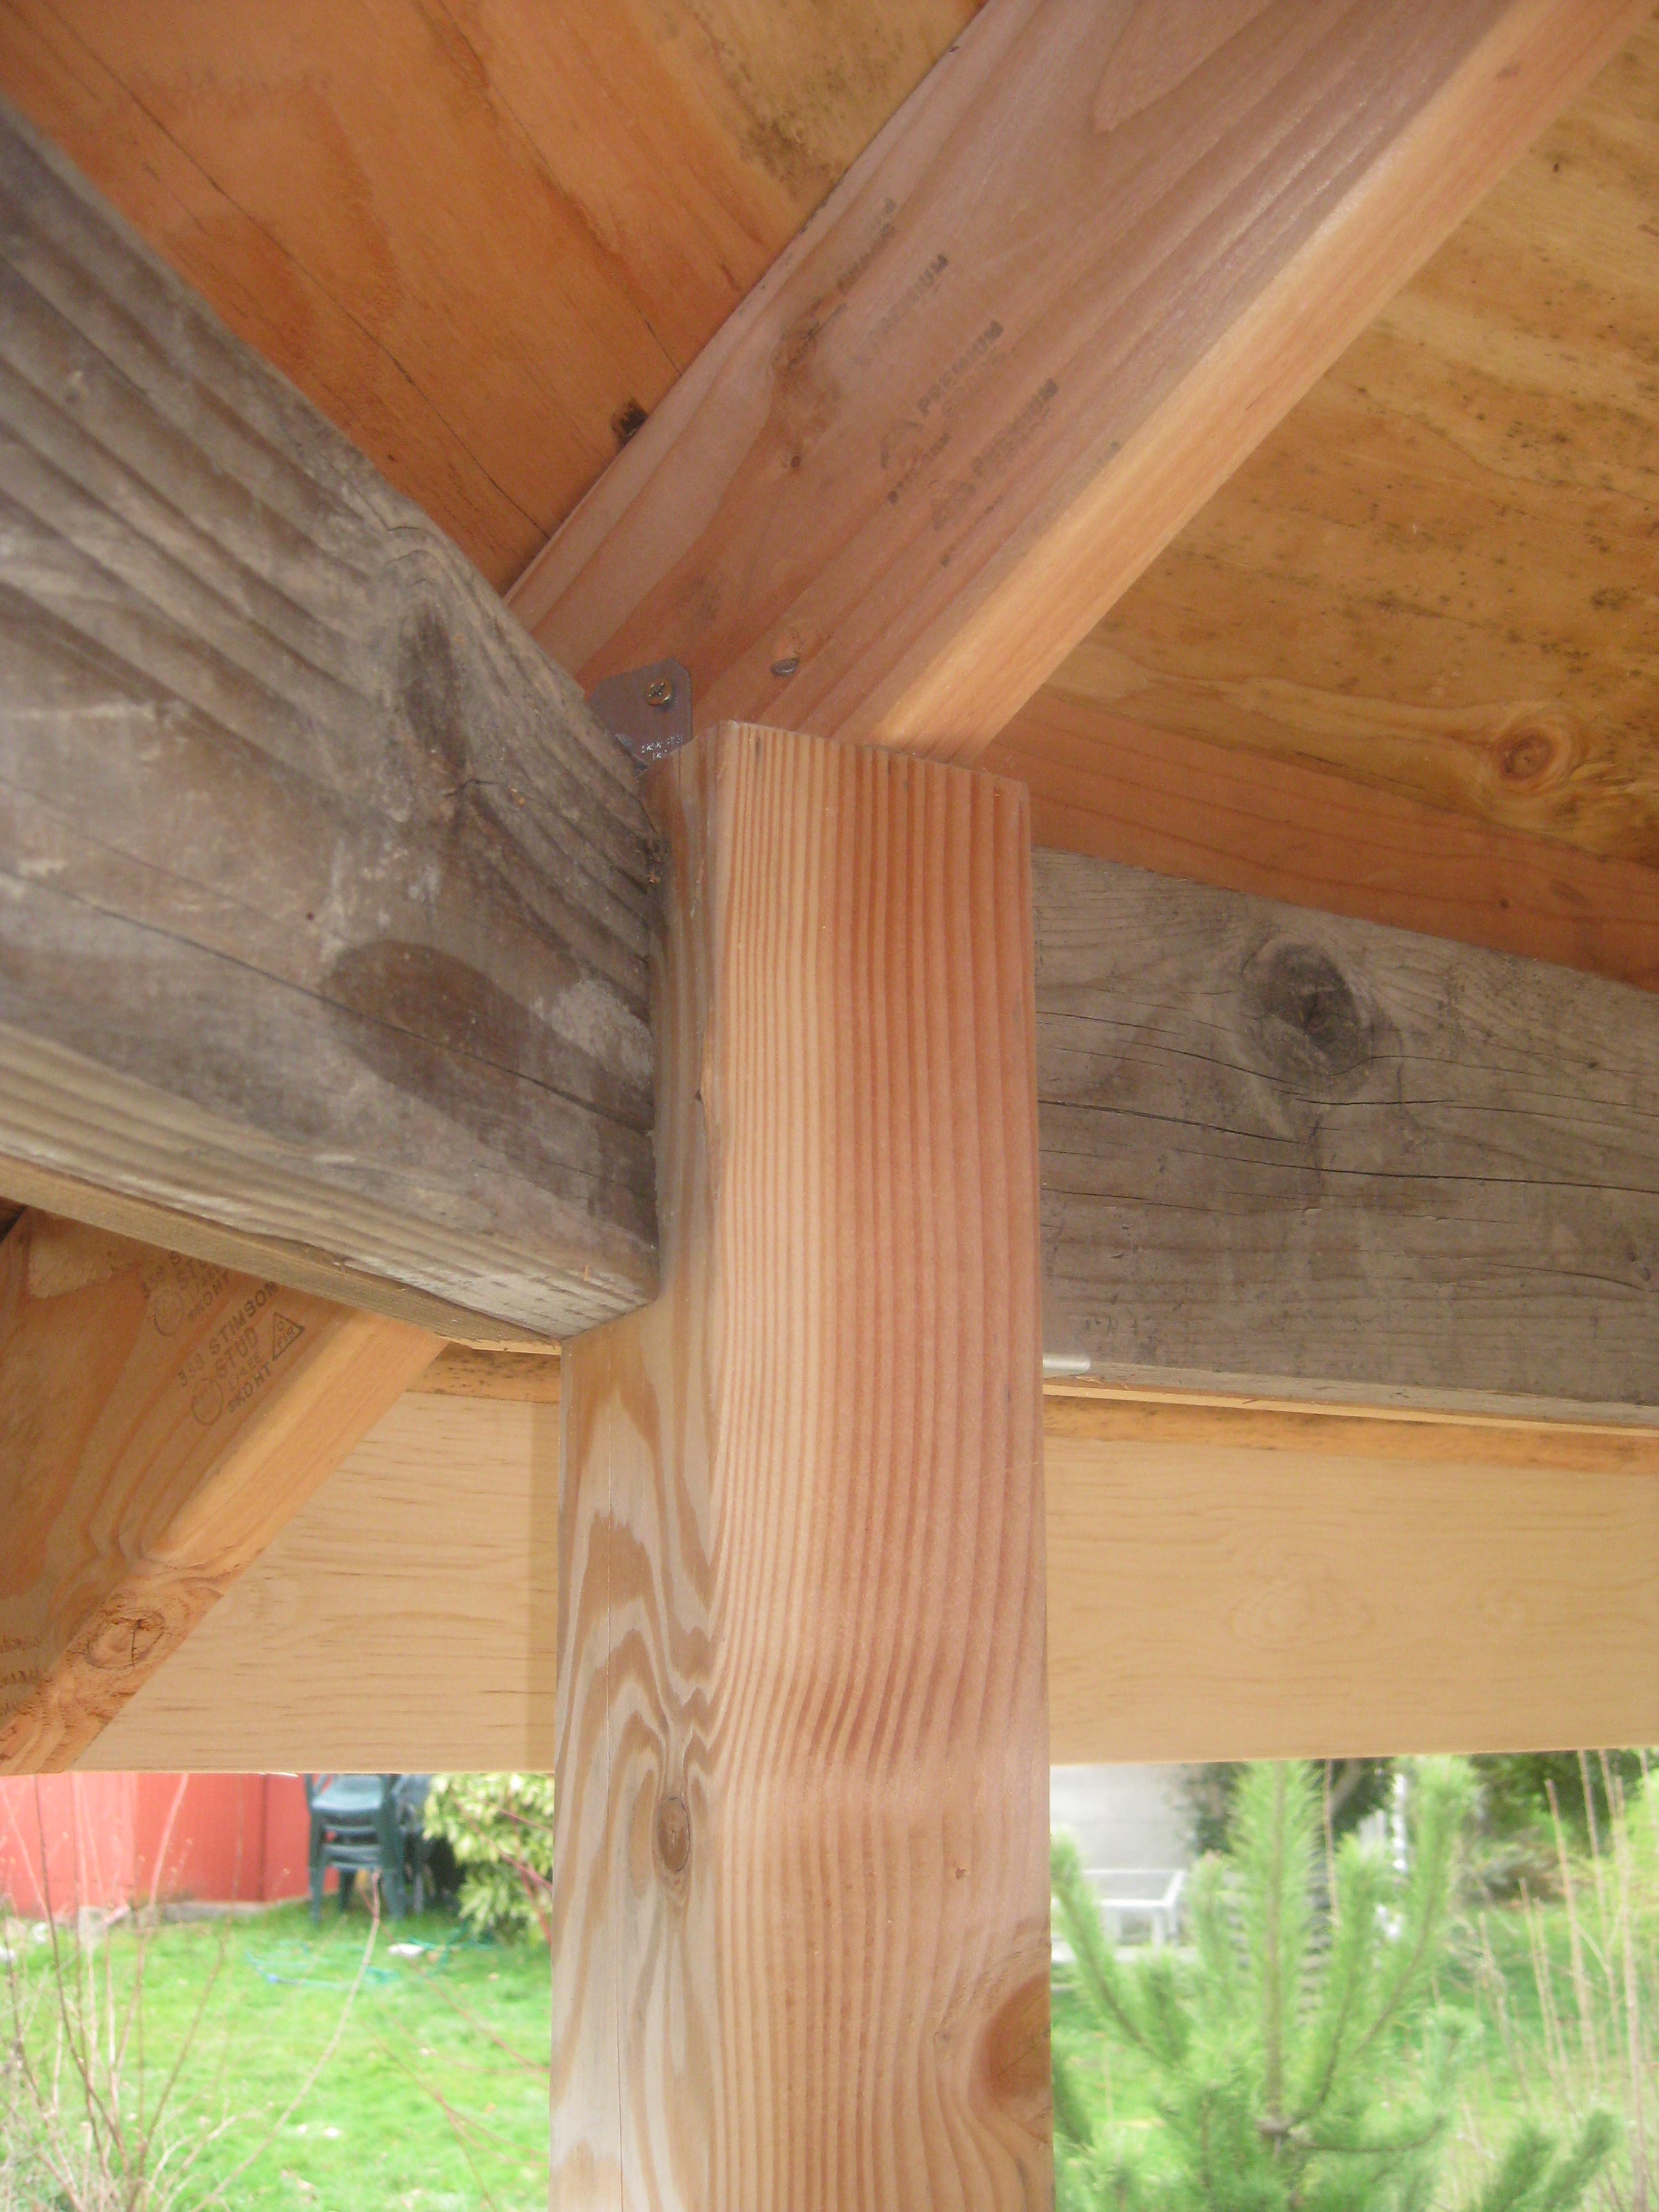
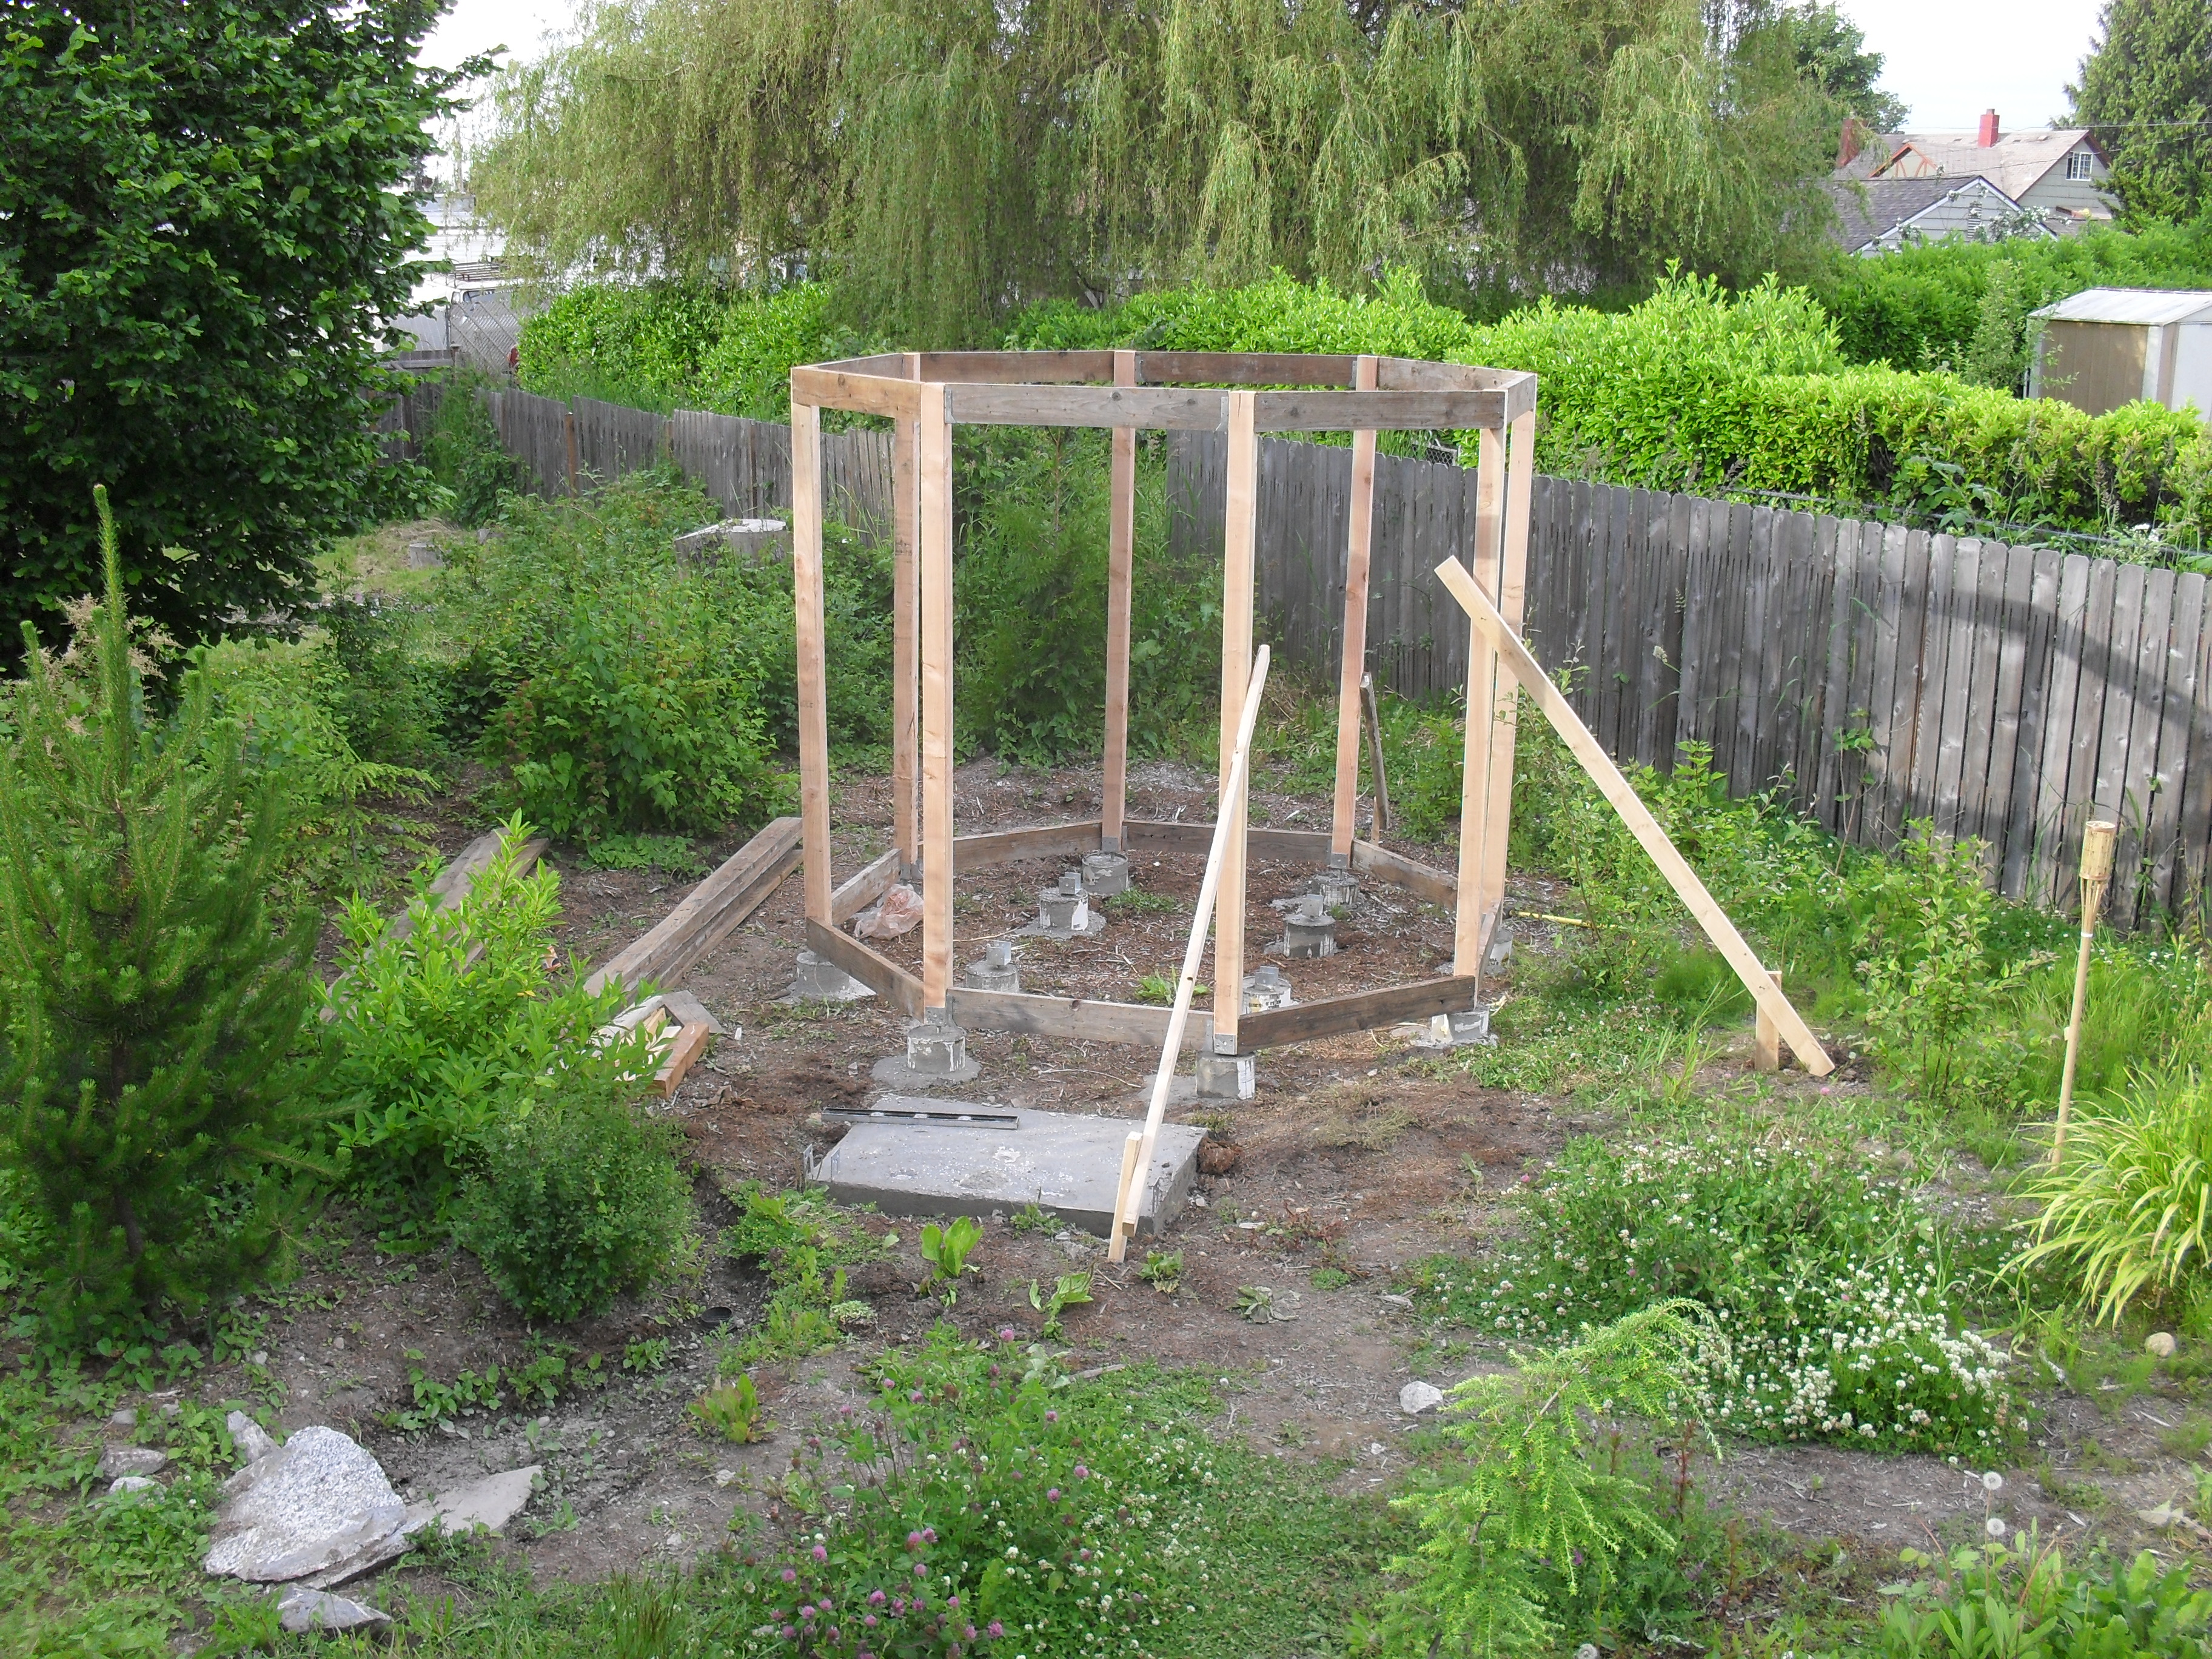 The posts, headers, and footers (?) went up pretty quickly.
Each post went into a steel bracket, one on each of the outer concrete pillars.
I was careful to plumb them all before attaching them.
The posts, headers, and footers (?) went up pretty quickly.
Each post went into a steel bracket, one on each of the outer concrete pillars.
I was careful to plumb them all before attaching them.
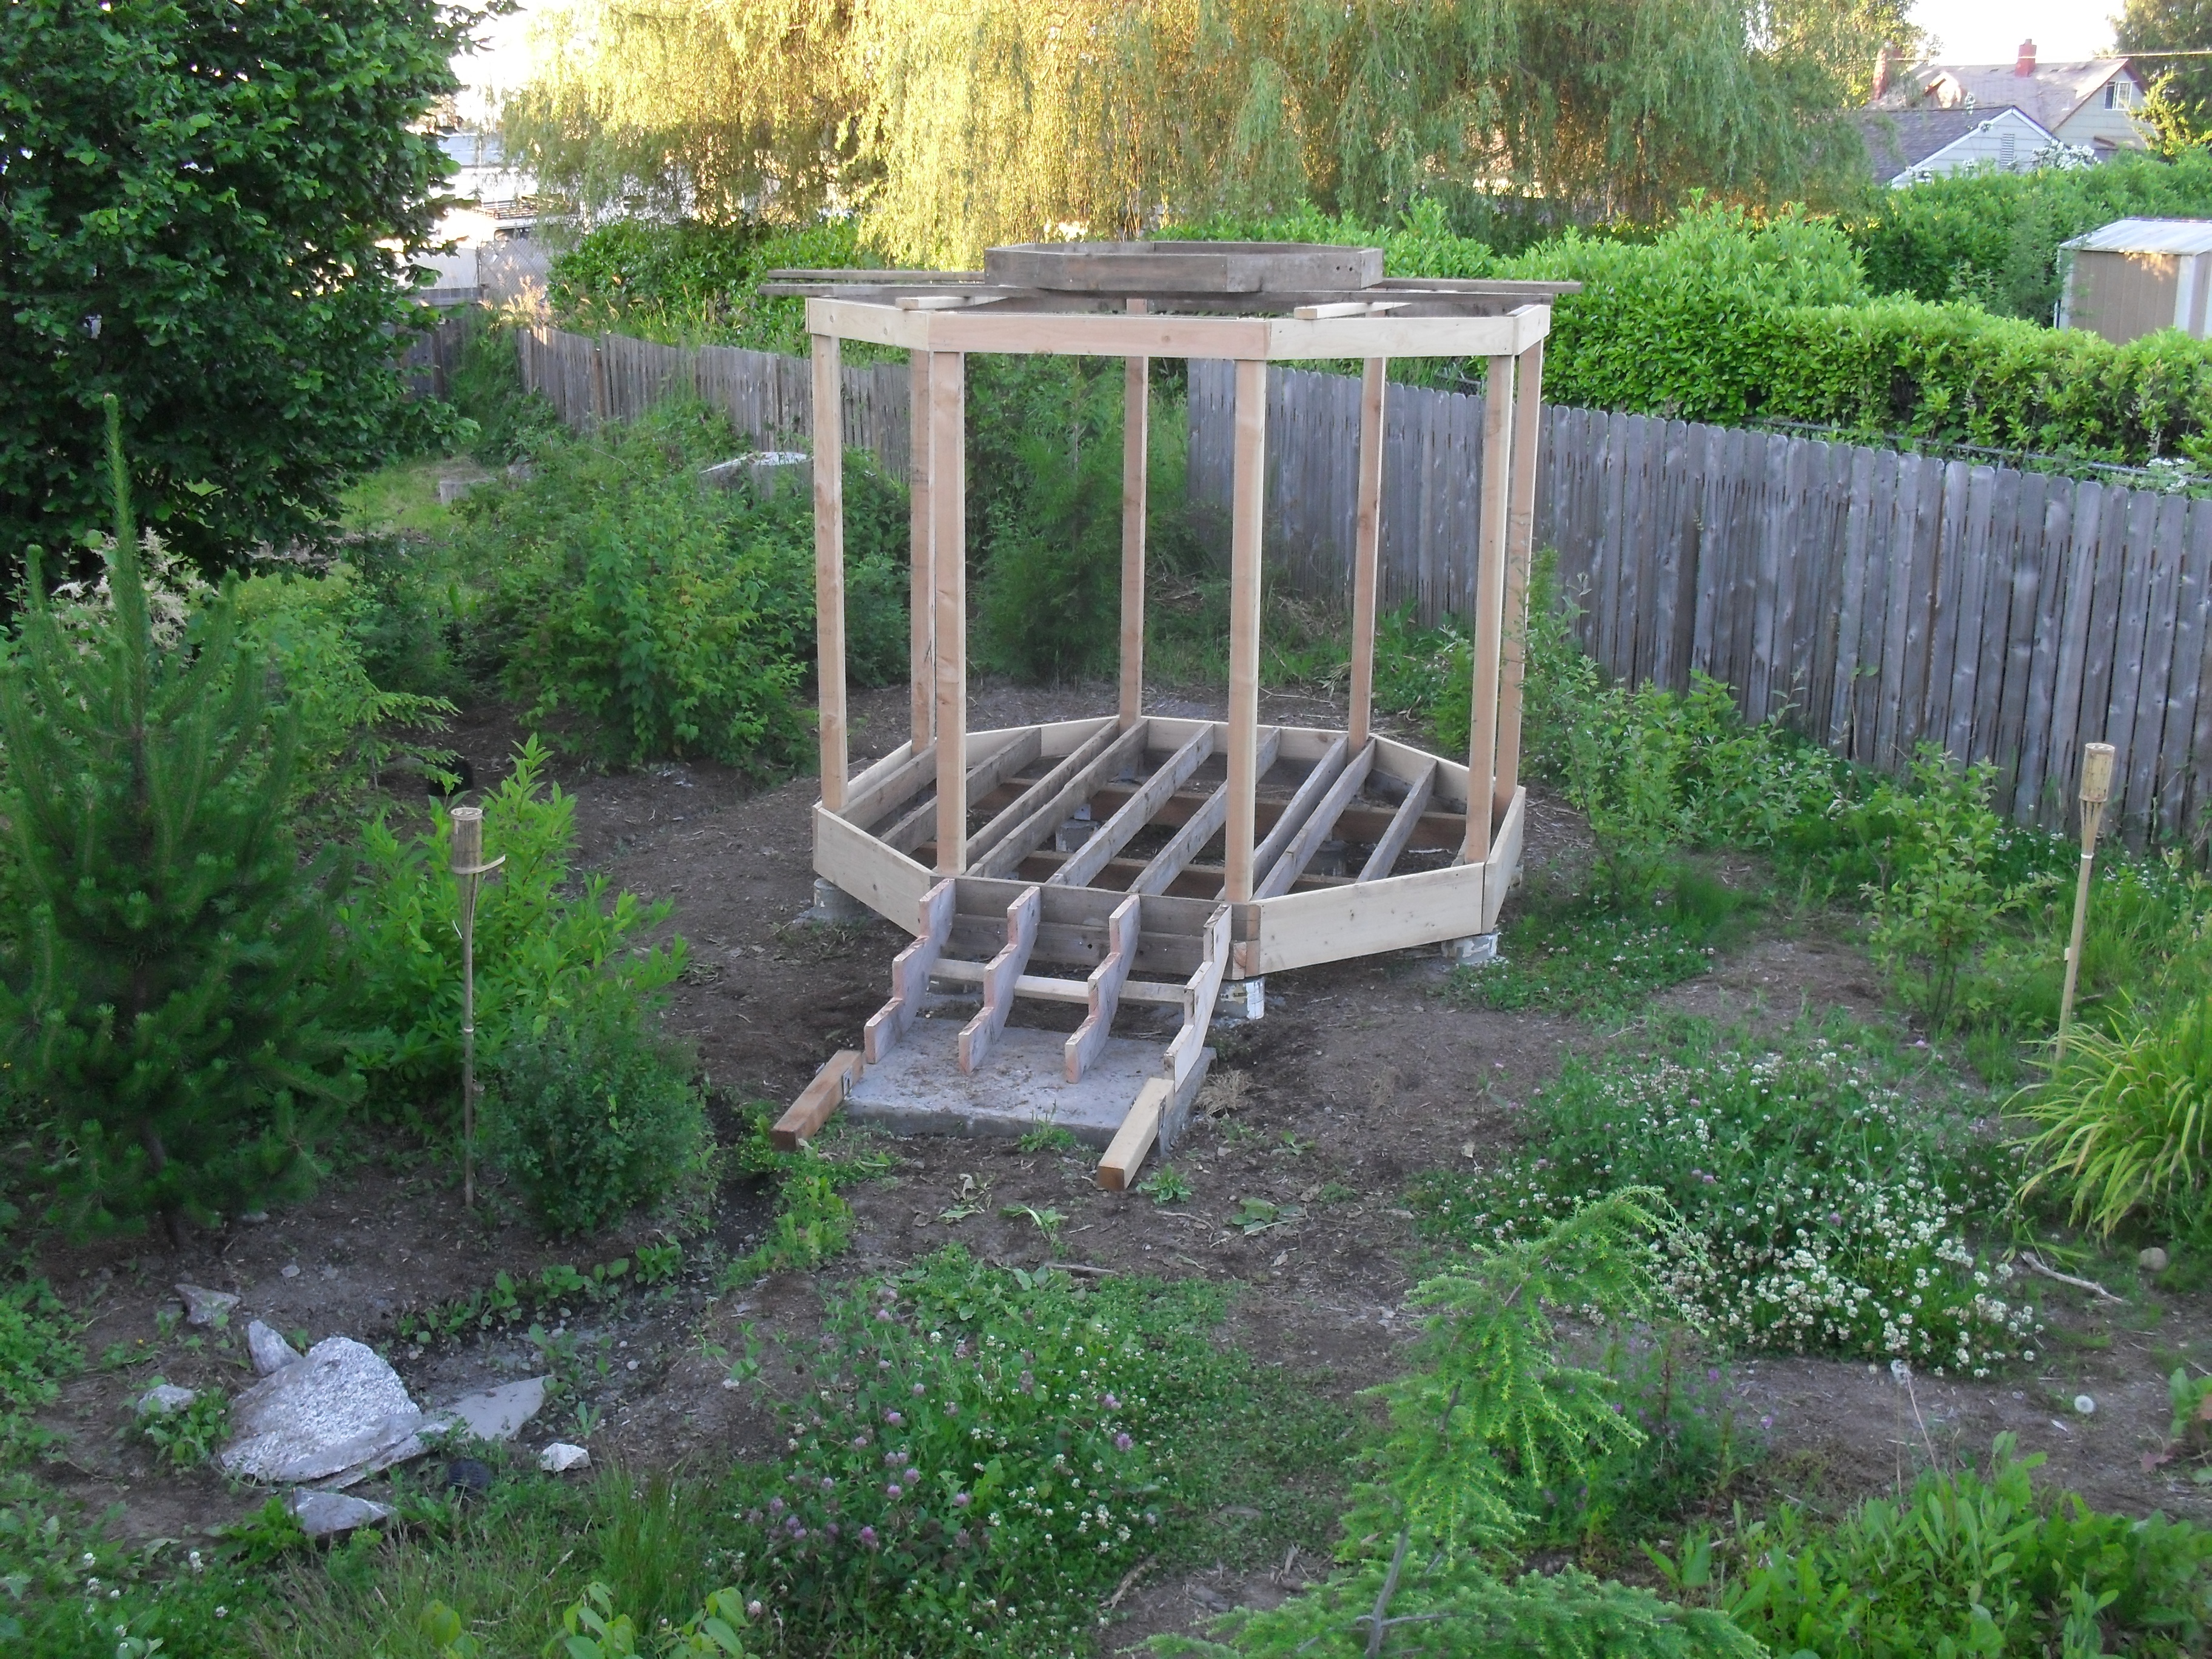
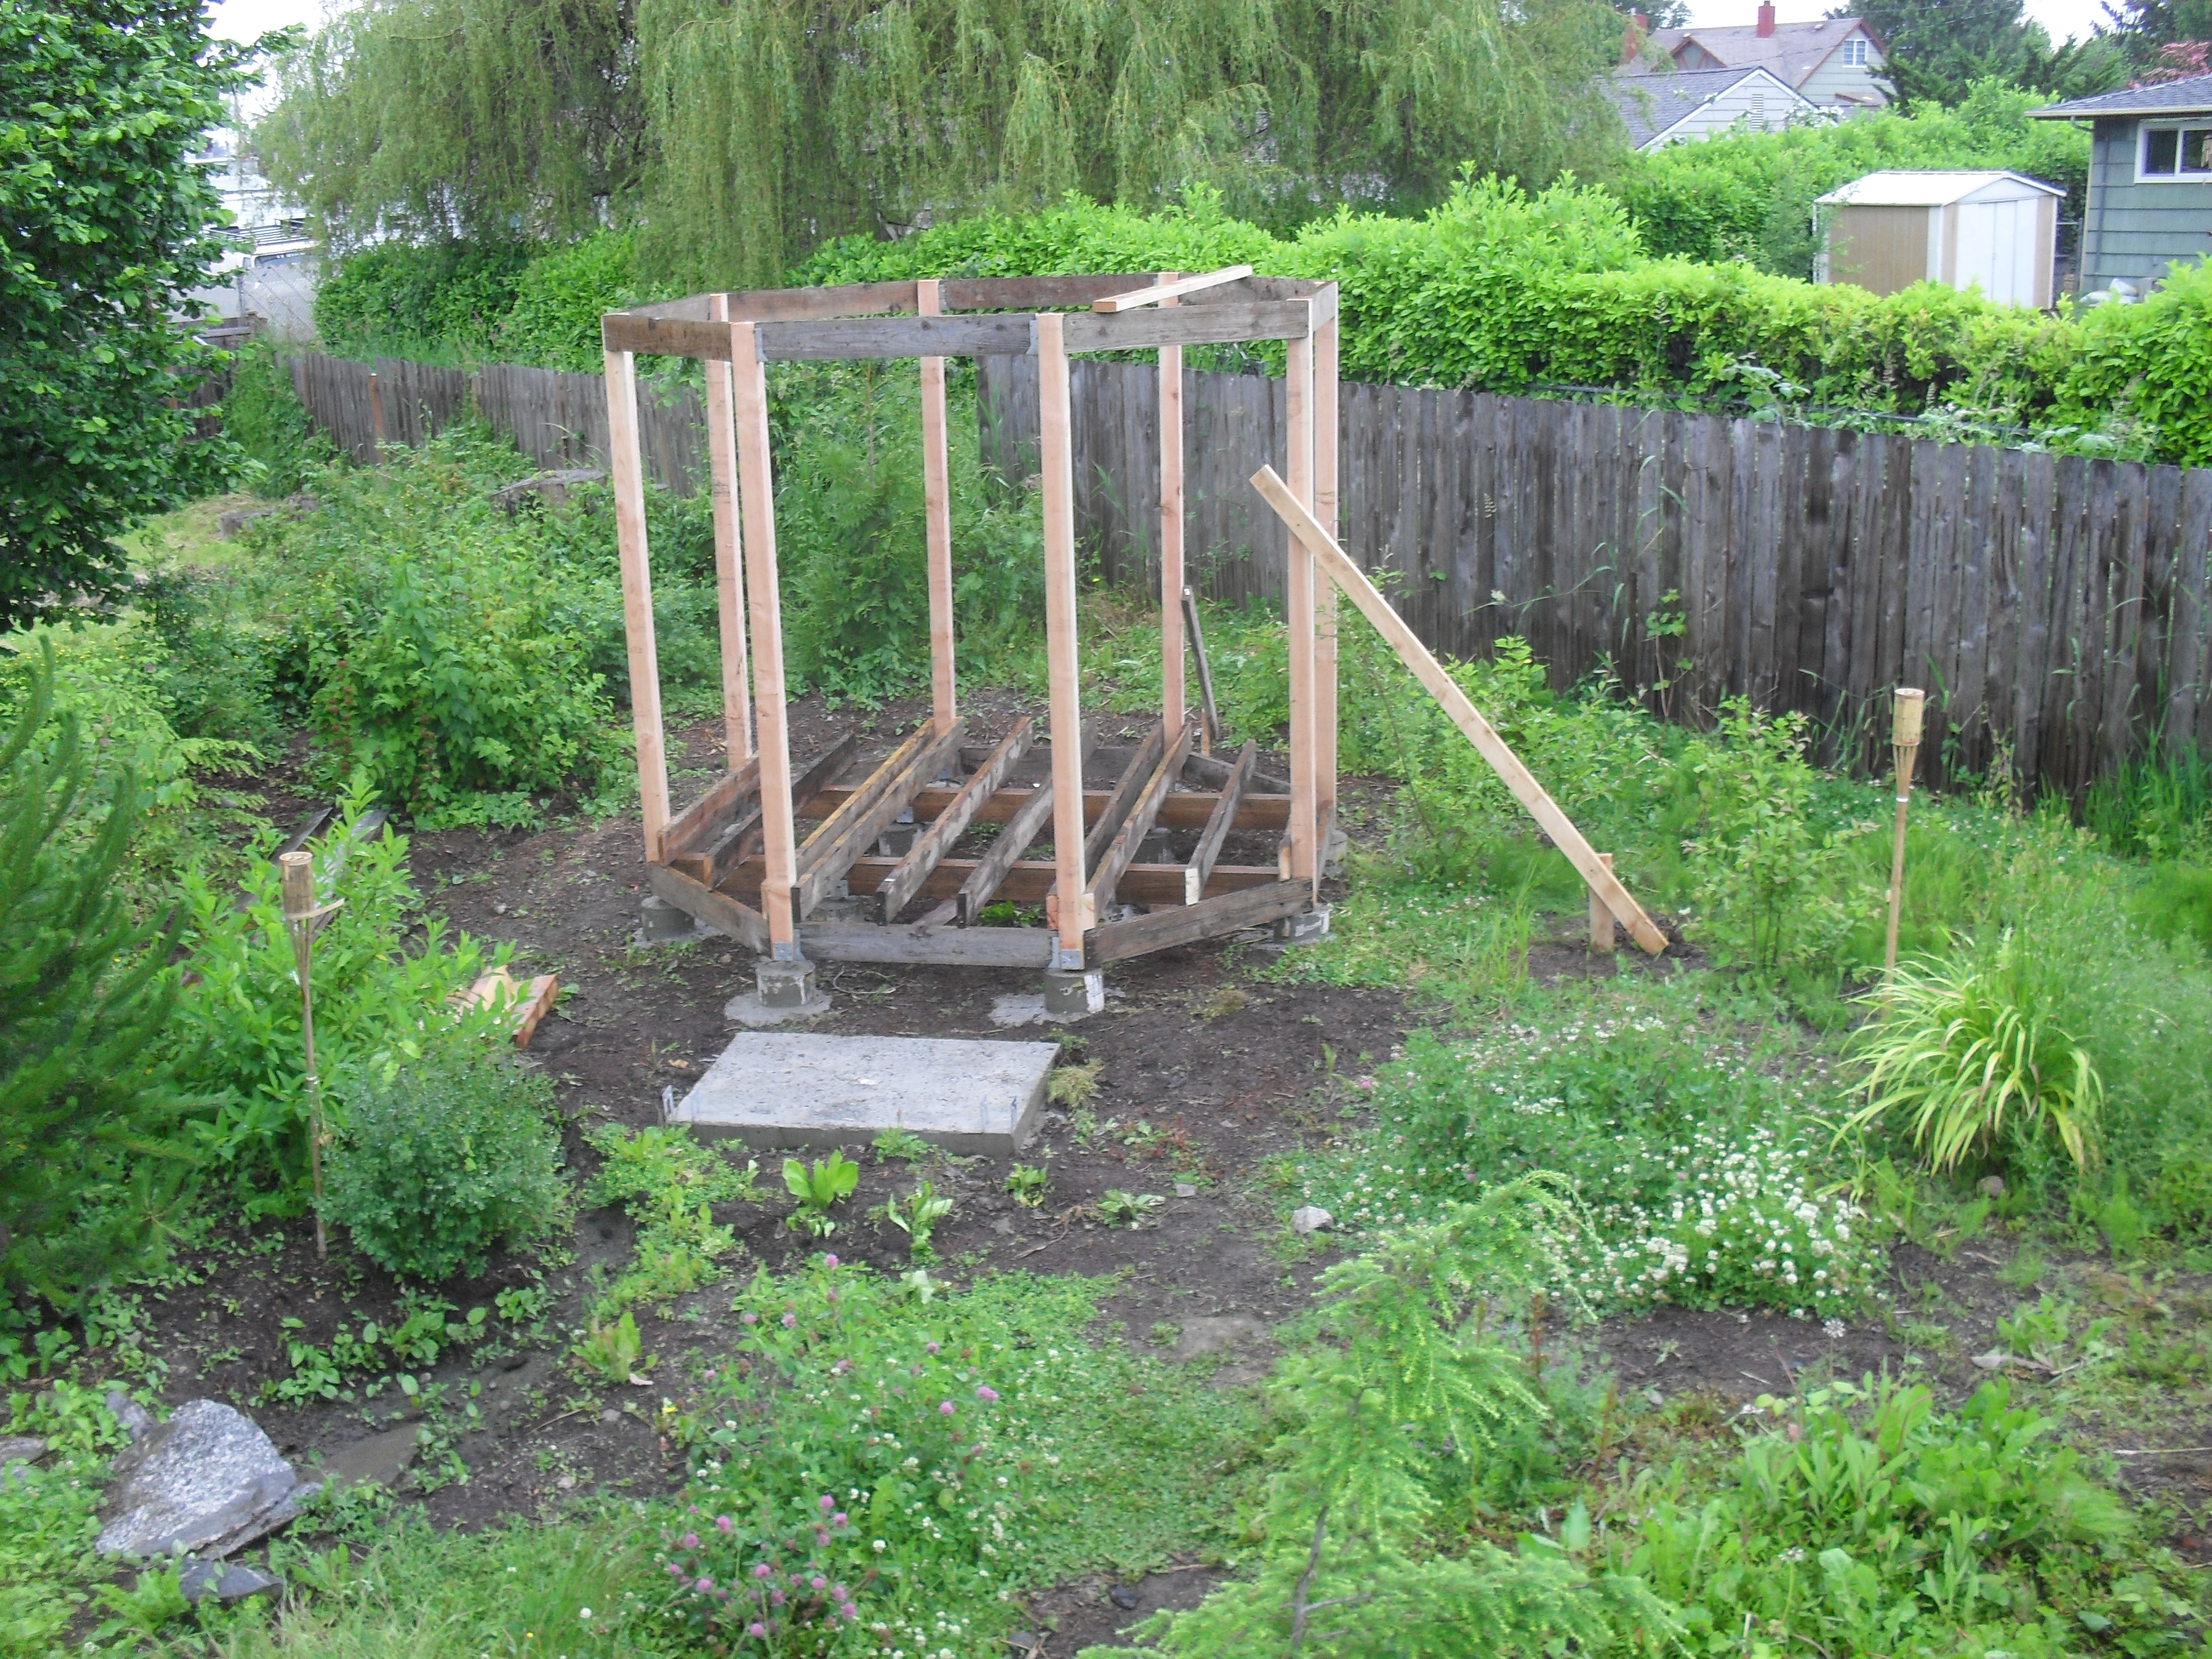 I set two 4X6 beams in the center 4 brackets, and butted them up to the footers.
I used a bunch of salvaged 2X6s for floor joists, setting them on top of the beams at 90 degrees, and sandwiching the posts.
When Dan saw that I was putting the 2X6s on thier sides, he said that I would be able to park a truck on it when it was done.
Nothing wrong with that.
I set two 4X6 beams in the center 4 brackets, and butted them up to the footers.
I used a bunch of salvaged 2X6s for floor joists, setting them on top of the beams at 90 degrees, and sandwiching the posts.
When Dan saw that I was putting the 2X6s on thier sides, he said that I would be able to park a truck on it when it was done.
Nothing wrong with that.
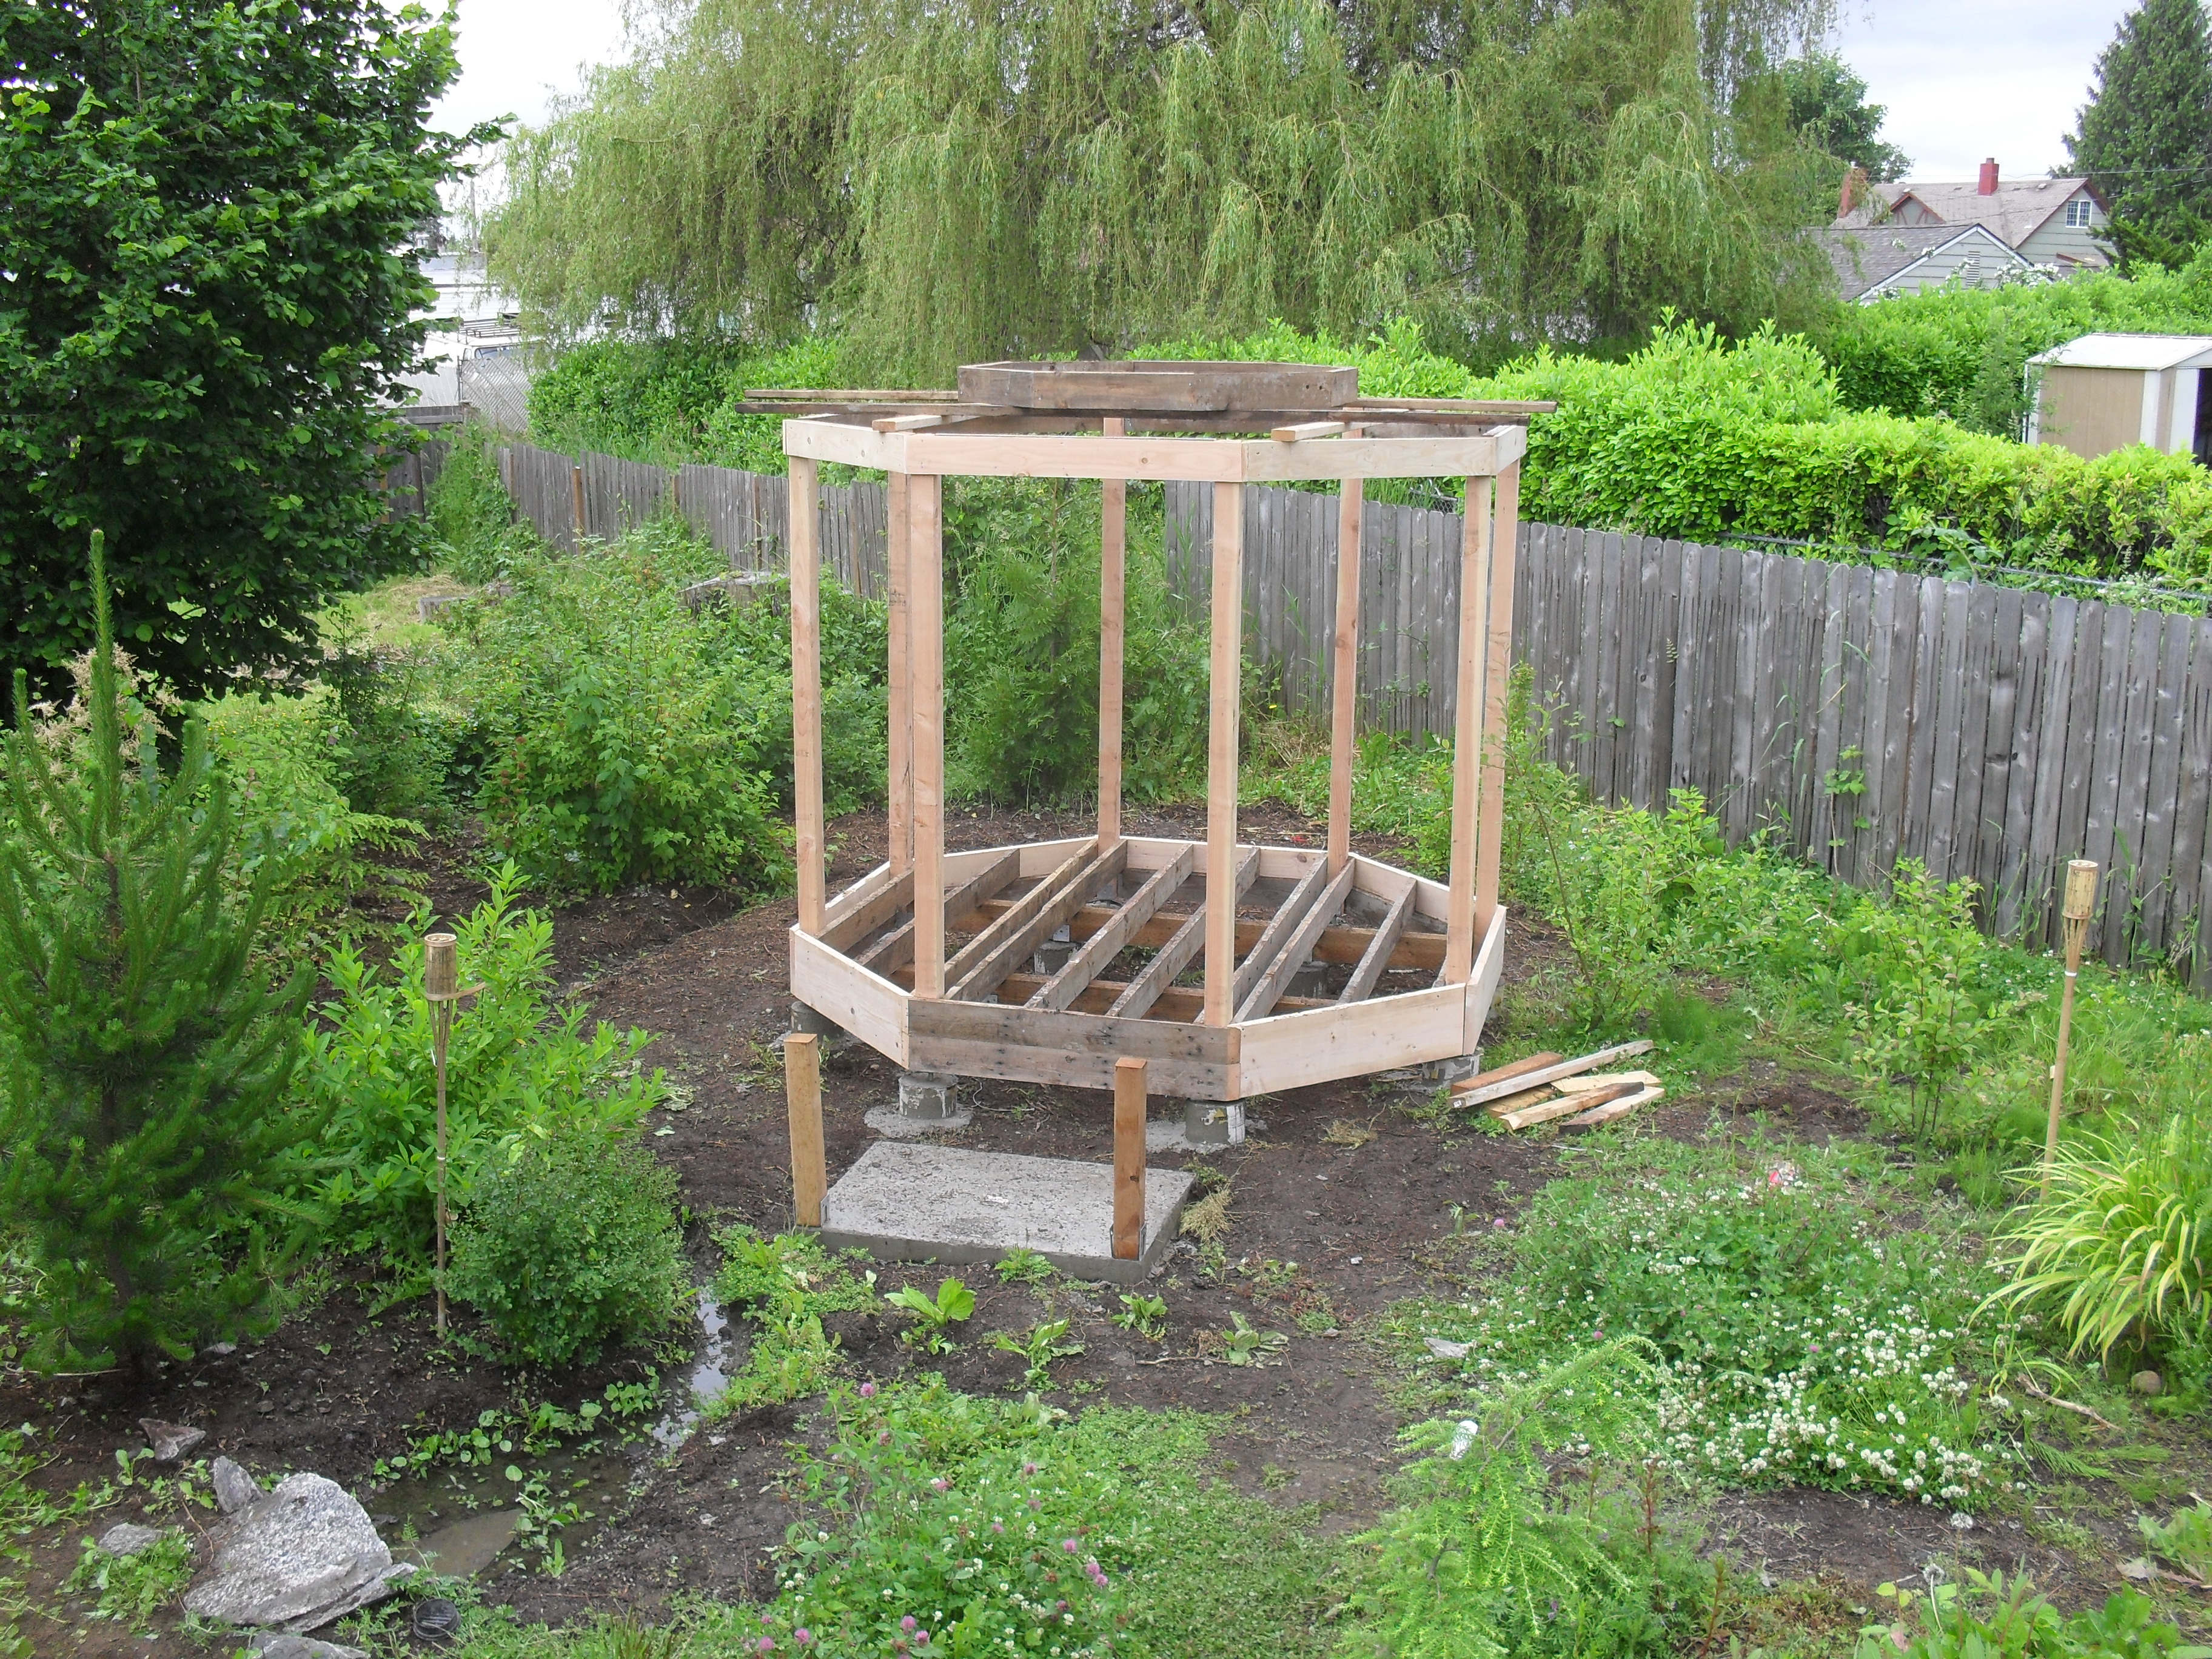
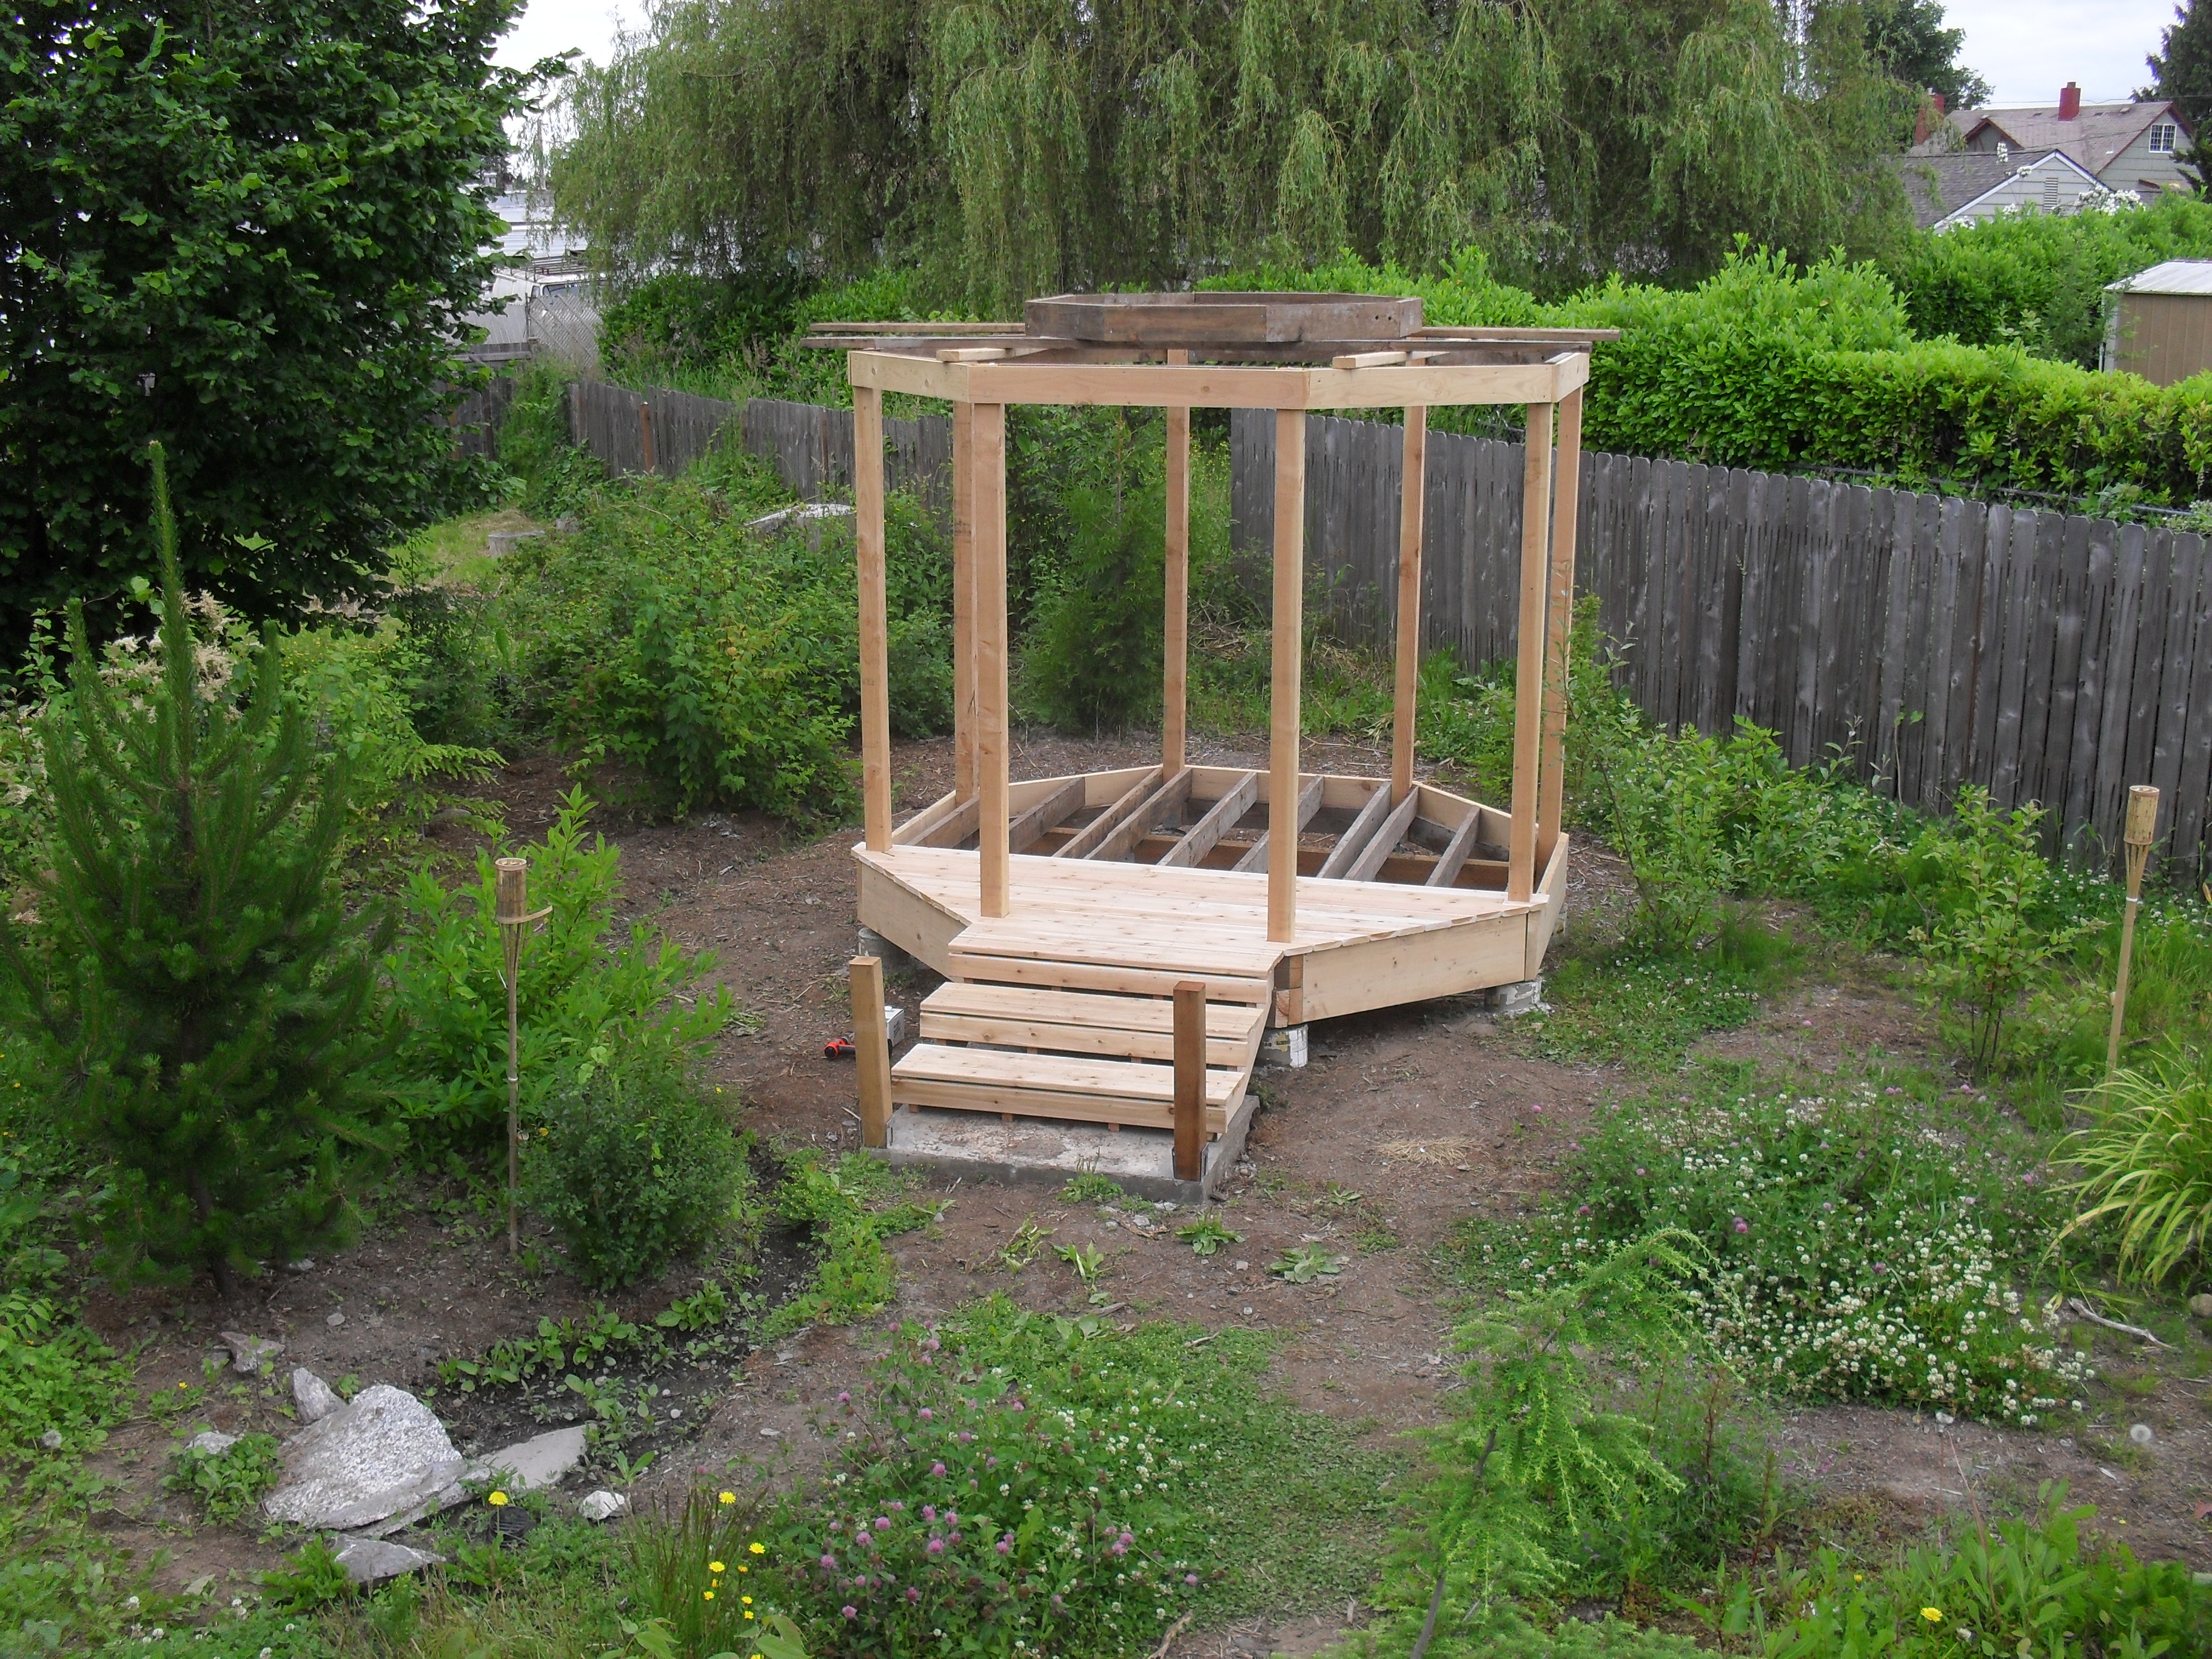
 The upper octagon was wrapped in a peice of 1X6 trim.
The bottom octagon, including the ends of the floor joists, was wrapped in a 2X12, except for the front, where I stacked two 2X6s.
At this point, the posts were feeling pretty solid.
I built the stair stringers out of a 2X12 and inclined them at a gentle 5-12 pitch.
The upper octagon was wrapped in a peice of 1X6 trim.
The bottom octagon, including the ends of the floor joists, was wrapped in a 2X12, except for the front, where I stacked two 2X6s.
At this point, the posts were feeling pretty solid.
I built the stair stringers out of a 2X12 and inclined them at a gentle 5-12 pitch.
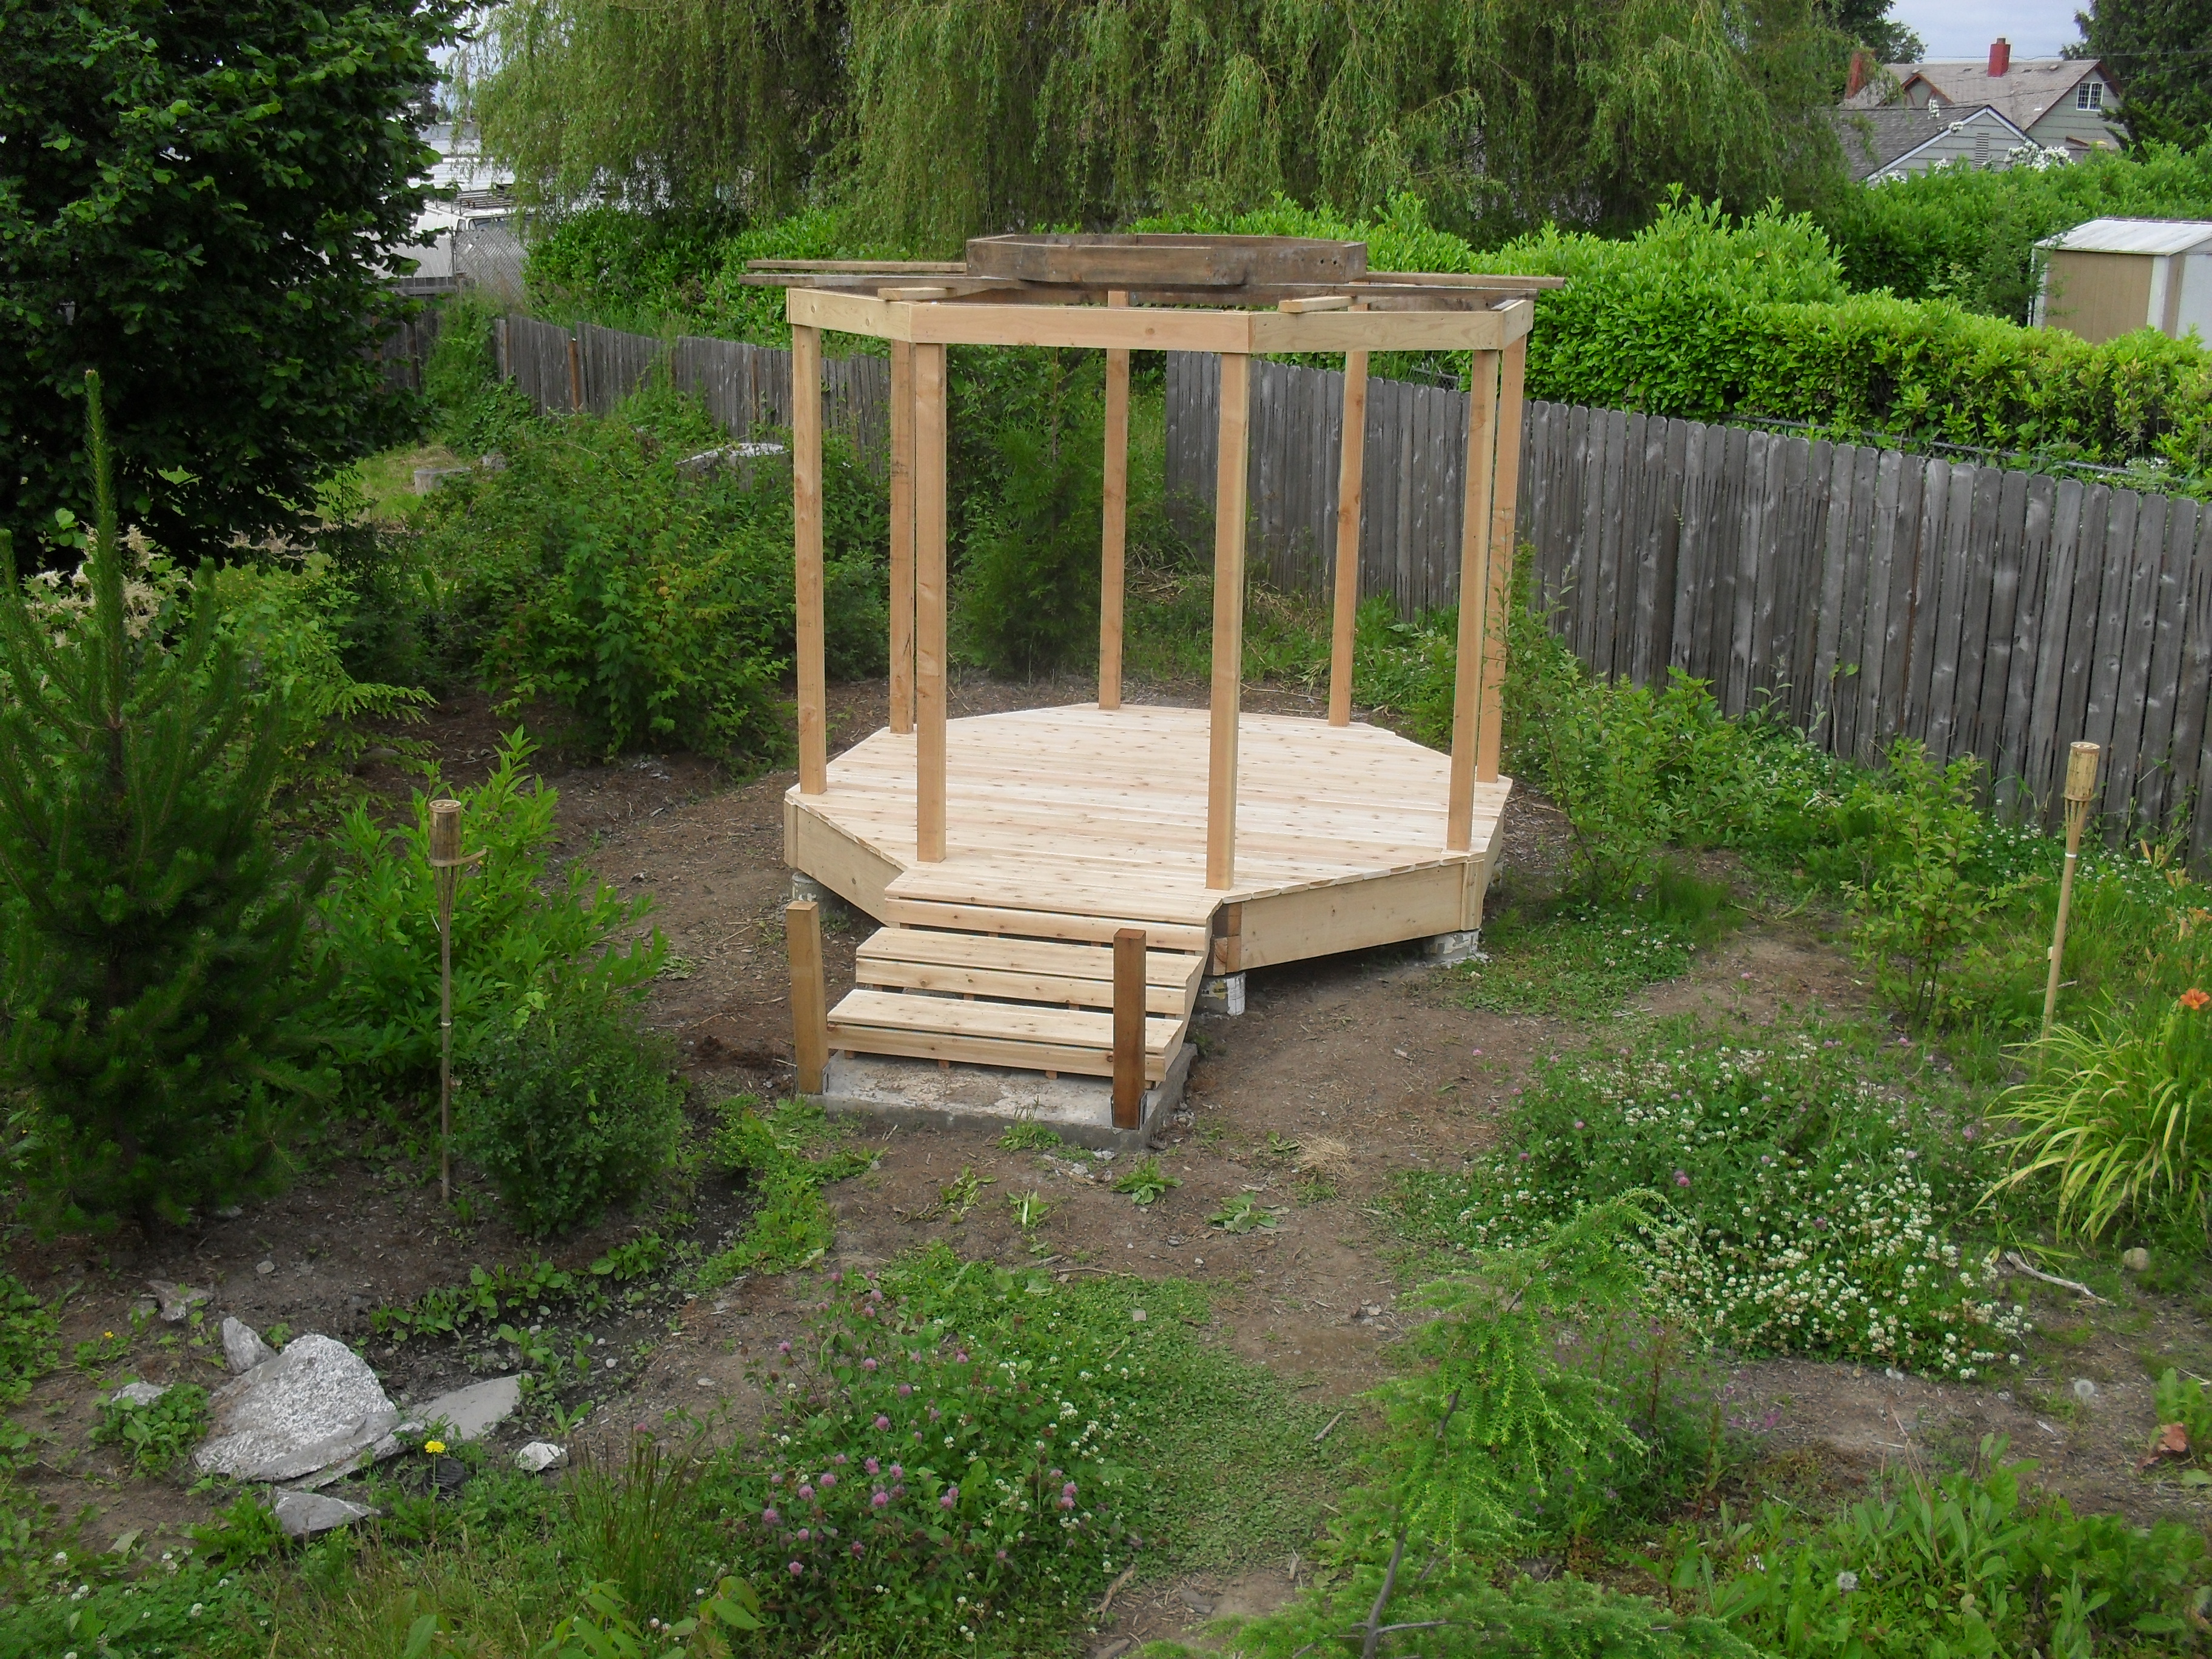 I installed the cedar 5/4 decking over the course of a couple days.
Those galvanized decking screws were hard to drive into those old salvaged floor joists!
That small octagon you see on the roof later became a planter when I adjusted my roof design. Sorry Dan.
I installed the cedar 5/4 decking over the course of a couple days.
Those galvanized decking screws were hard to drive into those old salvaged floor joists!
That small octagon you see on the roof later became a planter when I adjusted my roof design. Sorry Dan.
July 2010
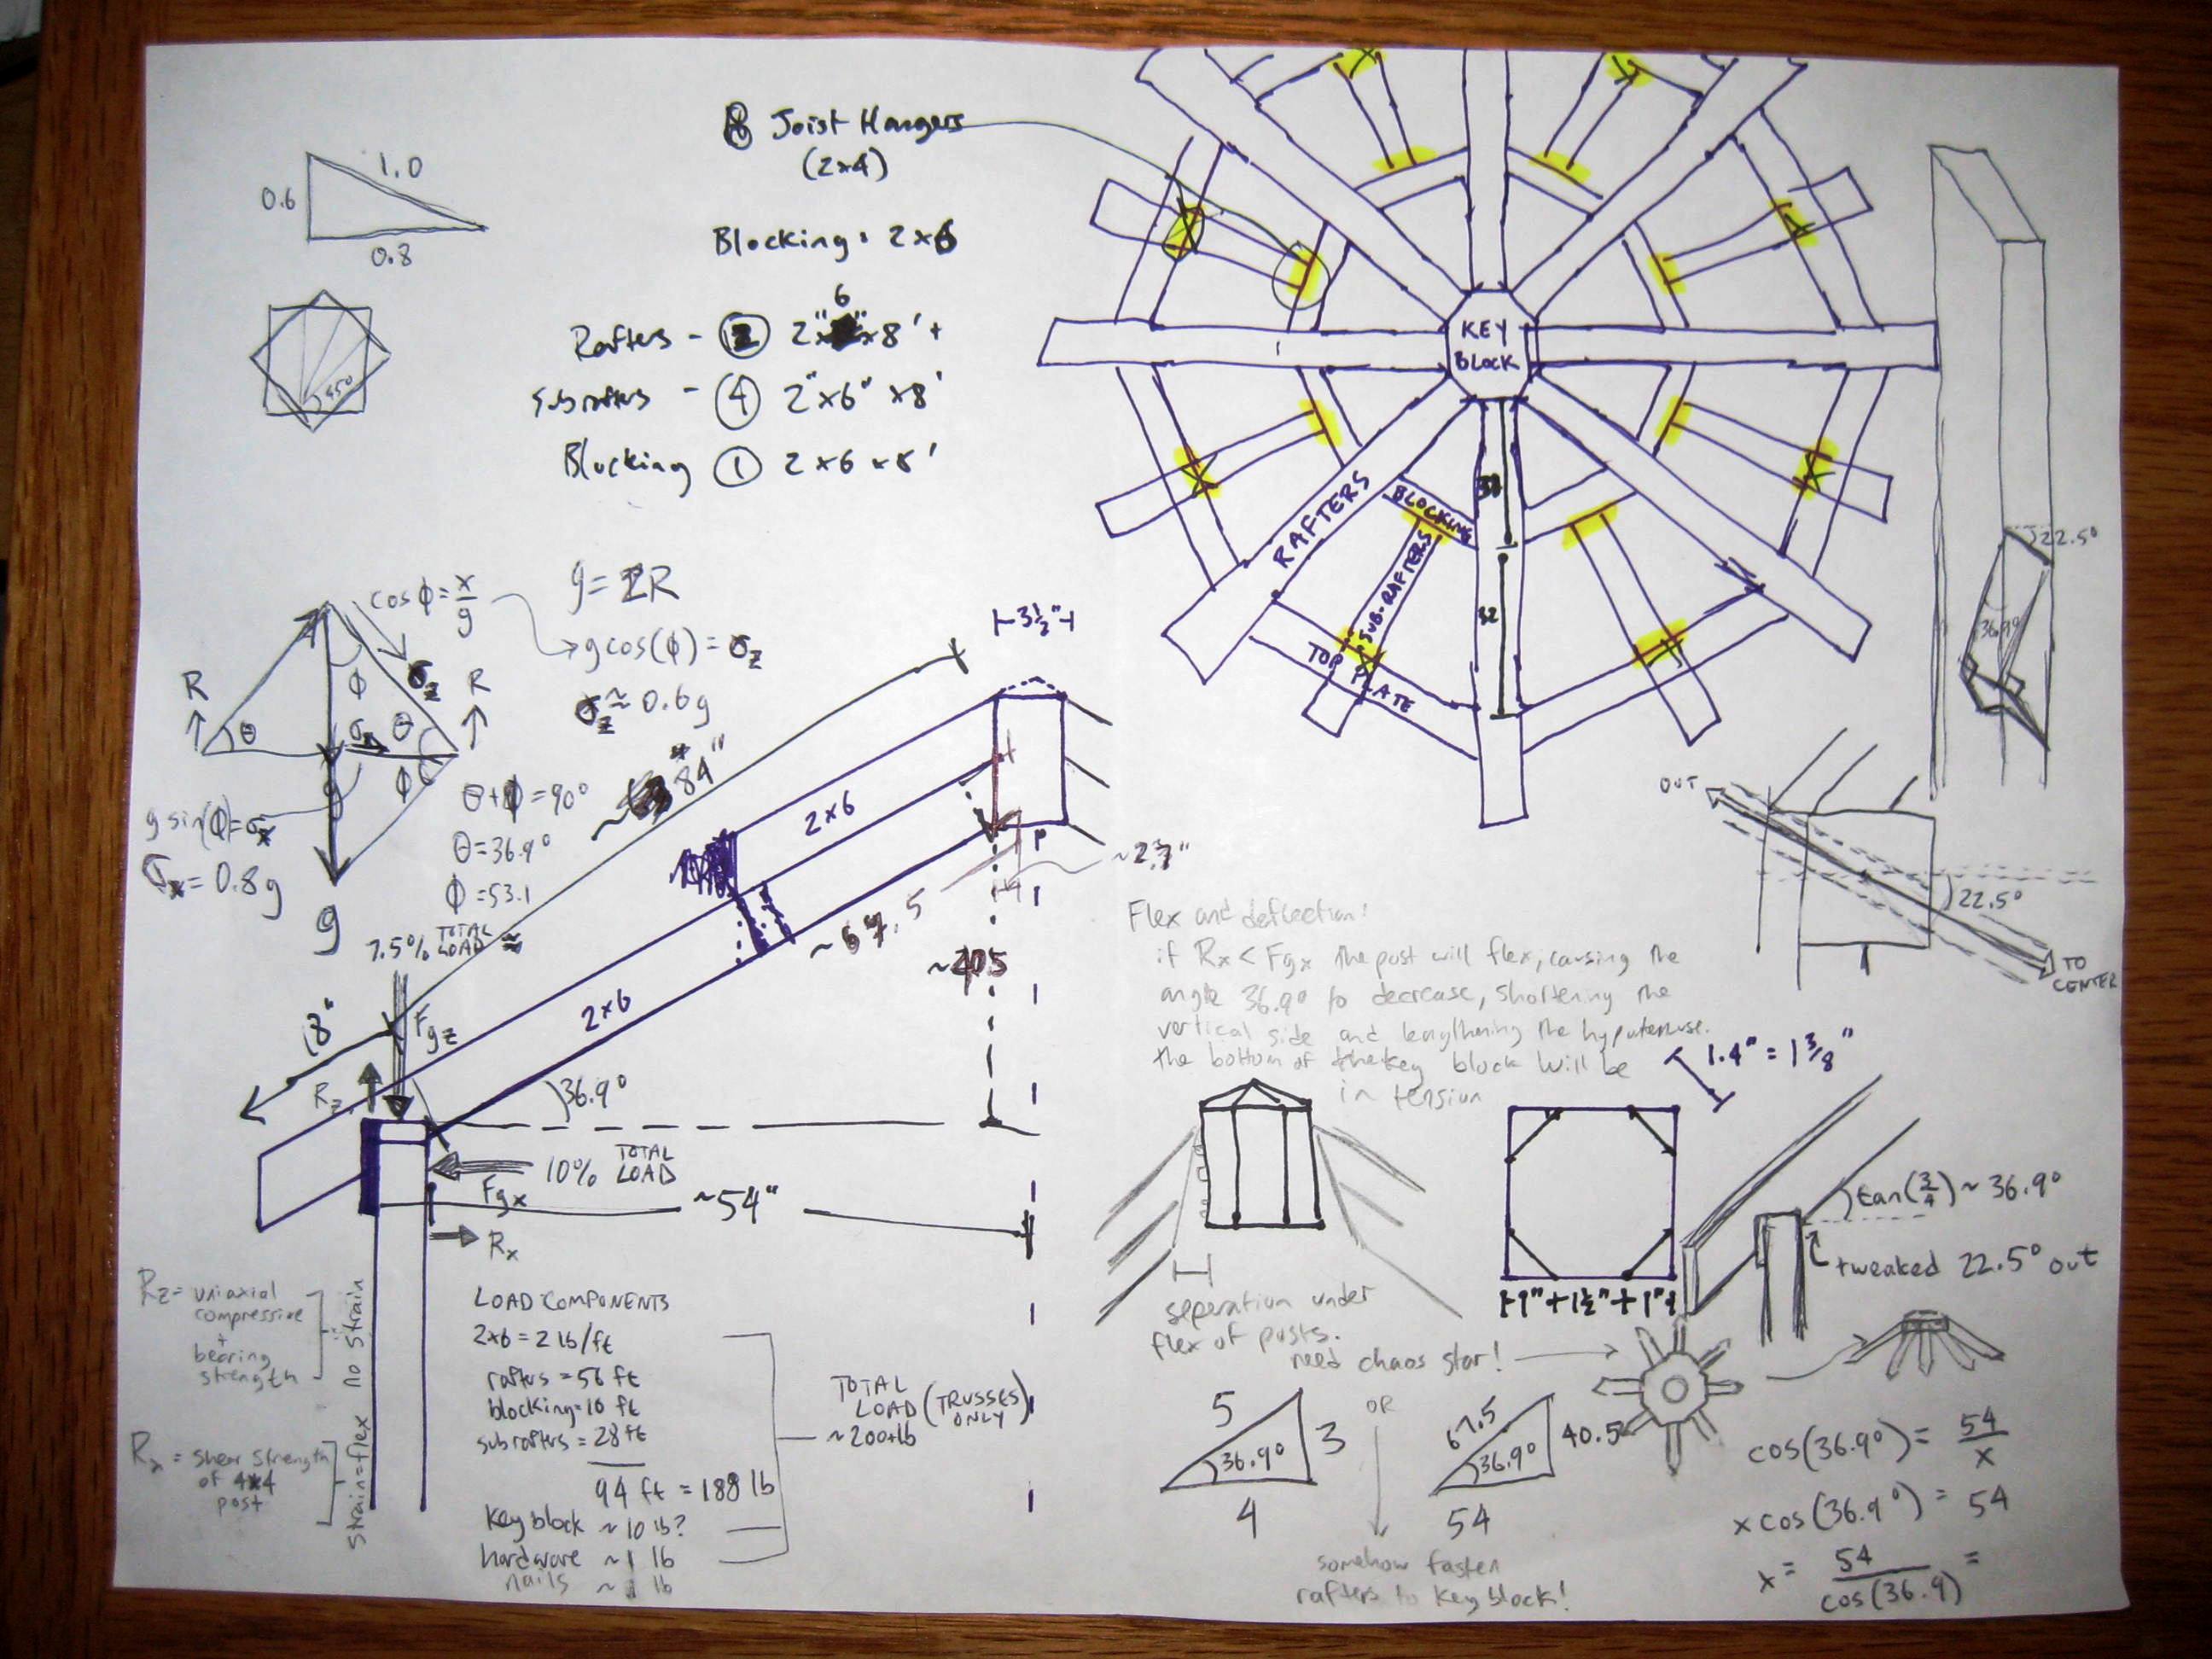 Thank you, Dr. Will Webber and Sarah Julin of Whatcom Community College, for teaching me how to use trig and vectors. It helped.
August 2010
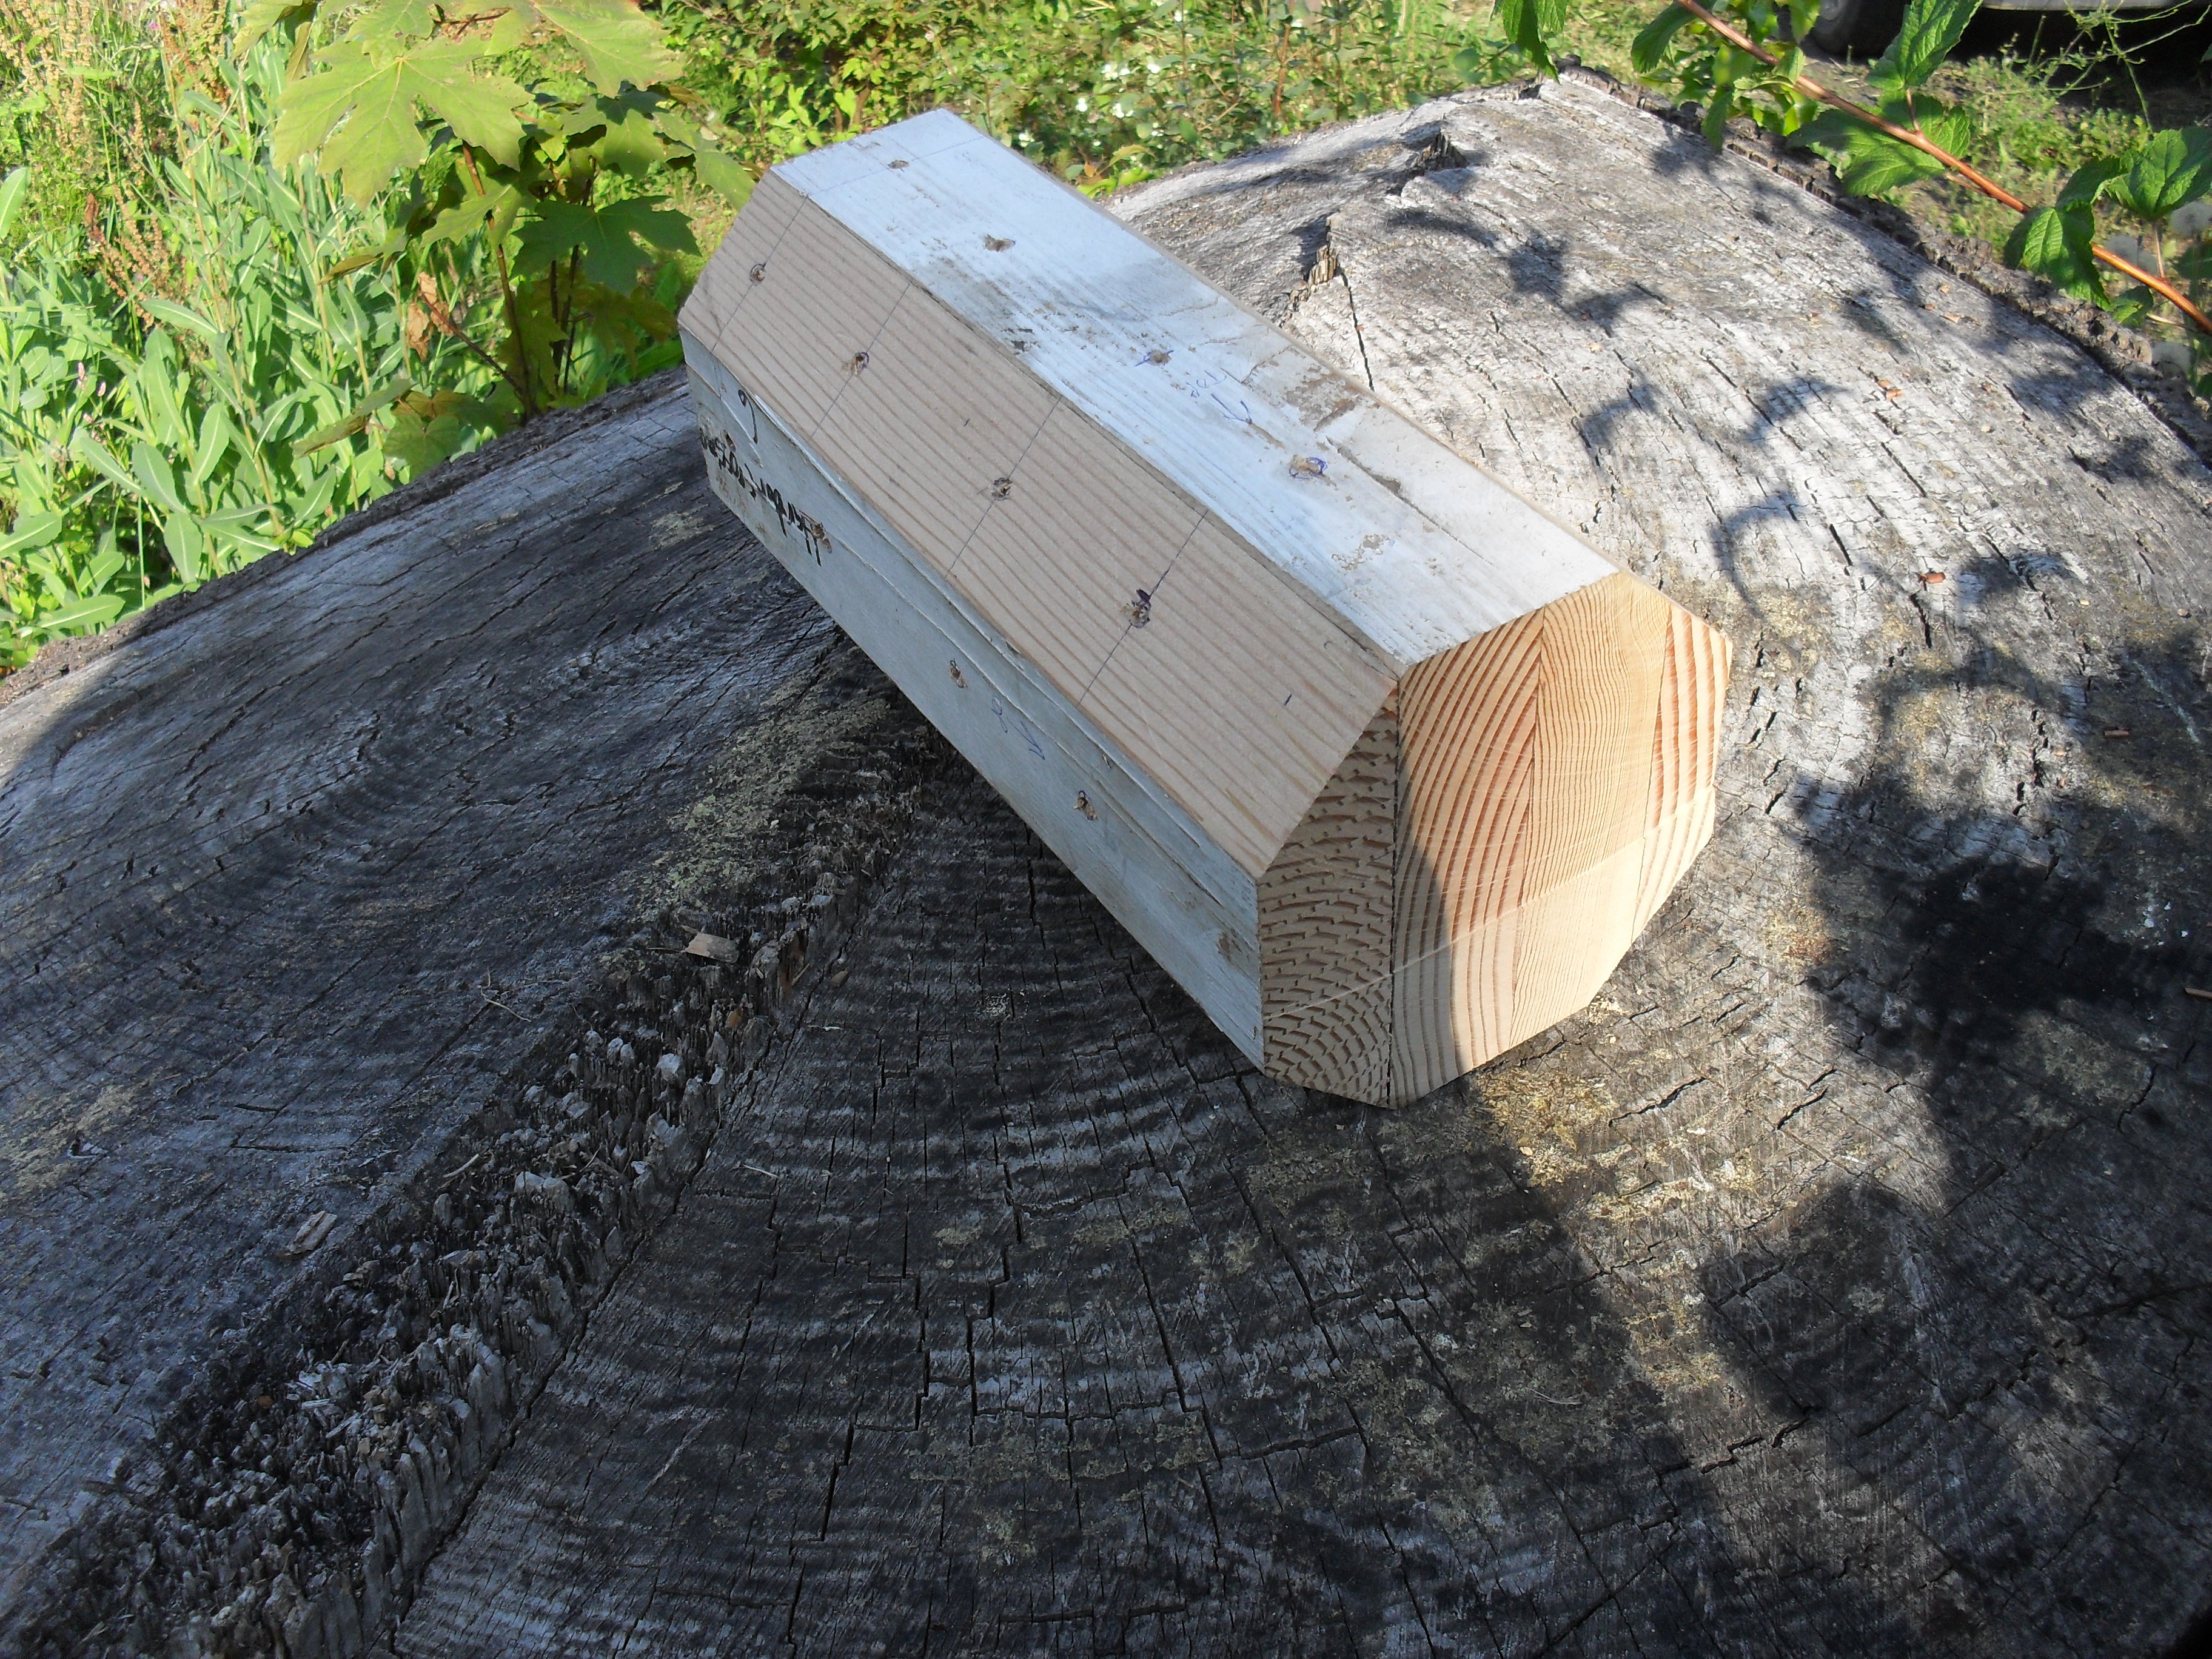

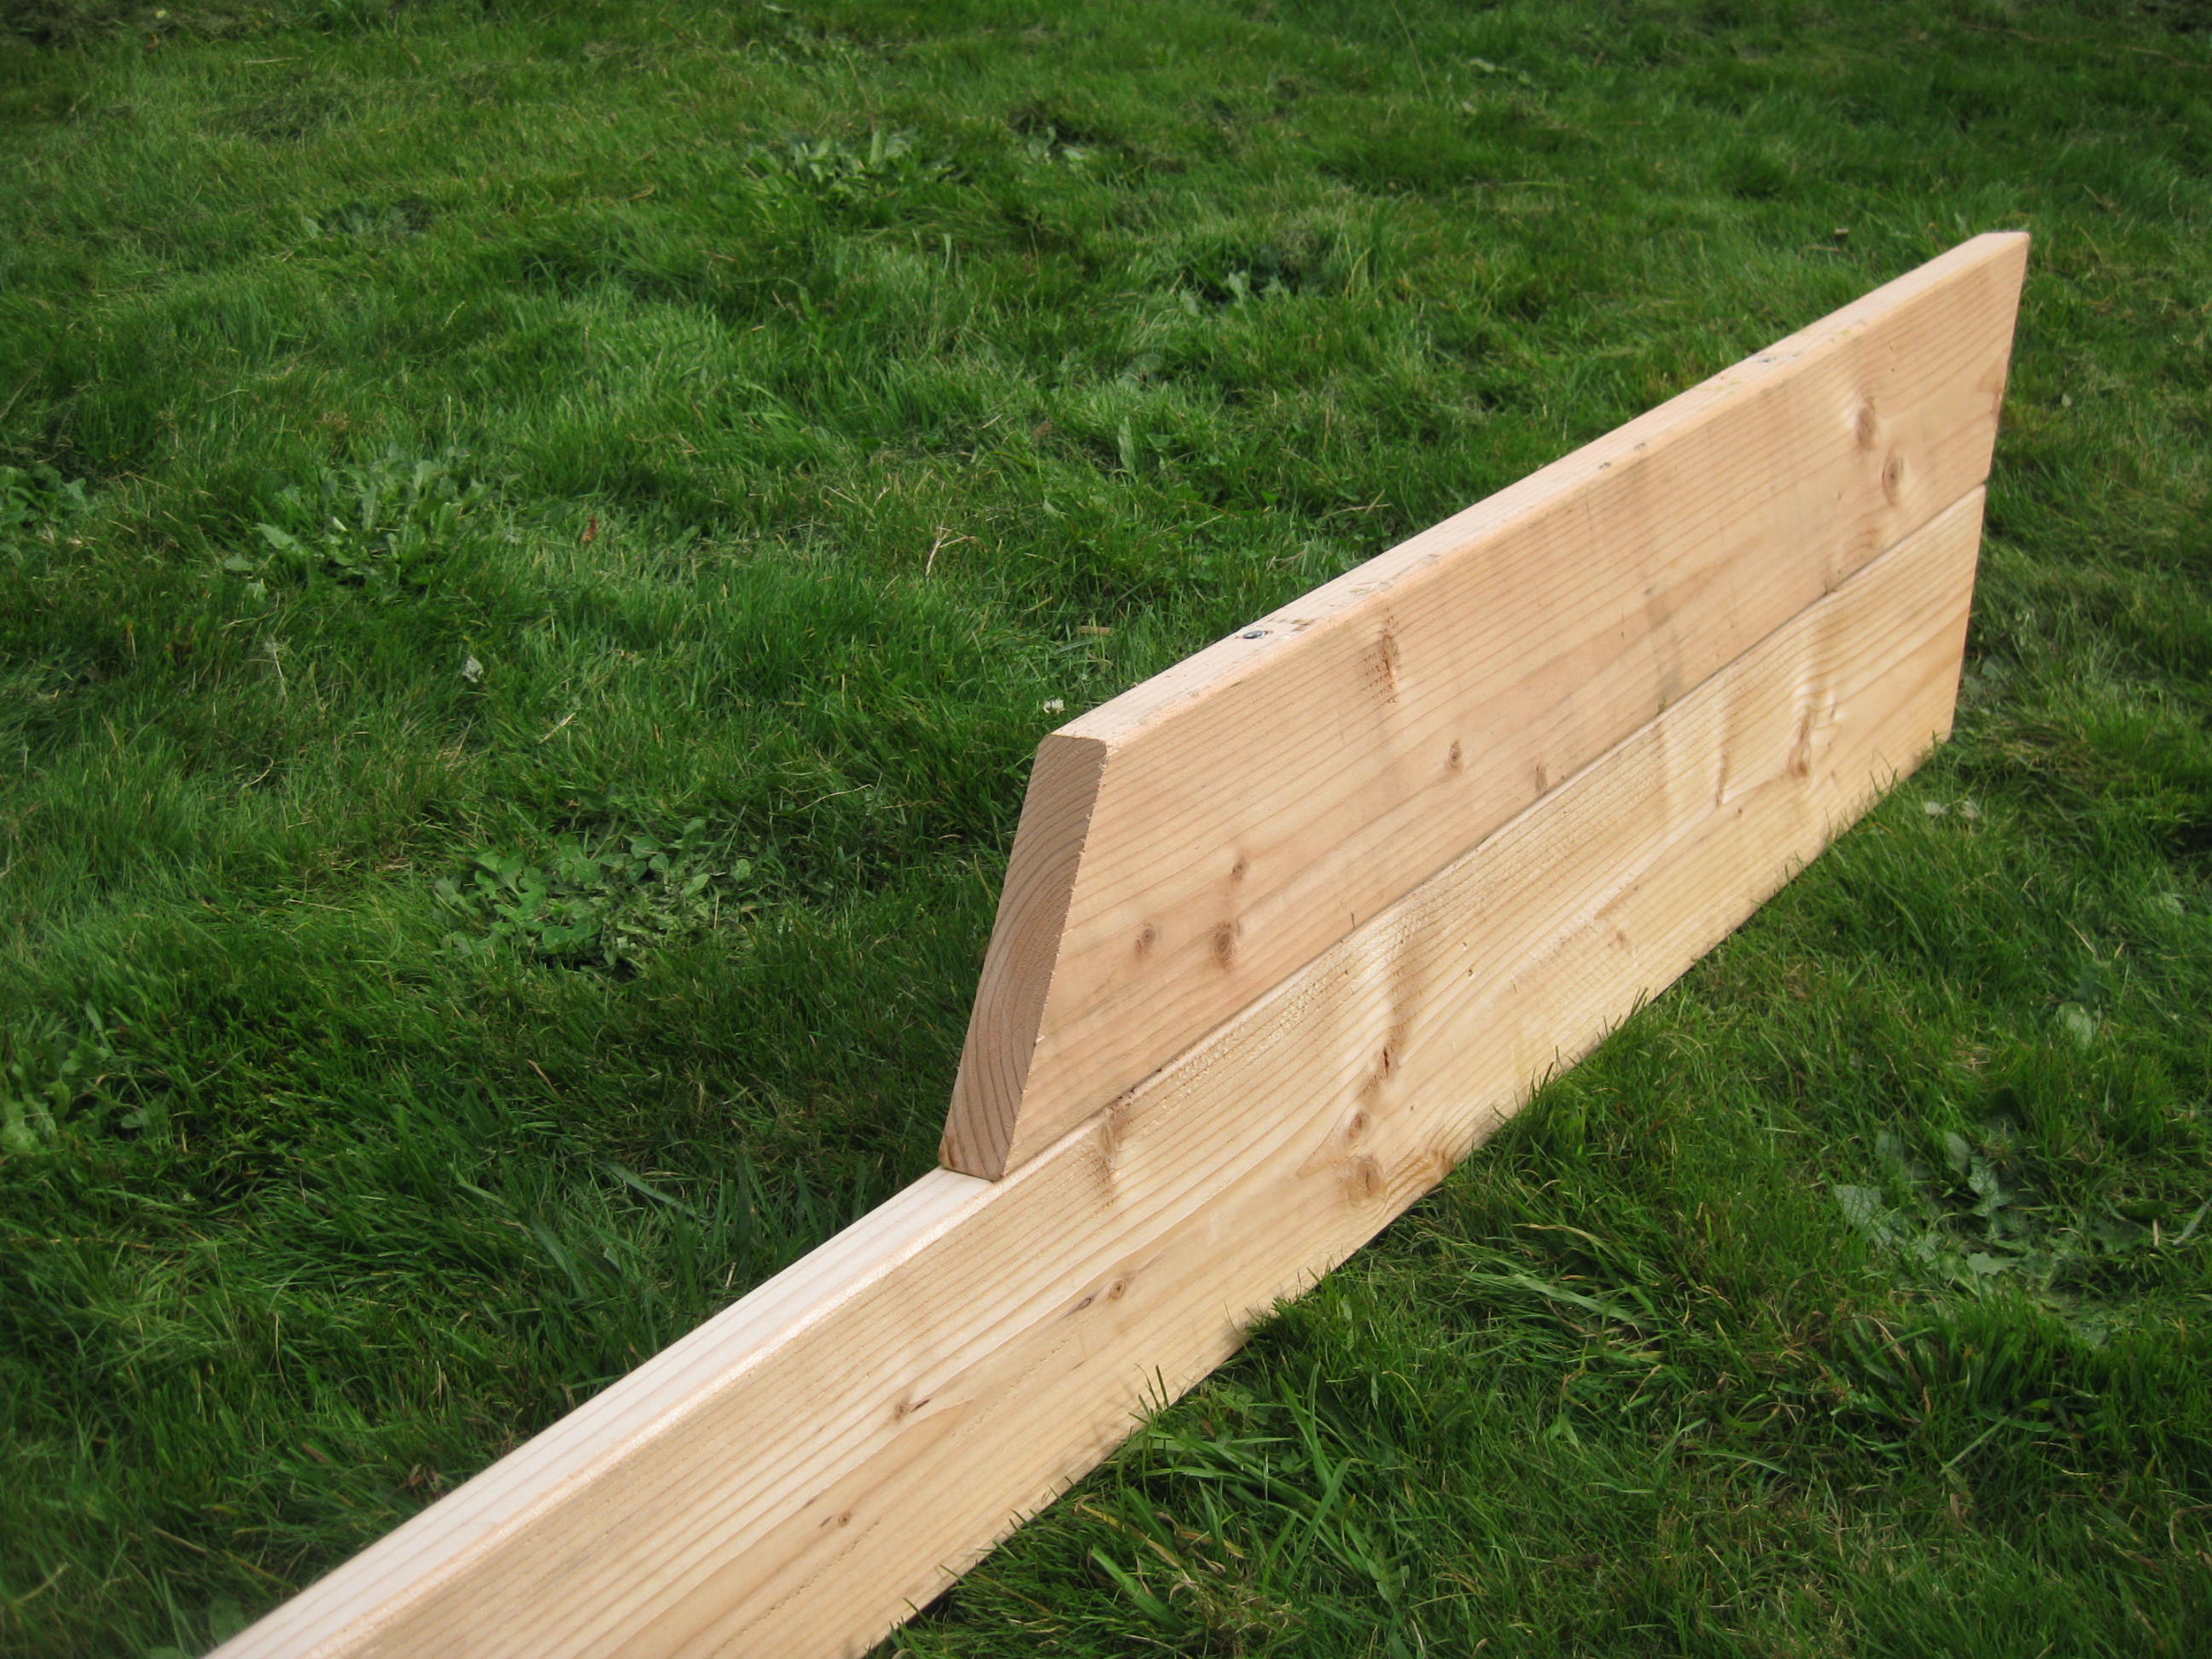
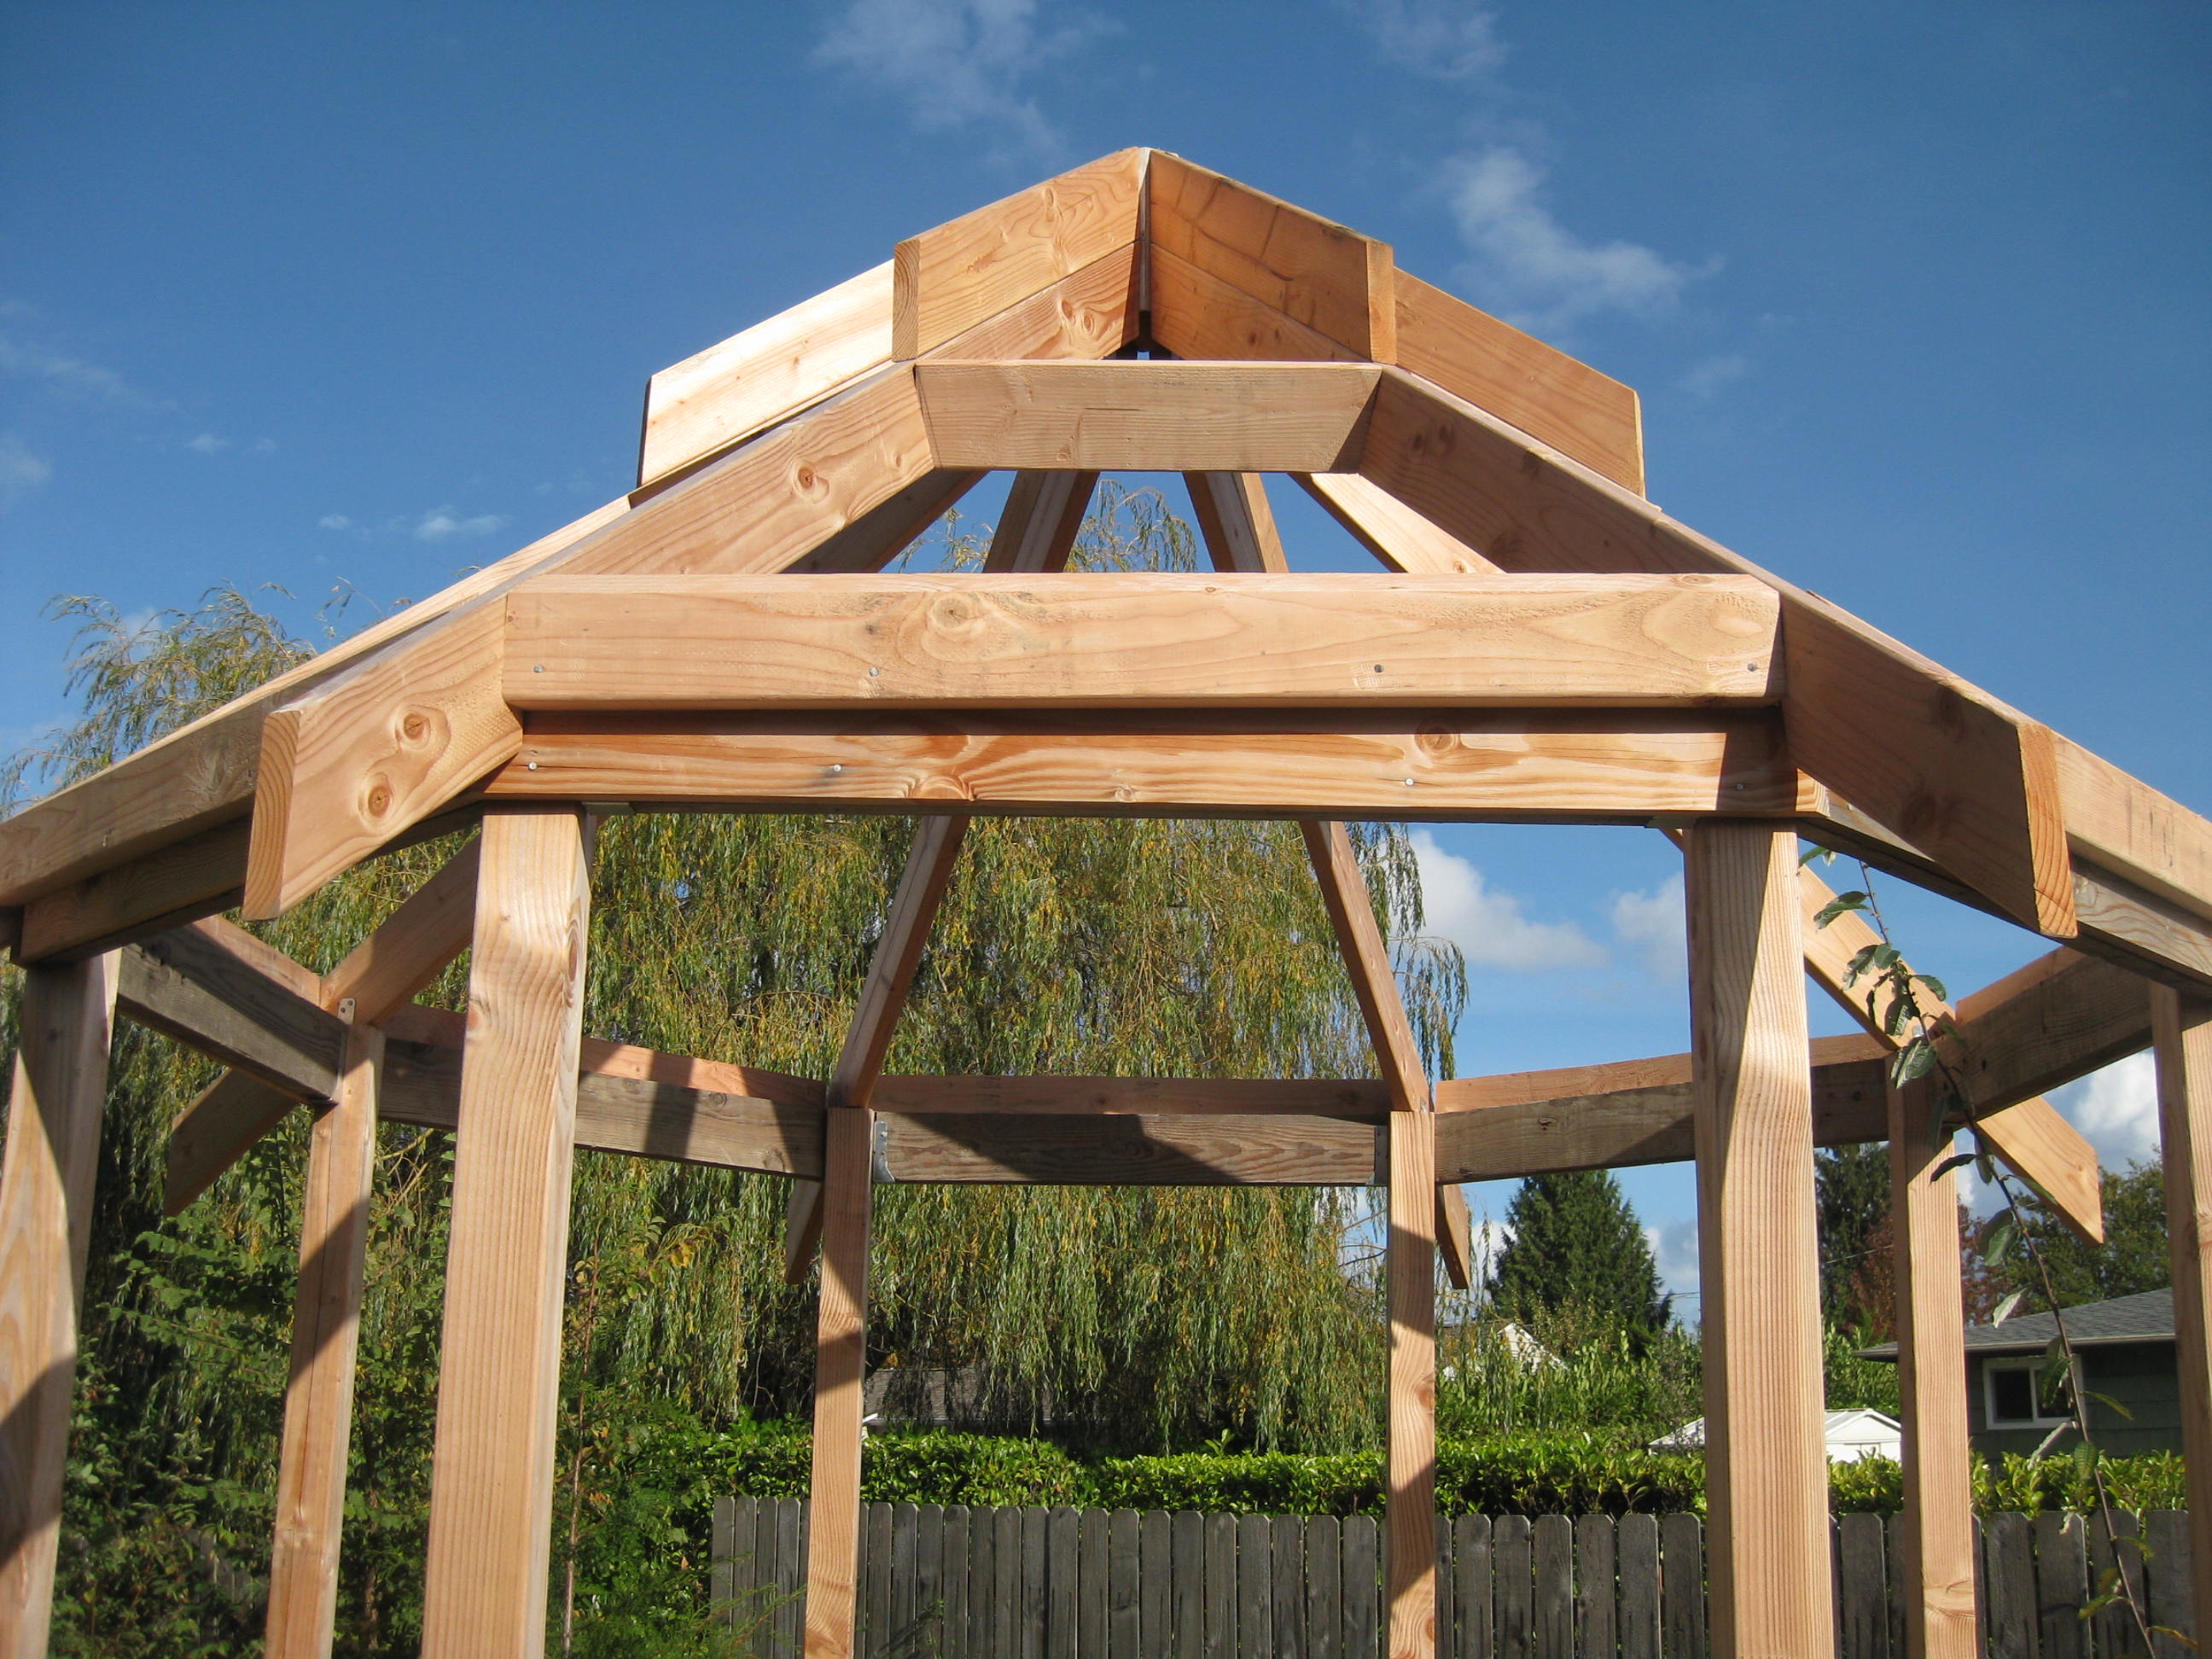
 This would be the keystone block in my roof, much like the keystone in a catenary arch.
 Those cuts in the base of the rafters were tough!
To get the rafters to sit properly on the top of each post, I had to figure out the right angles to cut.
These cuts involved two different angles in two separate in two planes (see right-side of sketch from July).
Those cuts in the base of the rafters were tough!
To get the rafters to sit properly on the top of each post, I had to figure out the right angles to cut.
These cuts involved two different angles in two separate in two planes (see right-side of sketch from July).
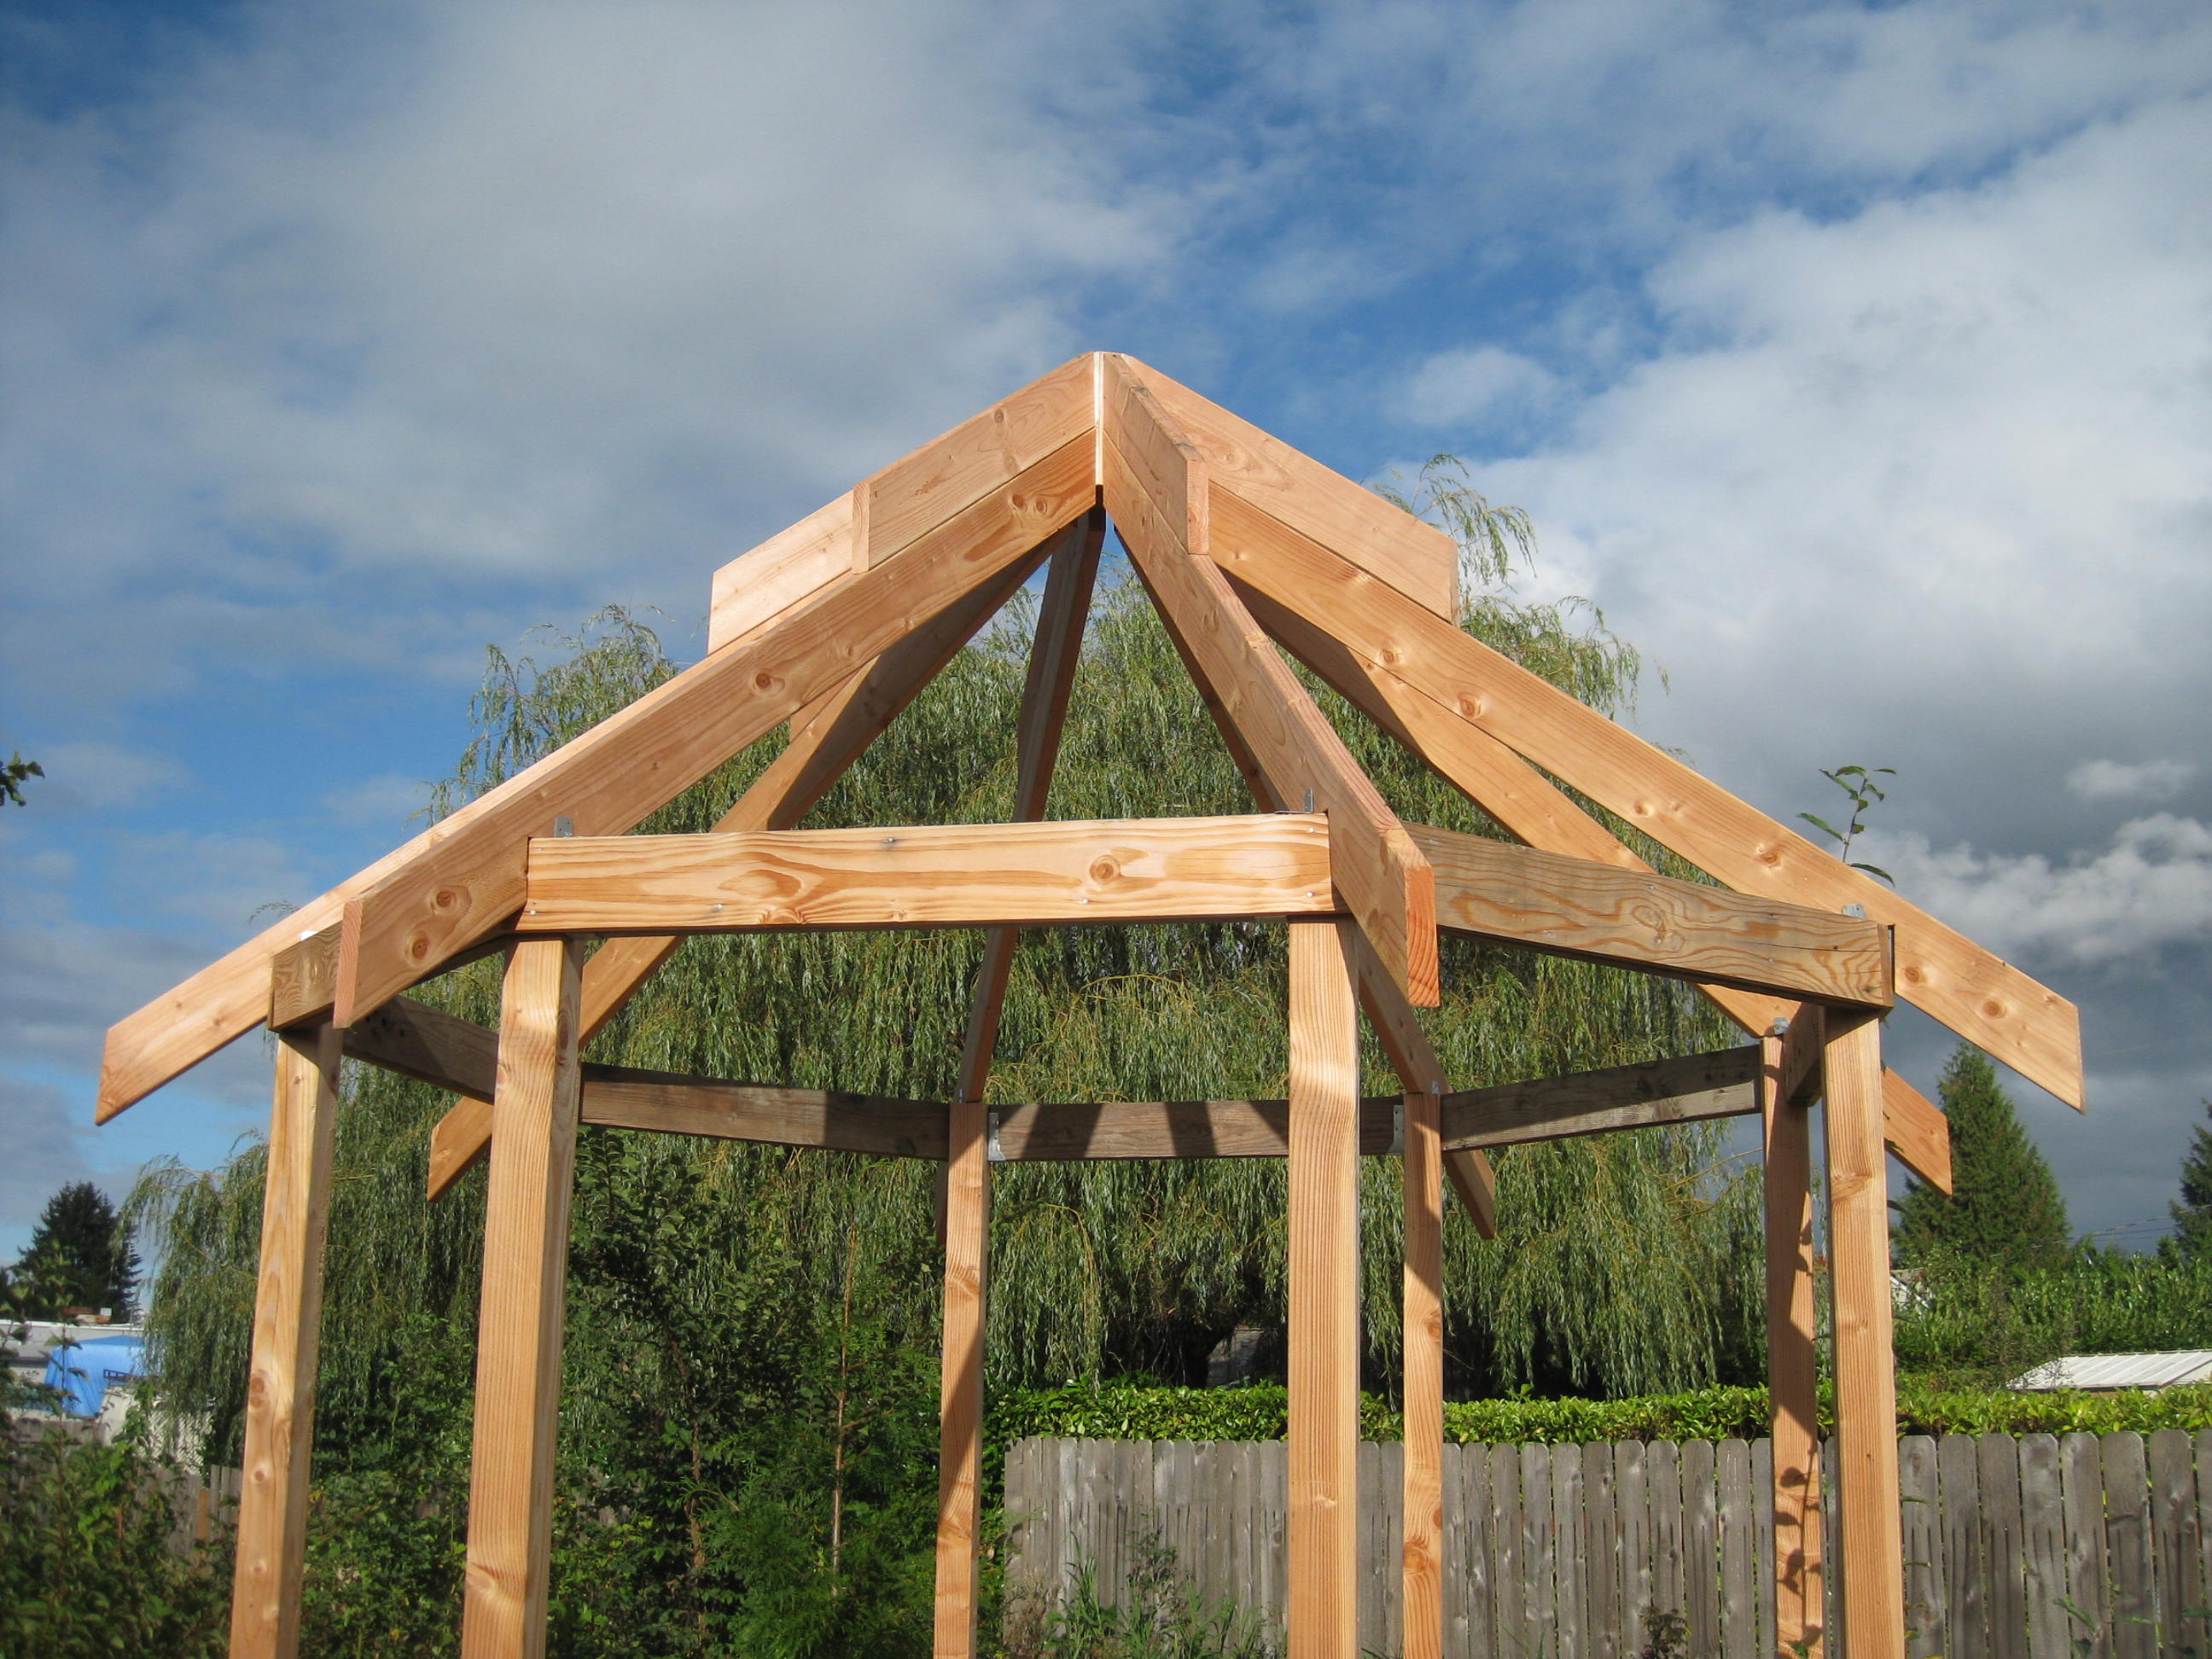
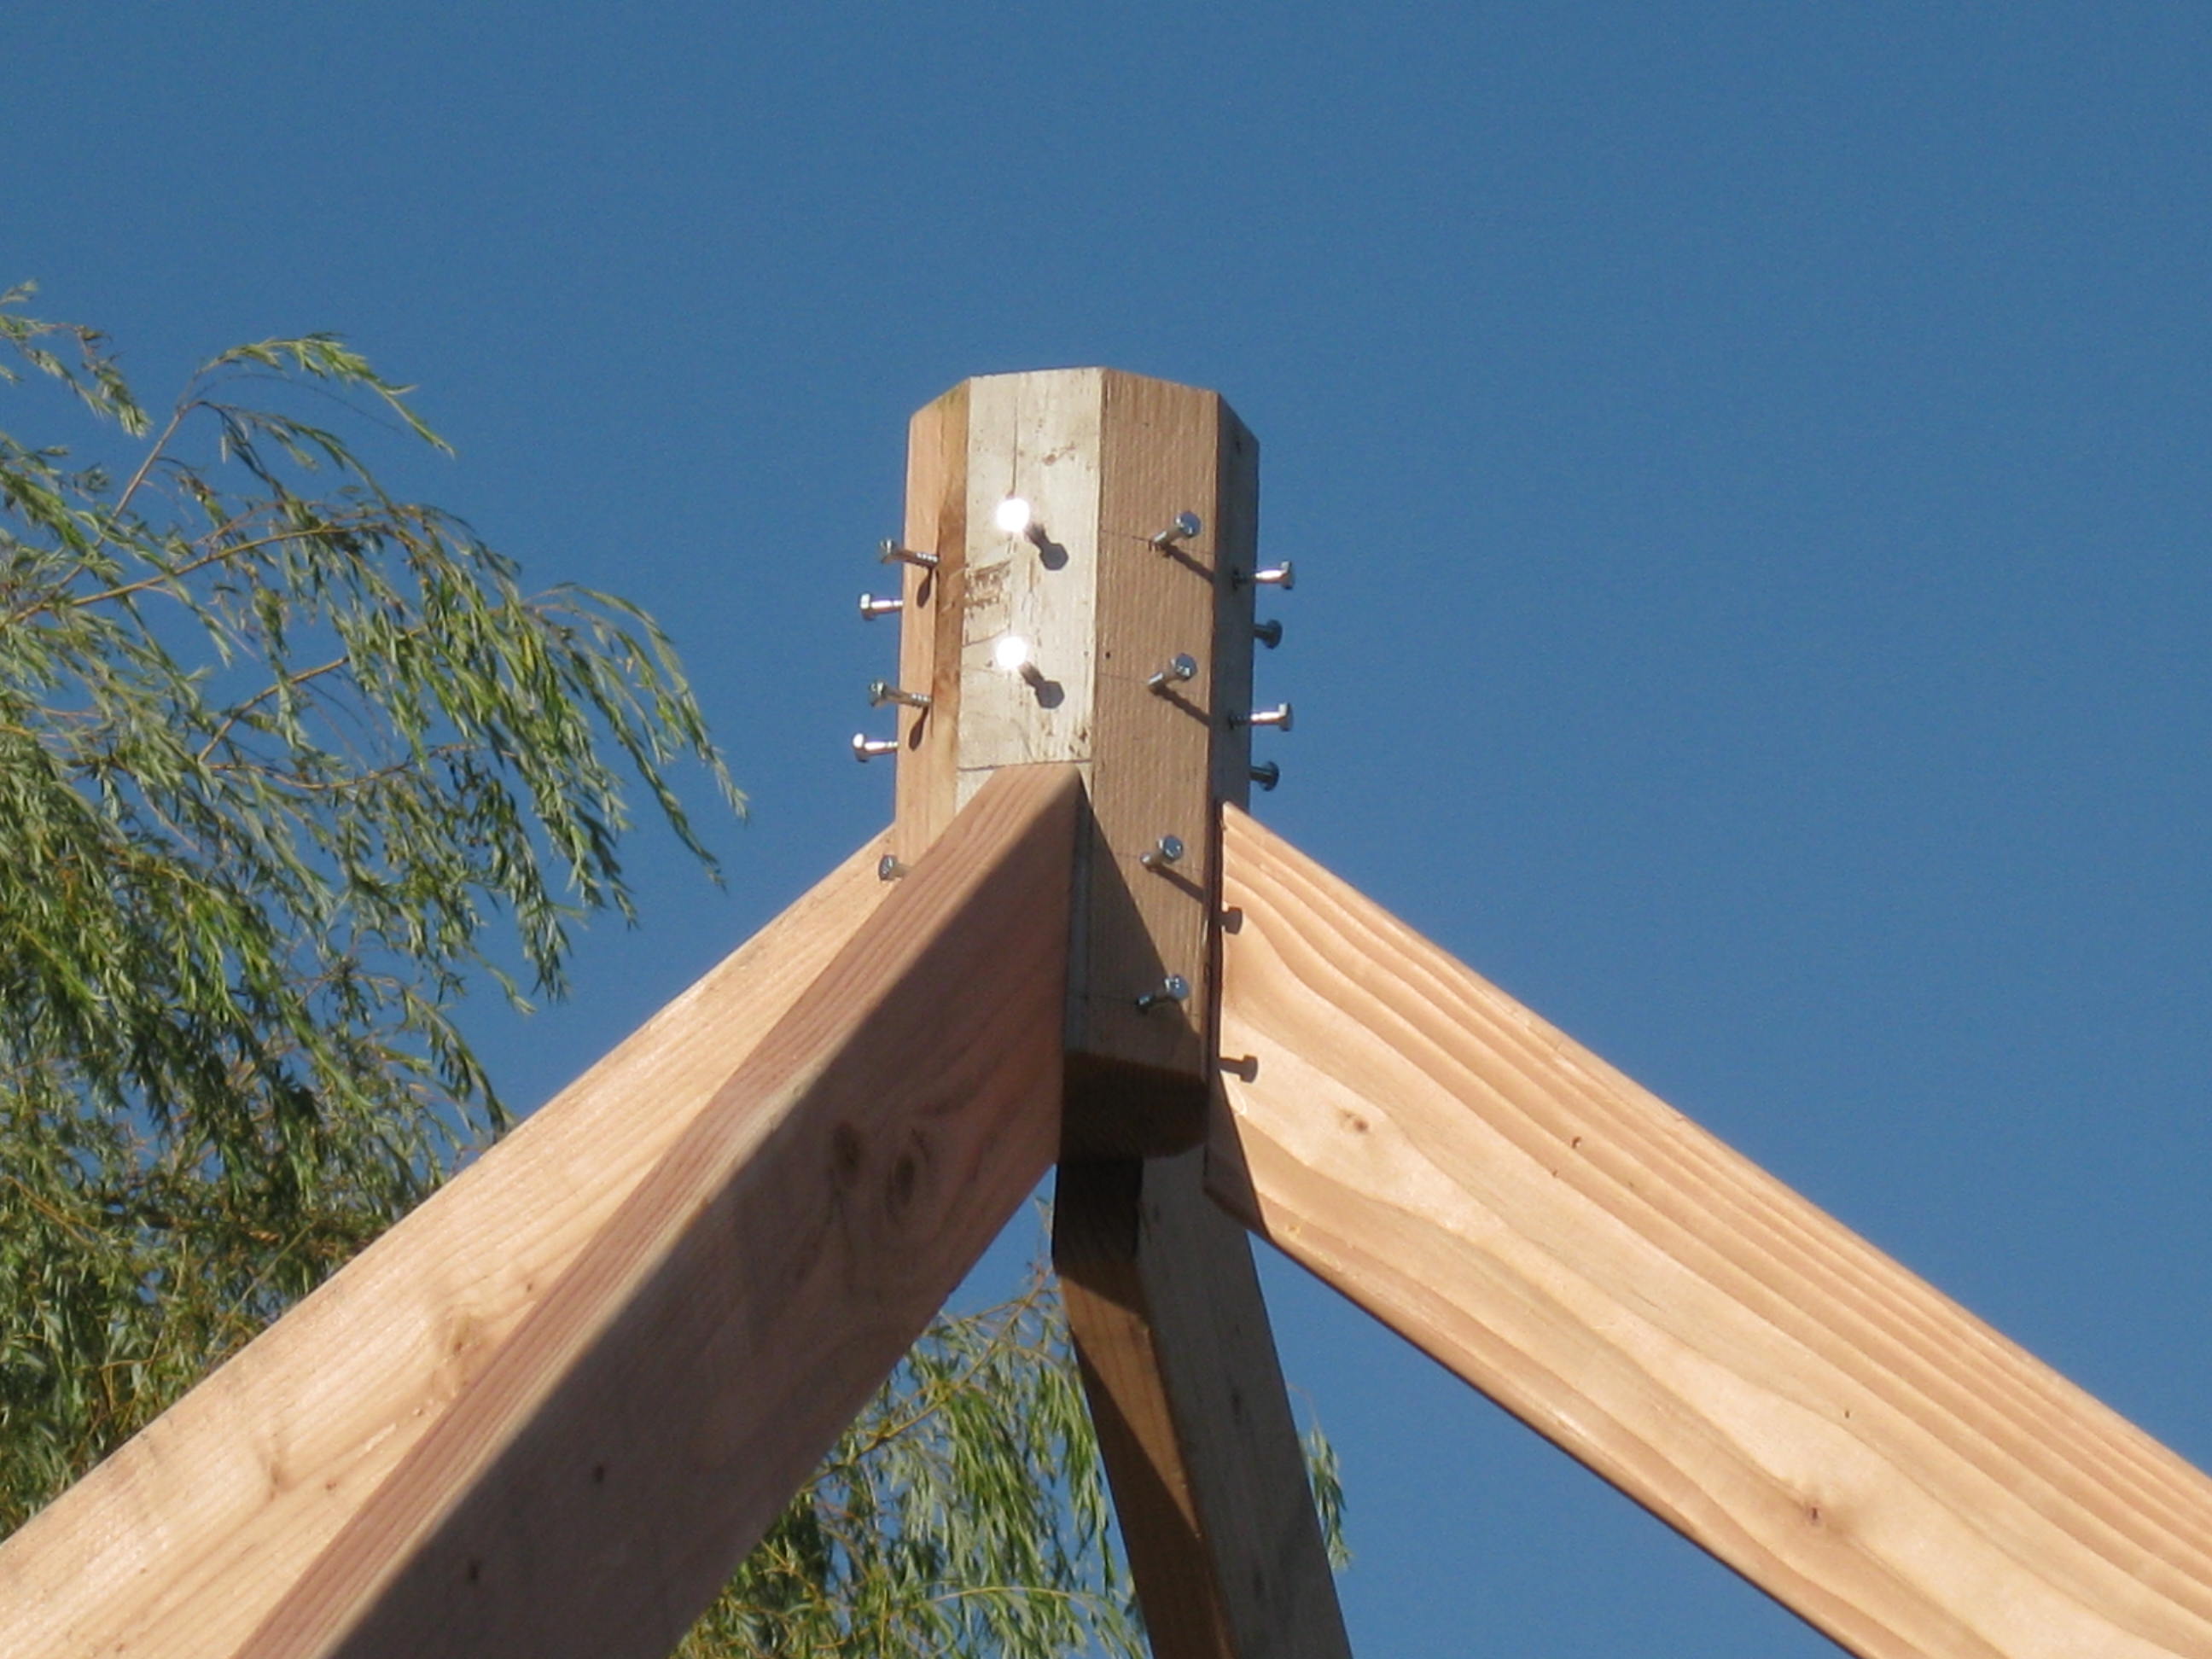 With Cary and Eric's help, I squeezed the key block between four rafters, just to test it out.
With only one screw in the base of each of the four rafters, the thing stood up just perfectly.
Then, Cary did a pull-up on one of the rafters before I could stop him, causing me a moment of panic.
It held his weight! Whew! I guess this is going to work!
With Cary and Eric's help, I squeezed the key block between four rafters, just to test it out.
With only one screw in the base of each of the four rafters, the thing stood up just perfectly.
Then, Cary did a pull-up on one of the rafters before I could stop him, causing me a moment of panic.
It held his weight! Whew! I guess this is going to work!
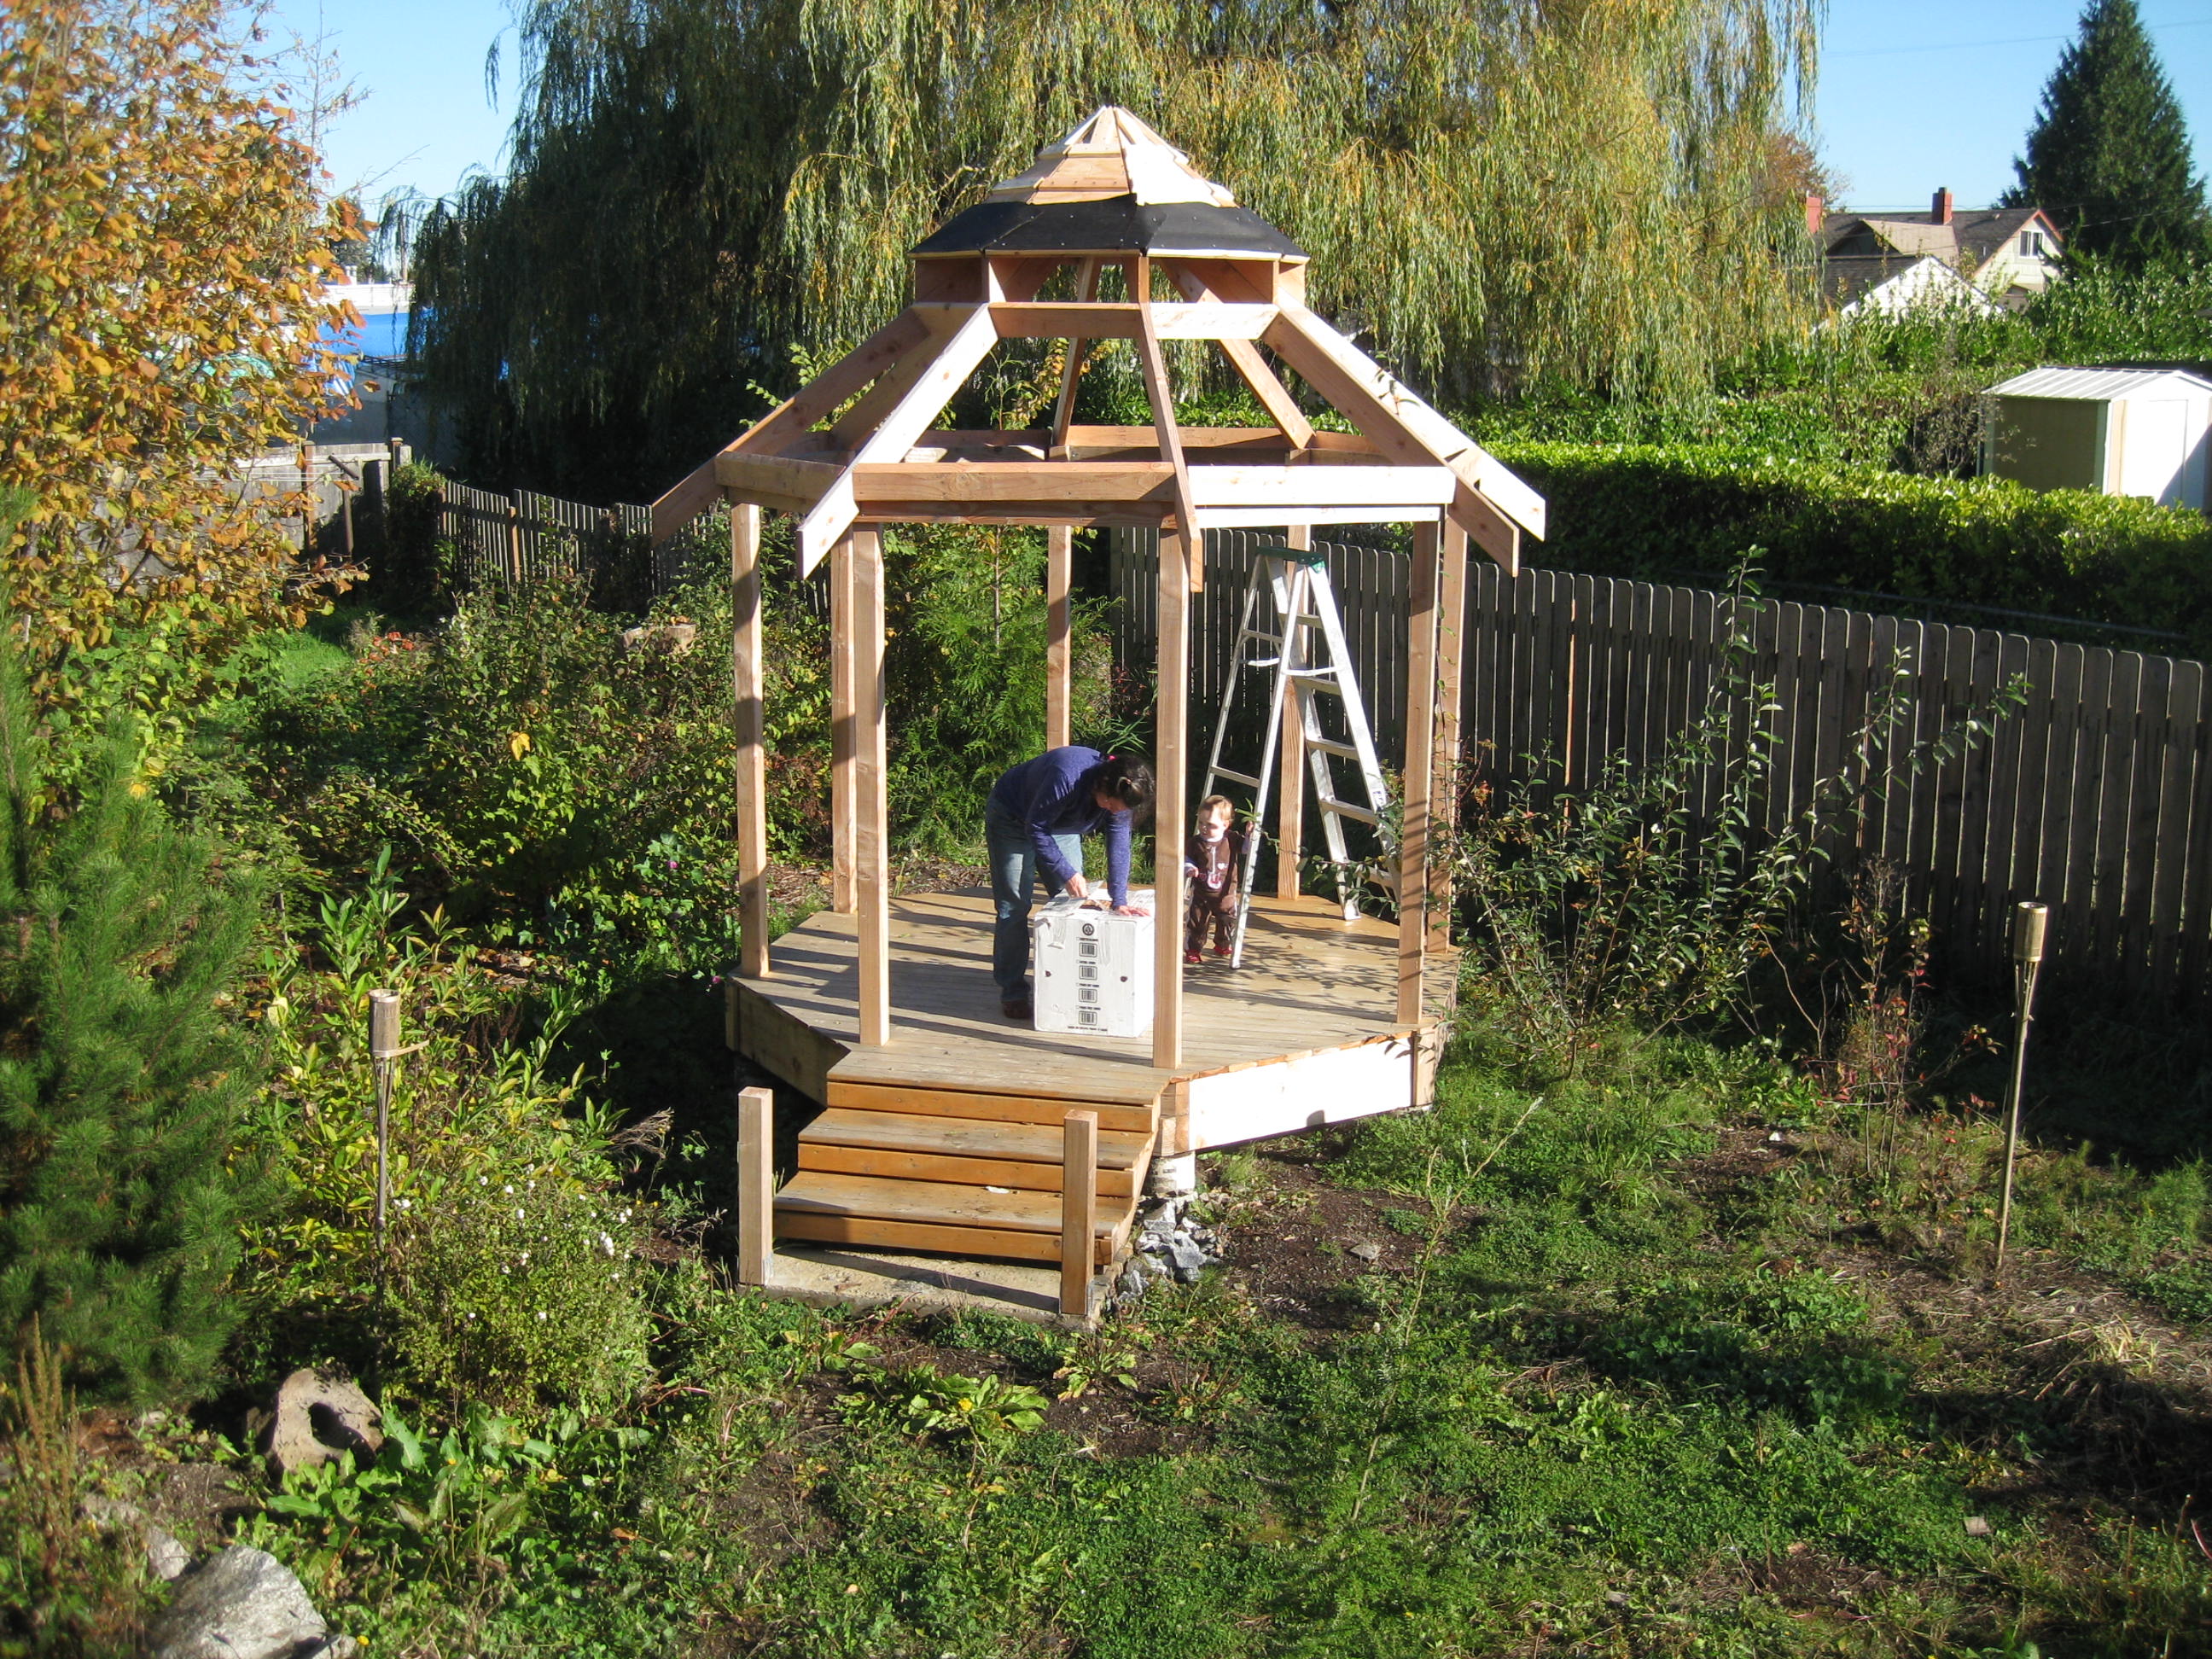
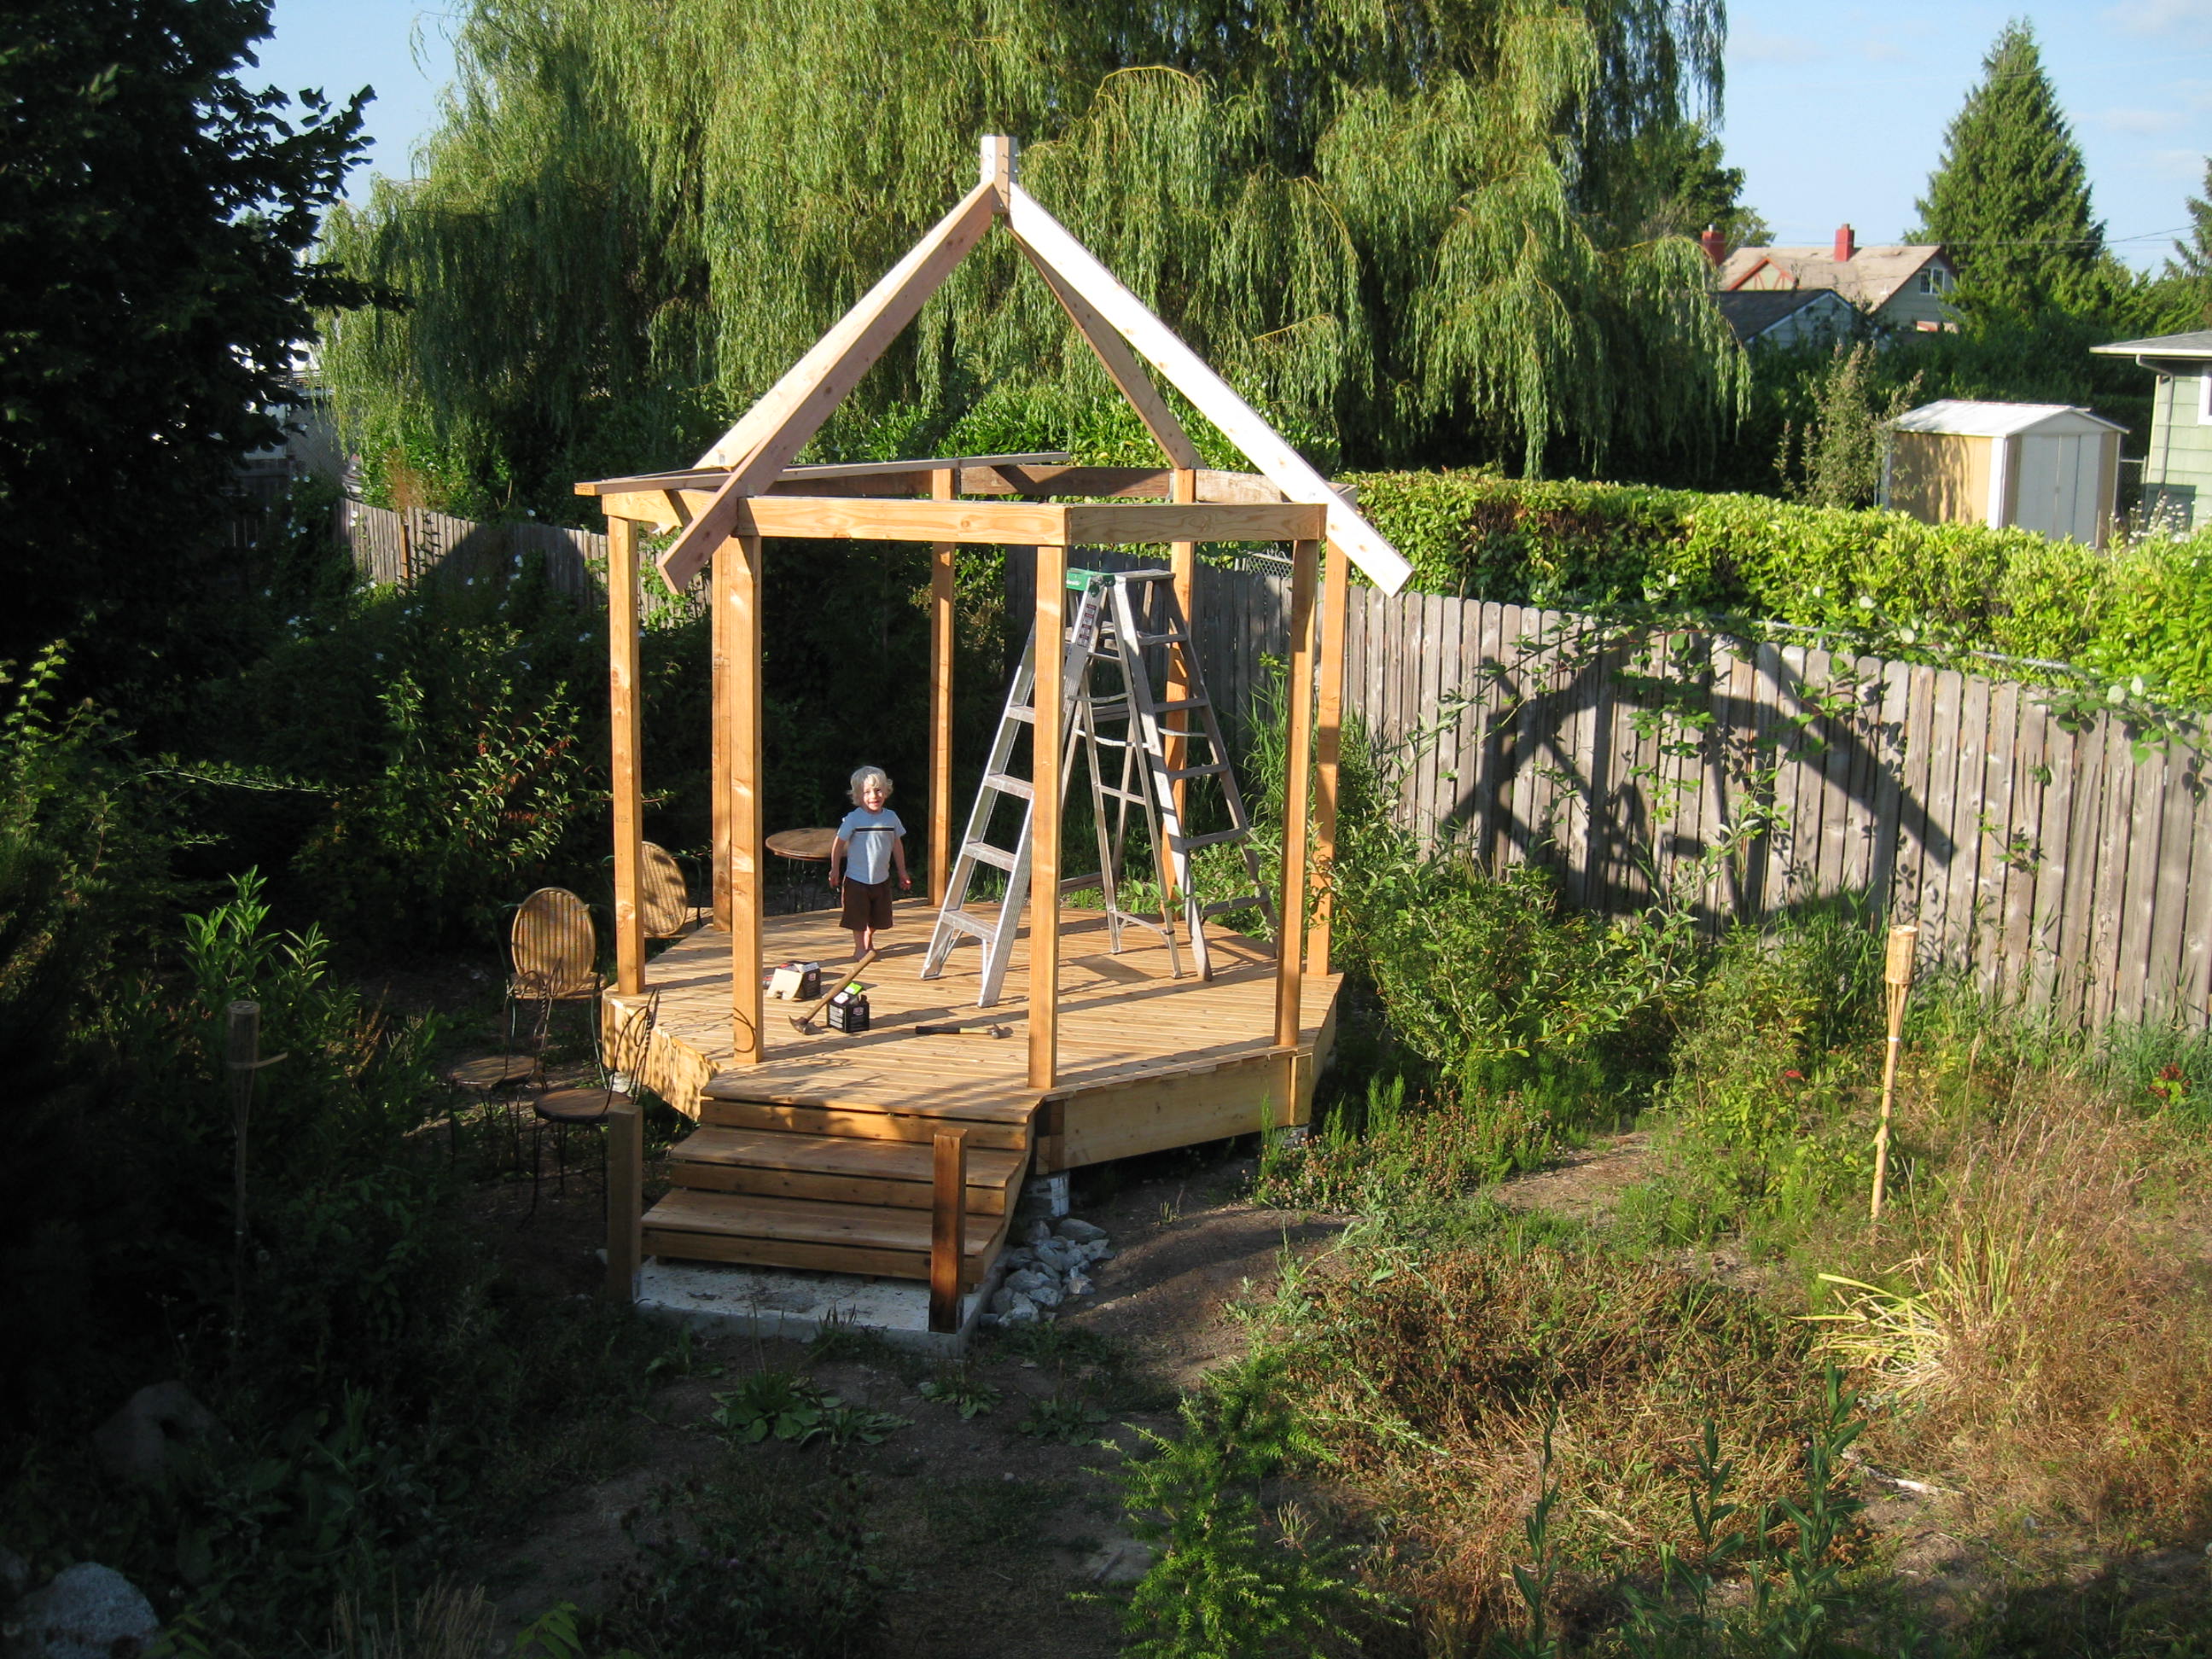 There's Conan in the proto-zebo, waiting for a chance to climb up the ladder.
September 2010
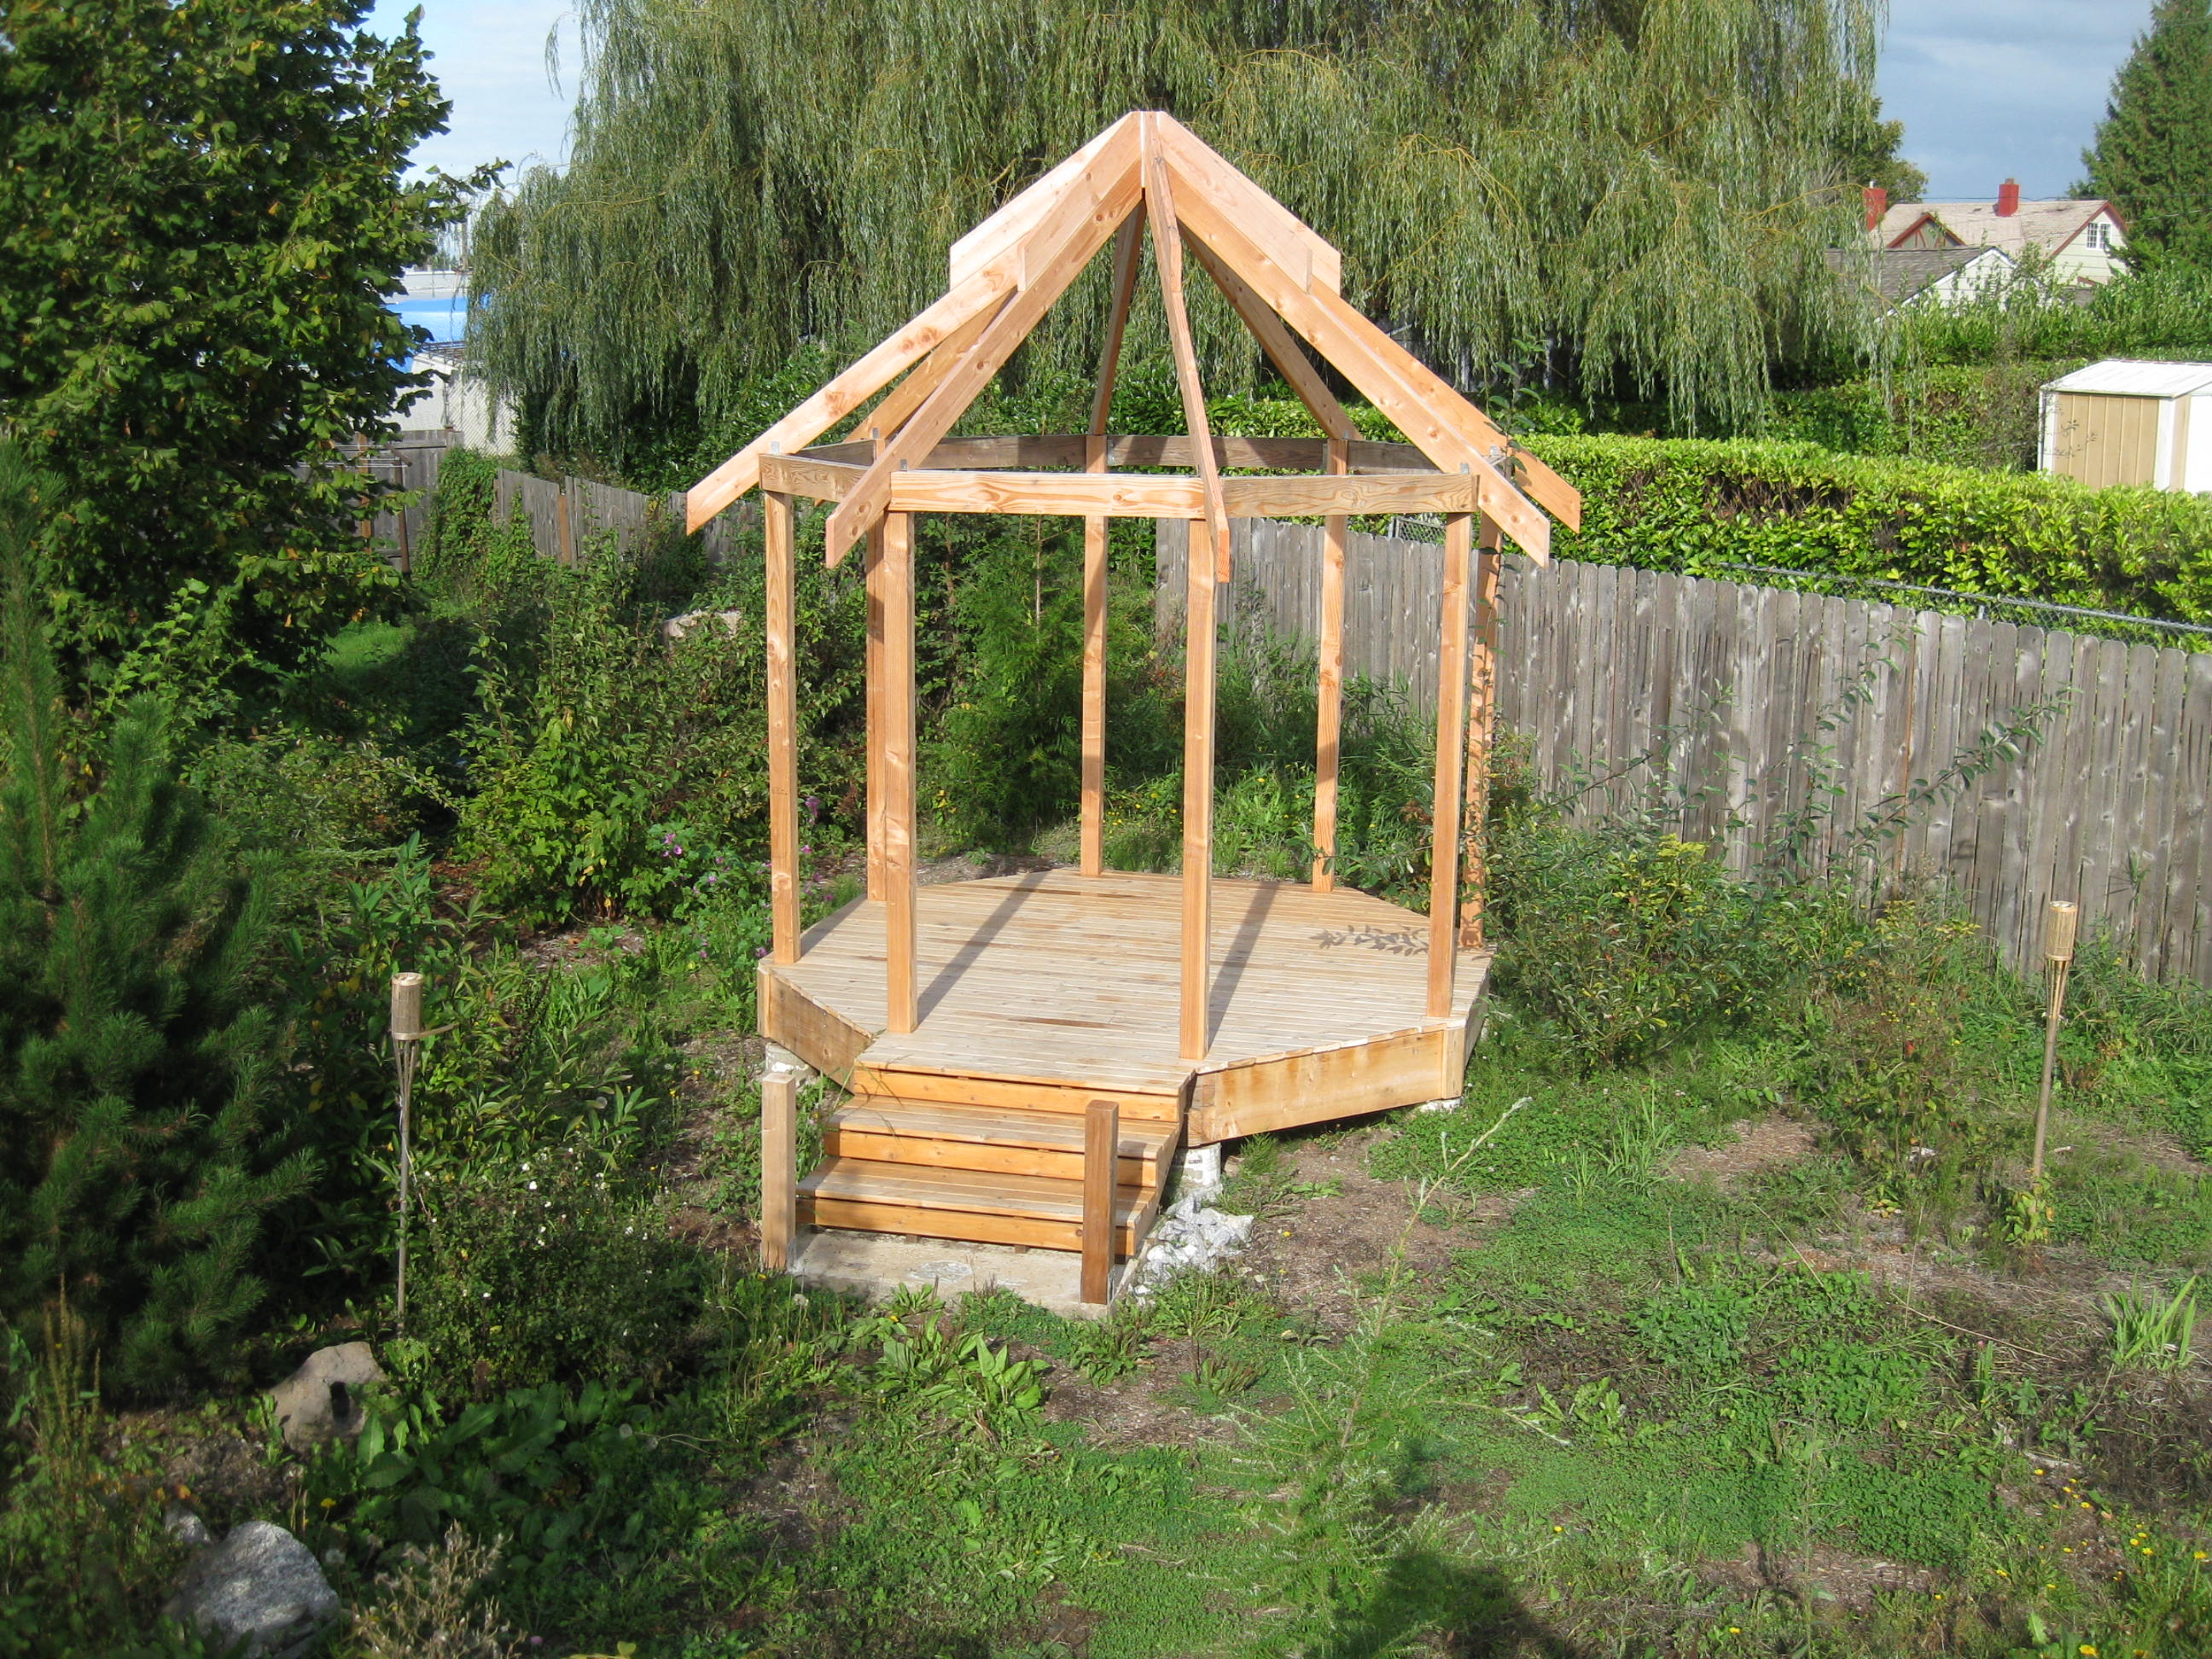
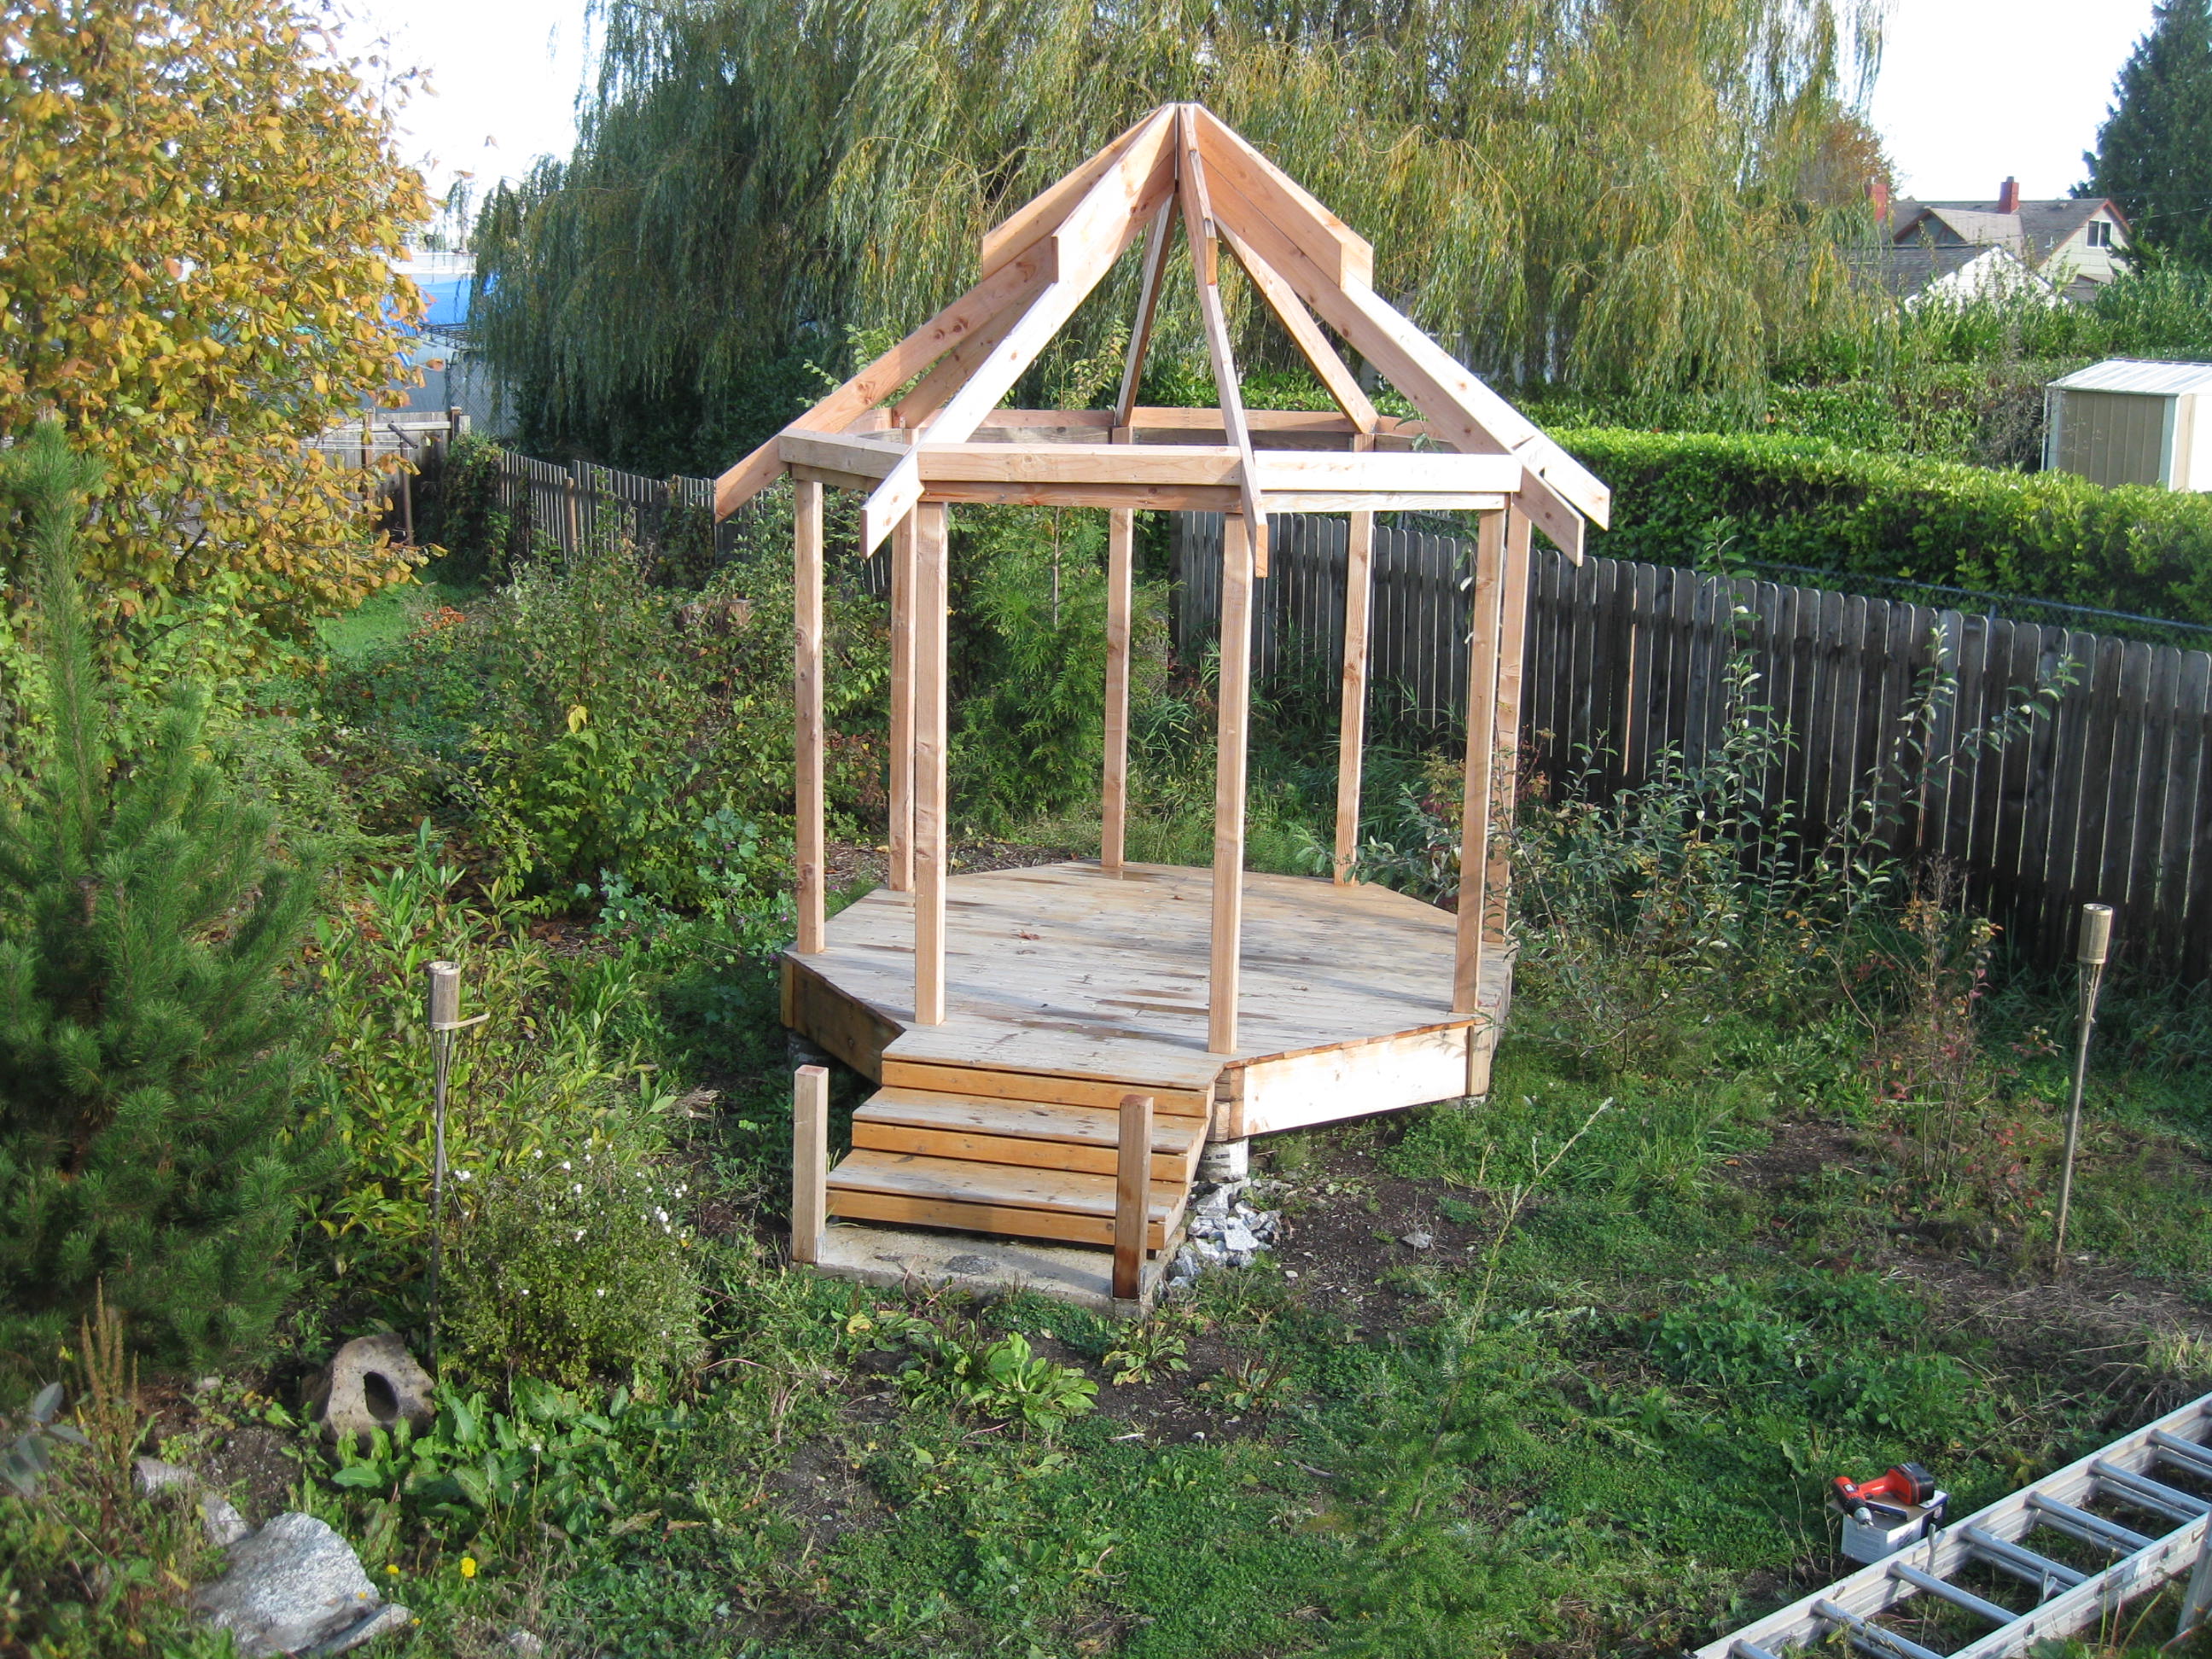
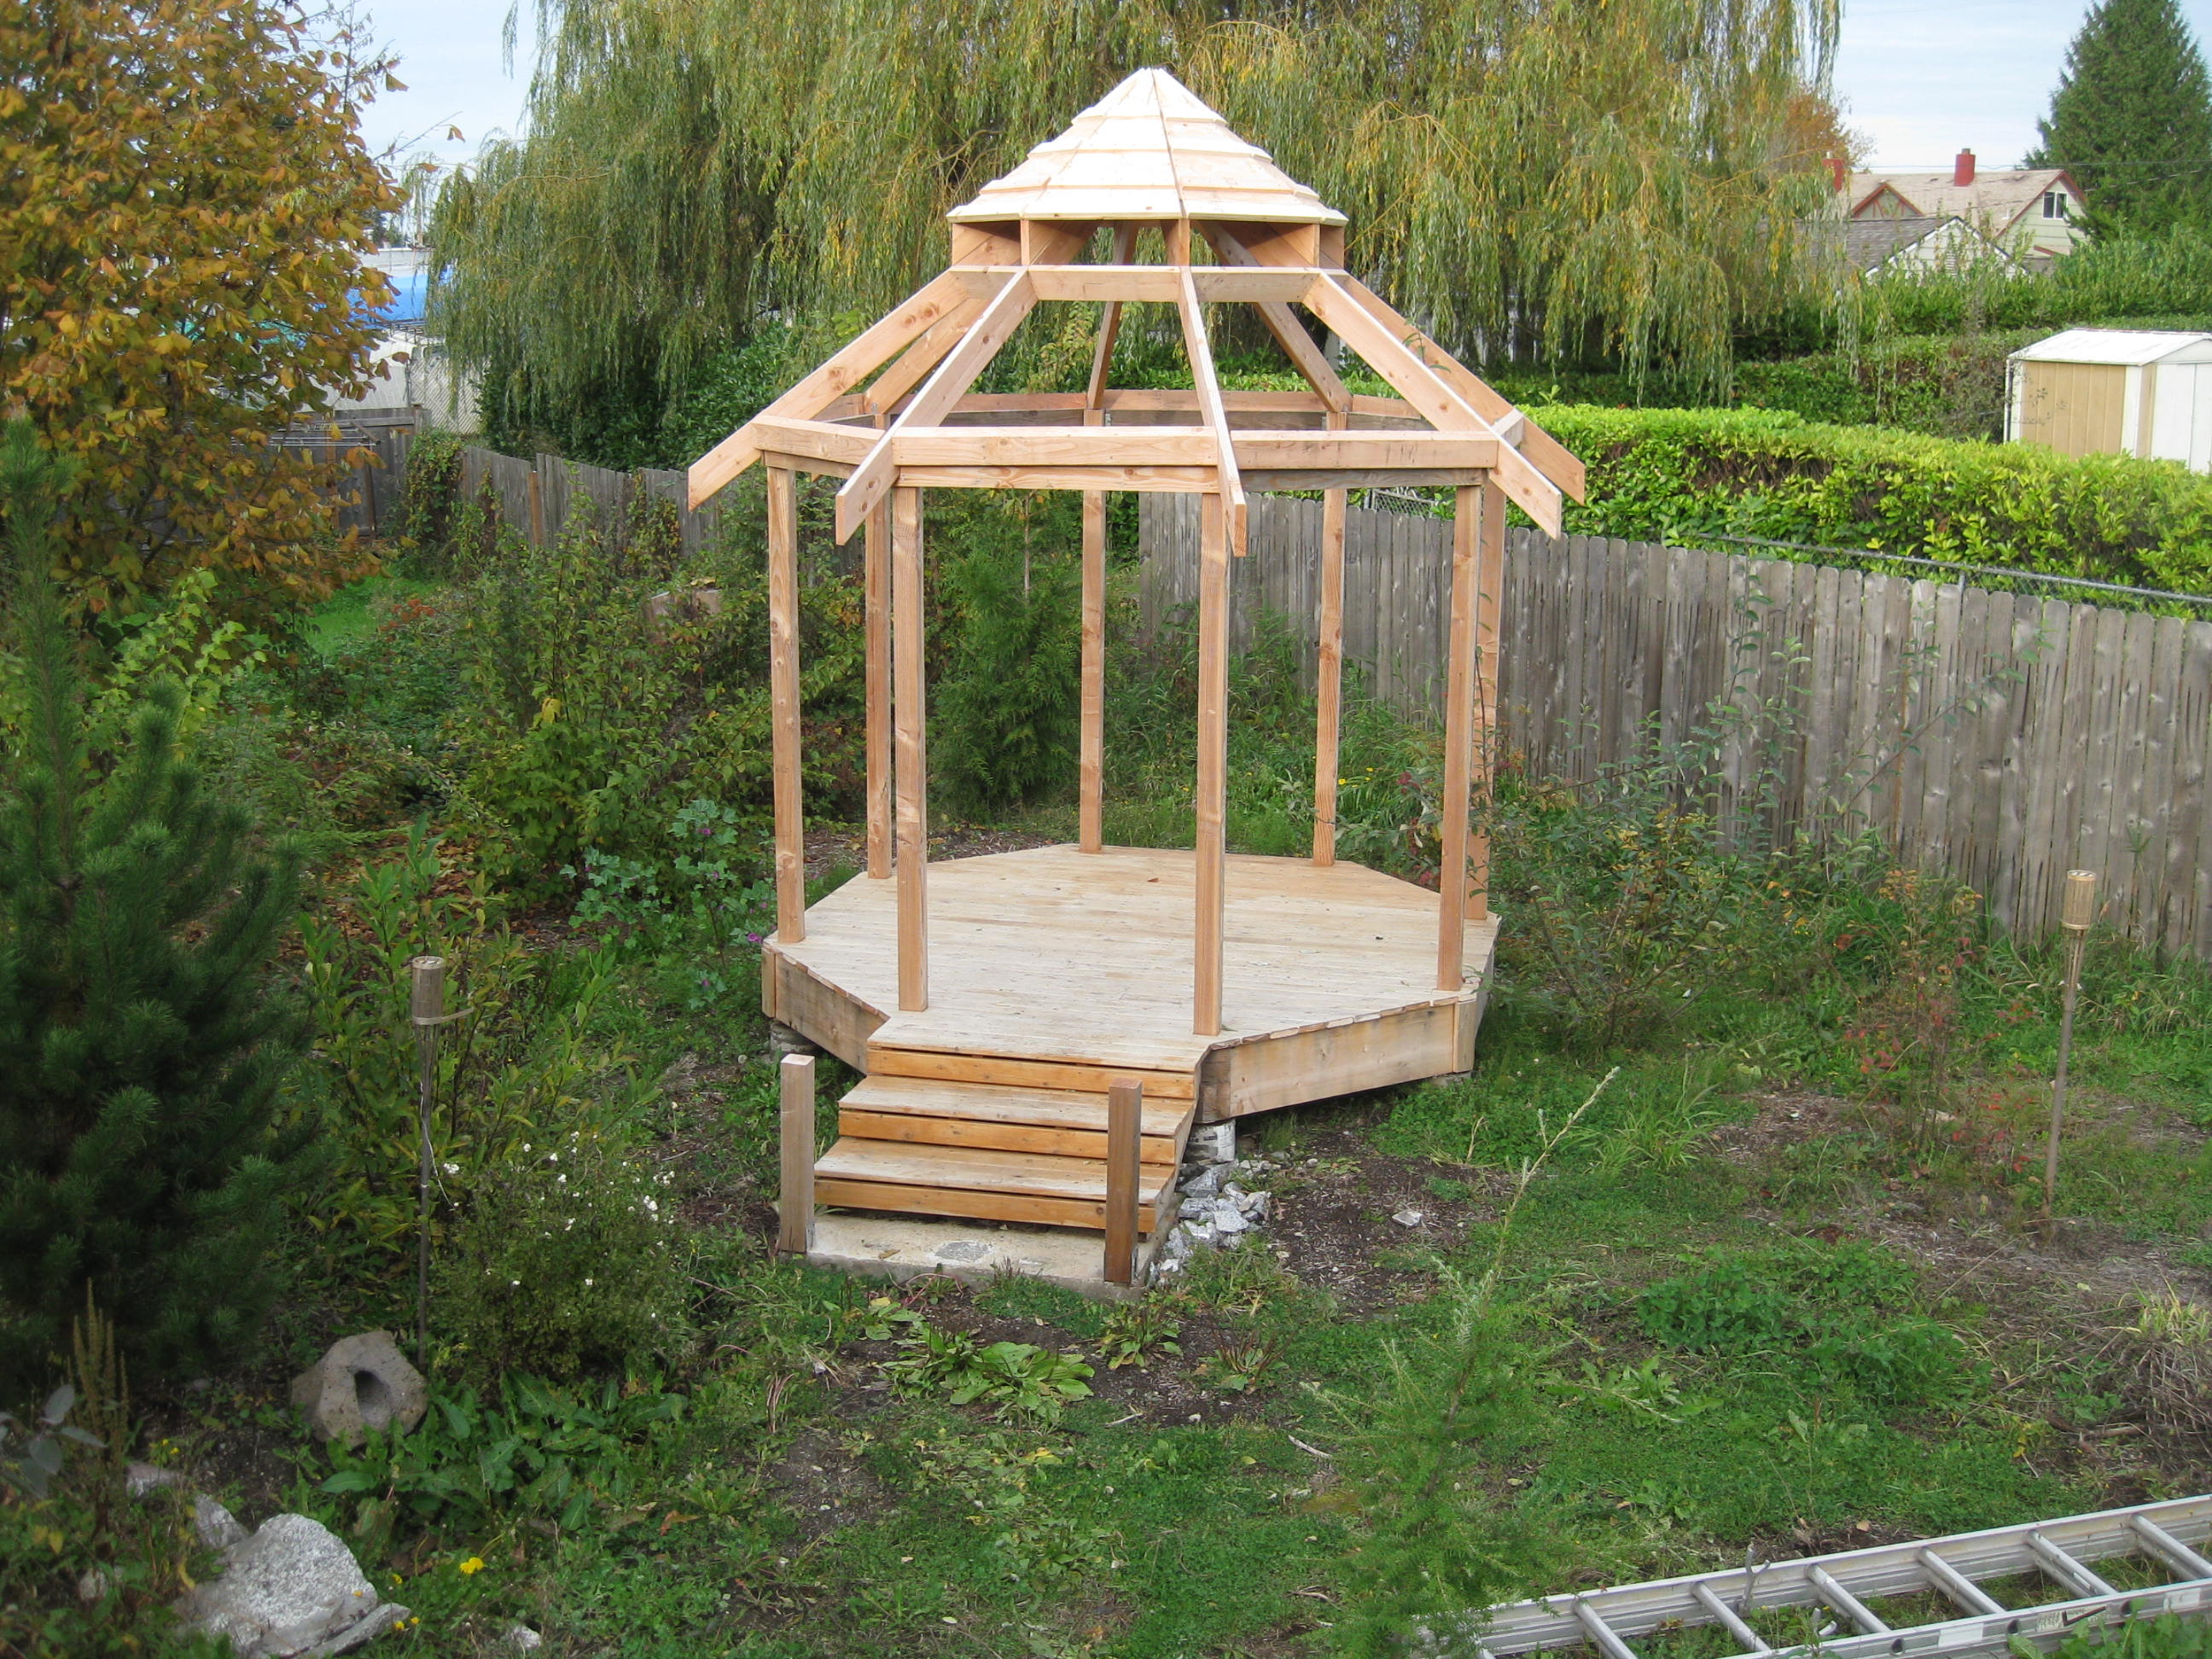
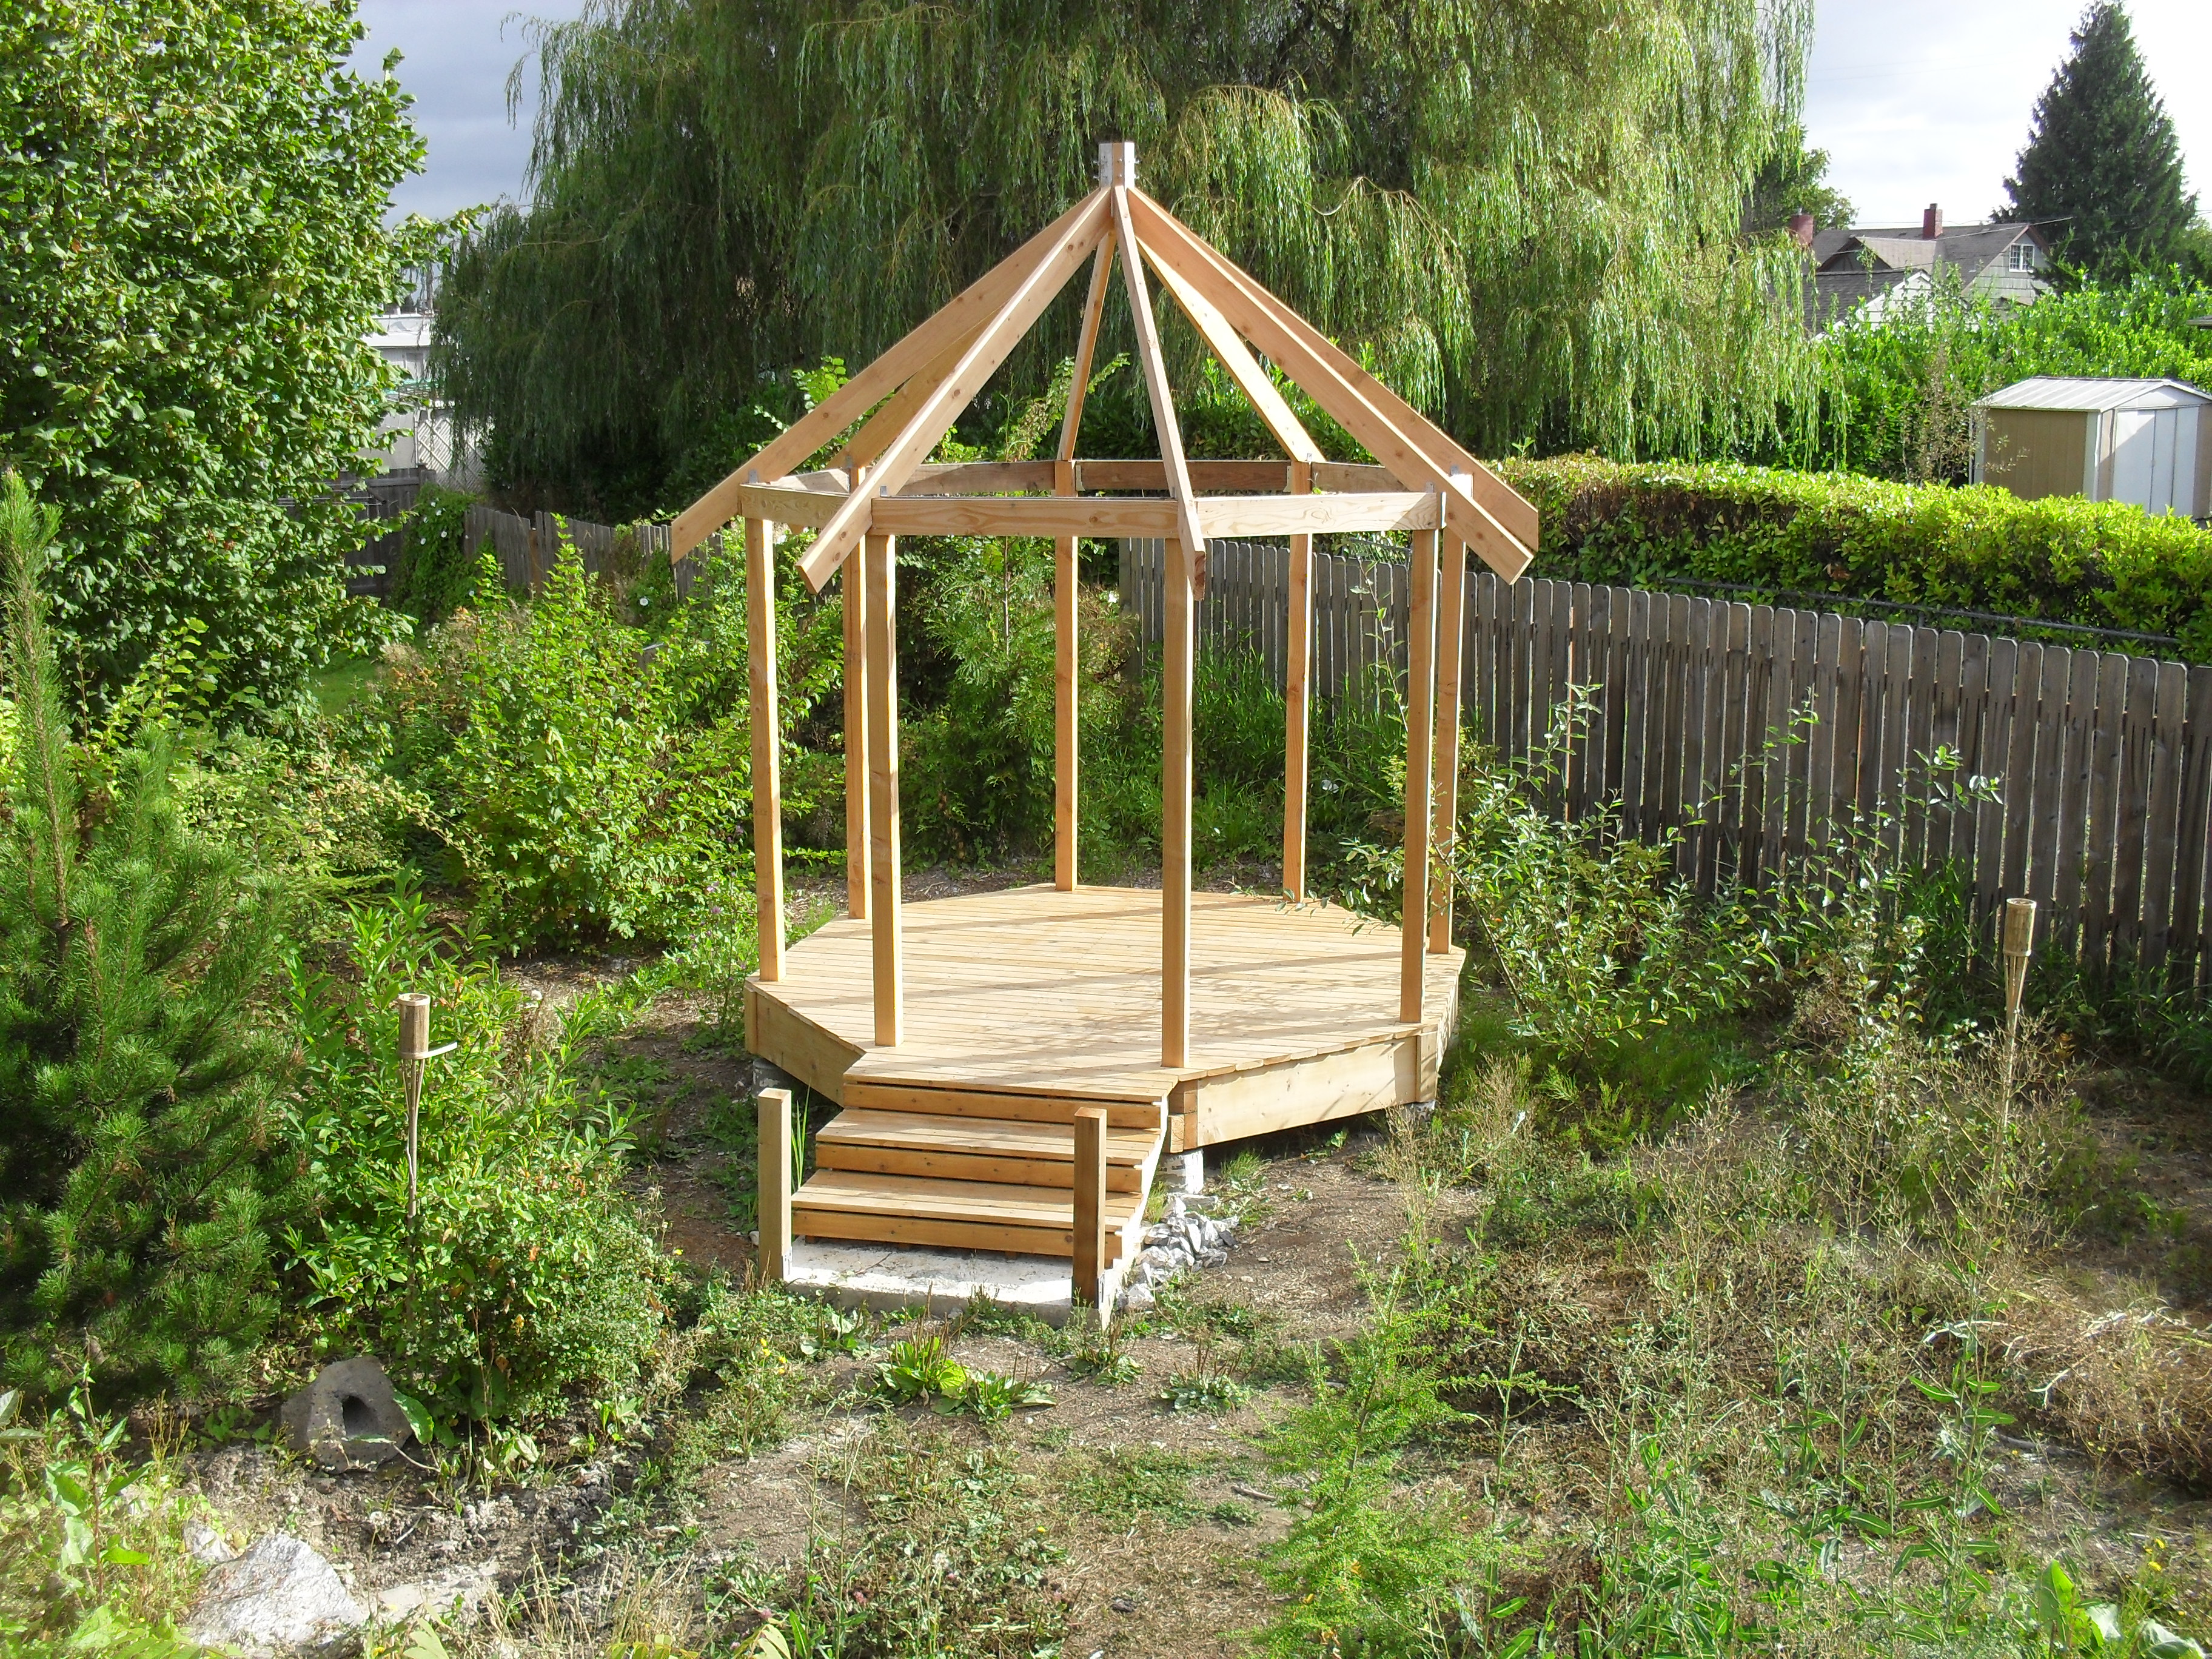 All I managed to do in September was to get the other four rafters up, temporarily.
I knew that they were all going to come down, as I had to glue them into the key block.
Also, I had other plans to make the roof more interesting.
All I managed to do in September was to get the other four rafters up, temporarily.
I knew that they were all going to come down, as I had to glue them into the key block.
Also, I had other plans to make the roof more interesting.
October 2010
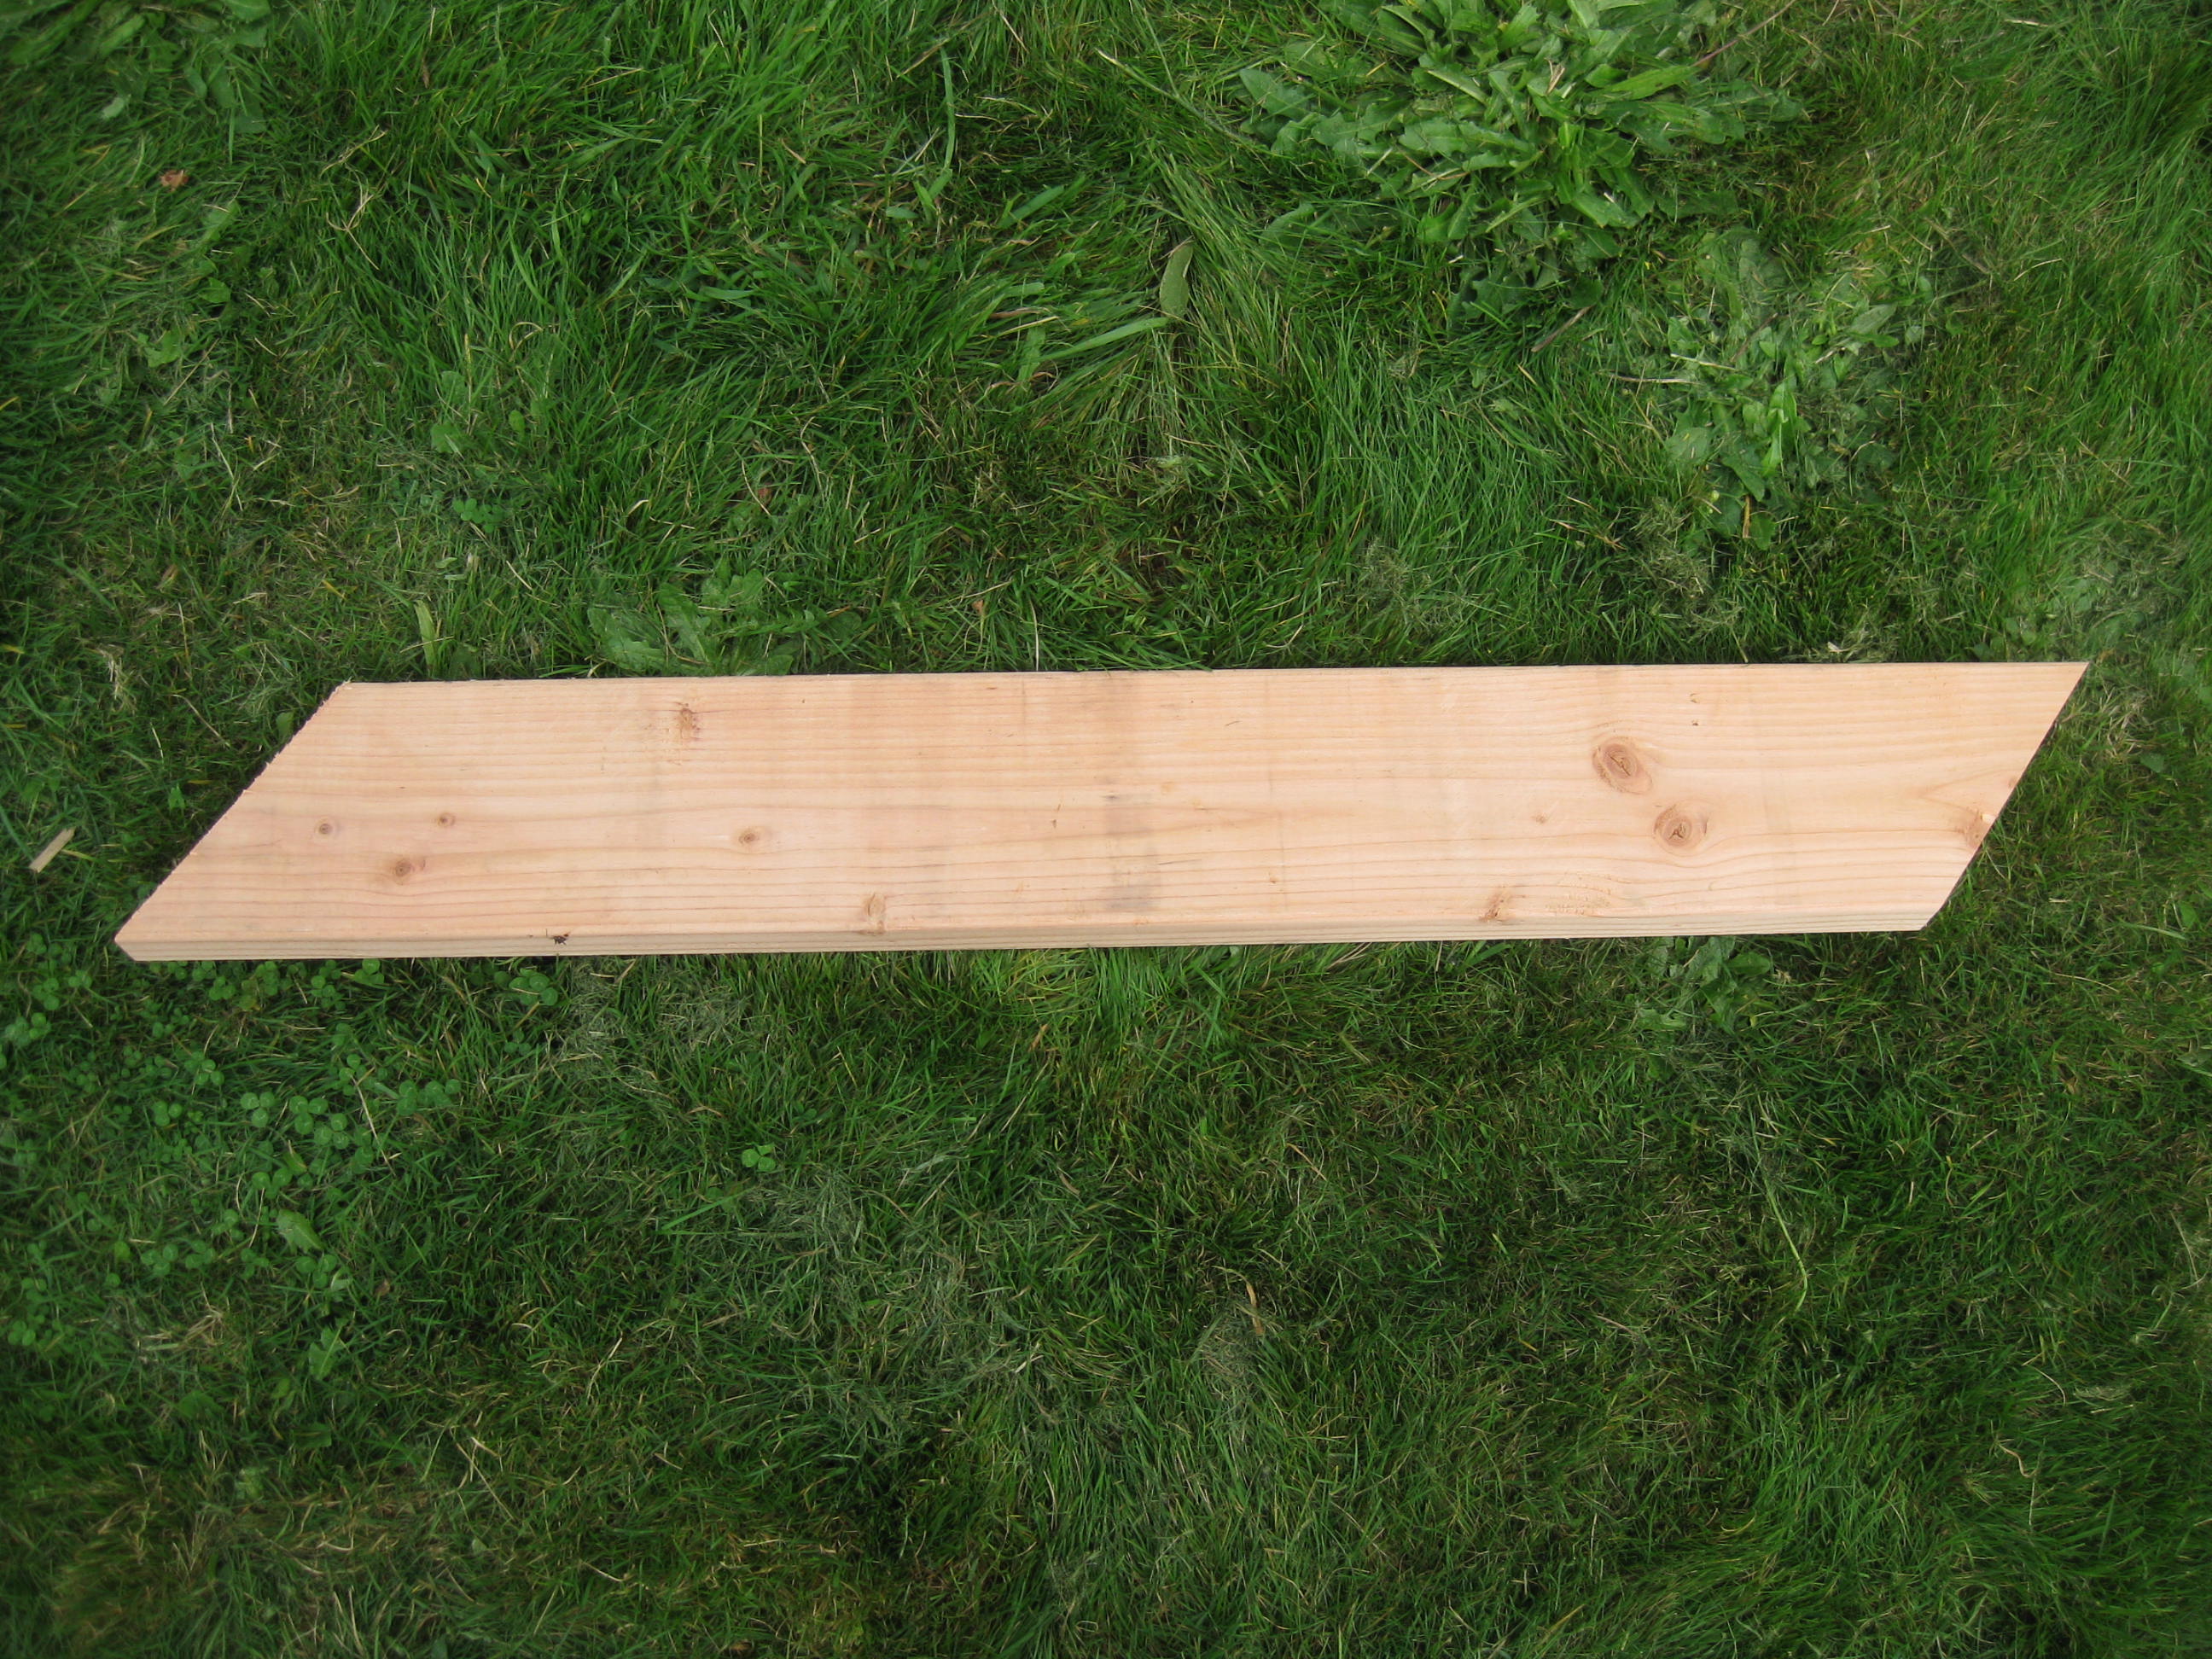
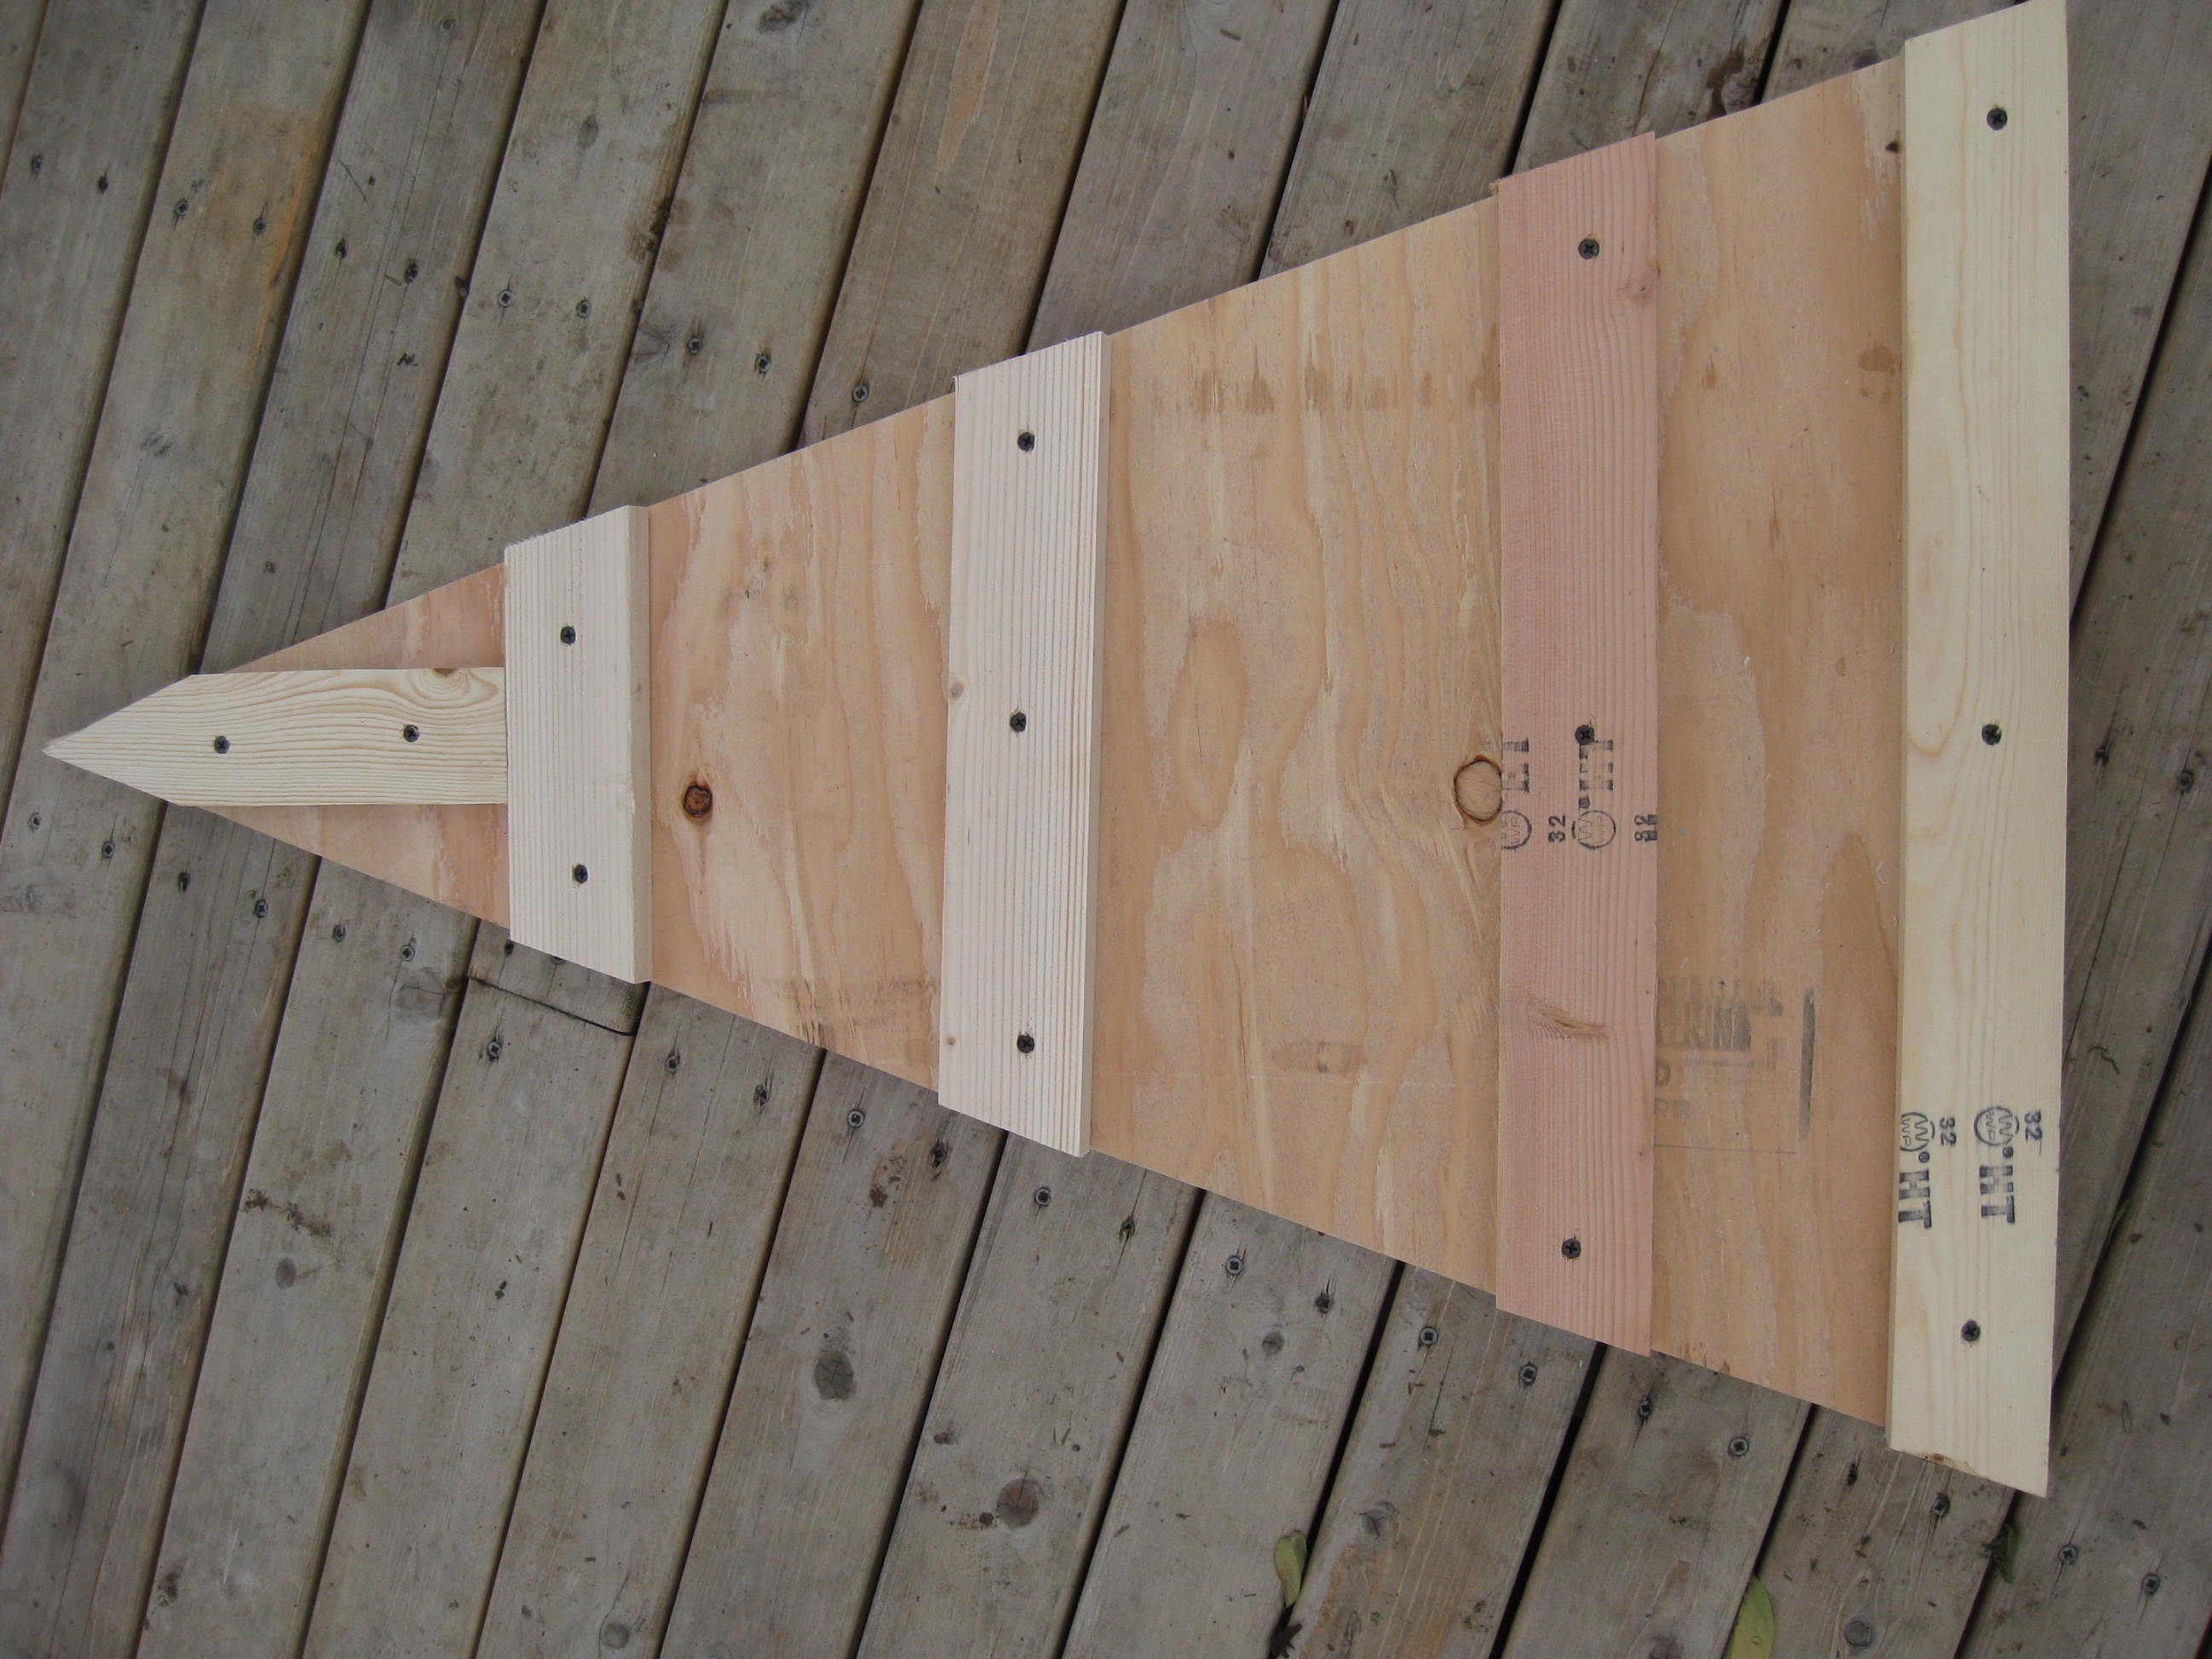
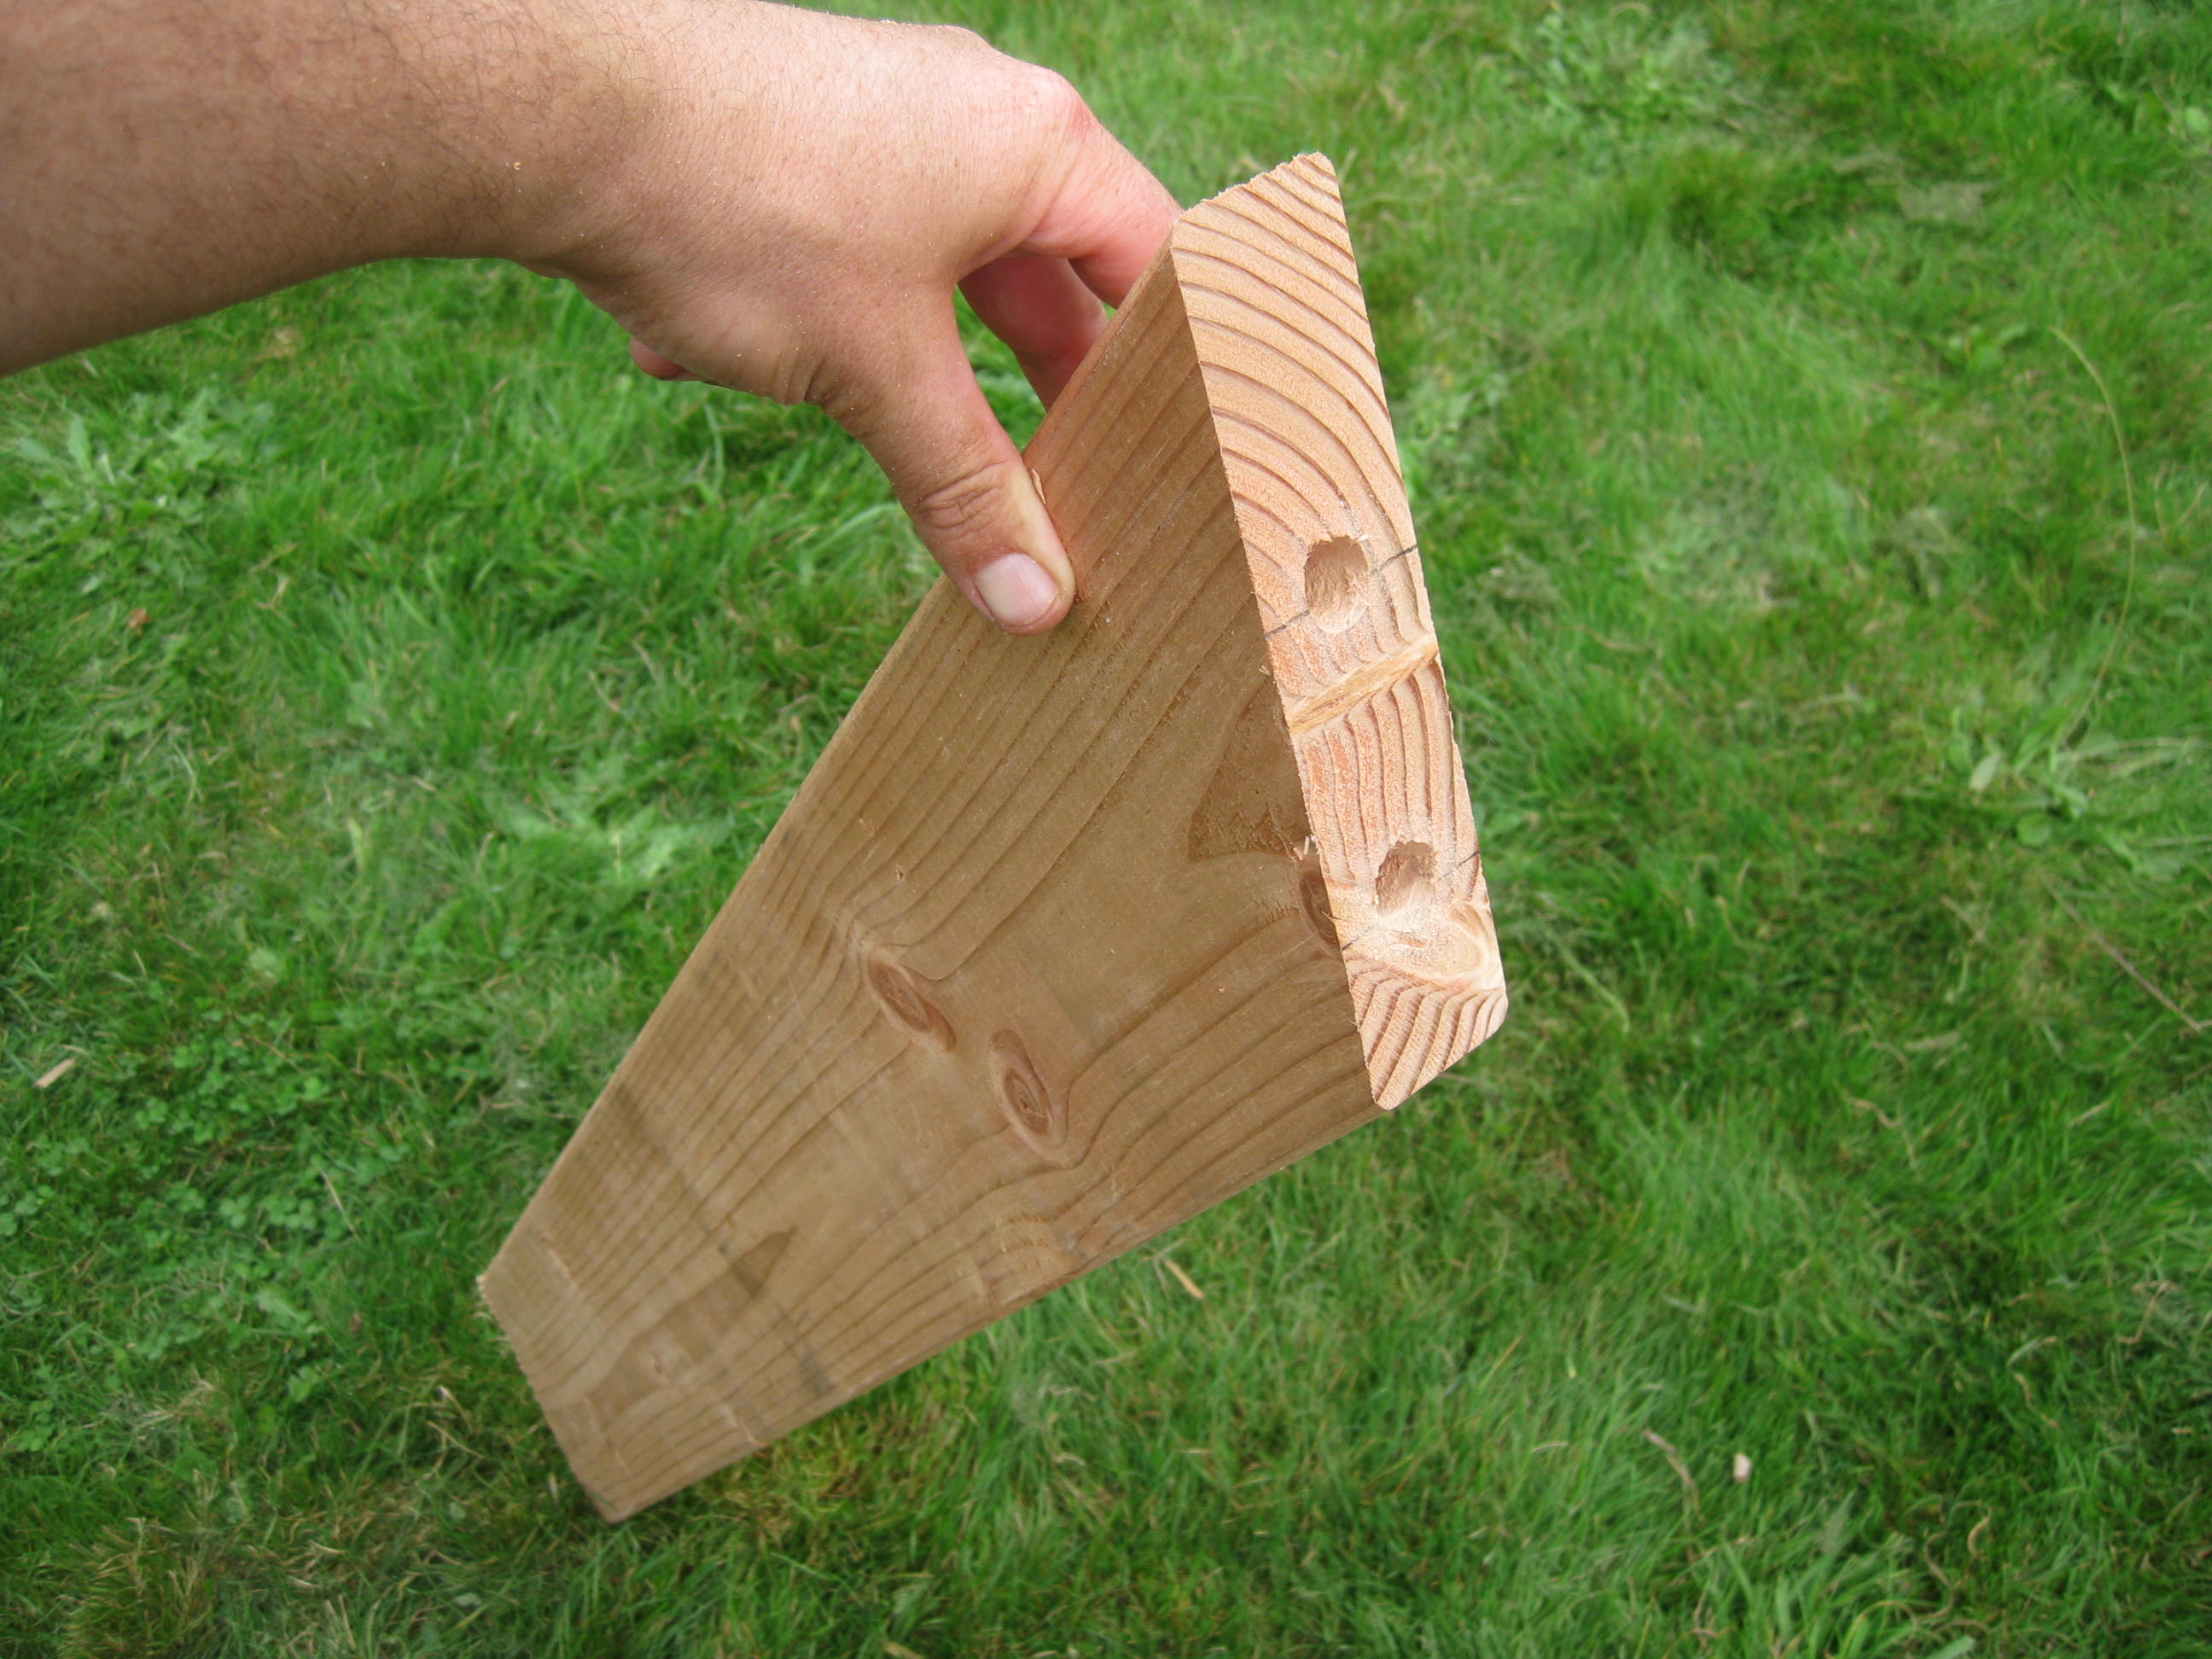 This shorter rafter section would be attached to the top of the longer rafters.
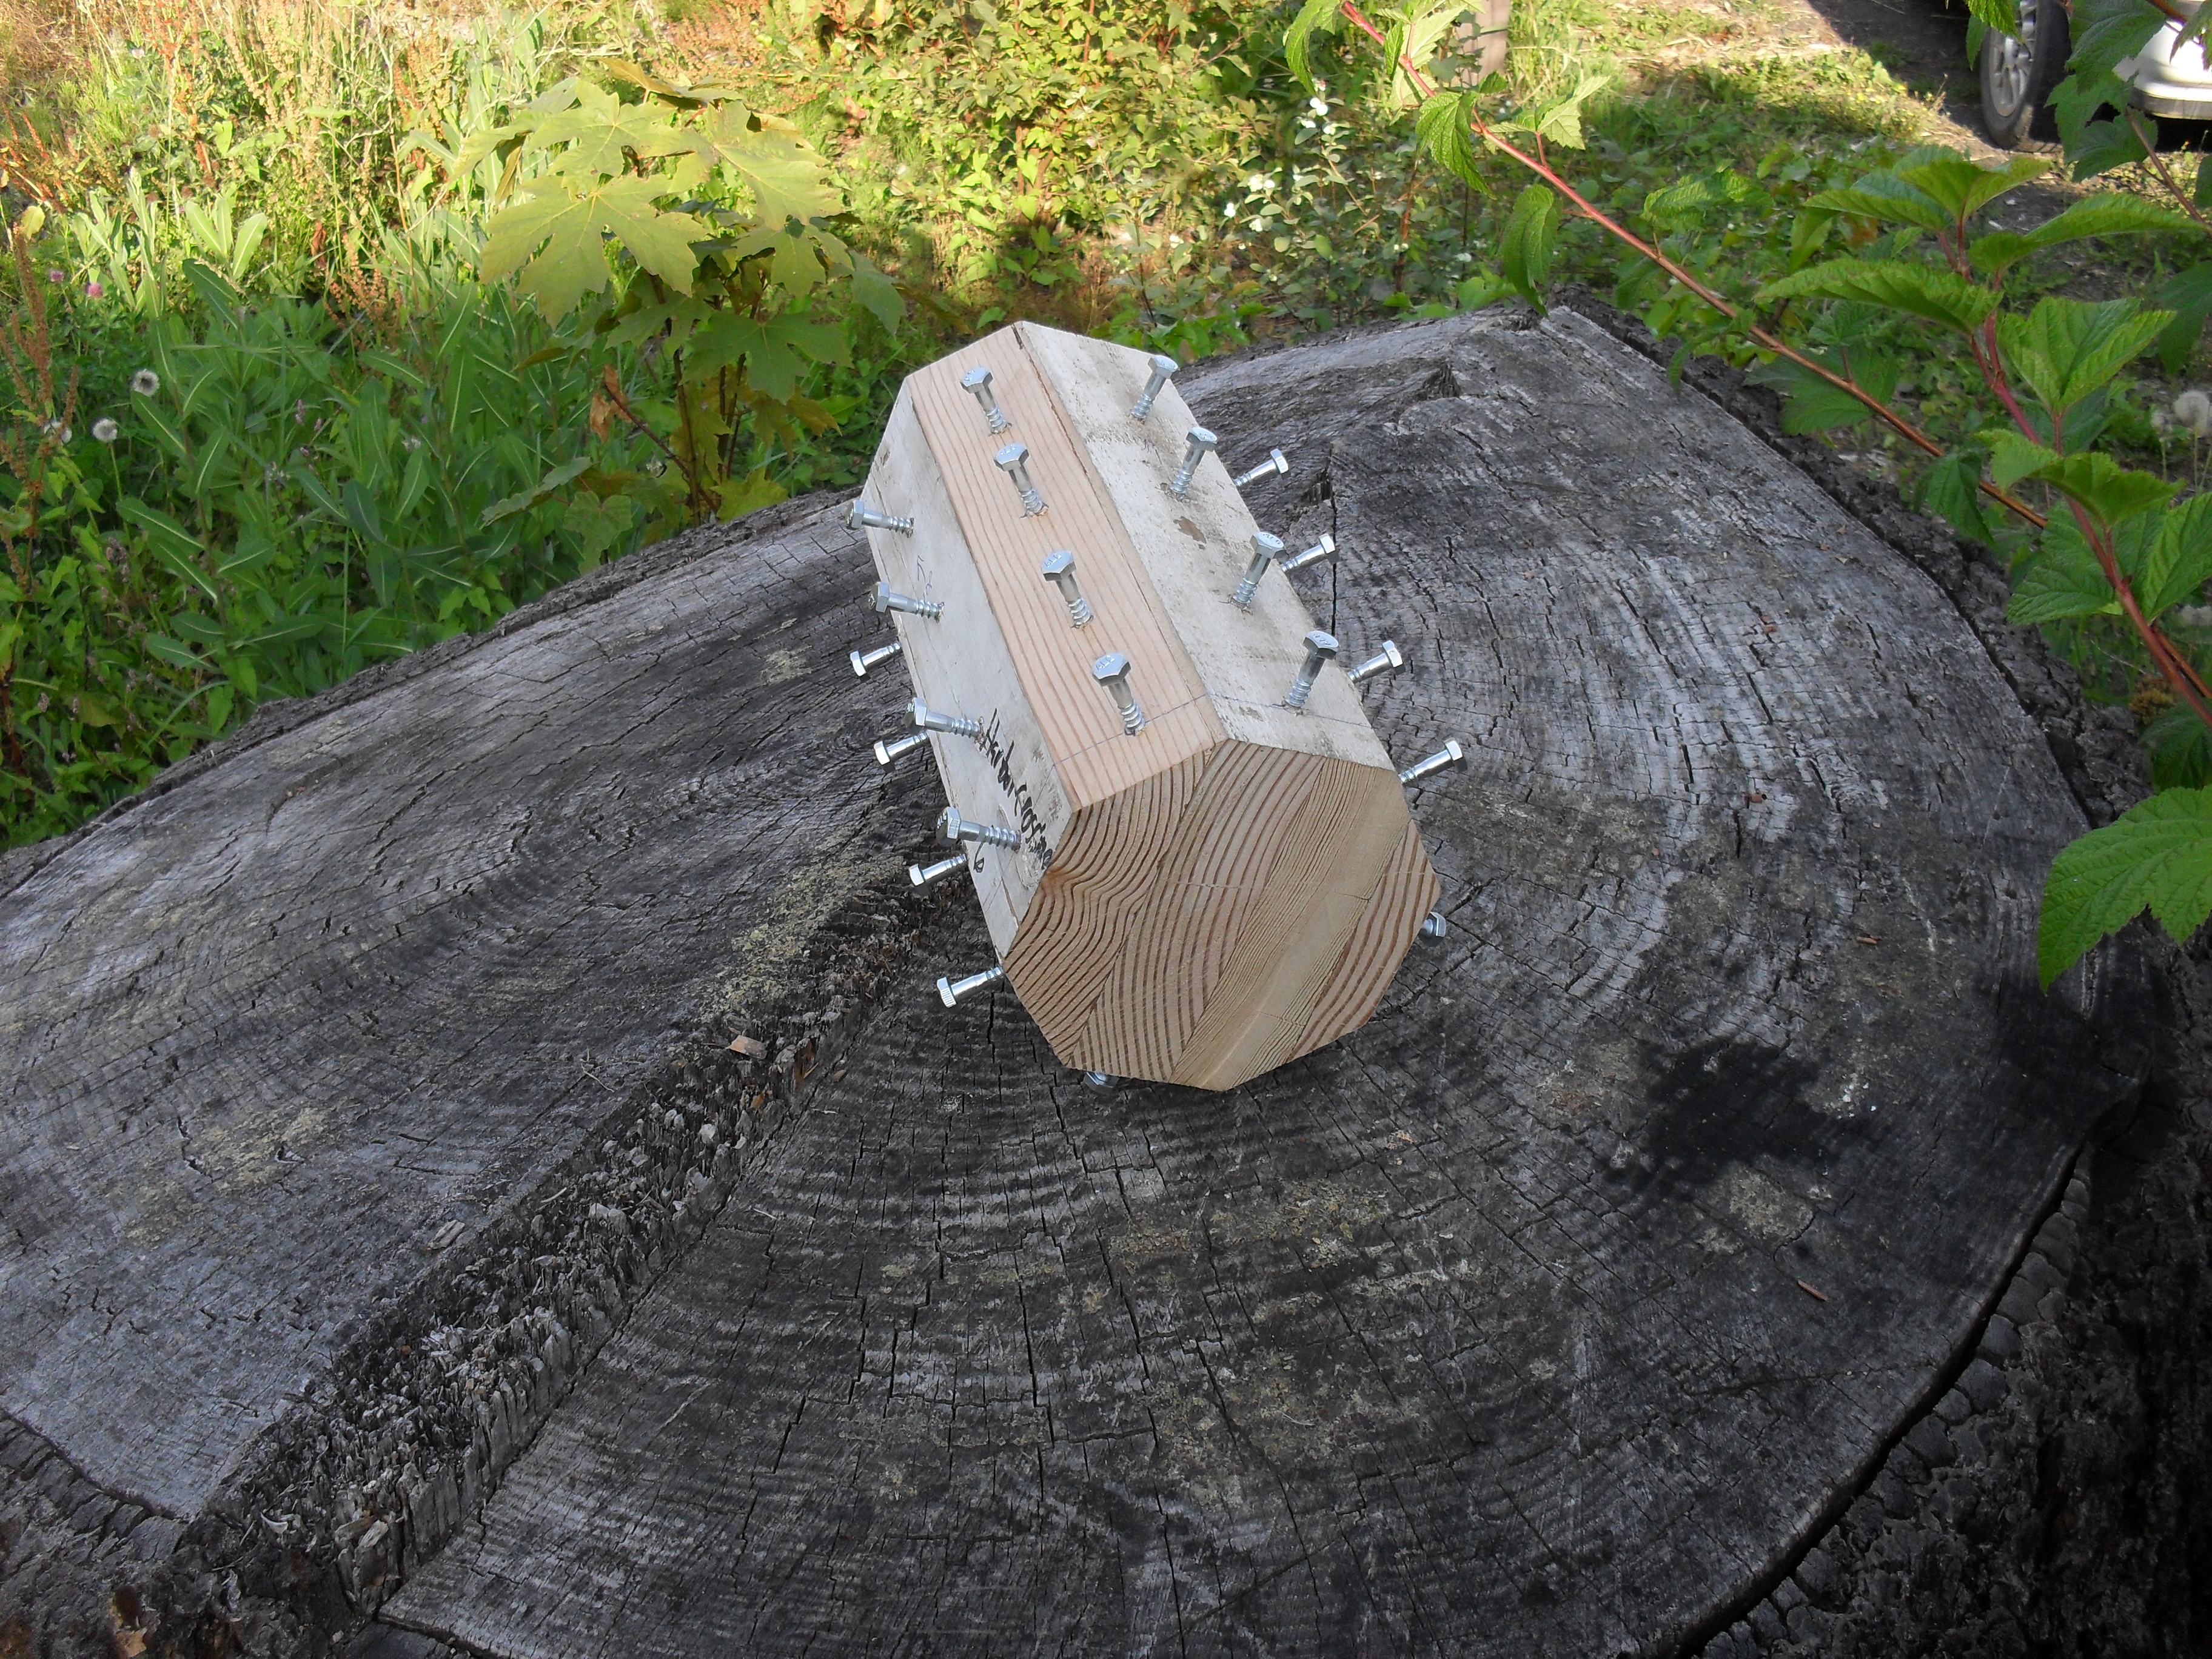
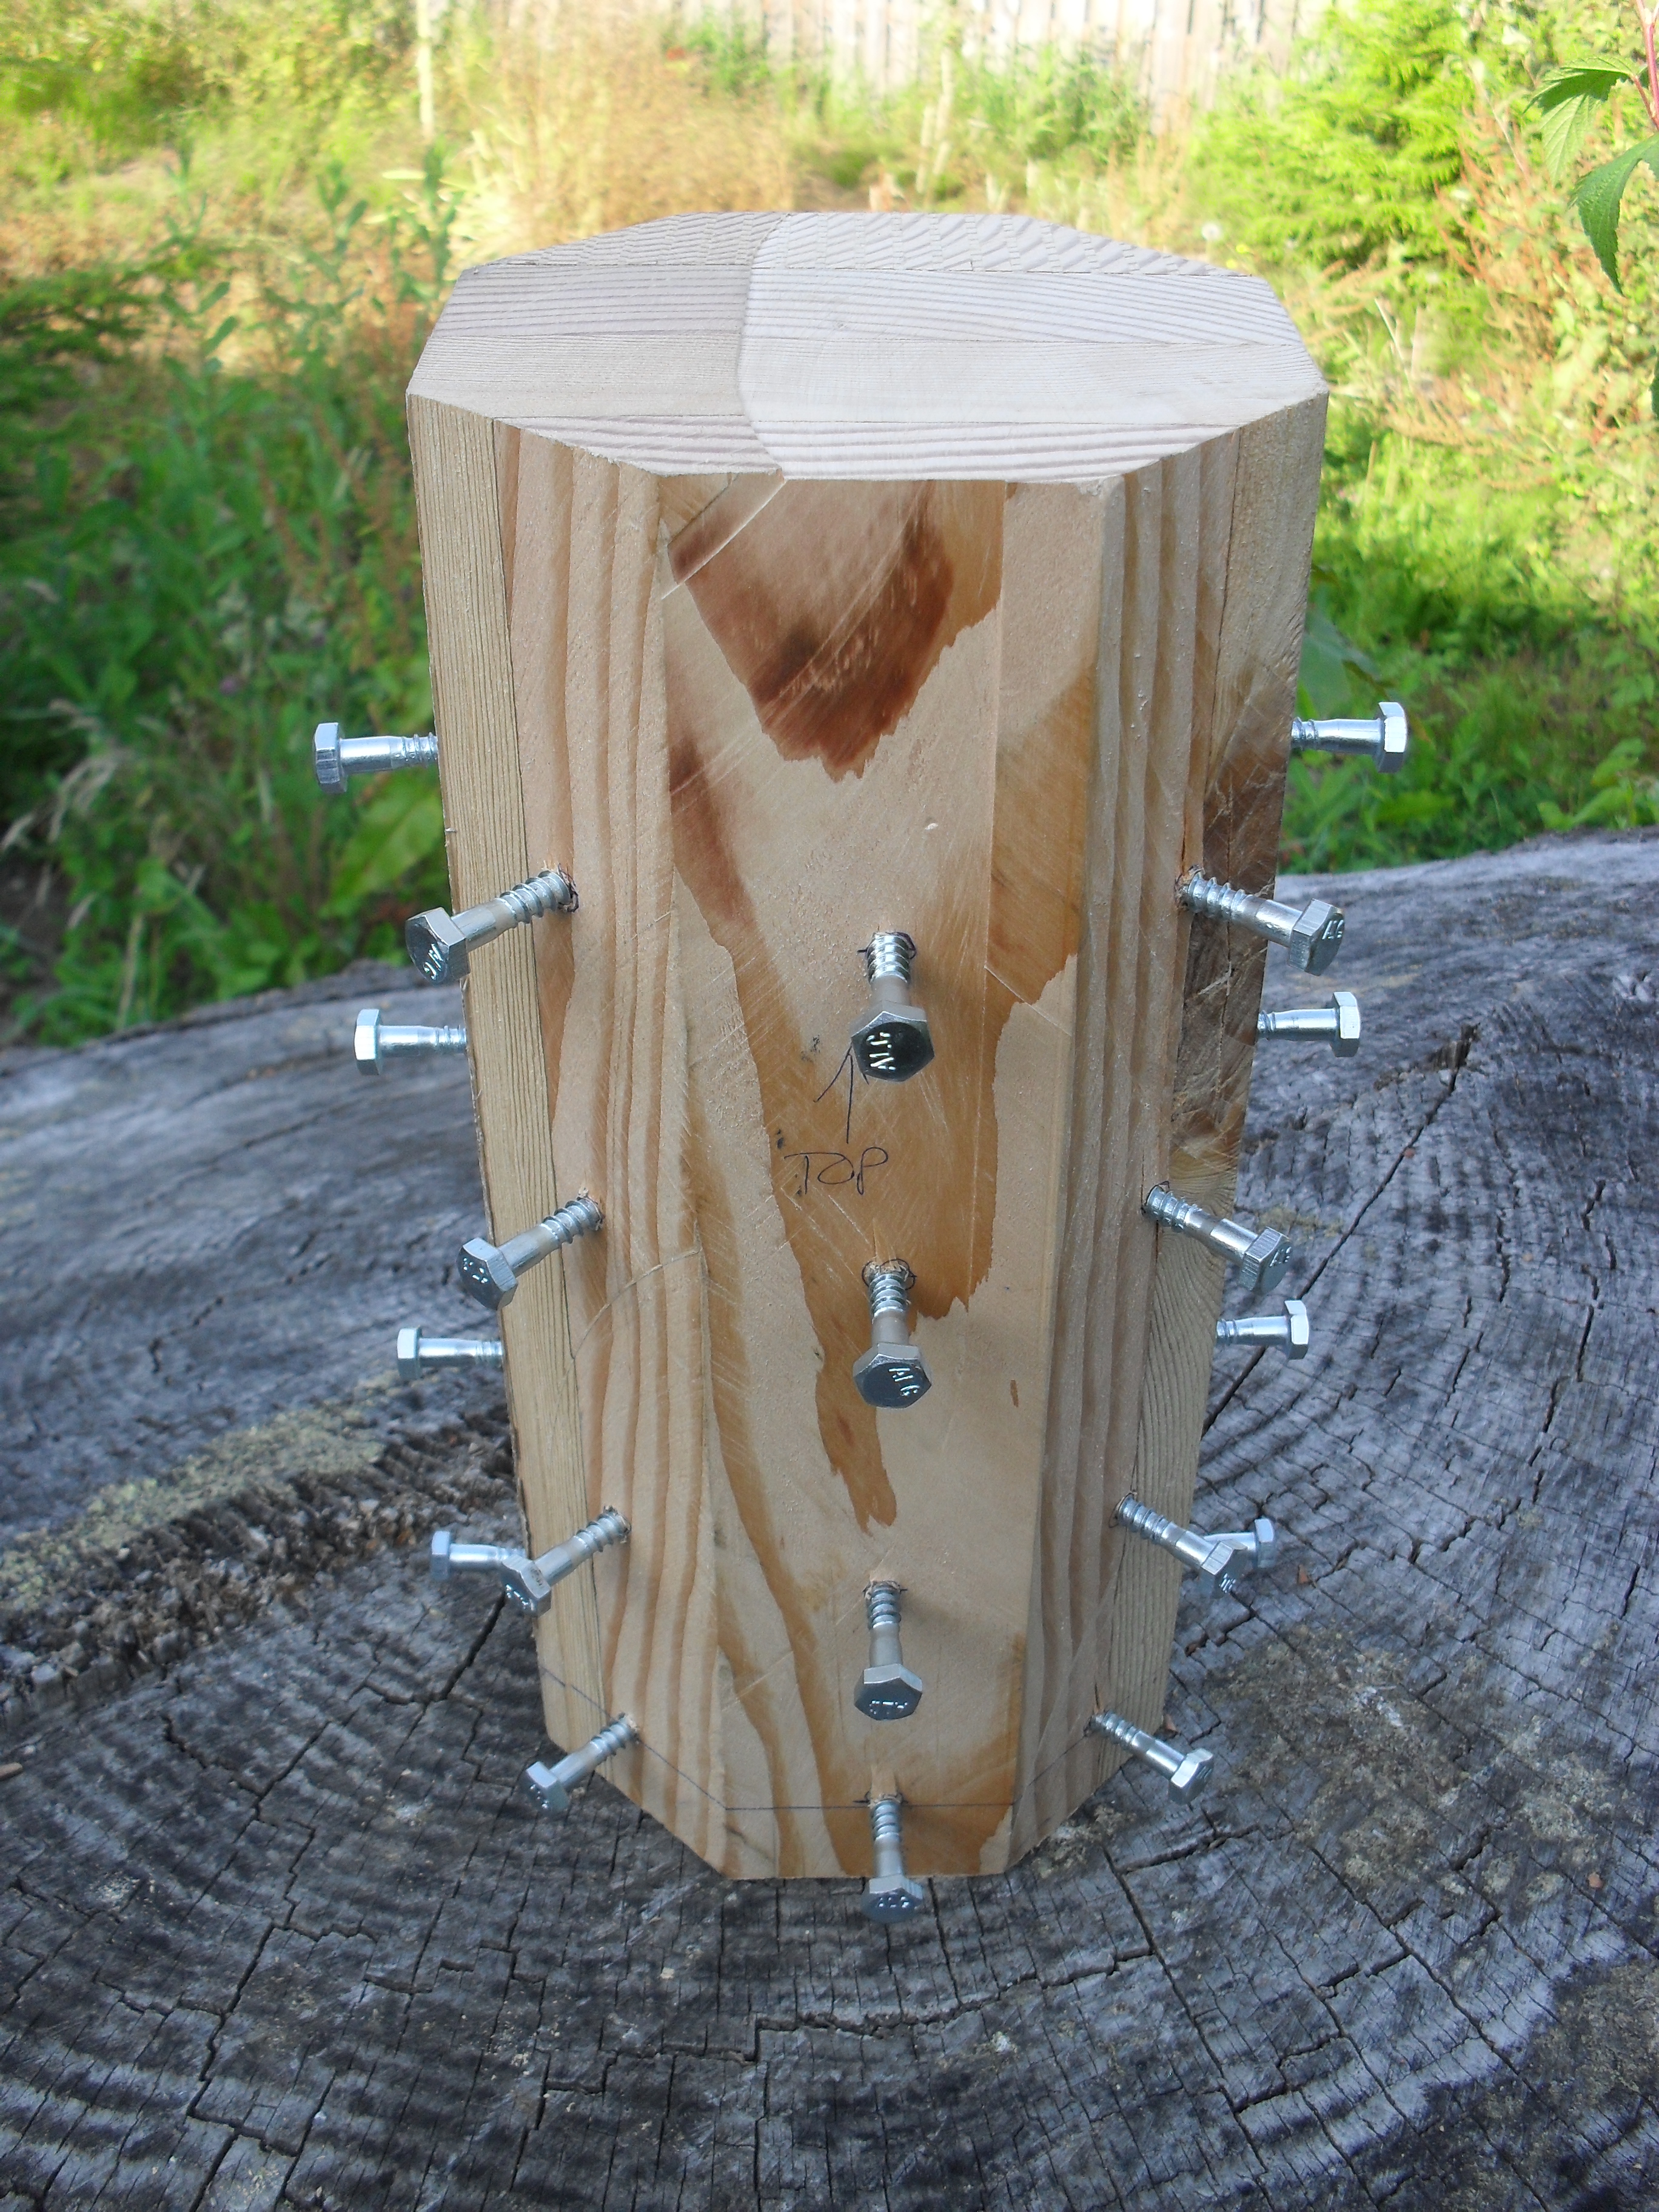
All of the rafters had sockets drilled in the ends to fit into the key block.
This shorter rafter section would be attached to the top of the longer rafters.
All of the rafters had sockets drilled in the ends to fit into the key block.
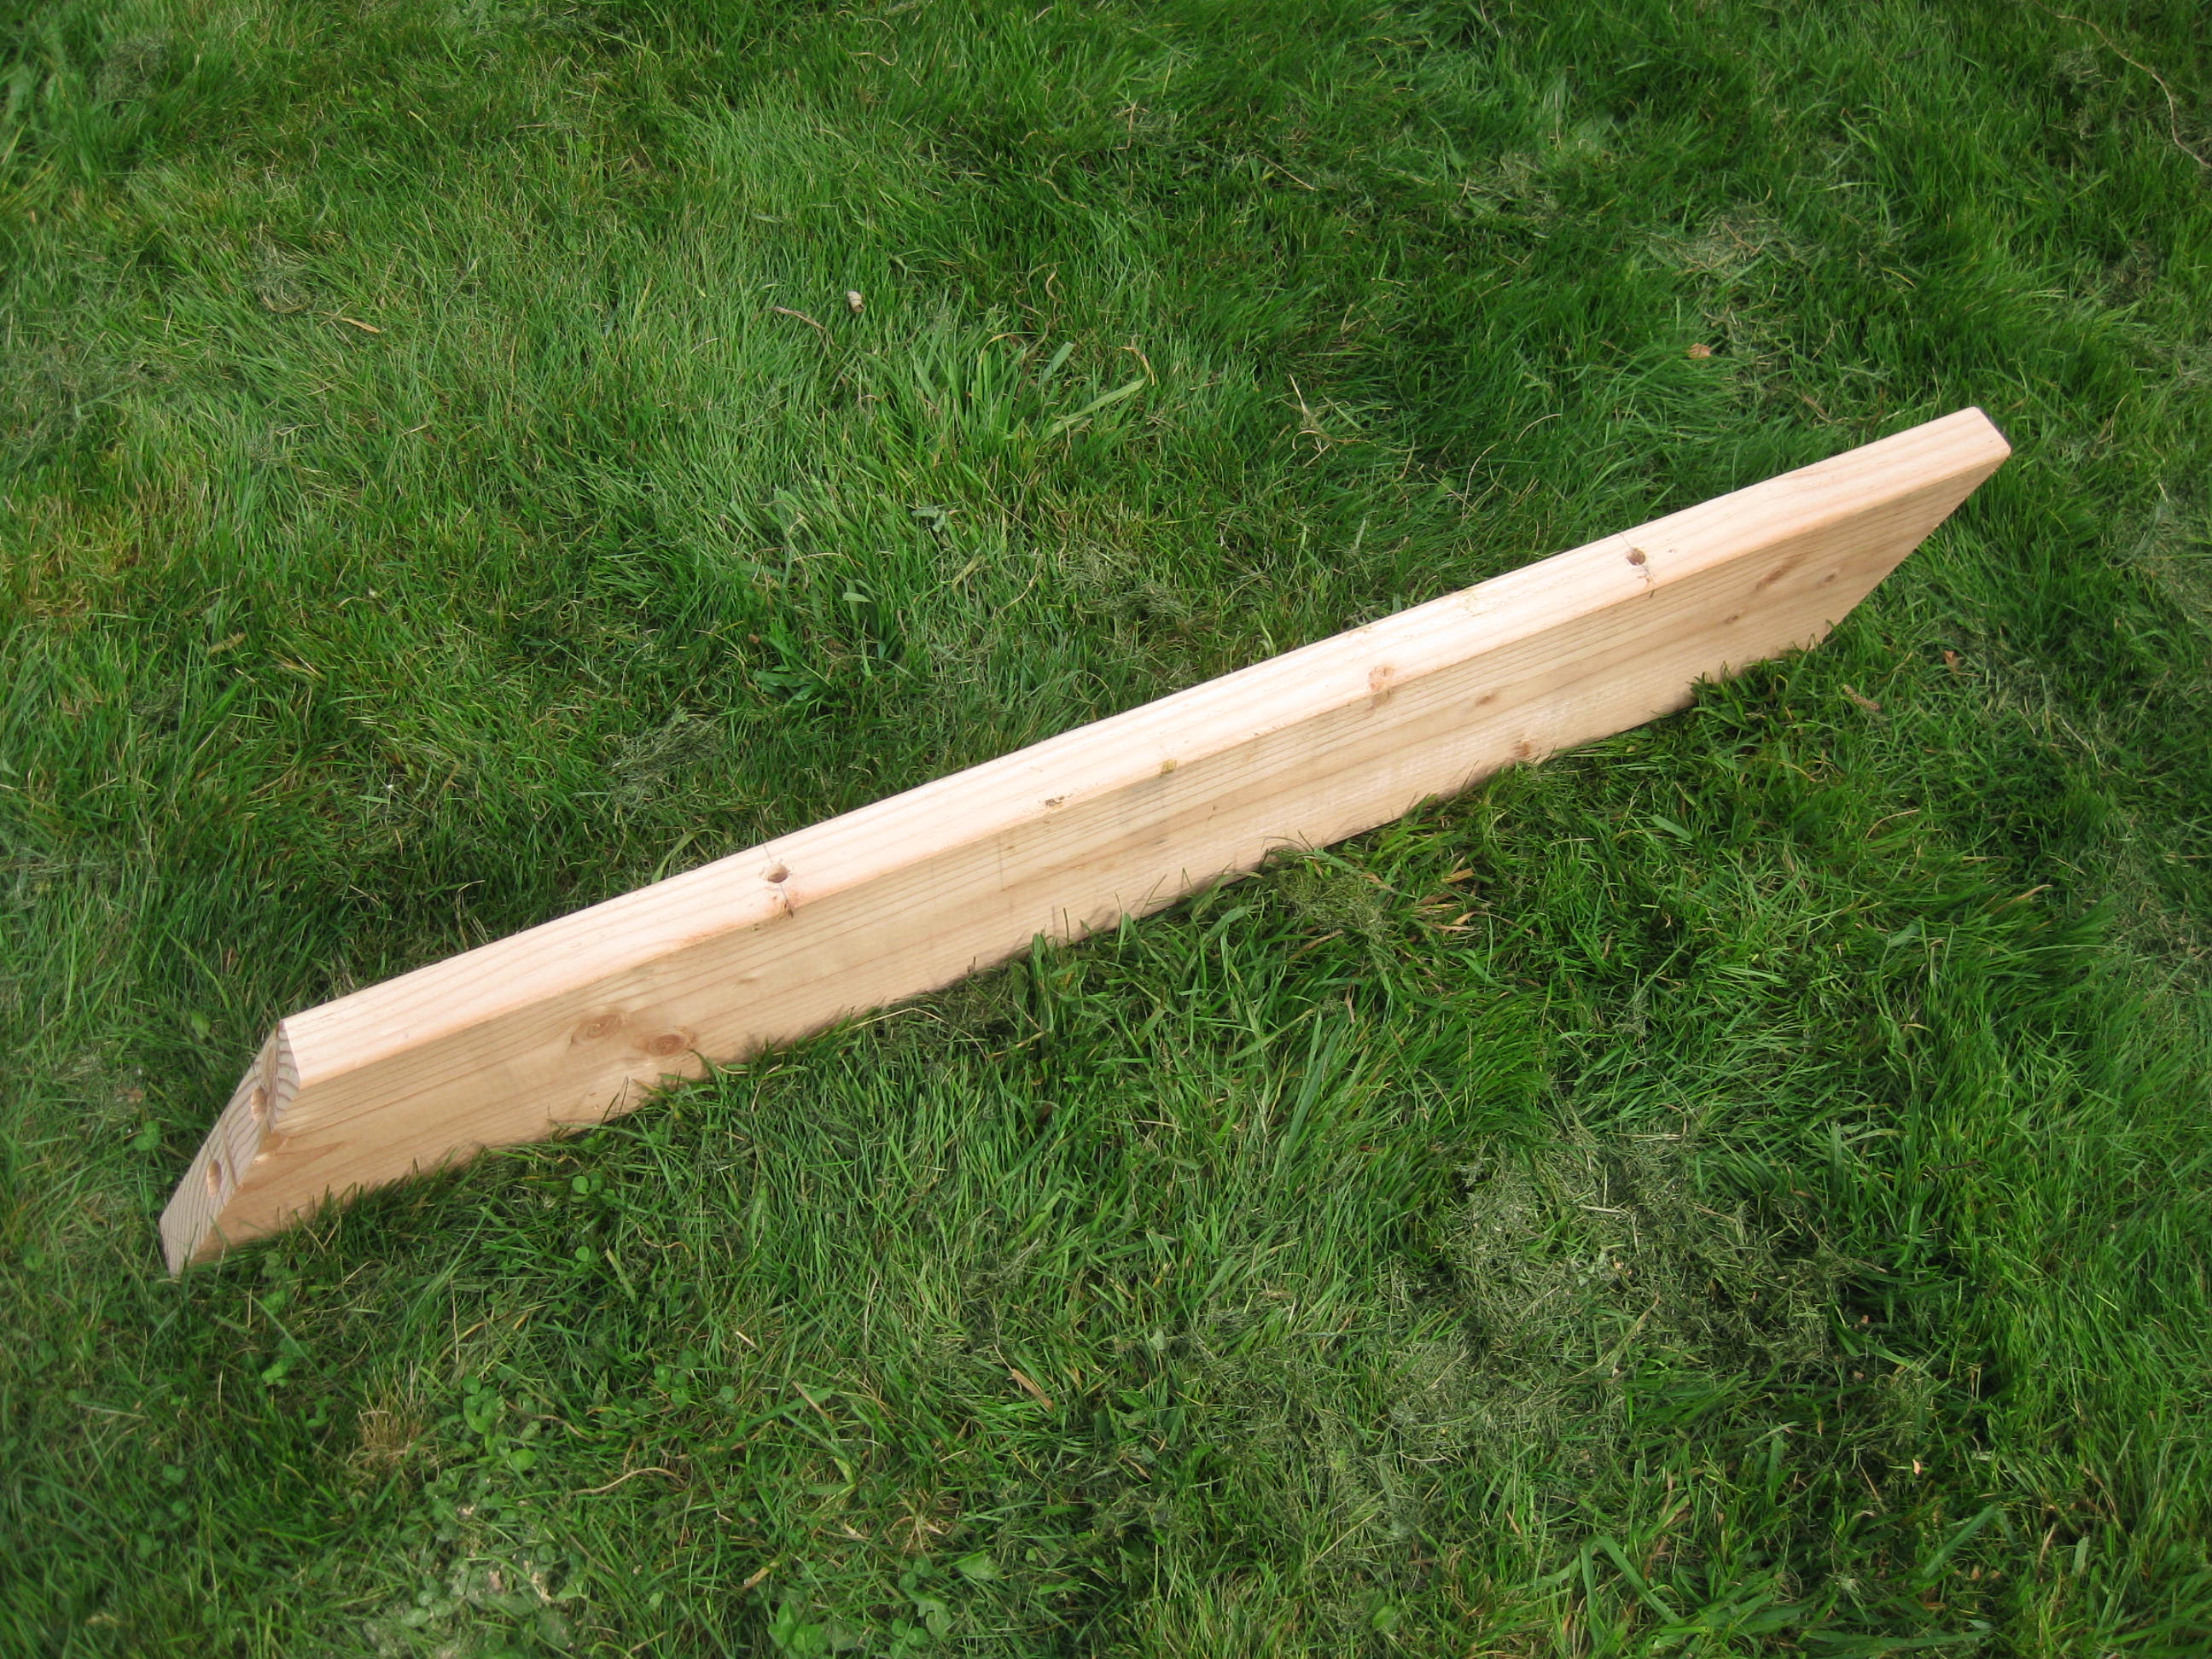
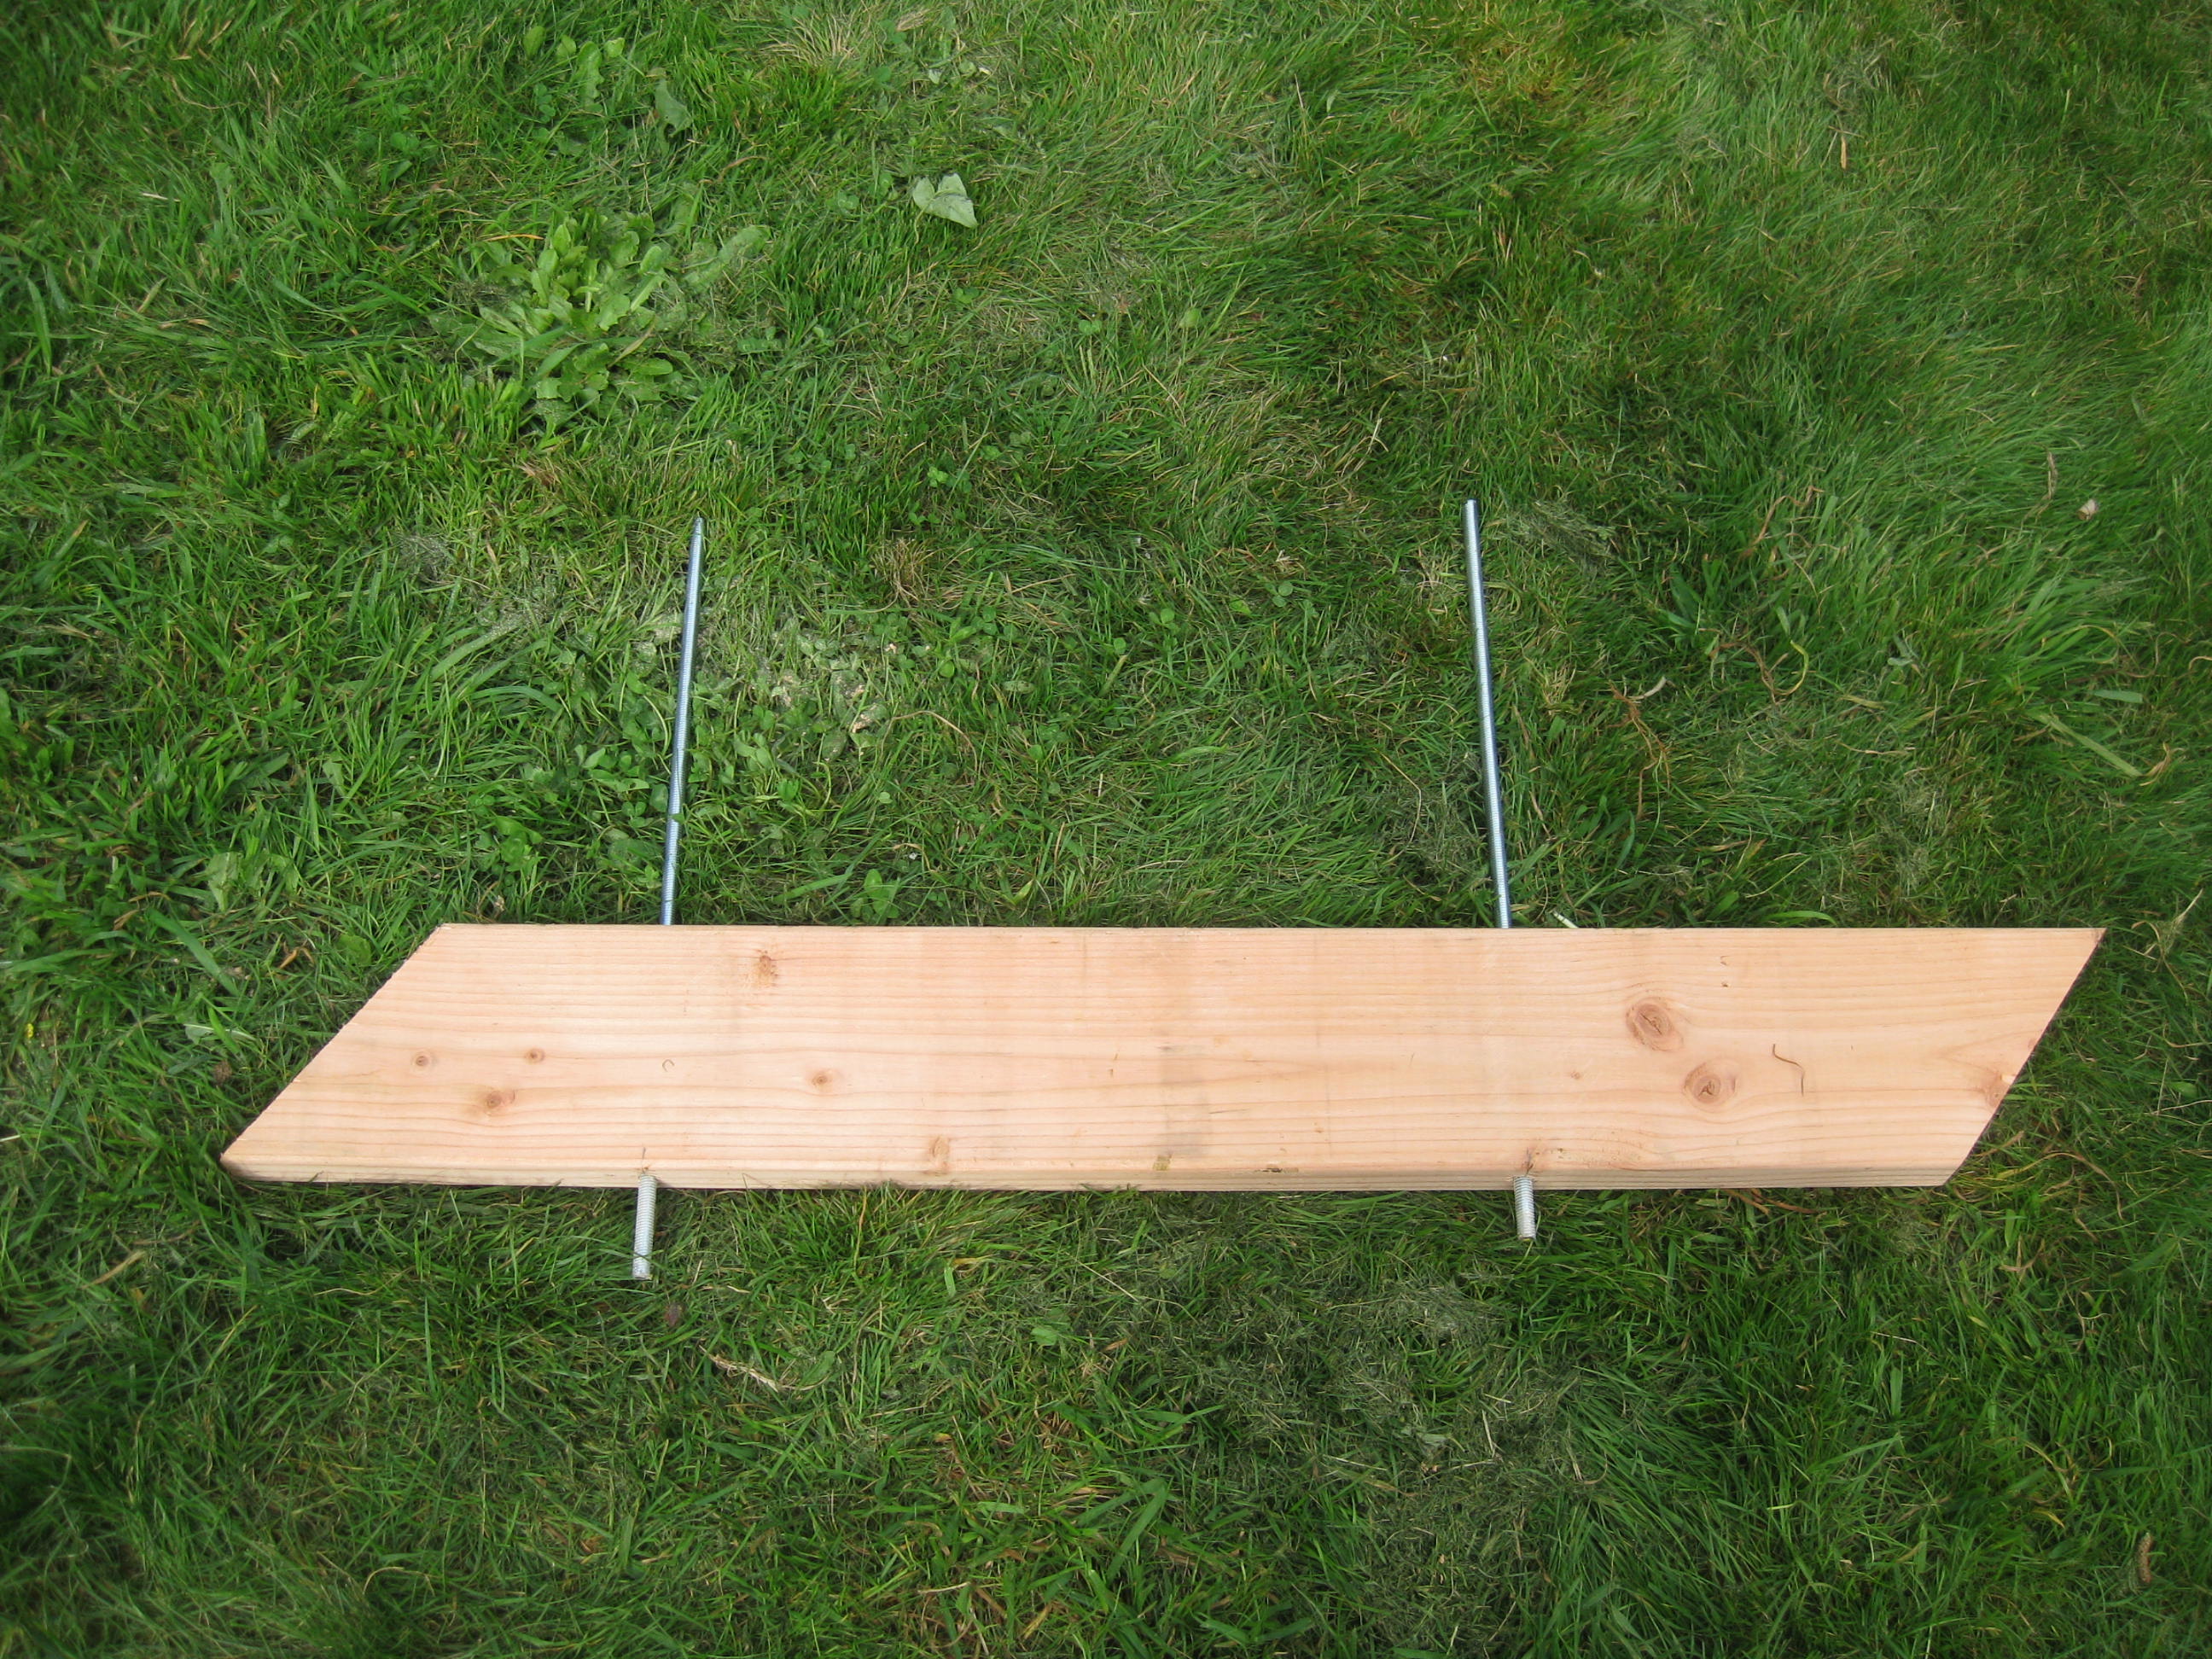 I drilled holes through the short rafters and drilled sockets in the longer rafters.
Then I hammered some allthread through the holes and into the sockets, connecting the two peices.
I drilled holes through the short rafters and drilled sockets in the longer rafters.
Then I hammered some allthread through the holes and into the sockets, connecting the two peices.
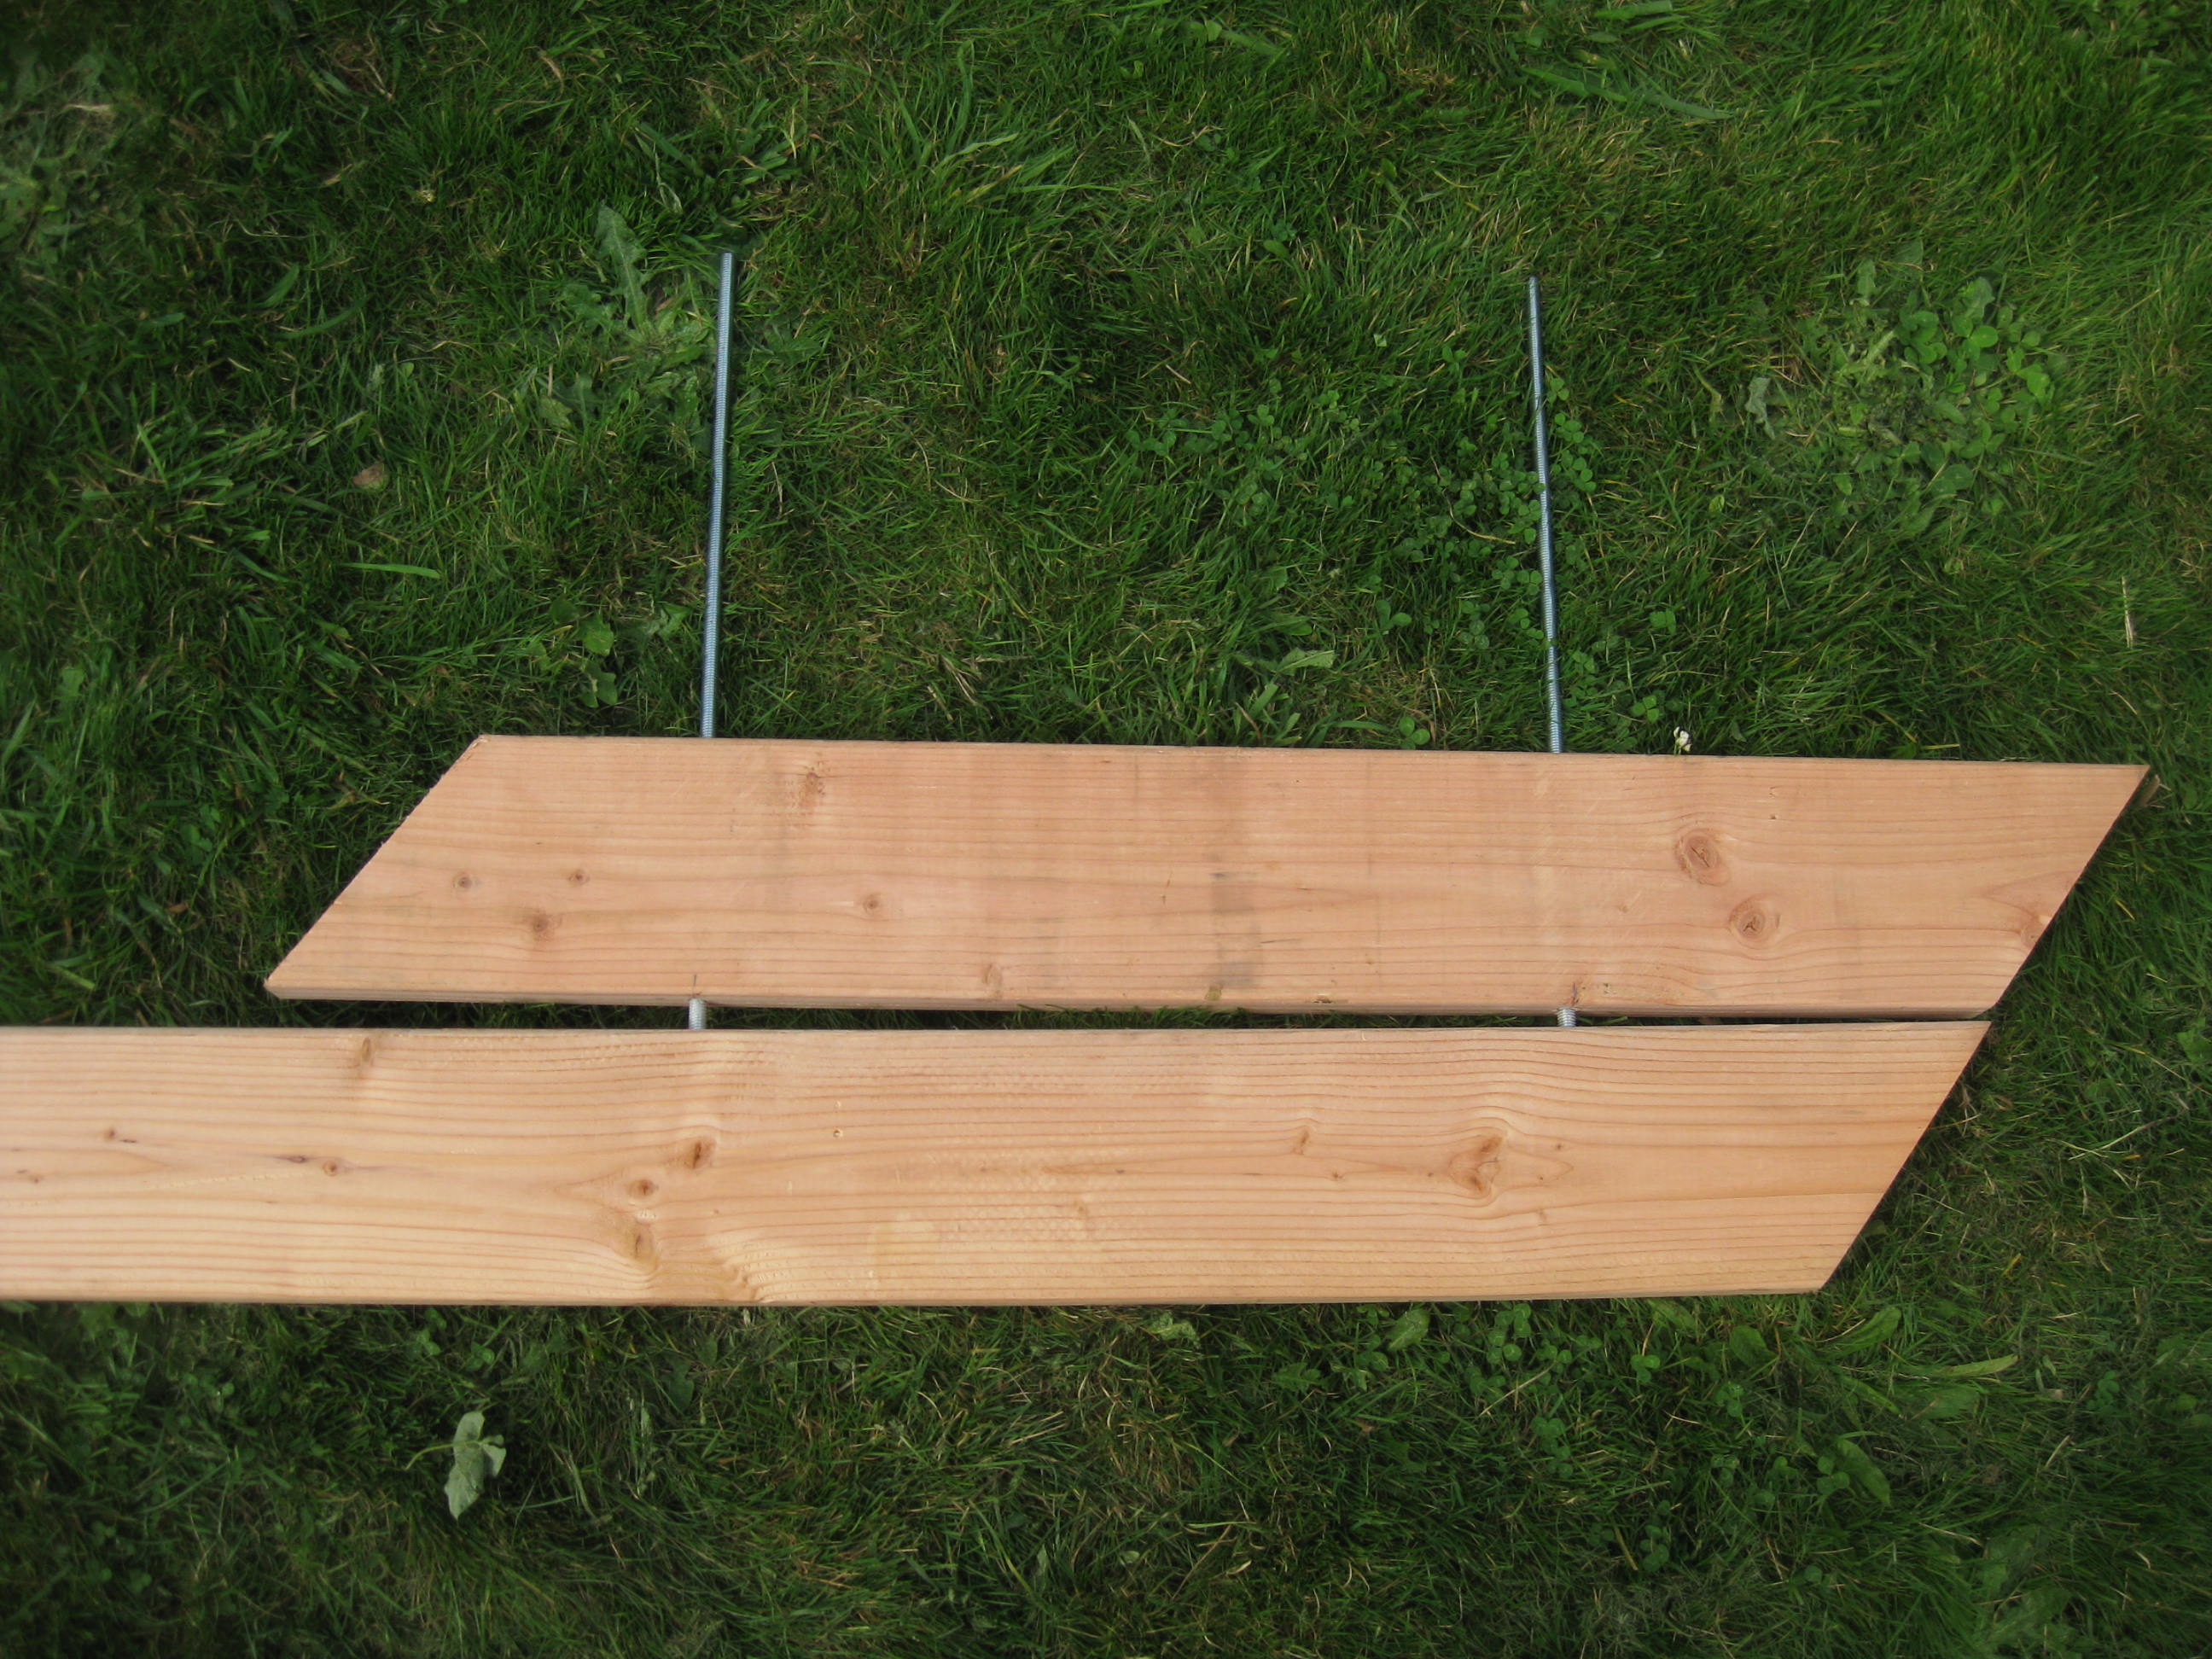
 Then I just cut the allthread off, flush with the rafters, like so.
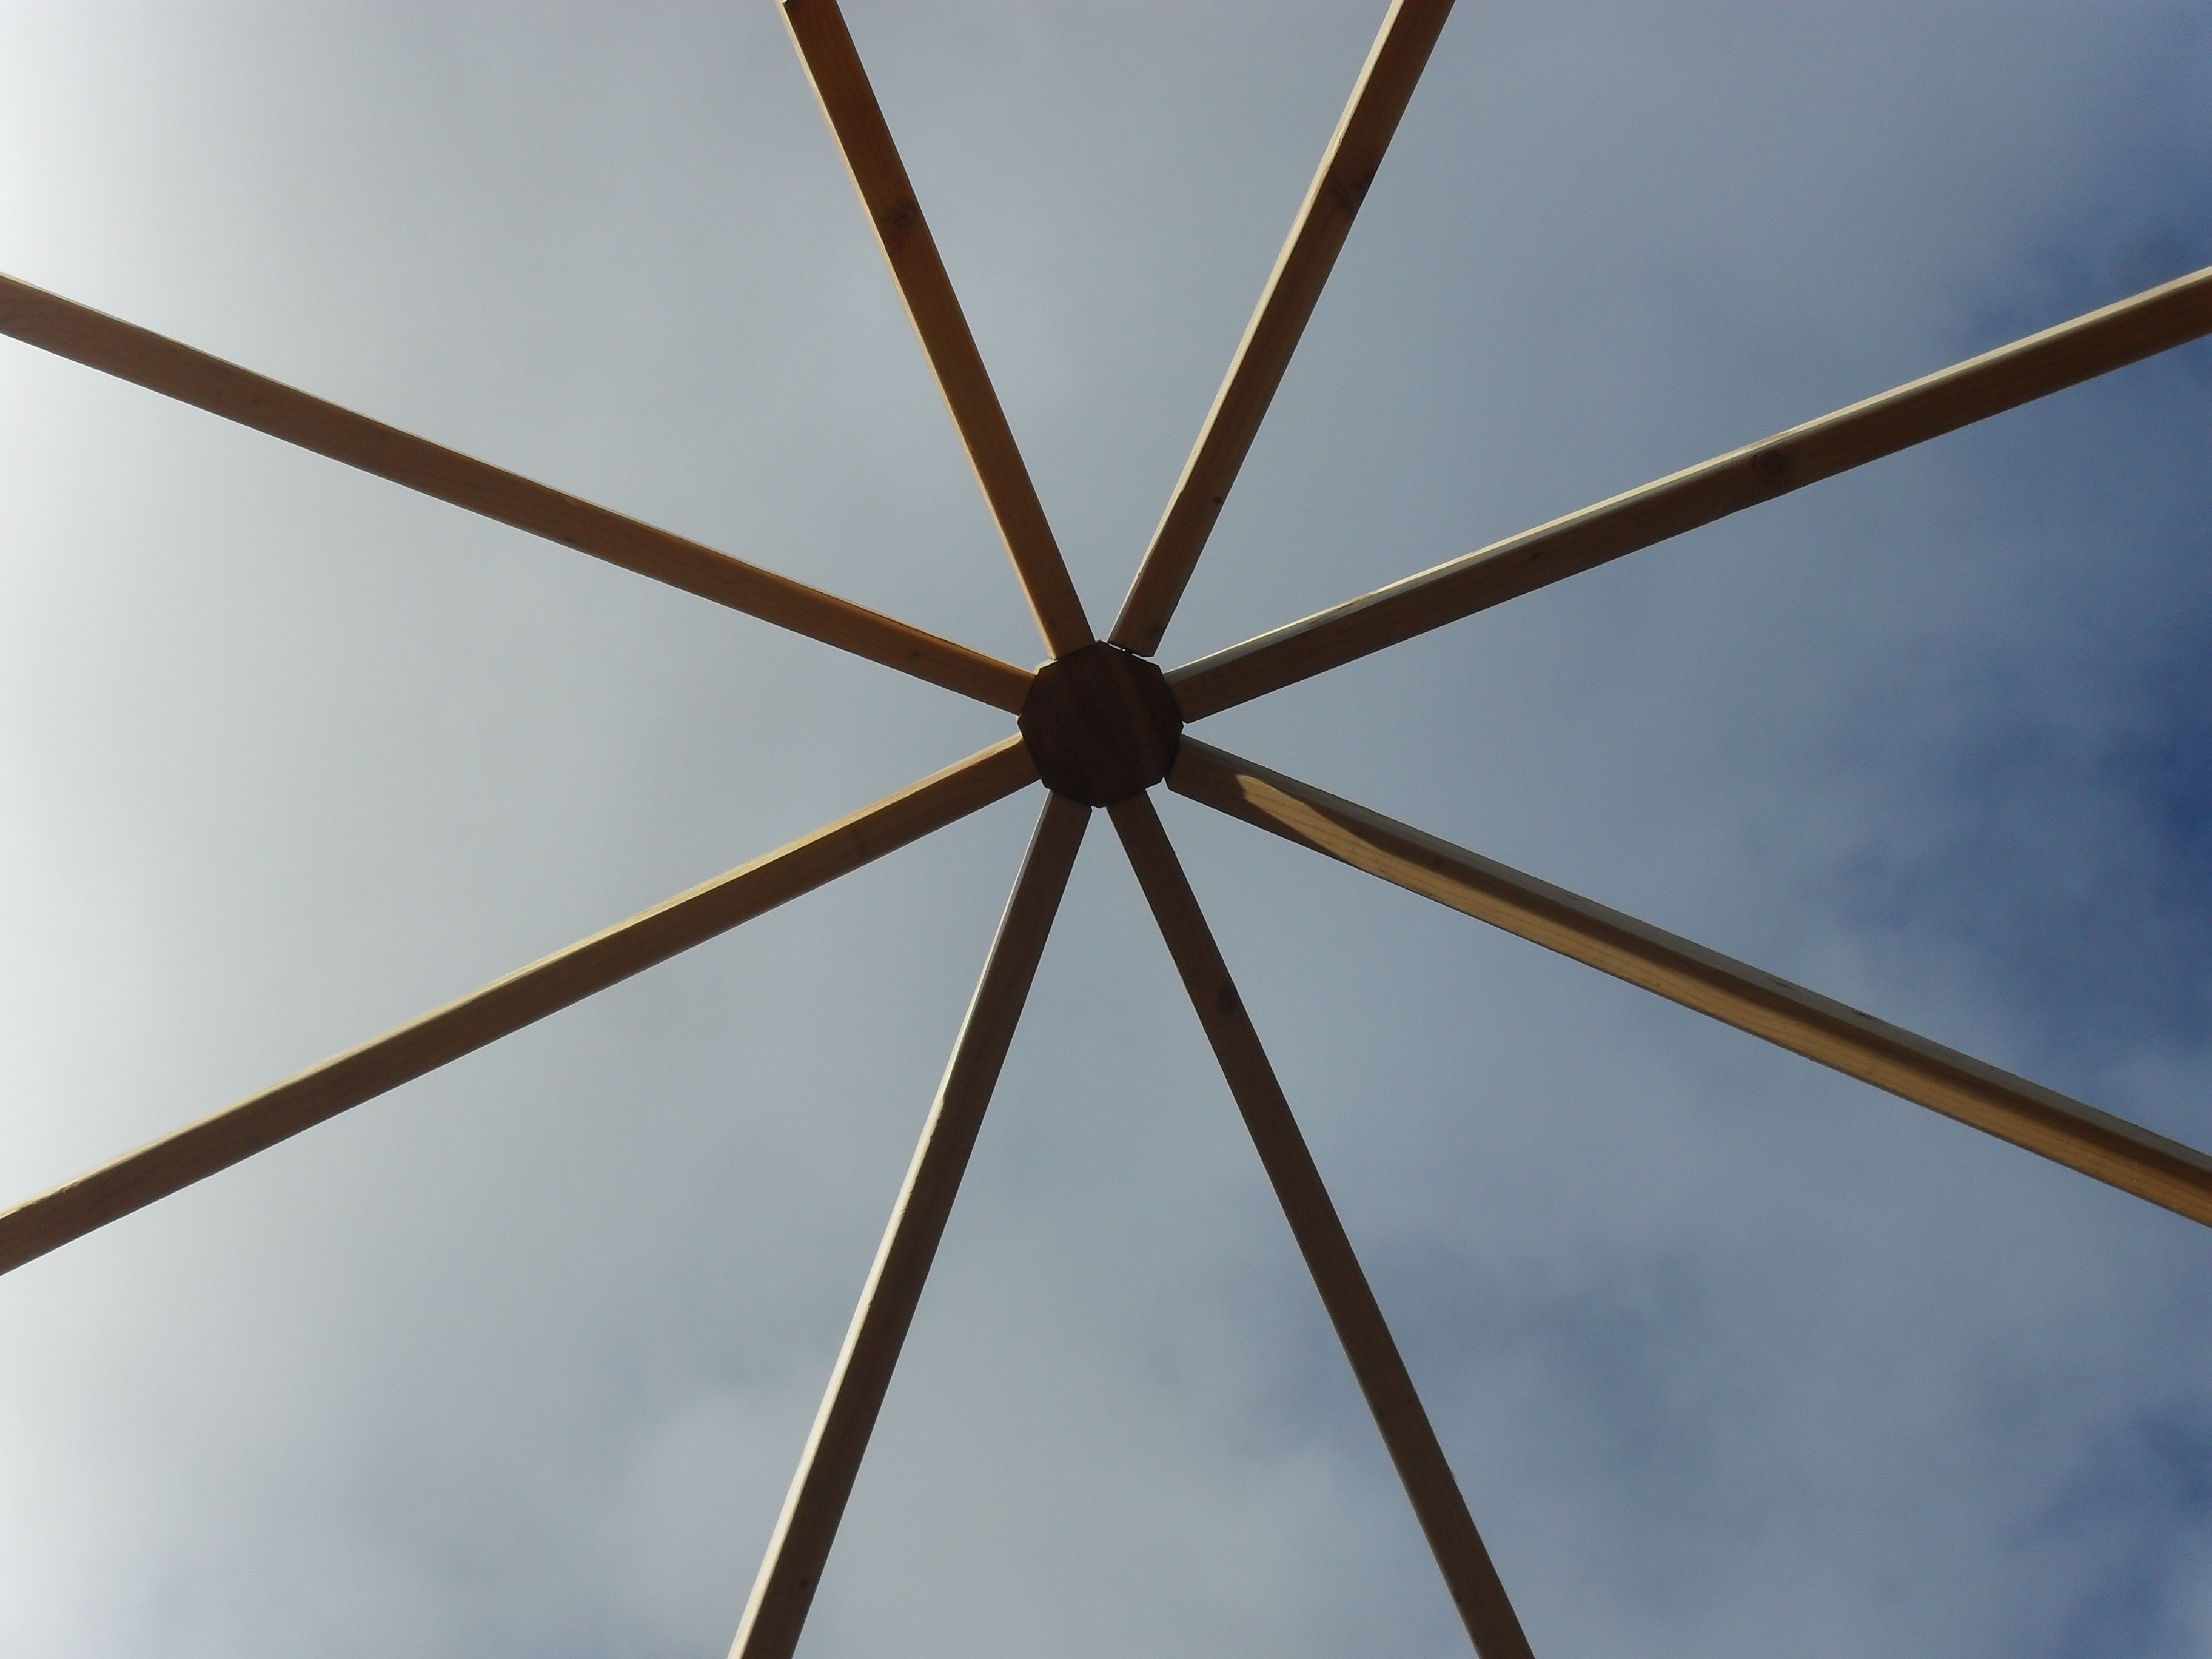
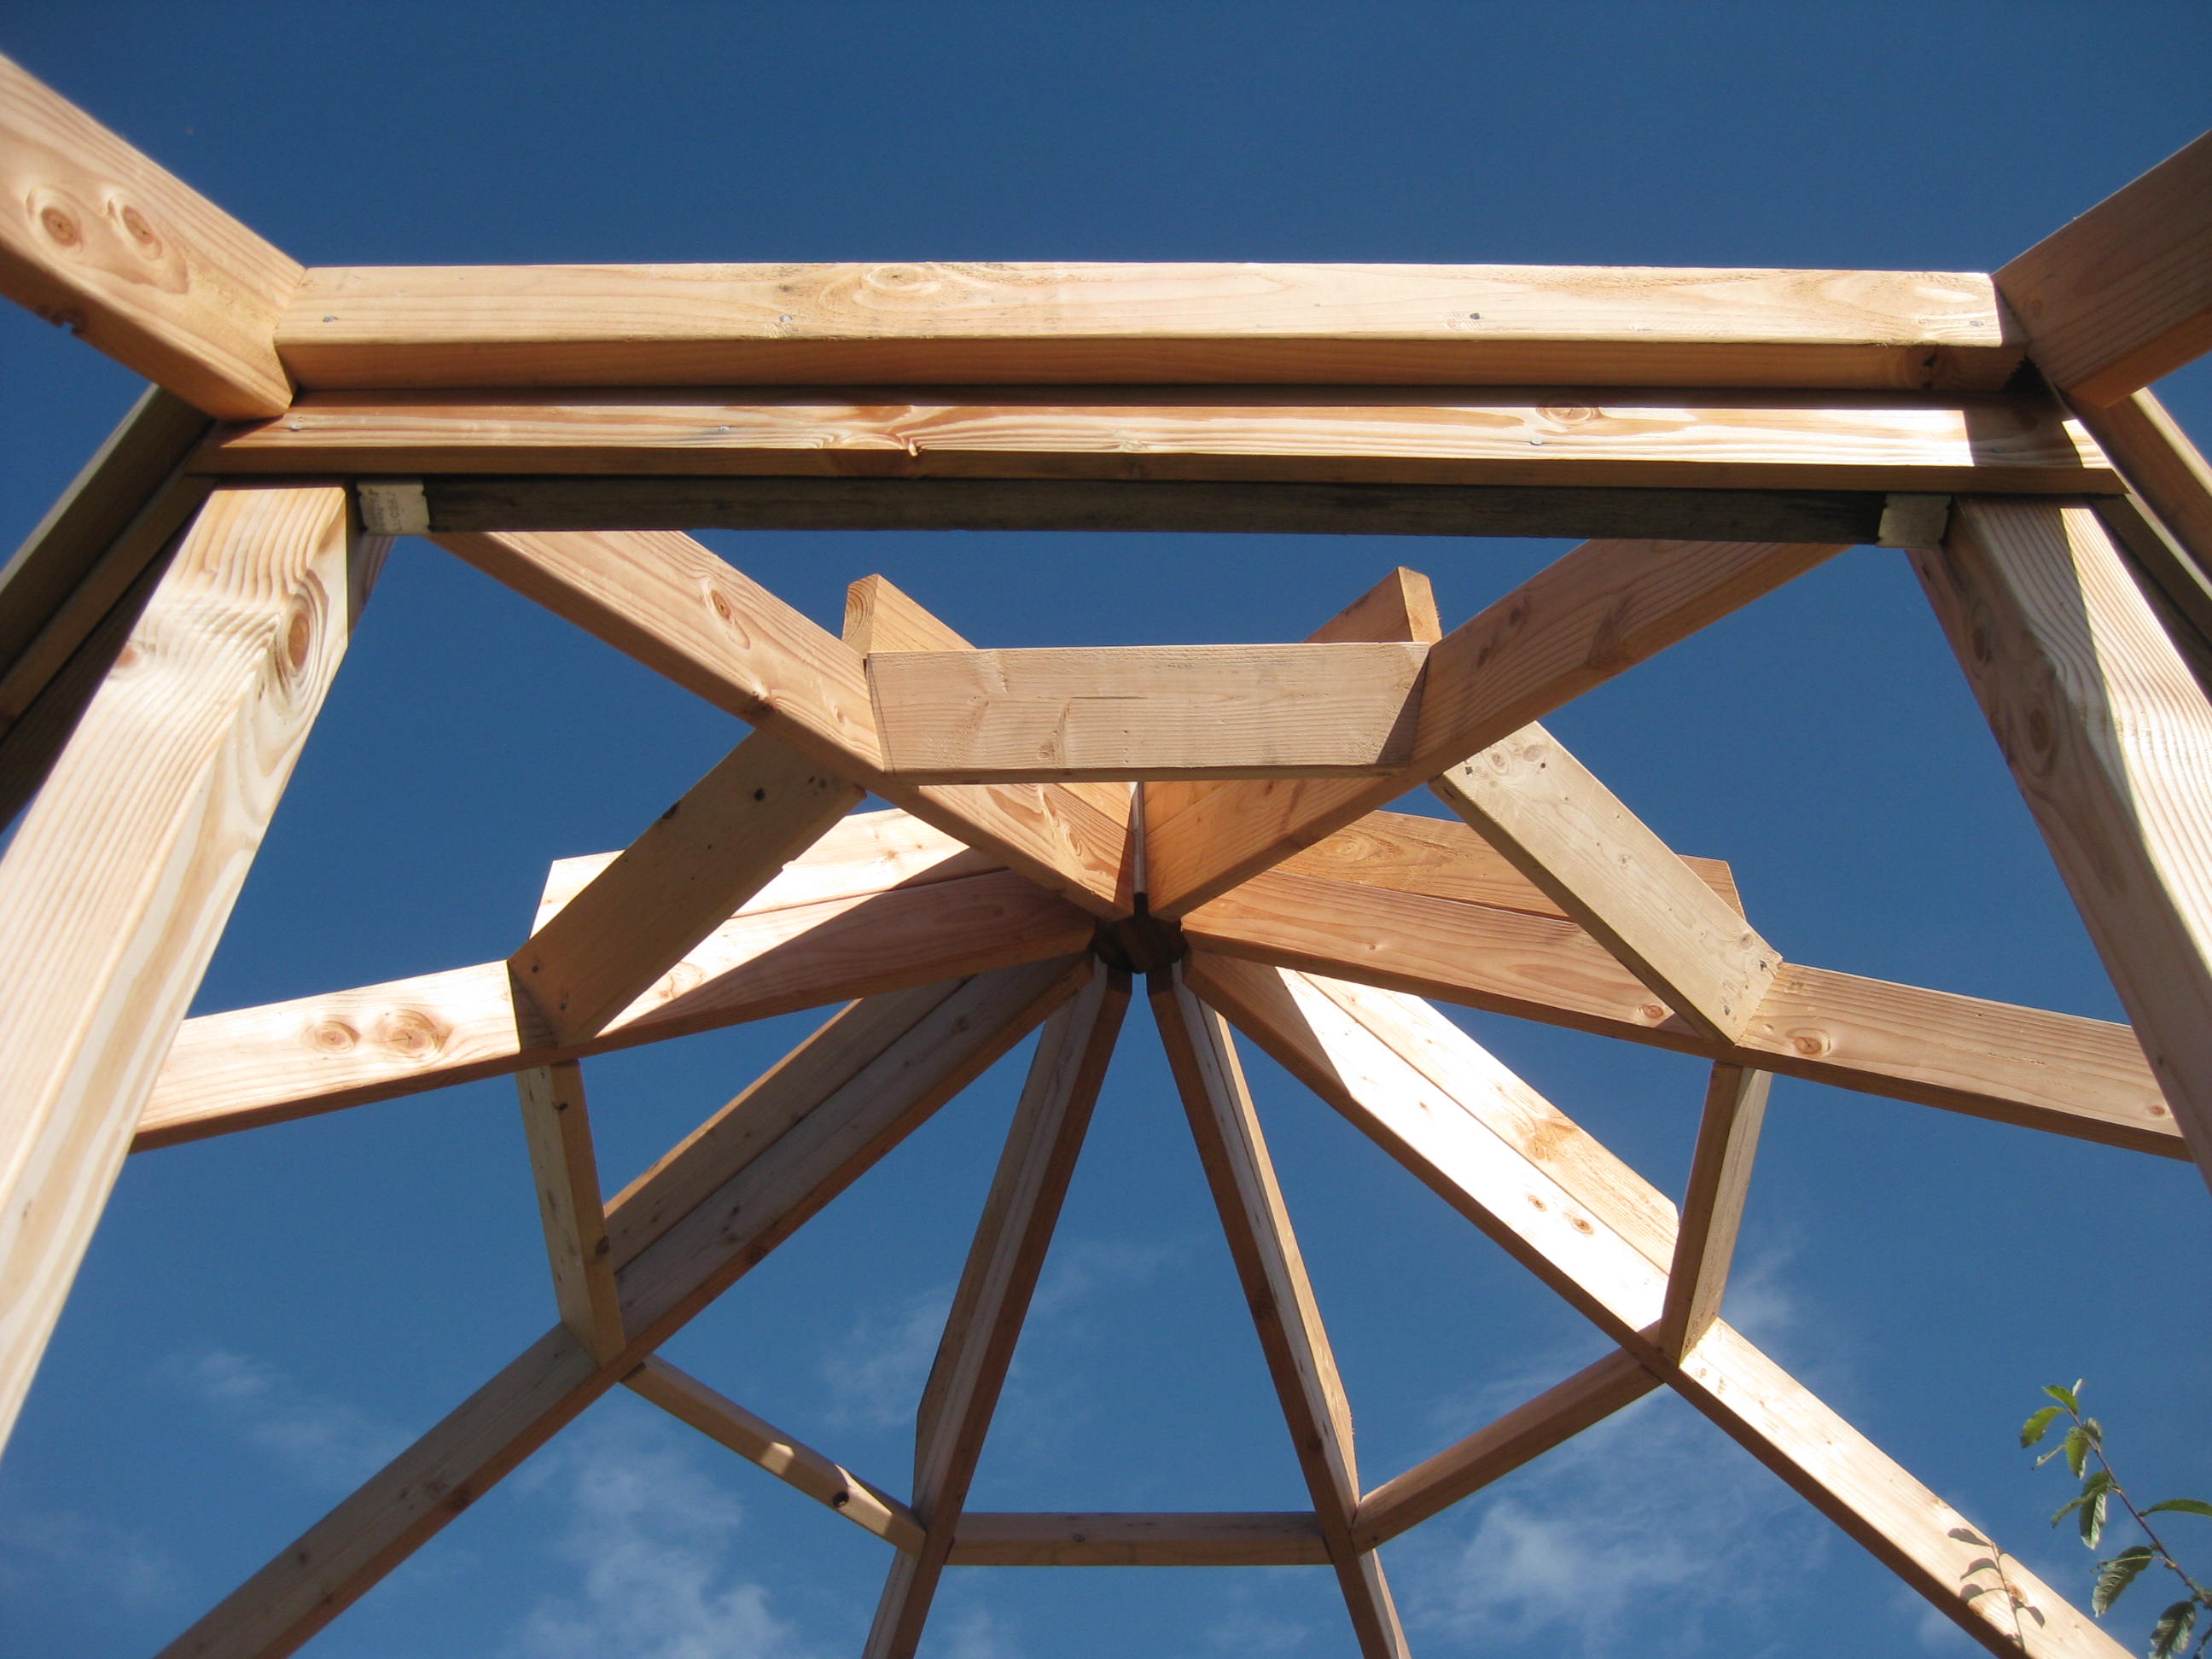
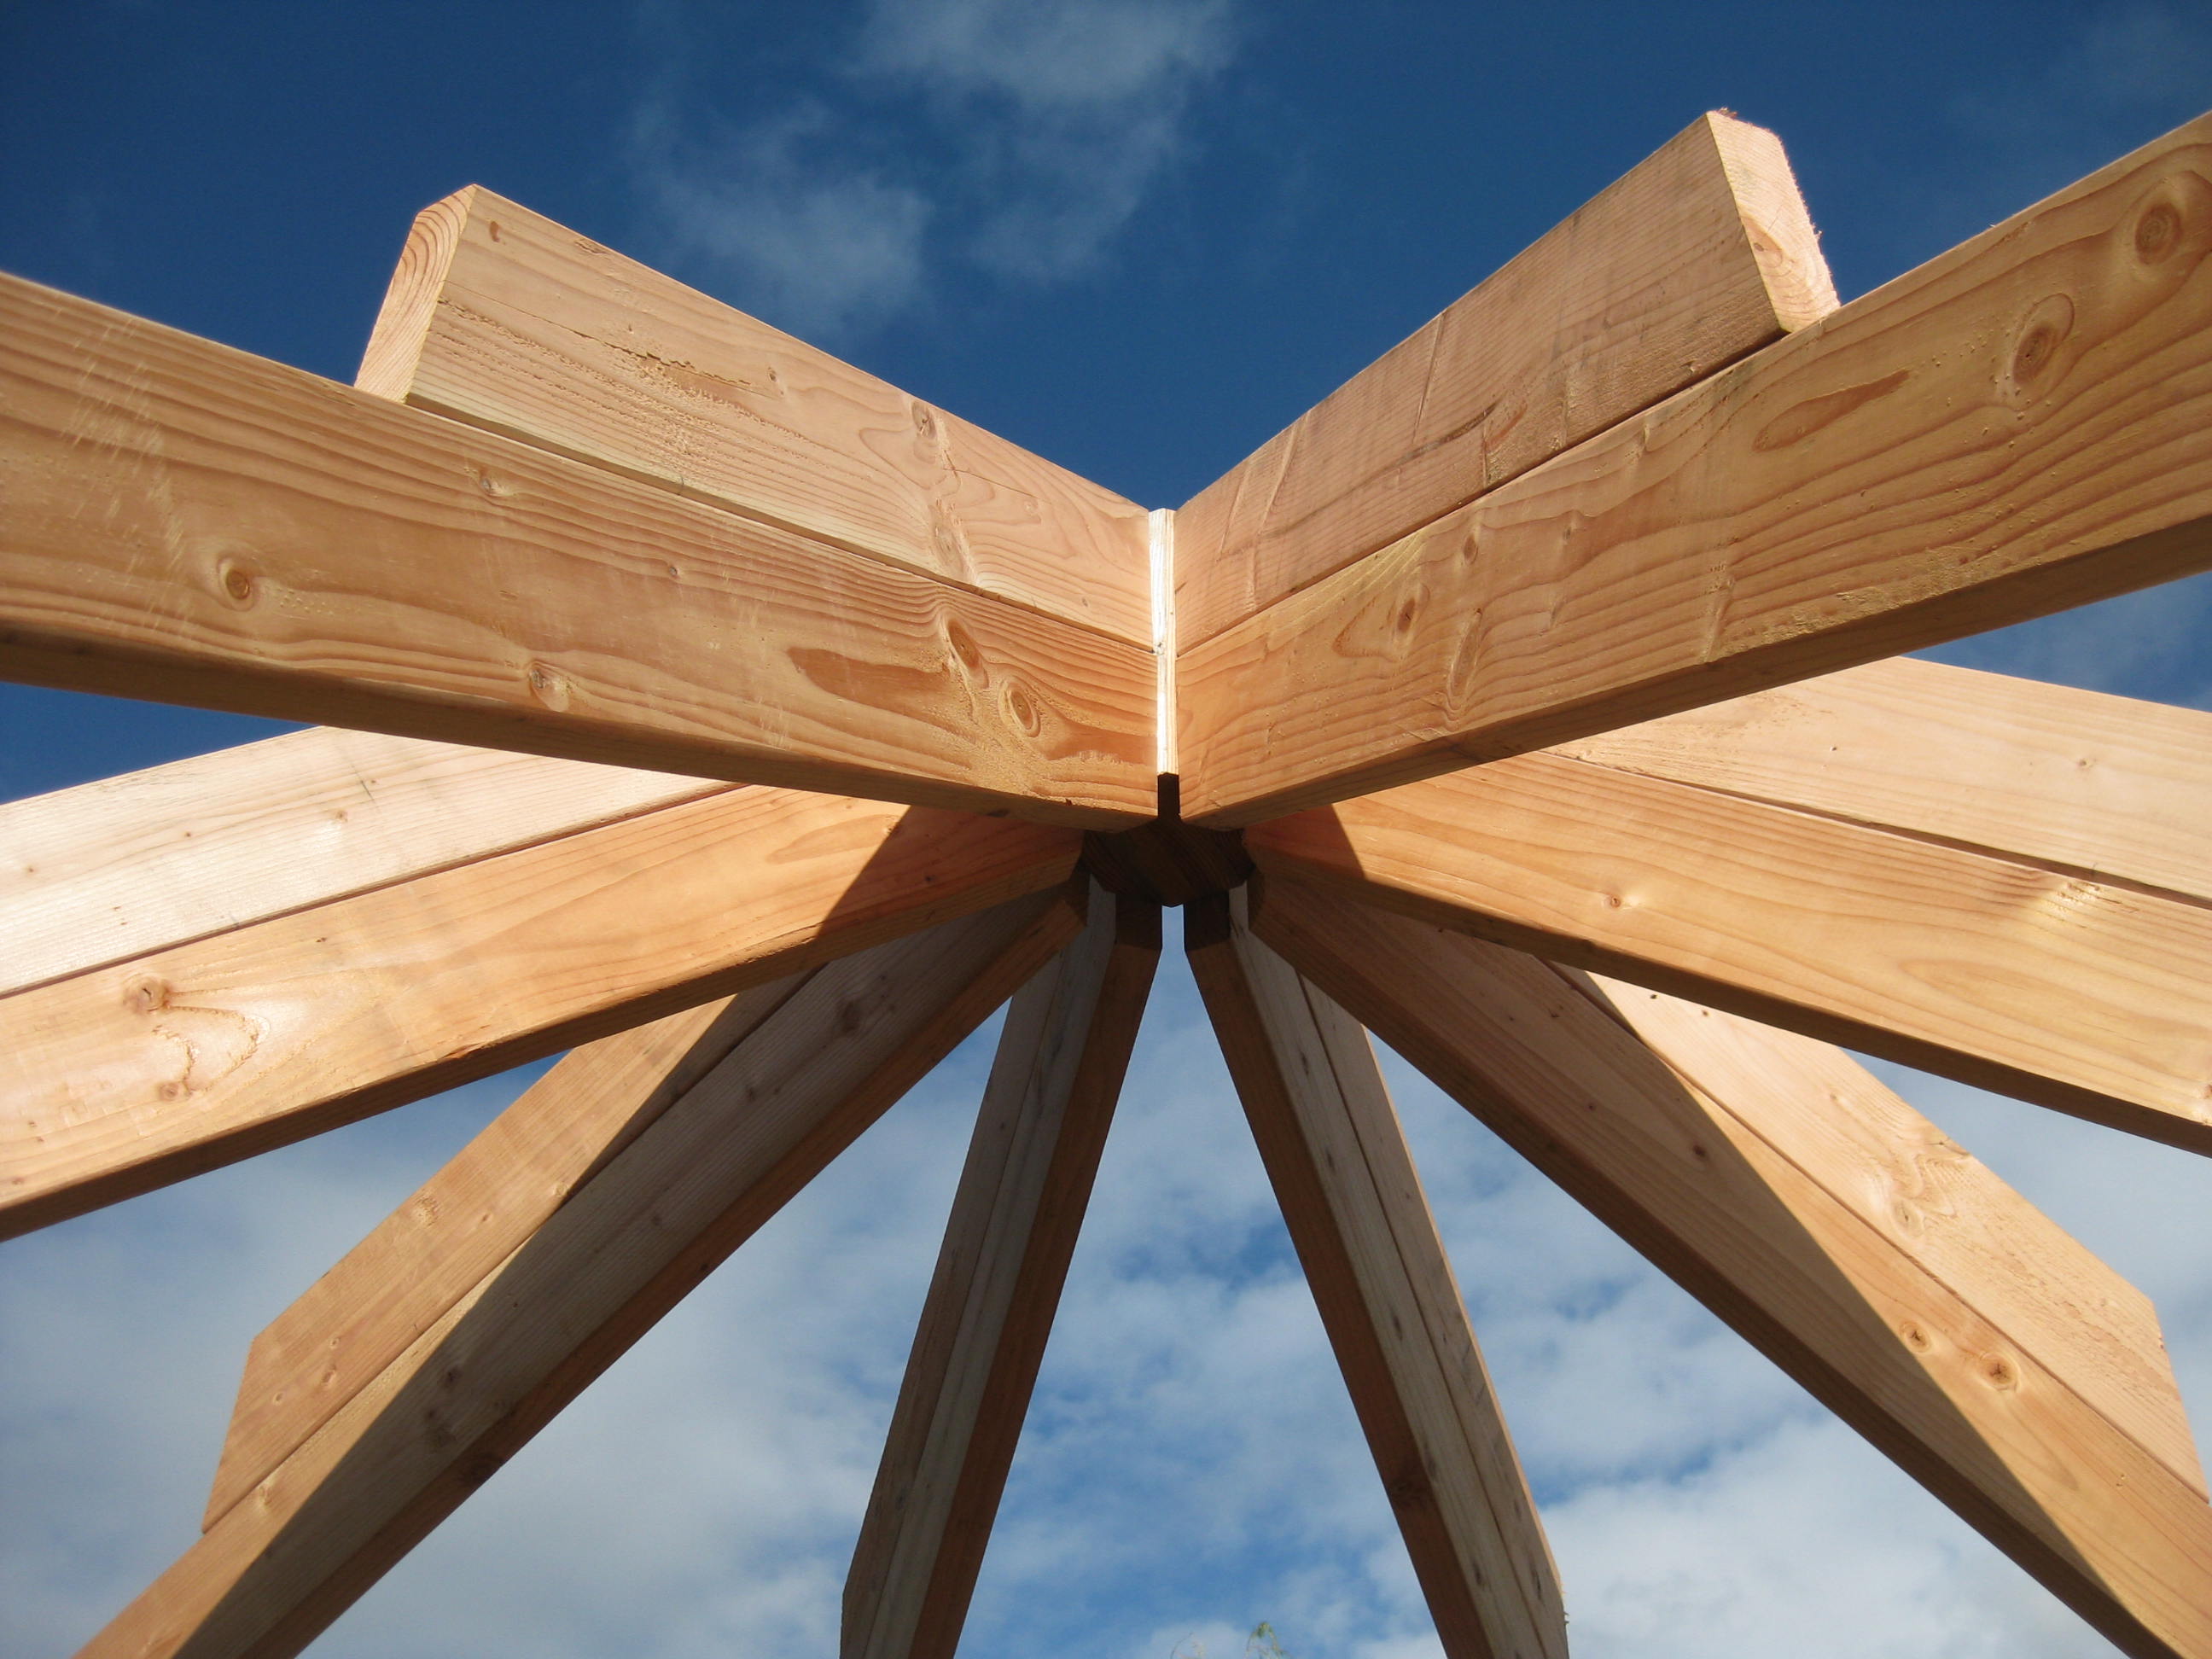 Once all eight rafters were assembled, Eric and I attached them to the key block with some construction adhesive.
I added additional screws and nails to the brackets at the bases of each rafter,
just in case anyone heavier than Cary wanted to do some pull-ups.
Once all eight rafters were assembled, Eric and I attached them to the key block with some construction adhesive.
I added additional screws and nails to the brackets at the bases of each rafter,
just in case anyone heavier than Cary wanted to do some pull-ups.
 That blocking in front was installed a little crooked.
I needed the top of the blocking to be flush with the top of the rafters, and those compound angles required some weird cuts!
That blocking in front was installed a little crooked.
I needed the top of the blocking to be flush with the top of the rafters, and those compound angles required some weird cuts!
 I covered it up later. Craftsman-smaftsman.
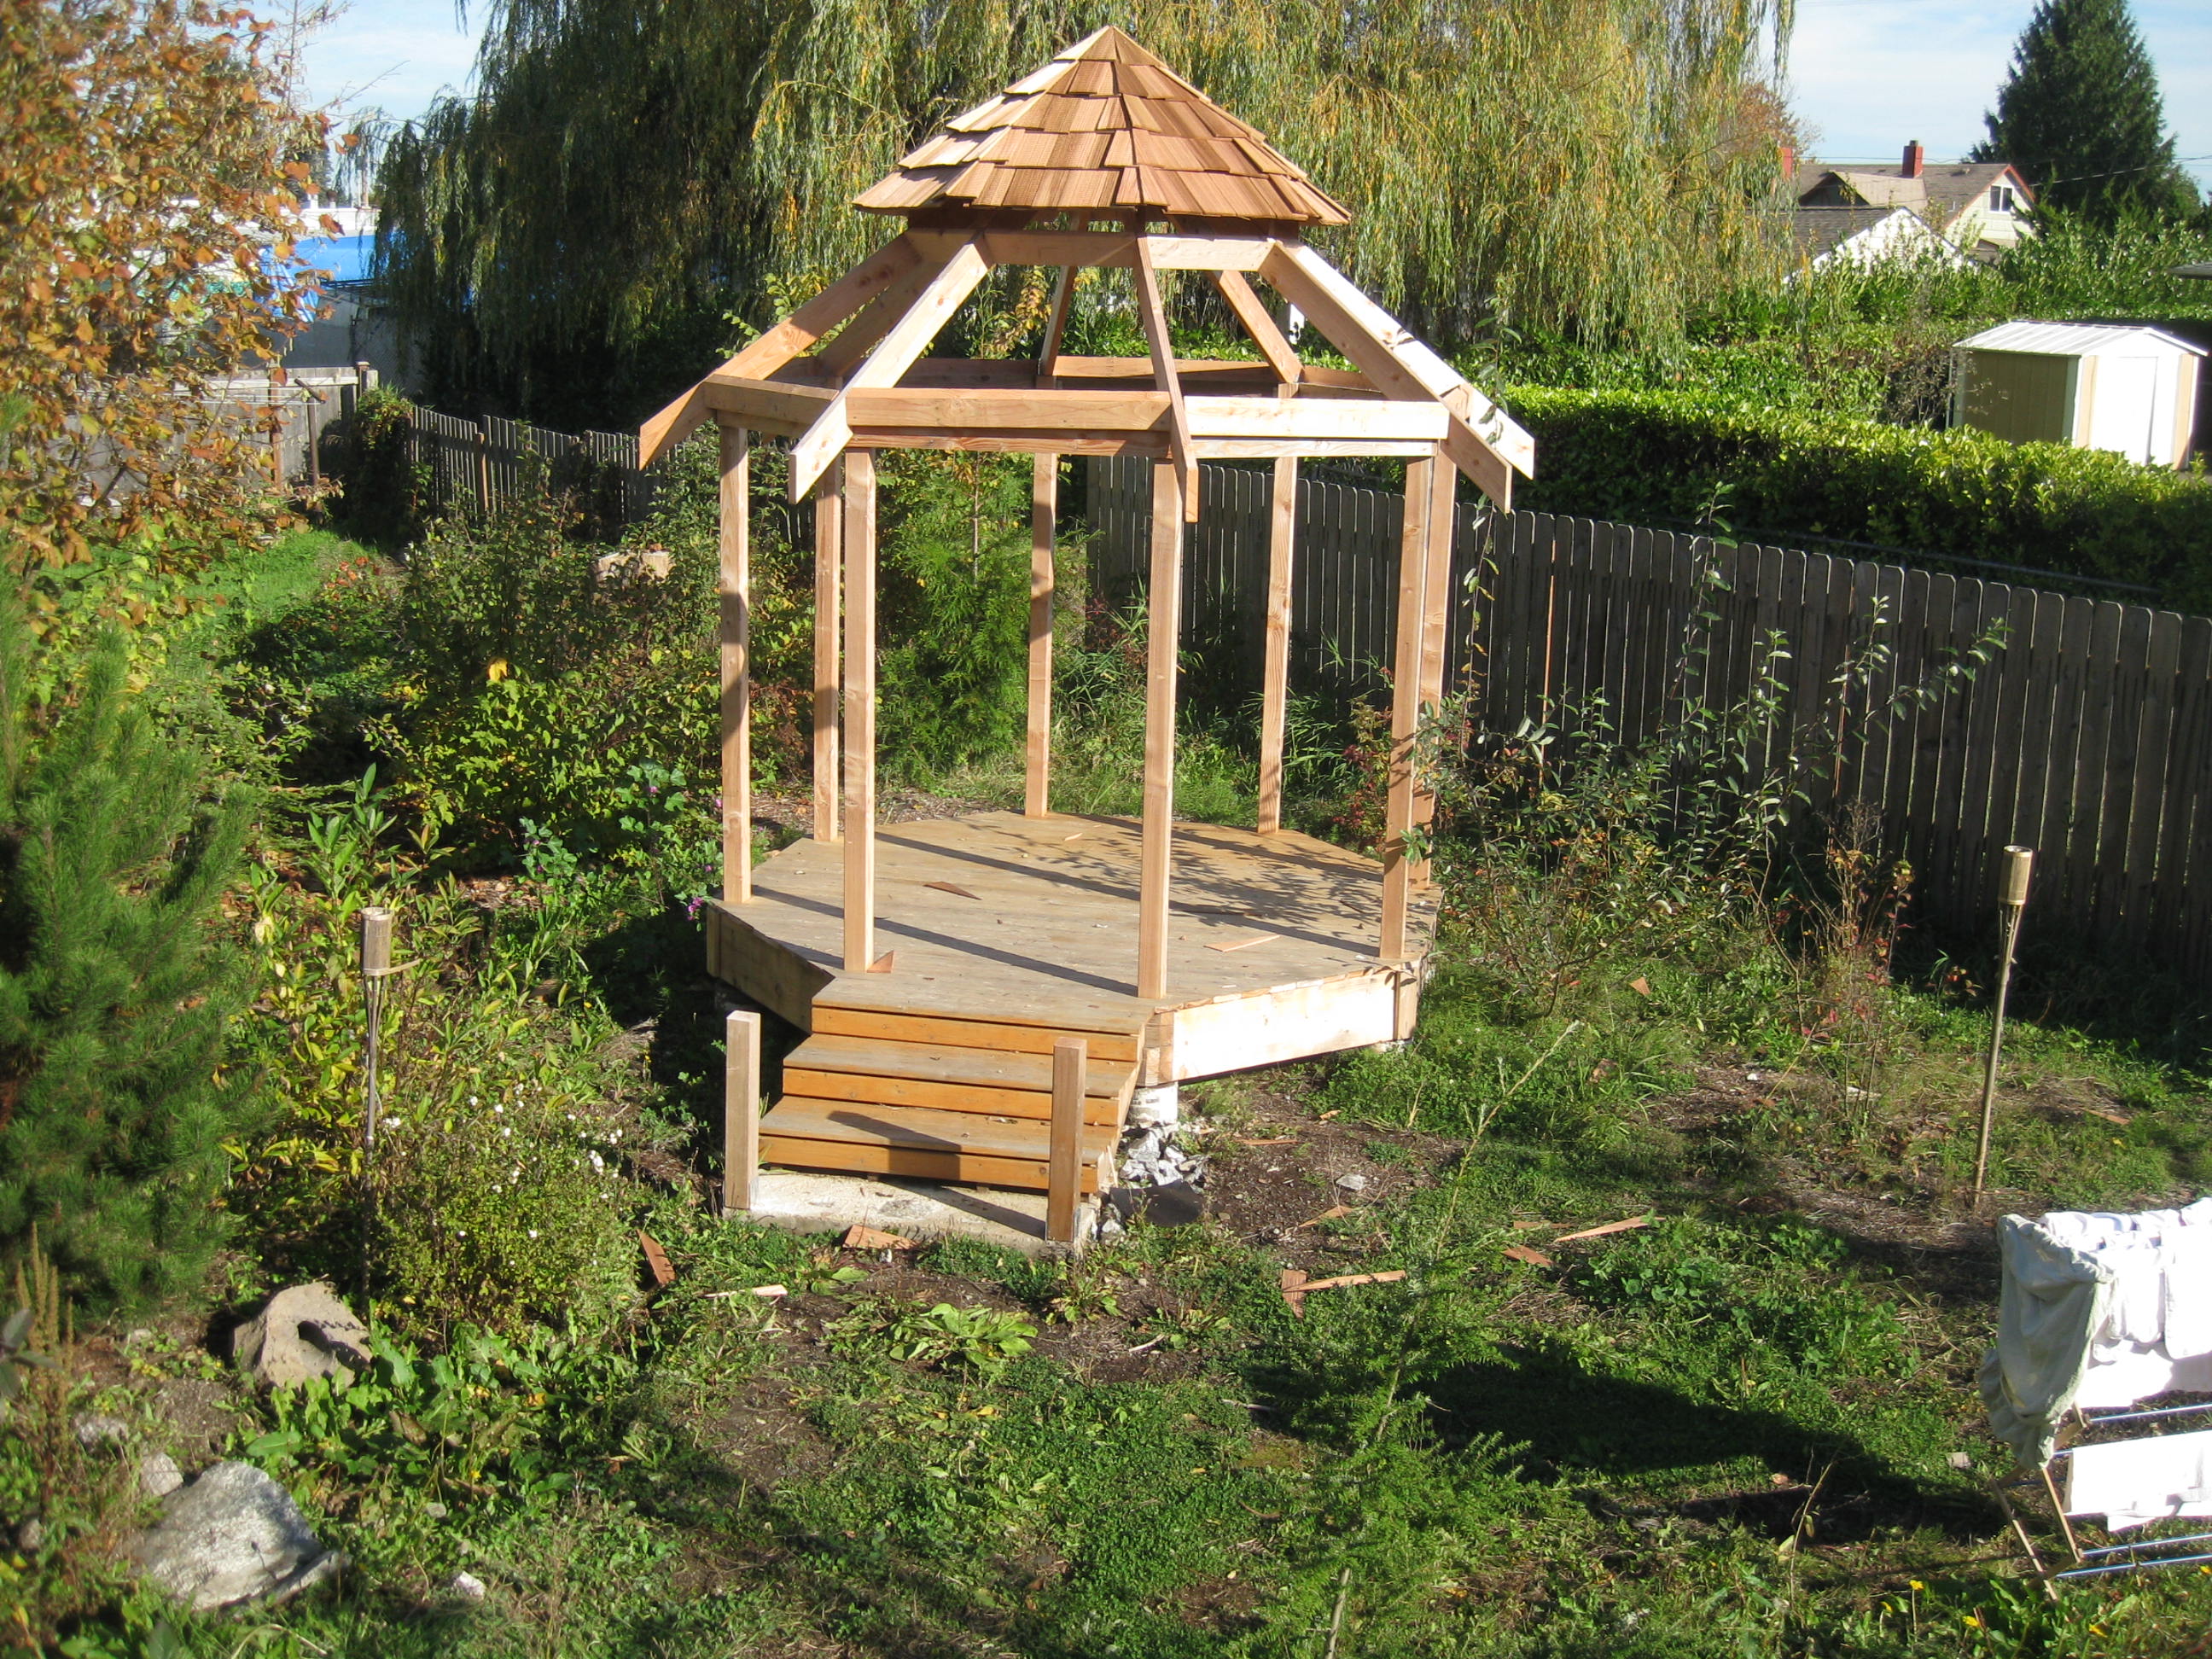
 This was my solution, to combine skip sheeting with regular sheeting.
I built eight of these panels and installed them on the upper roof.
This was my solution, to combine skip sheeting with regular sheeting.
I built eight of these panels and installed them on the upper roof.
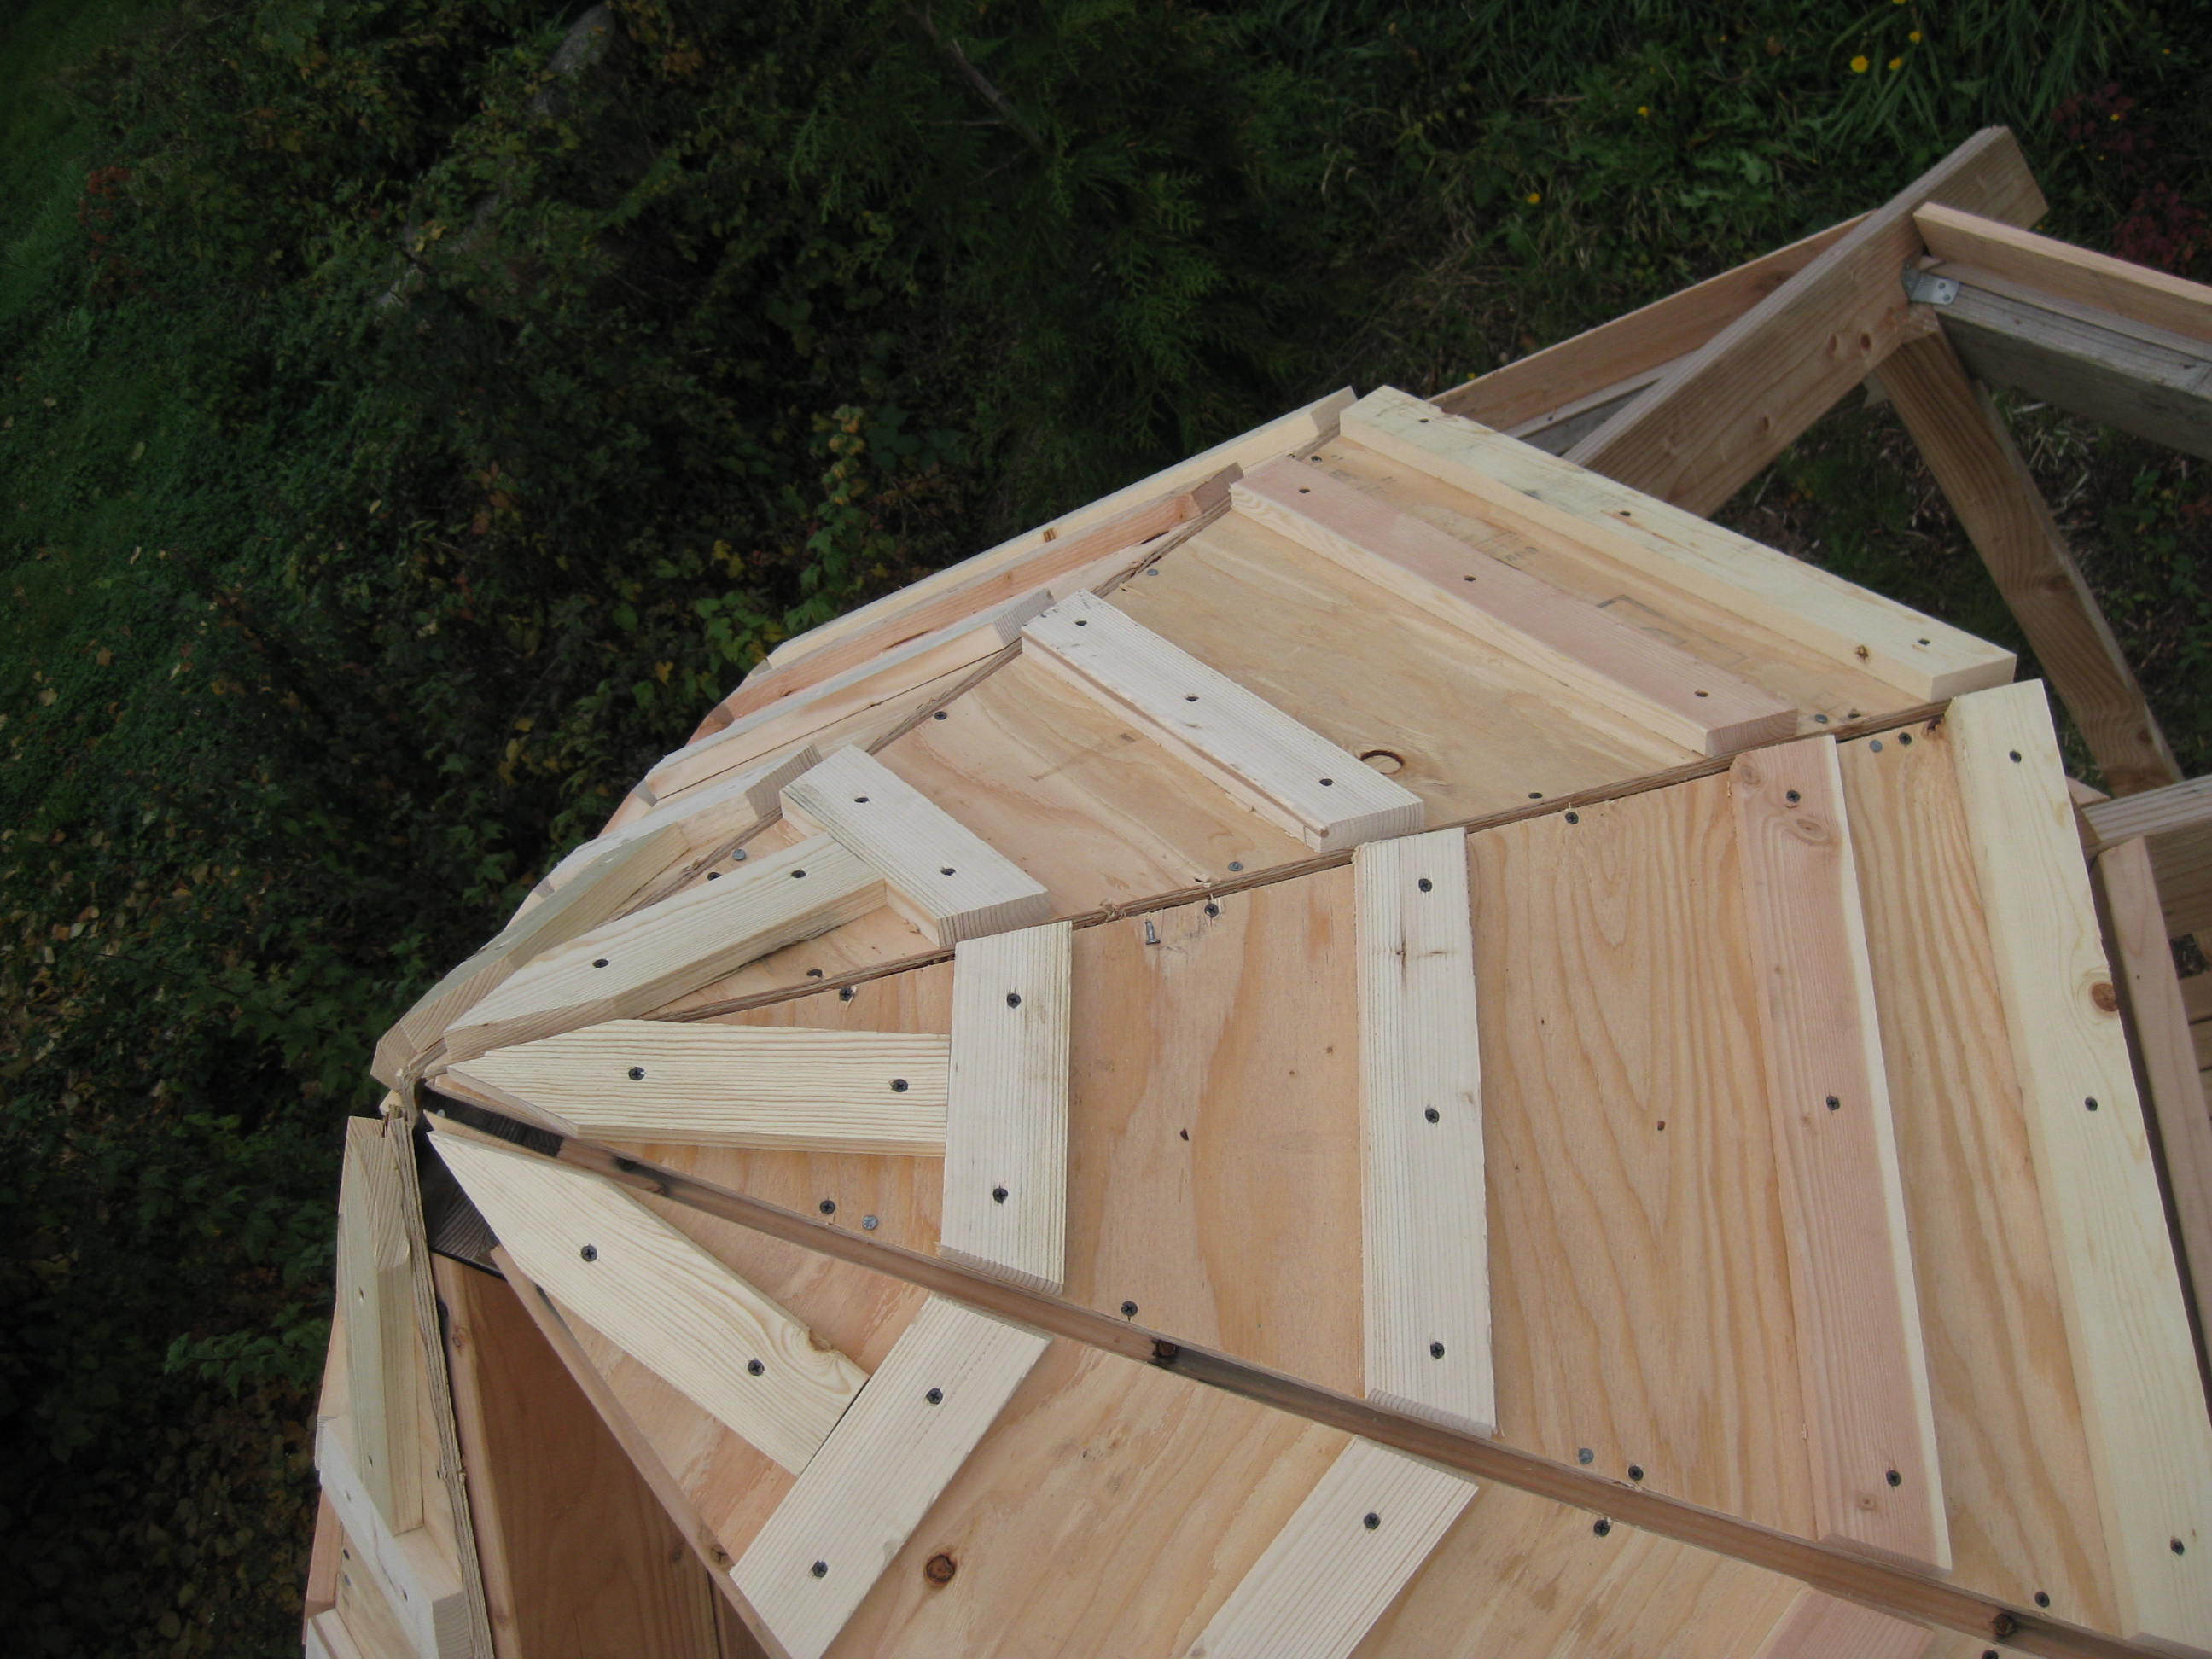
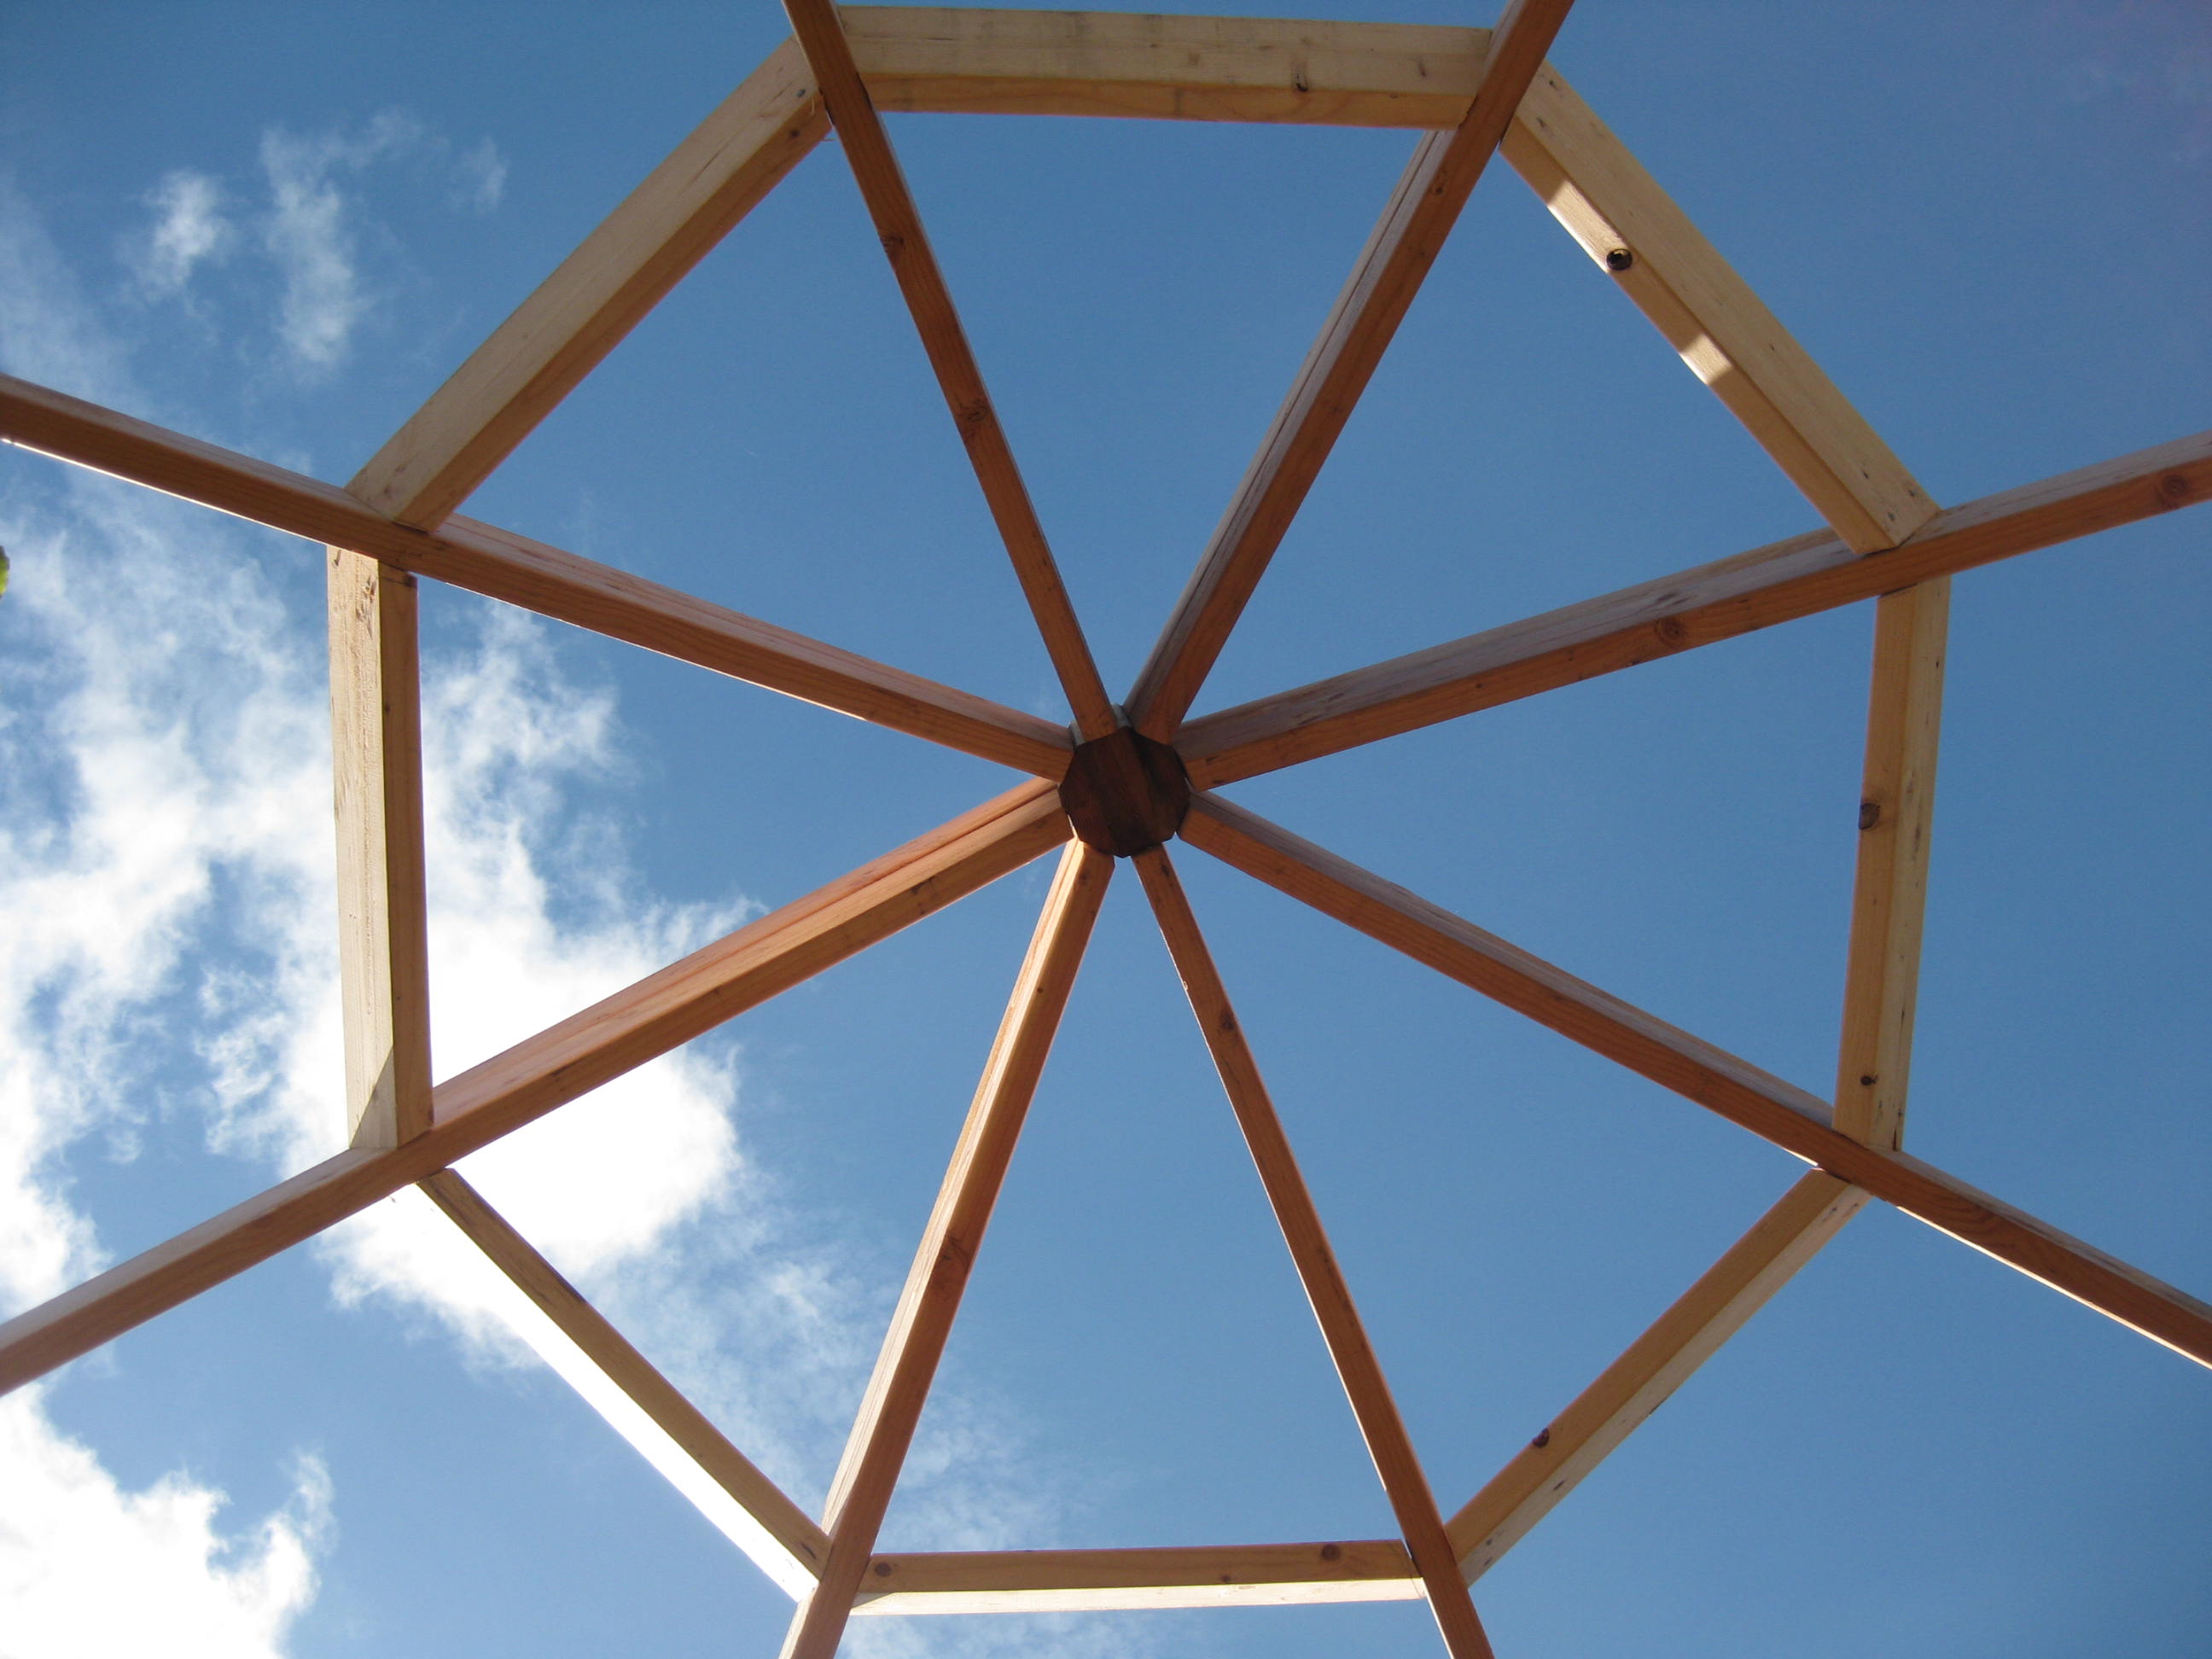
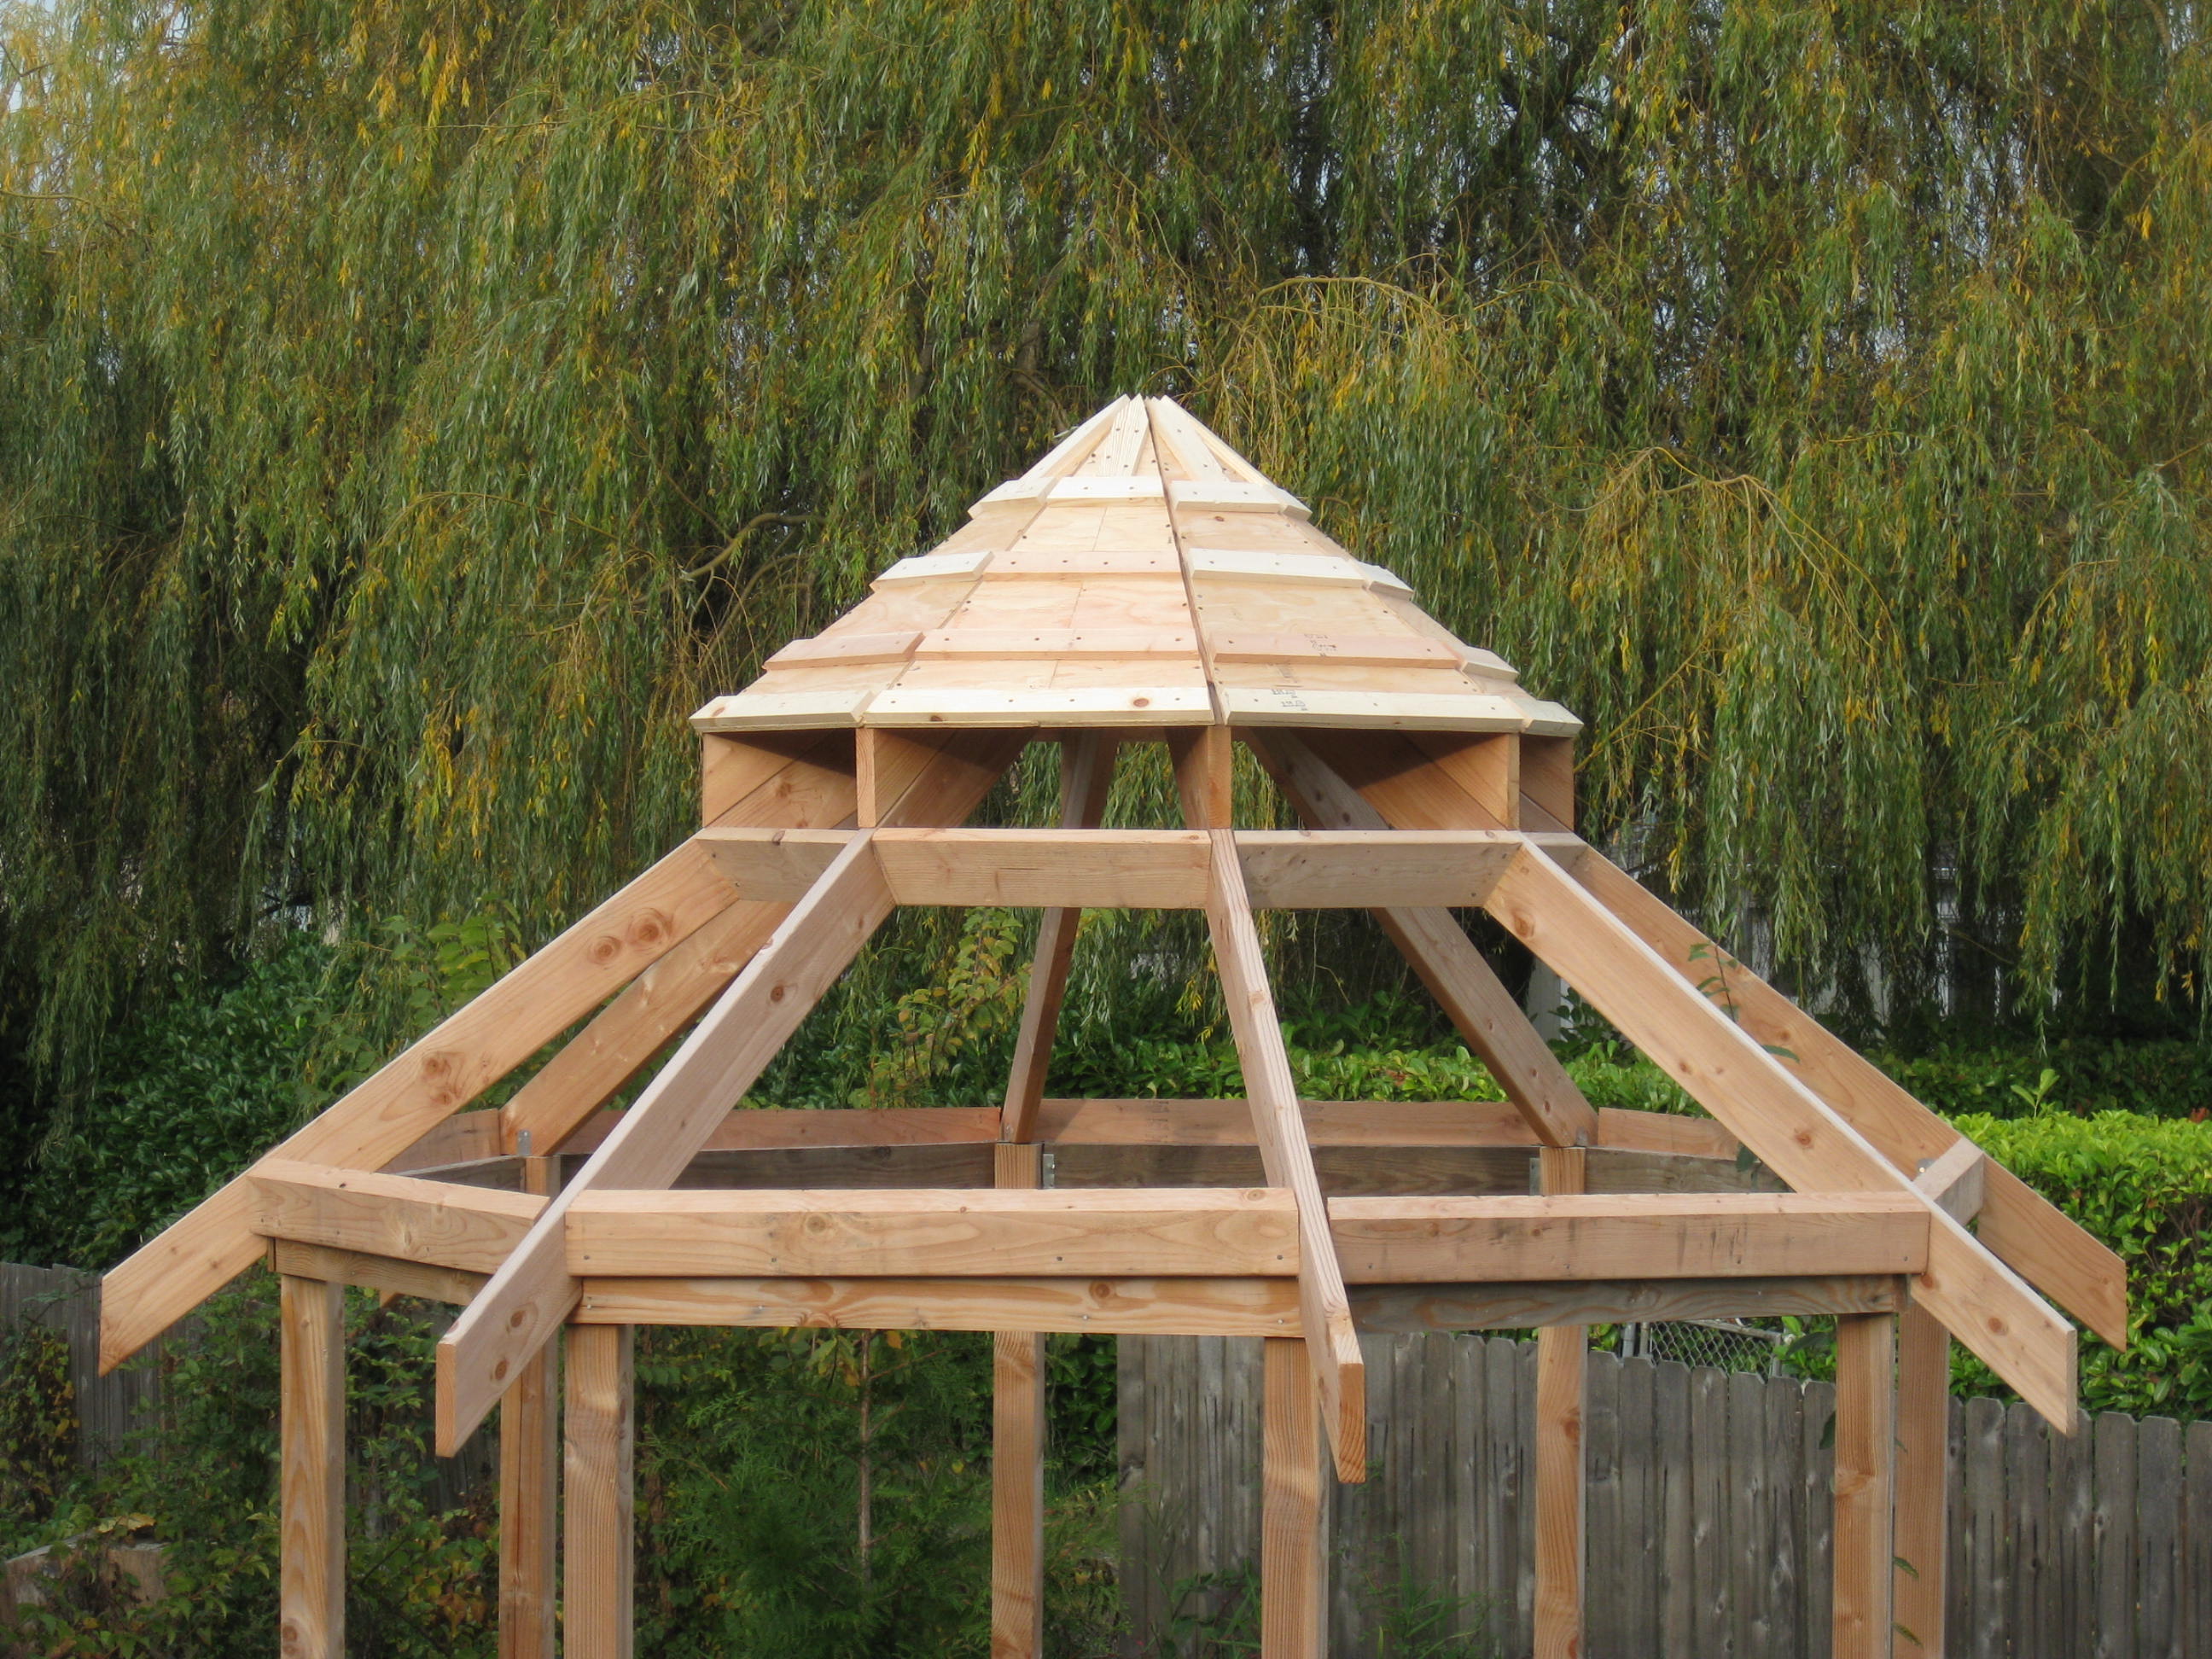 Looking pretty cool!
 ...and looking pretty good from below as well.
November 2010
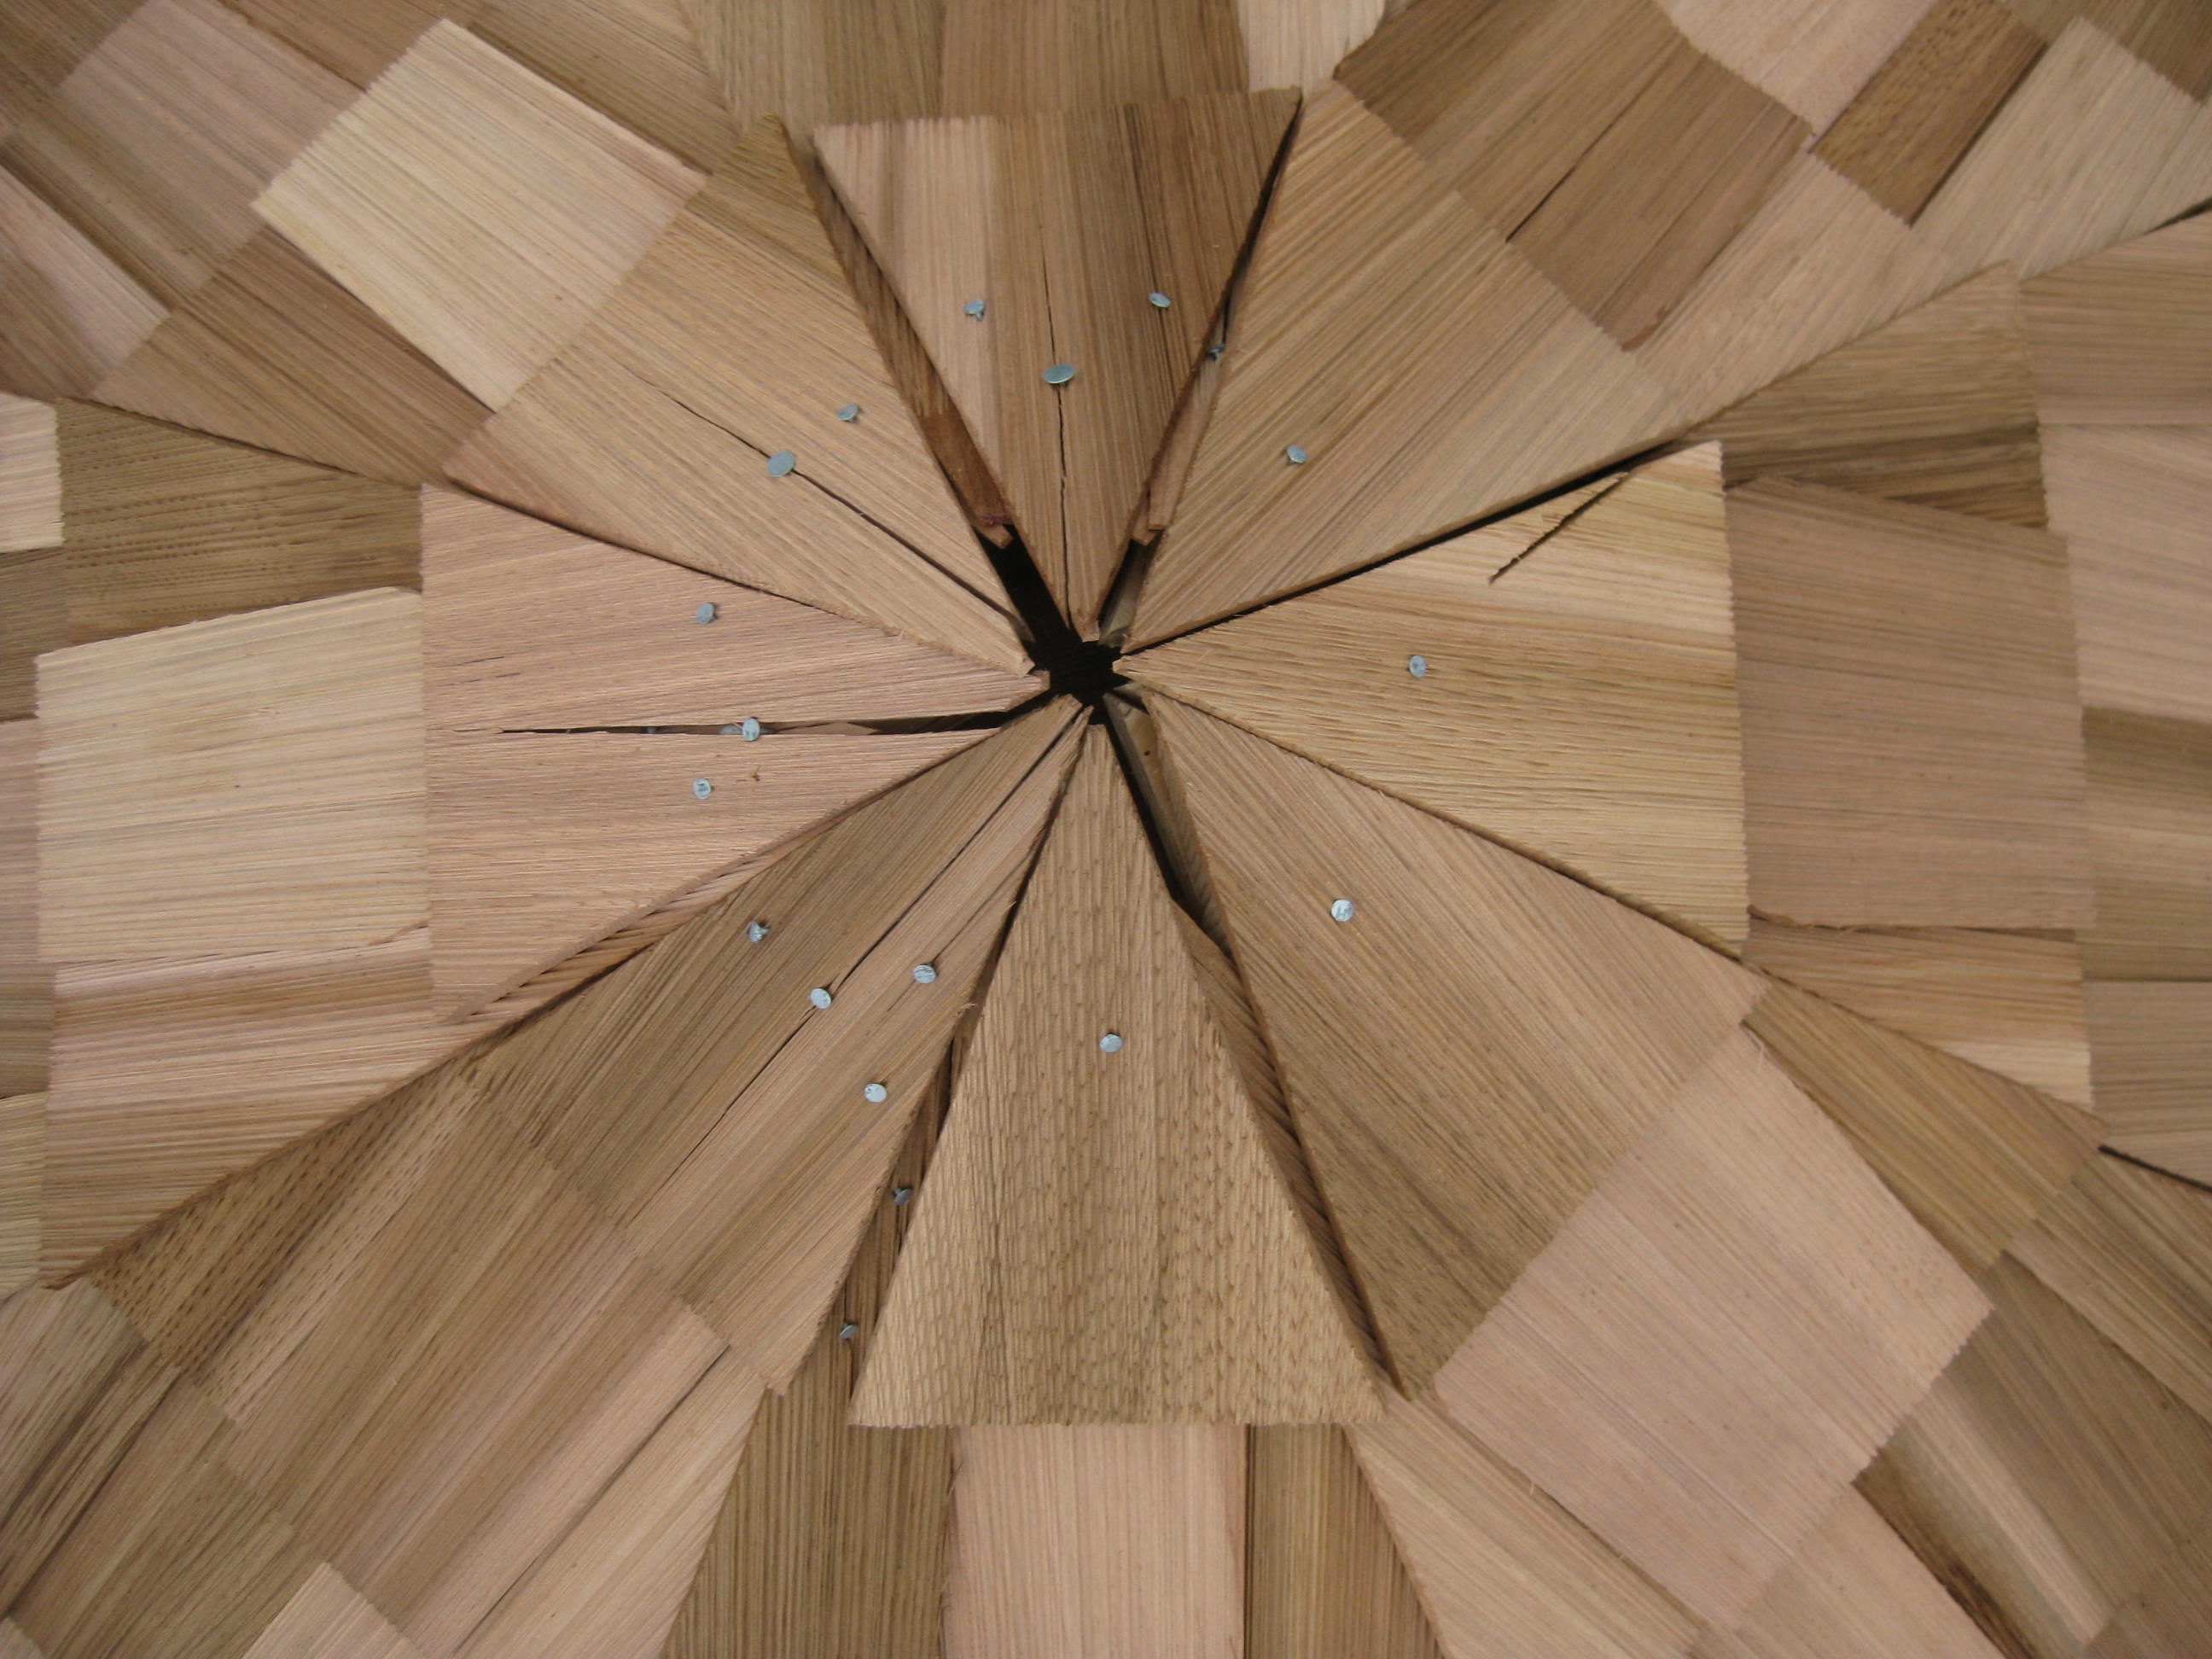
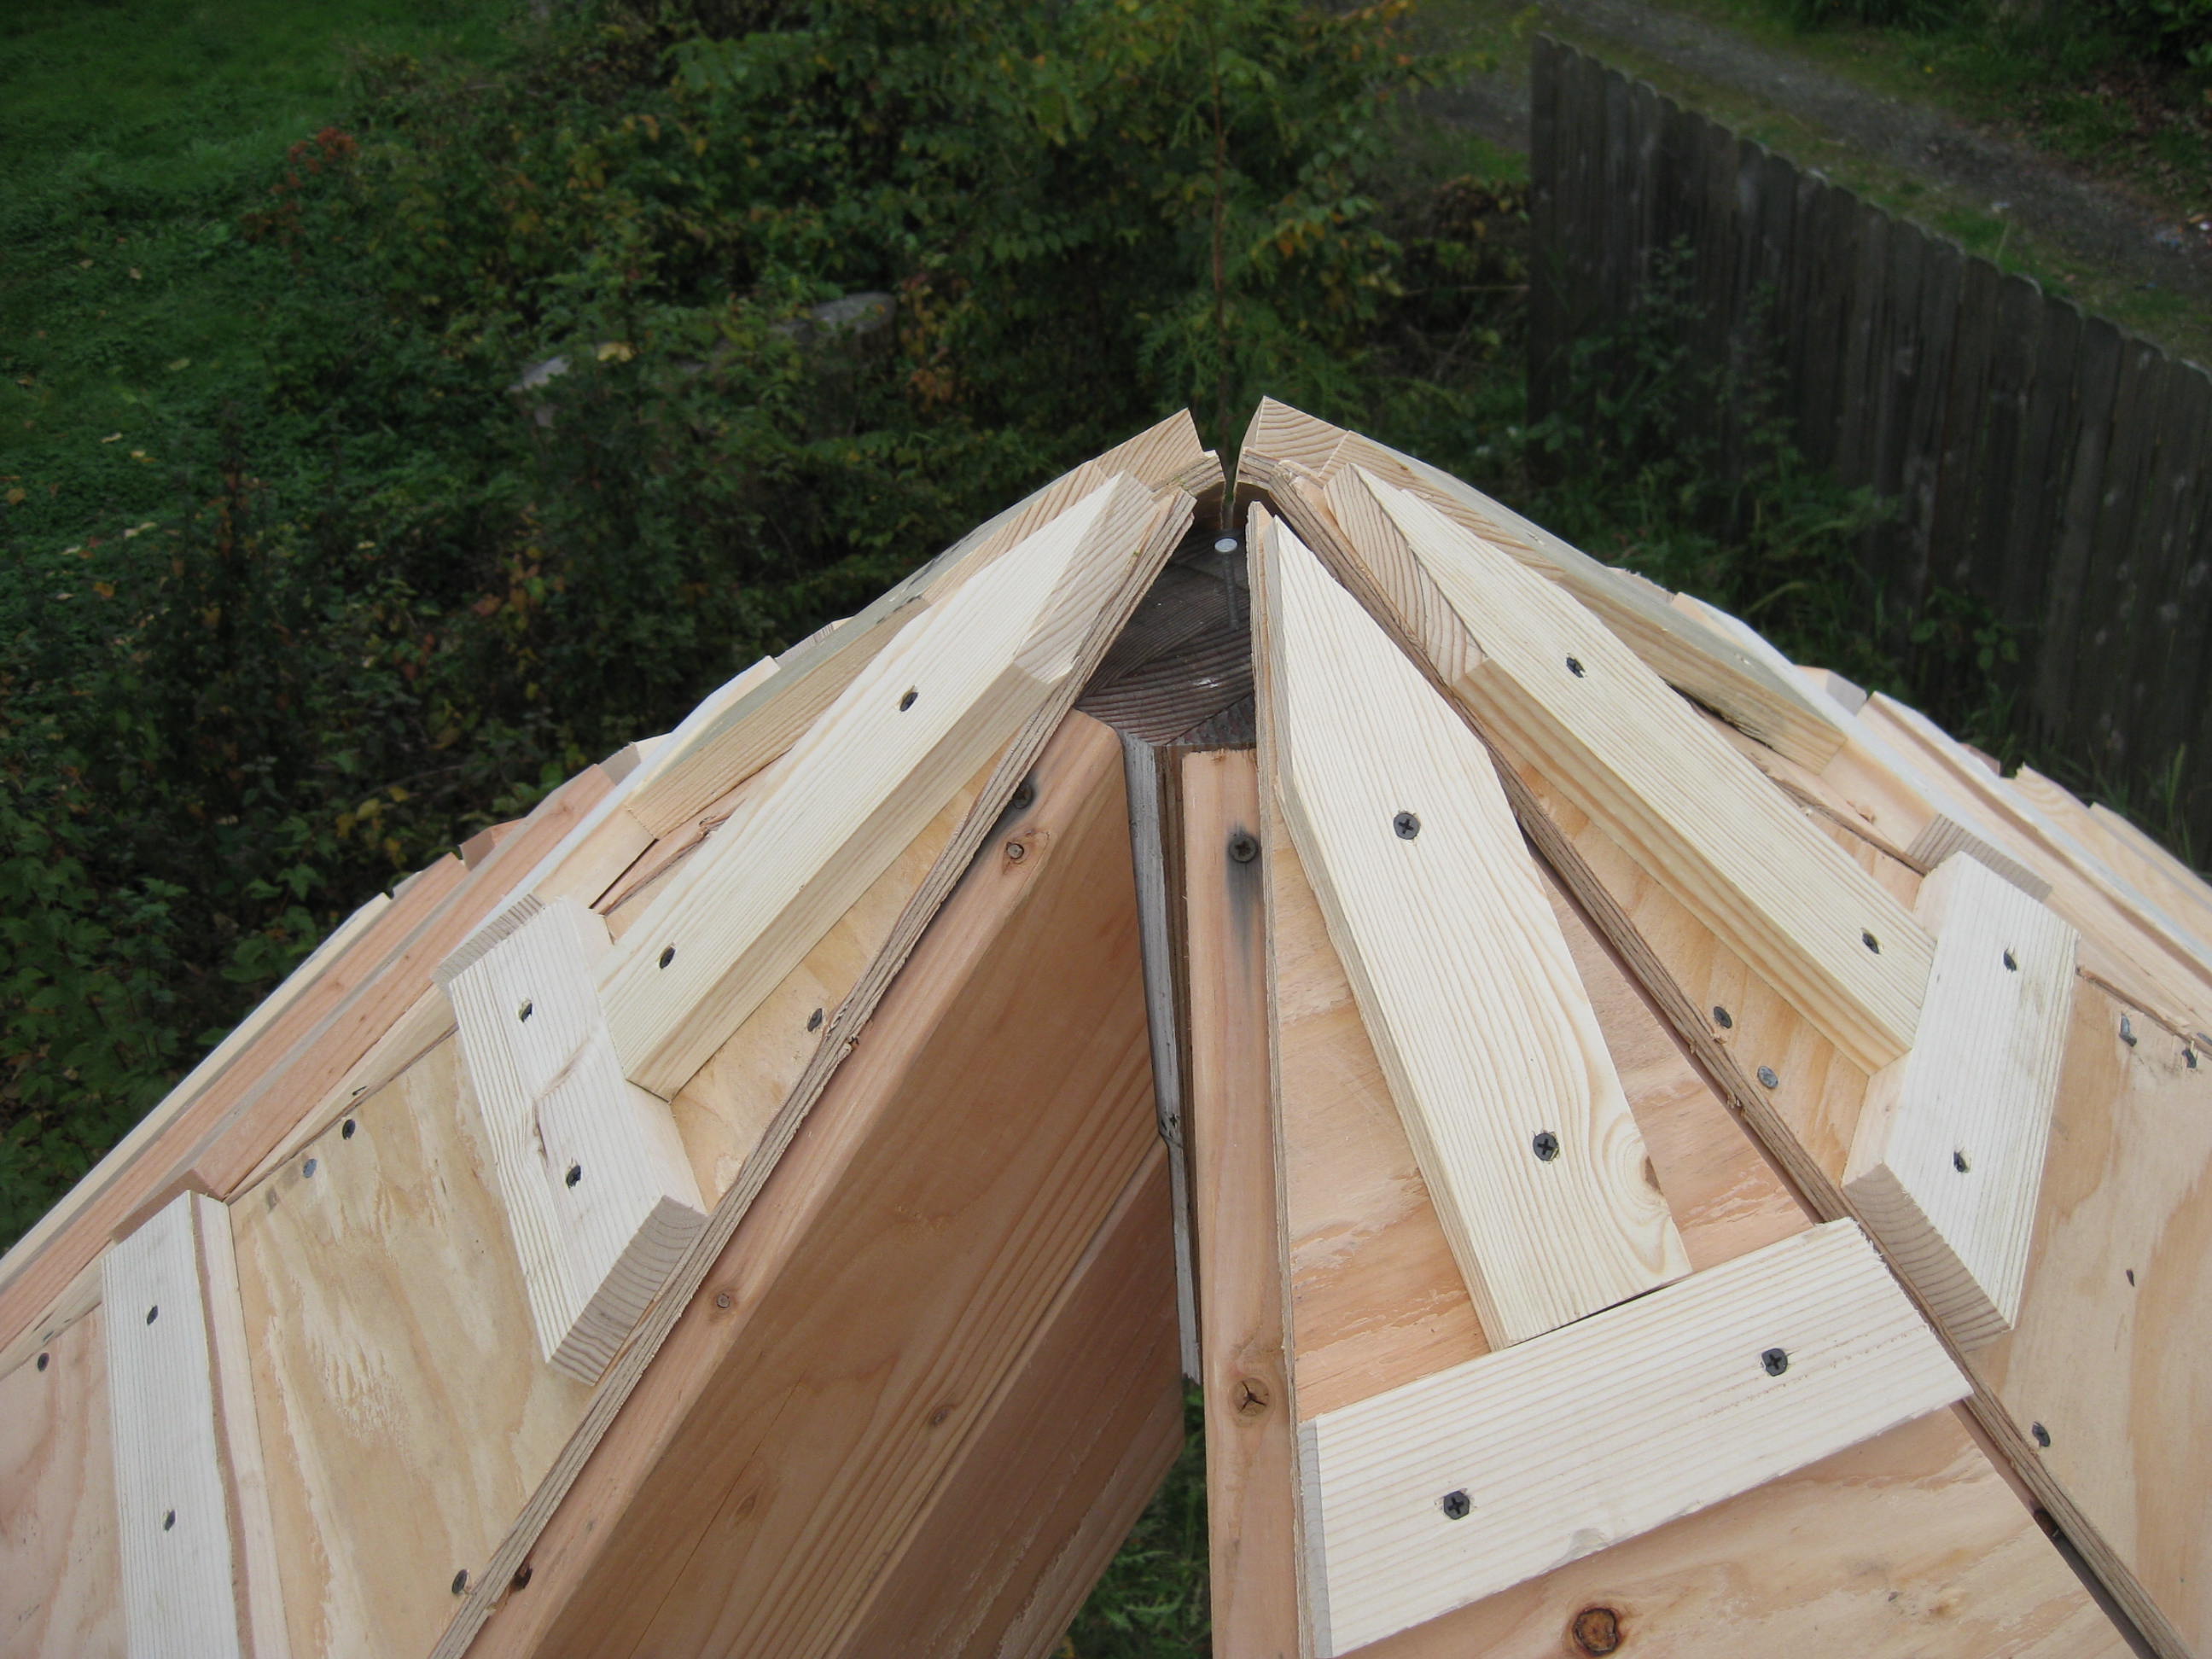
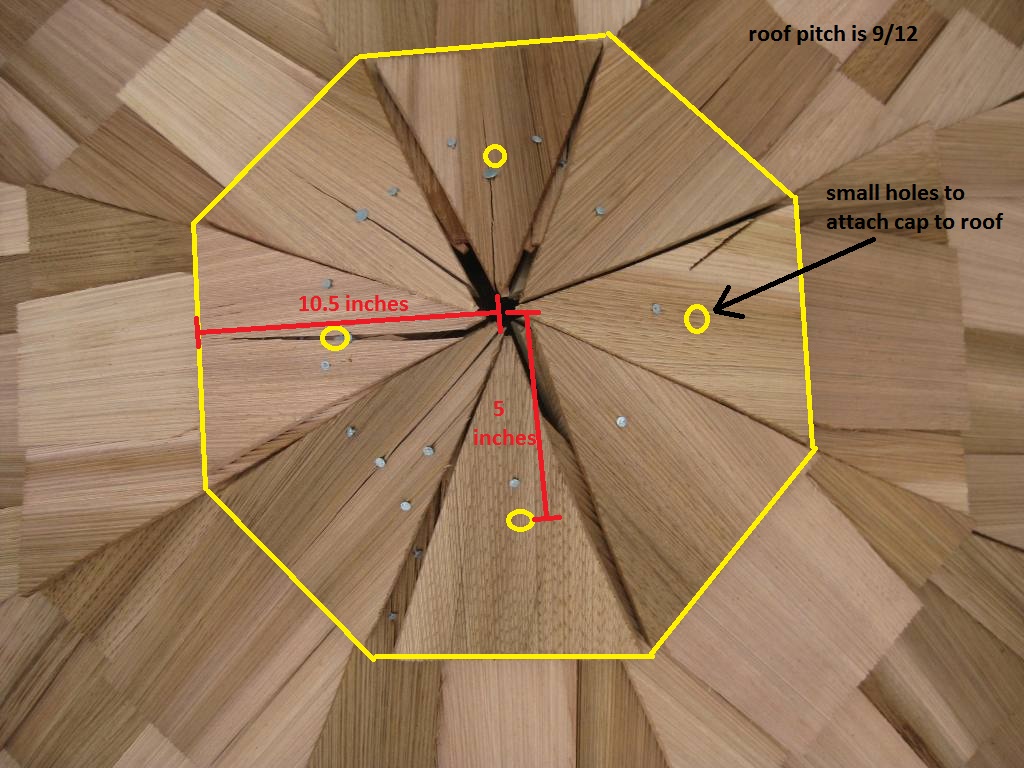
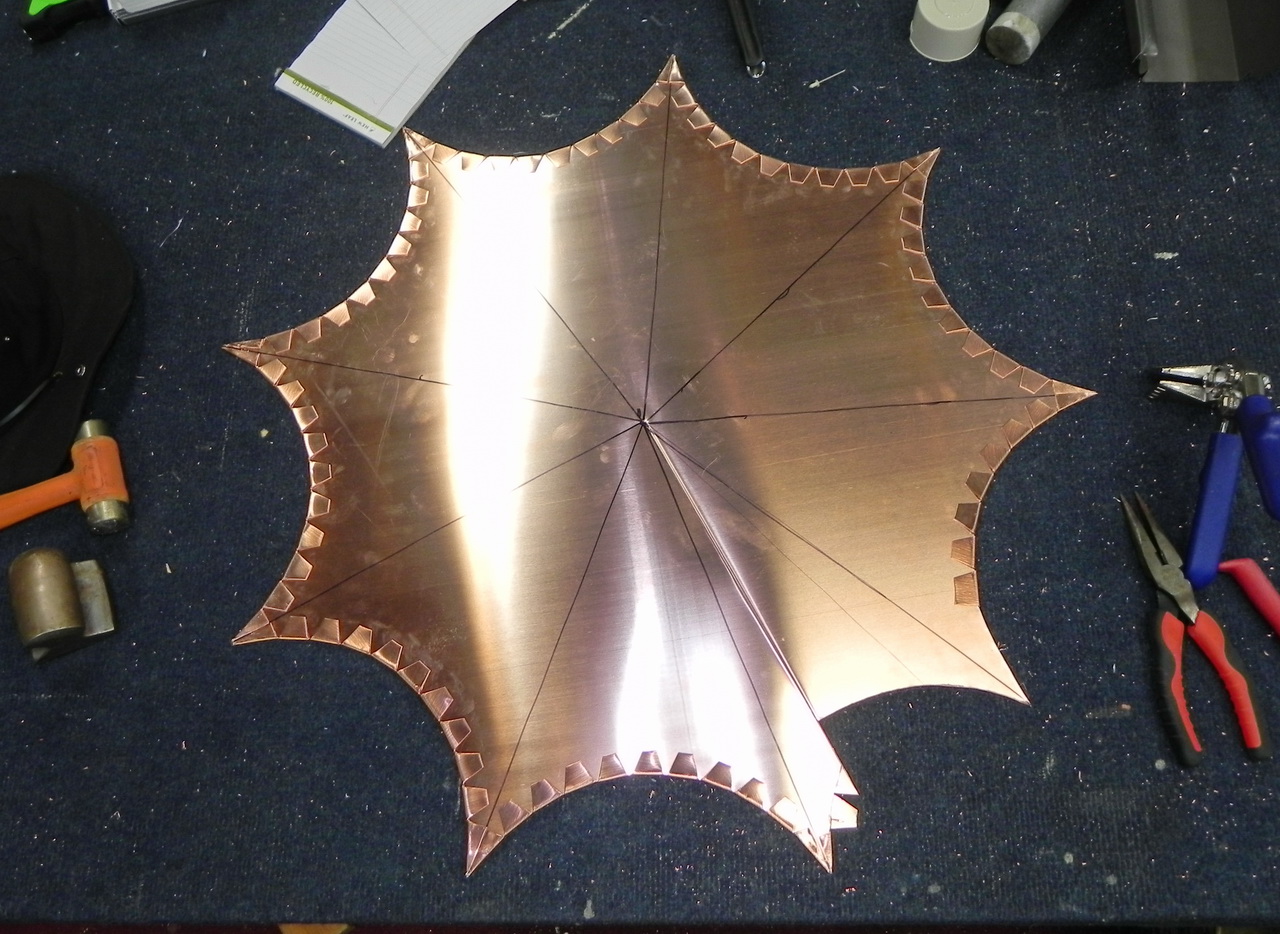
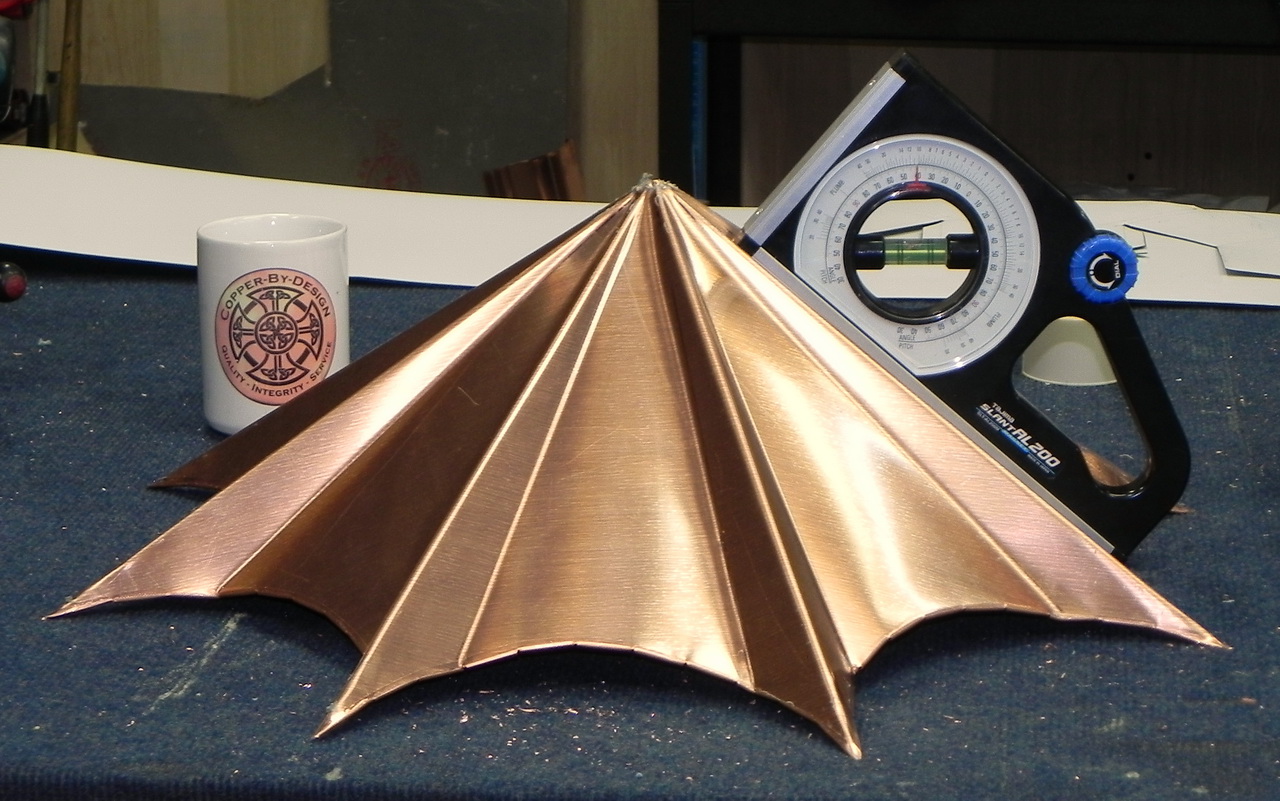
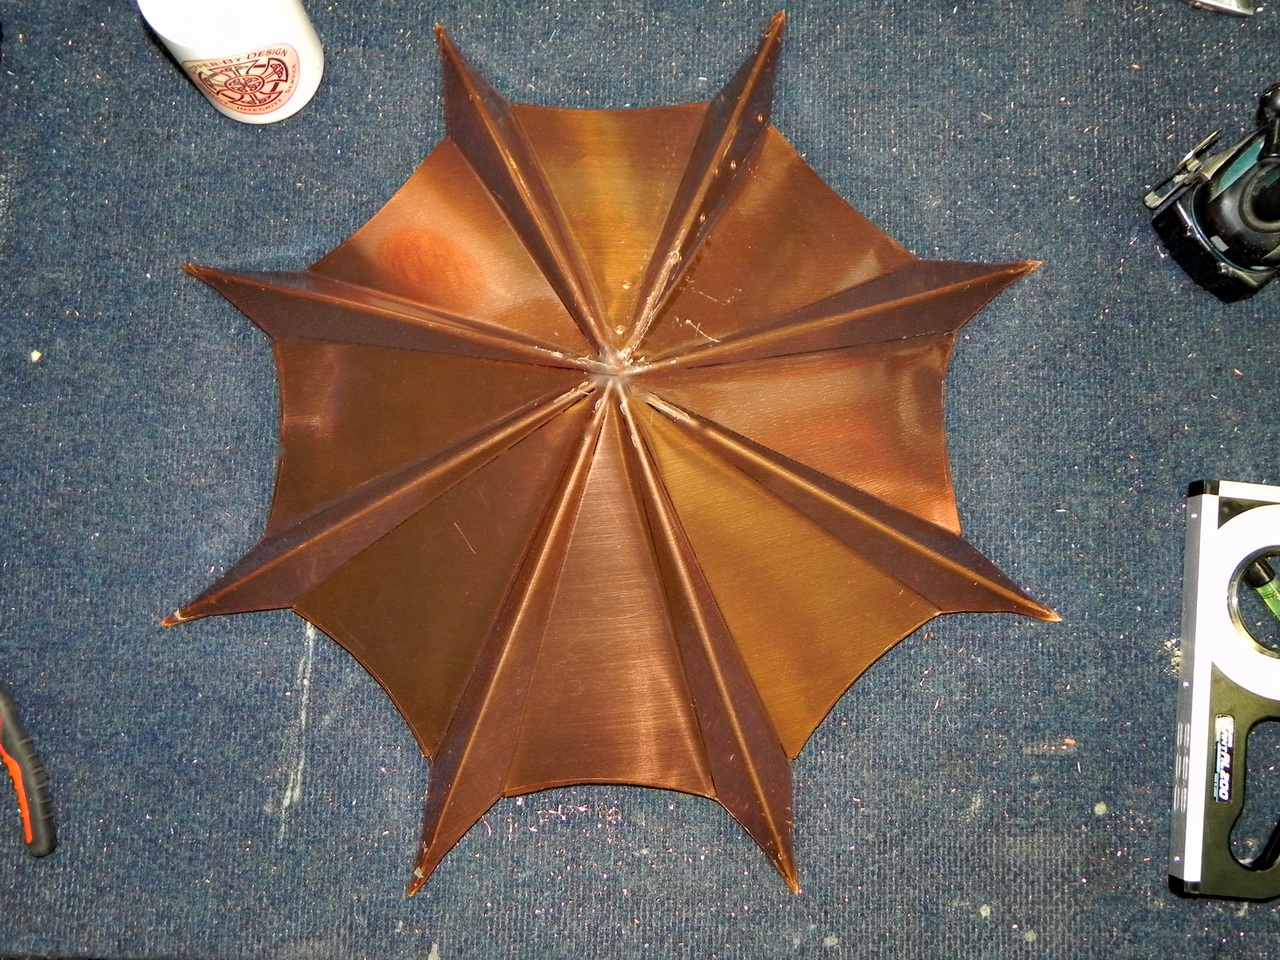
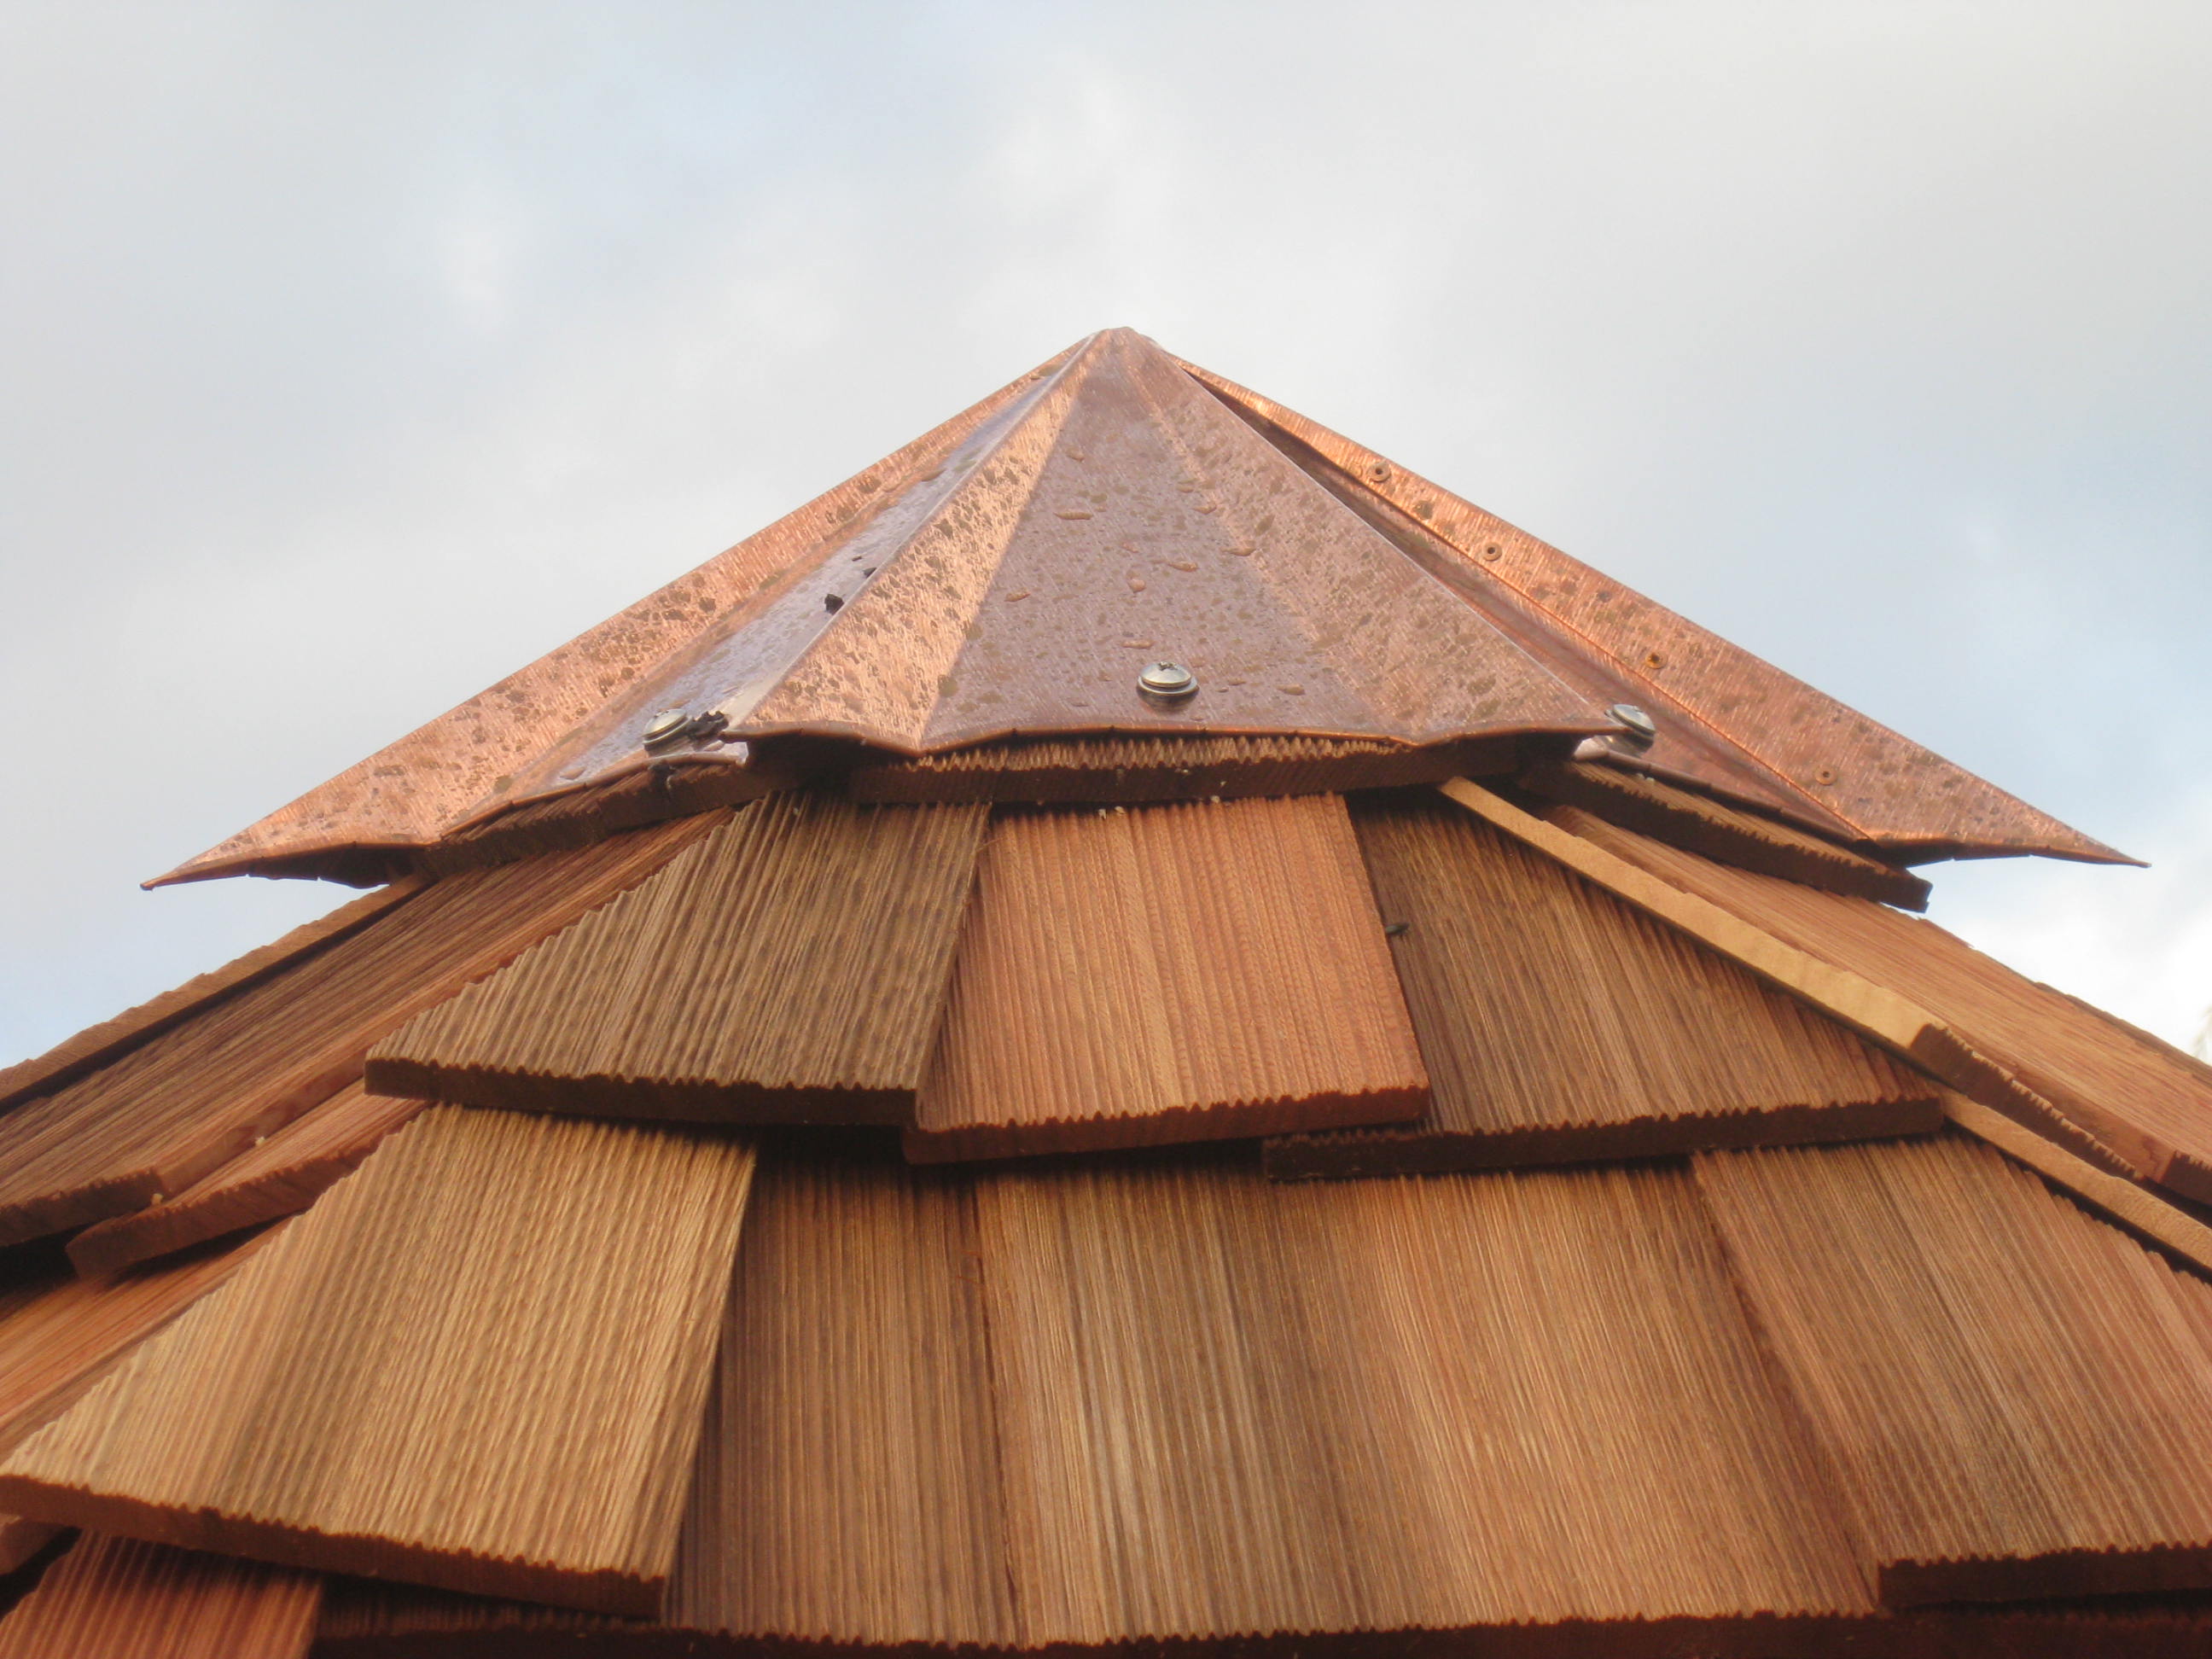
 I would be making the top look better with a cap of some sort...
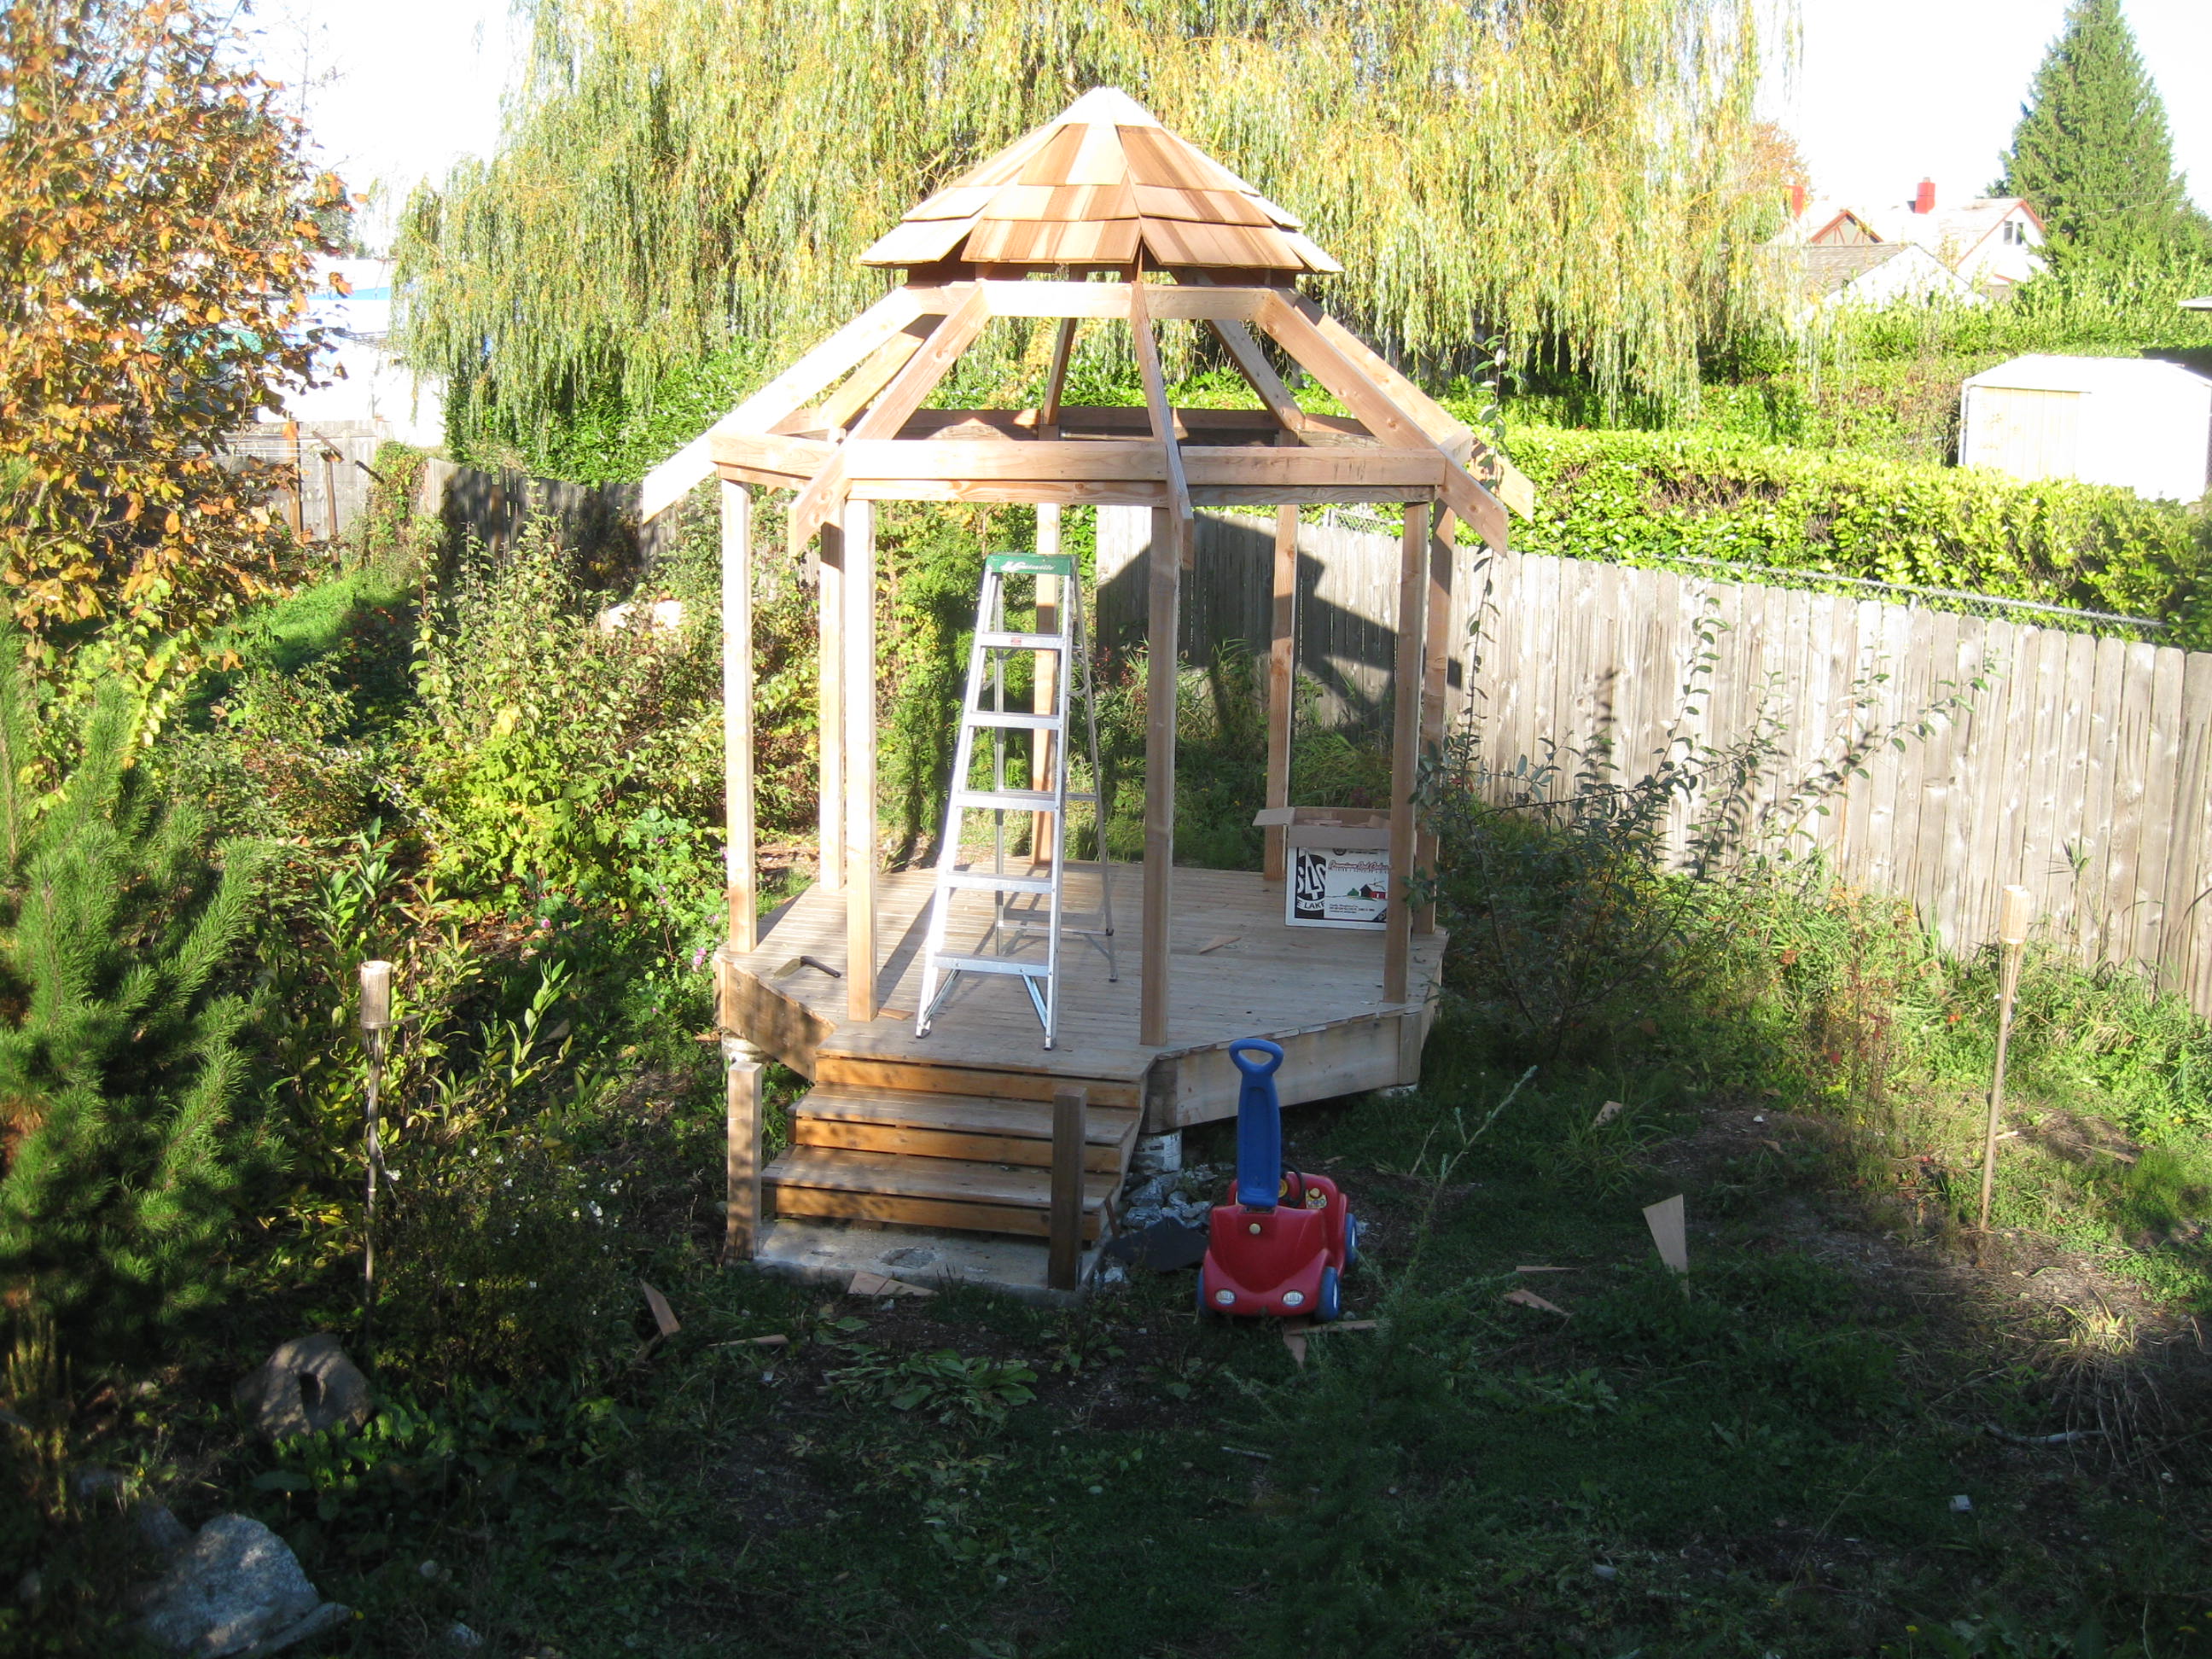
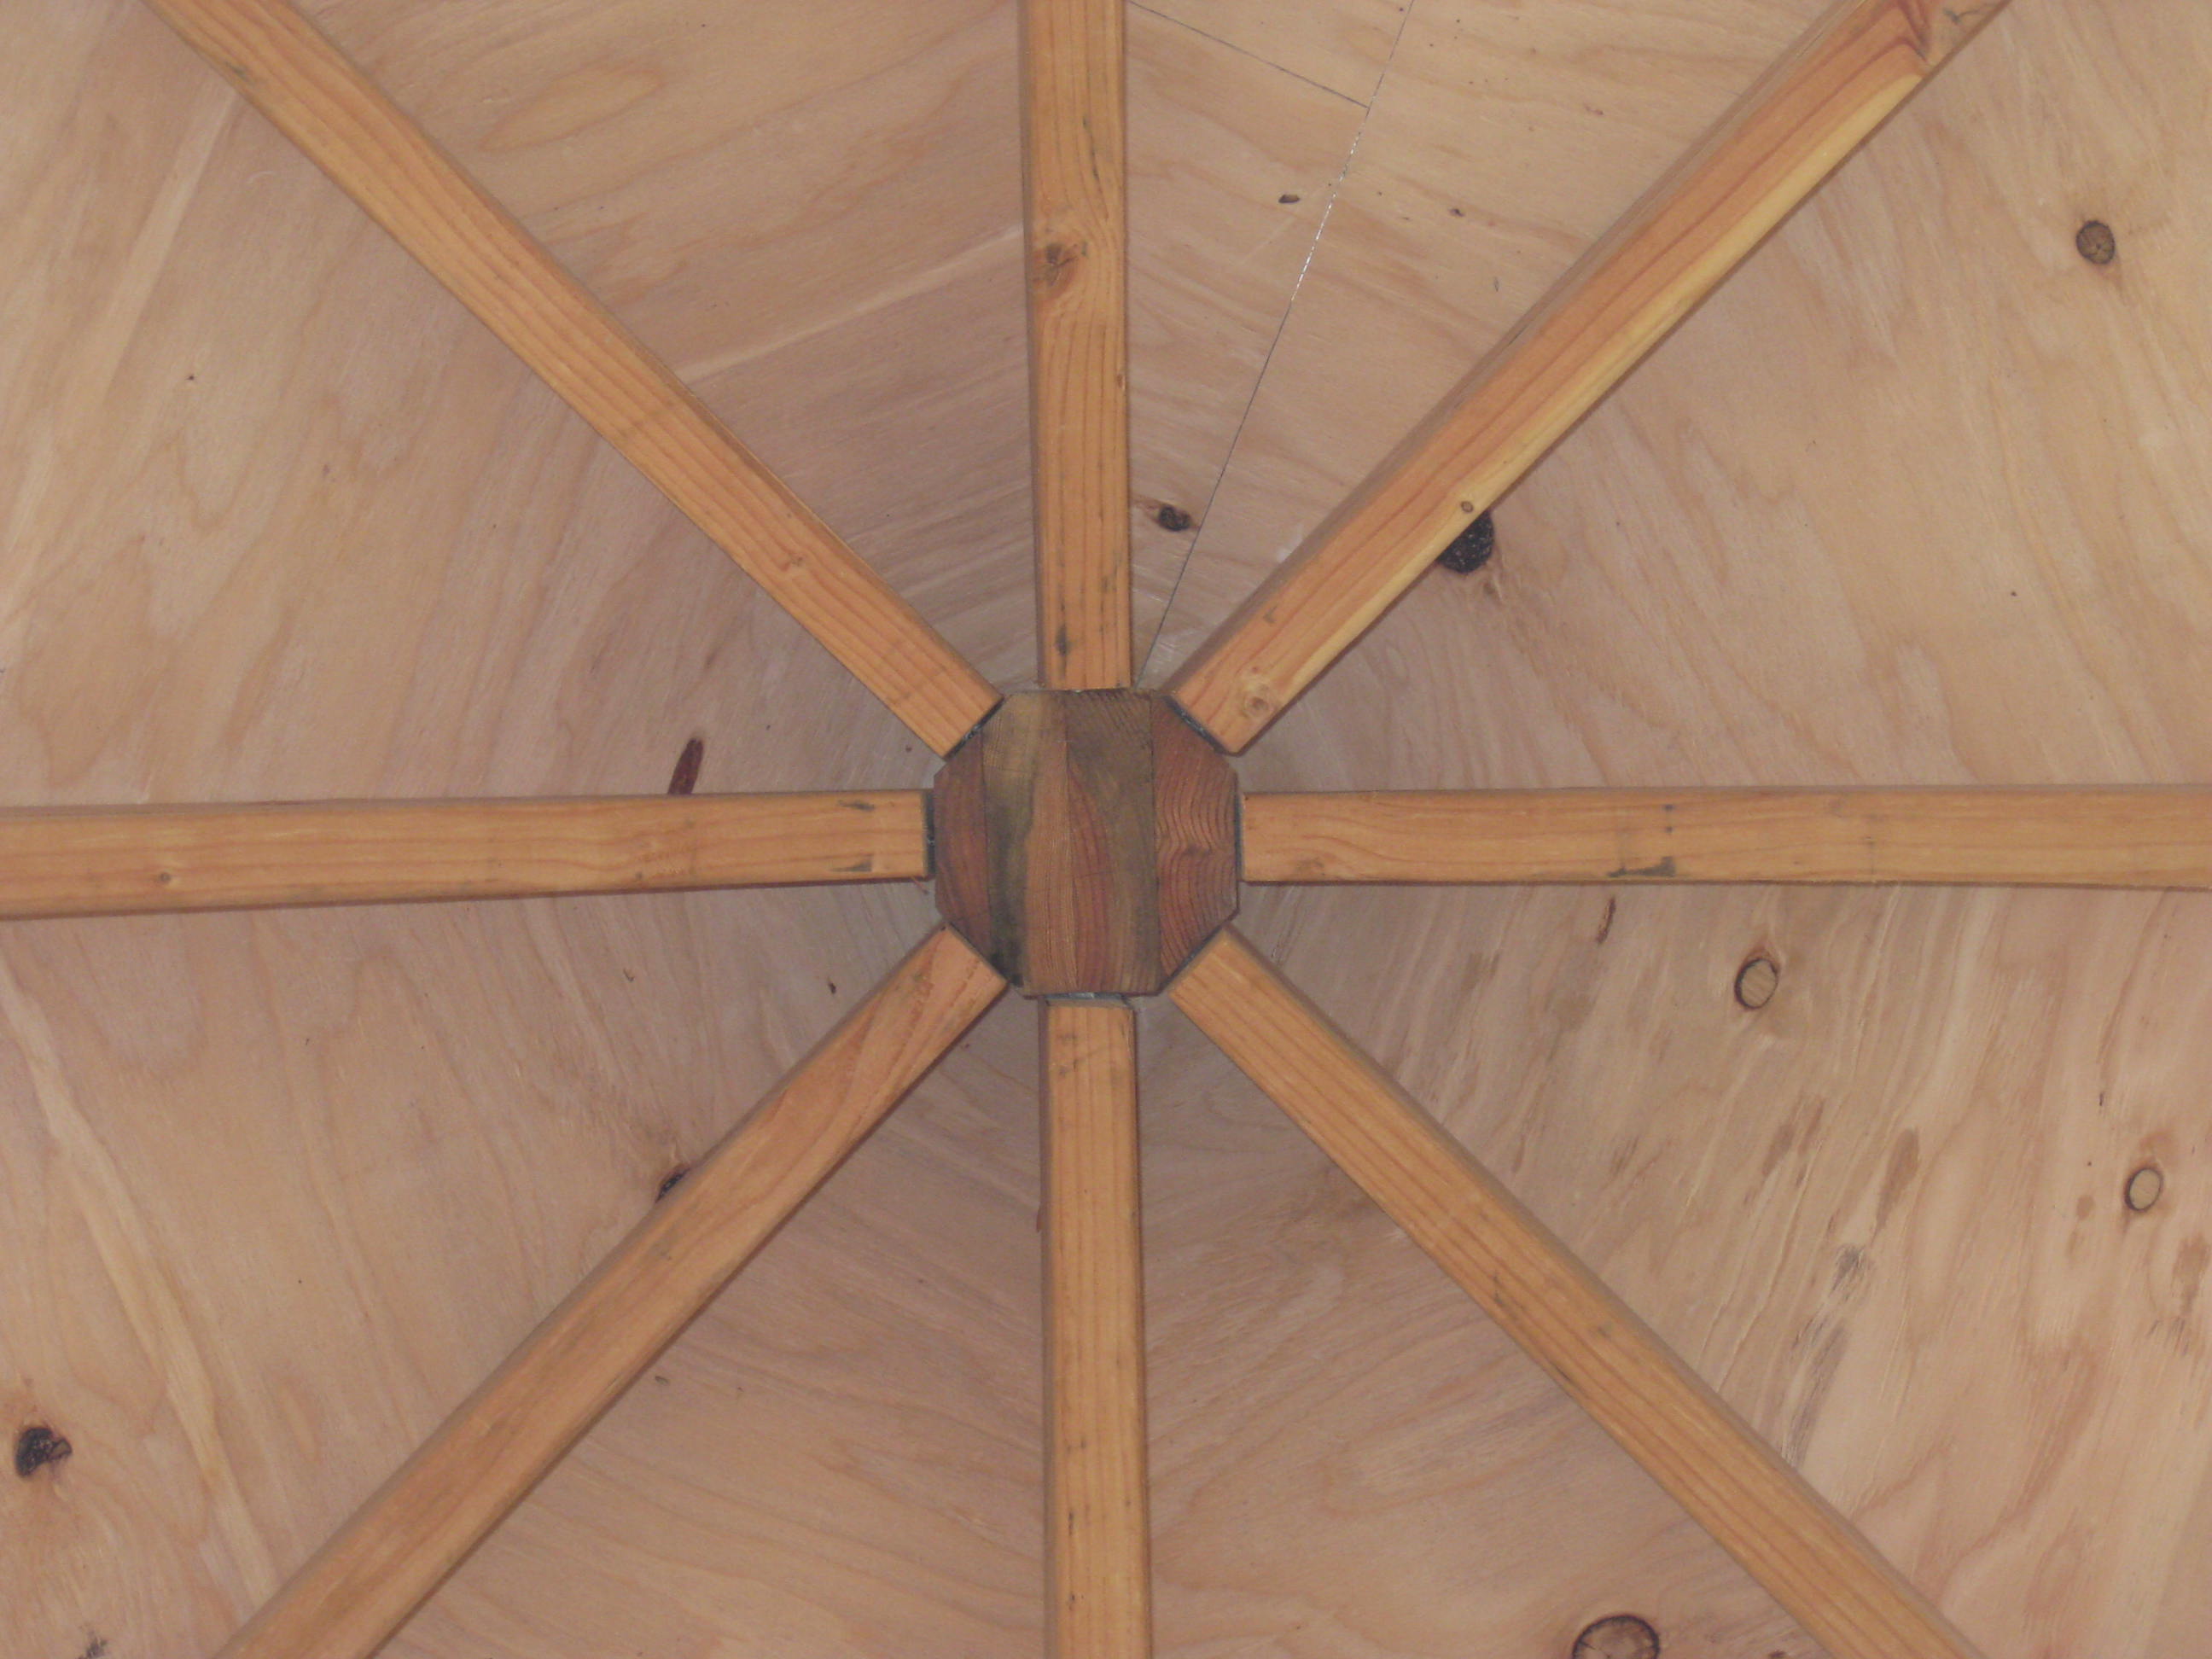
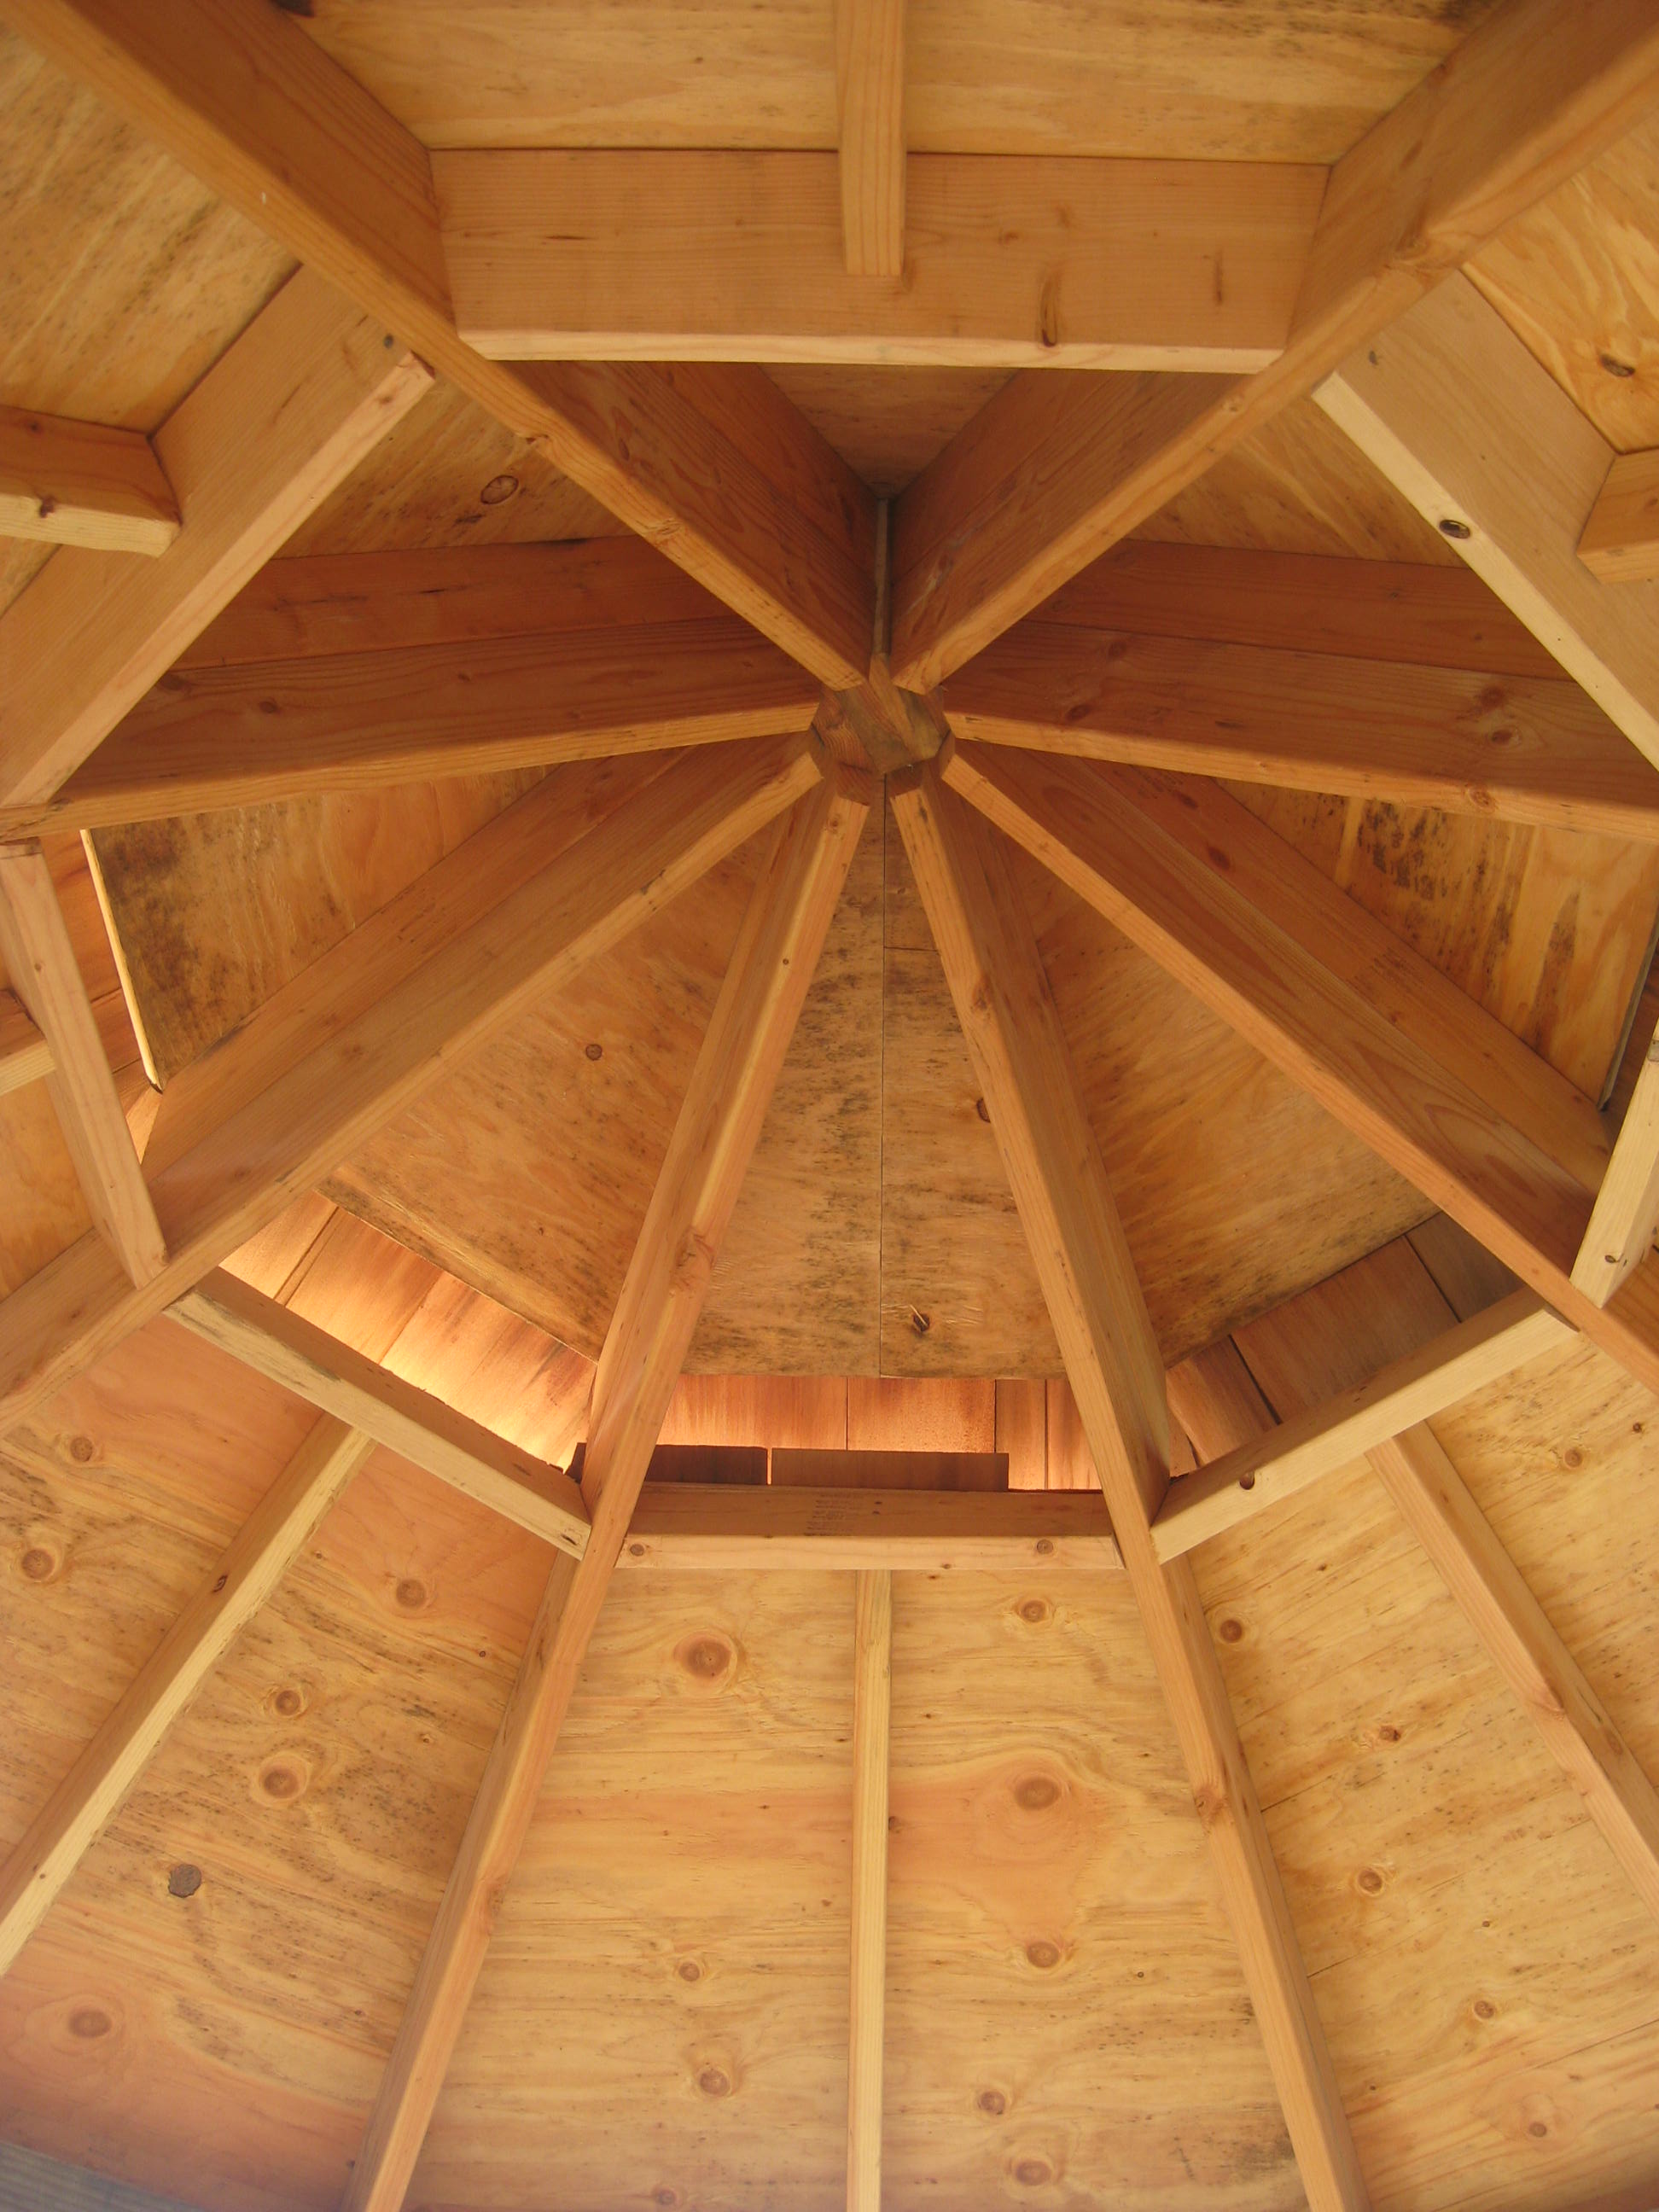
 I added one peice of radial blocking on the lower roof, between each rafter, for the panels to attach to.
Then, I built eight panels and installed them.
I added one peice of radial blocking on the lower roof, between each rafter, for the panels to attach to.
Then, I built eight panels and installed them. 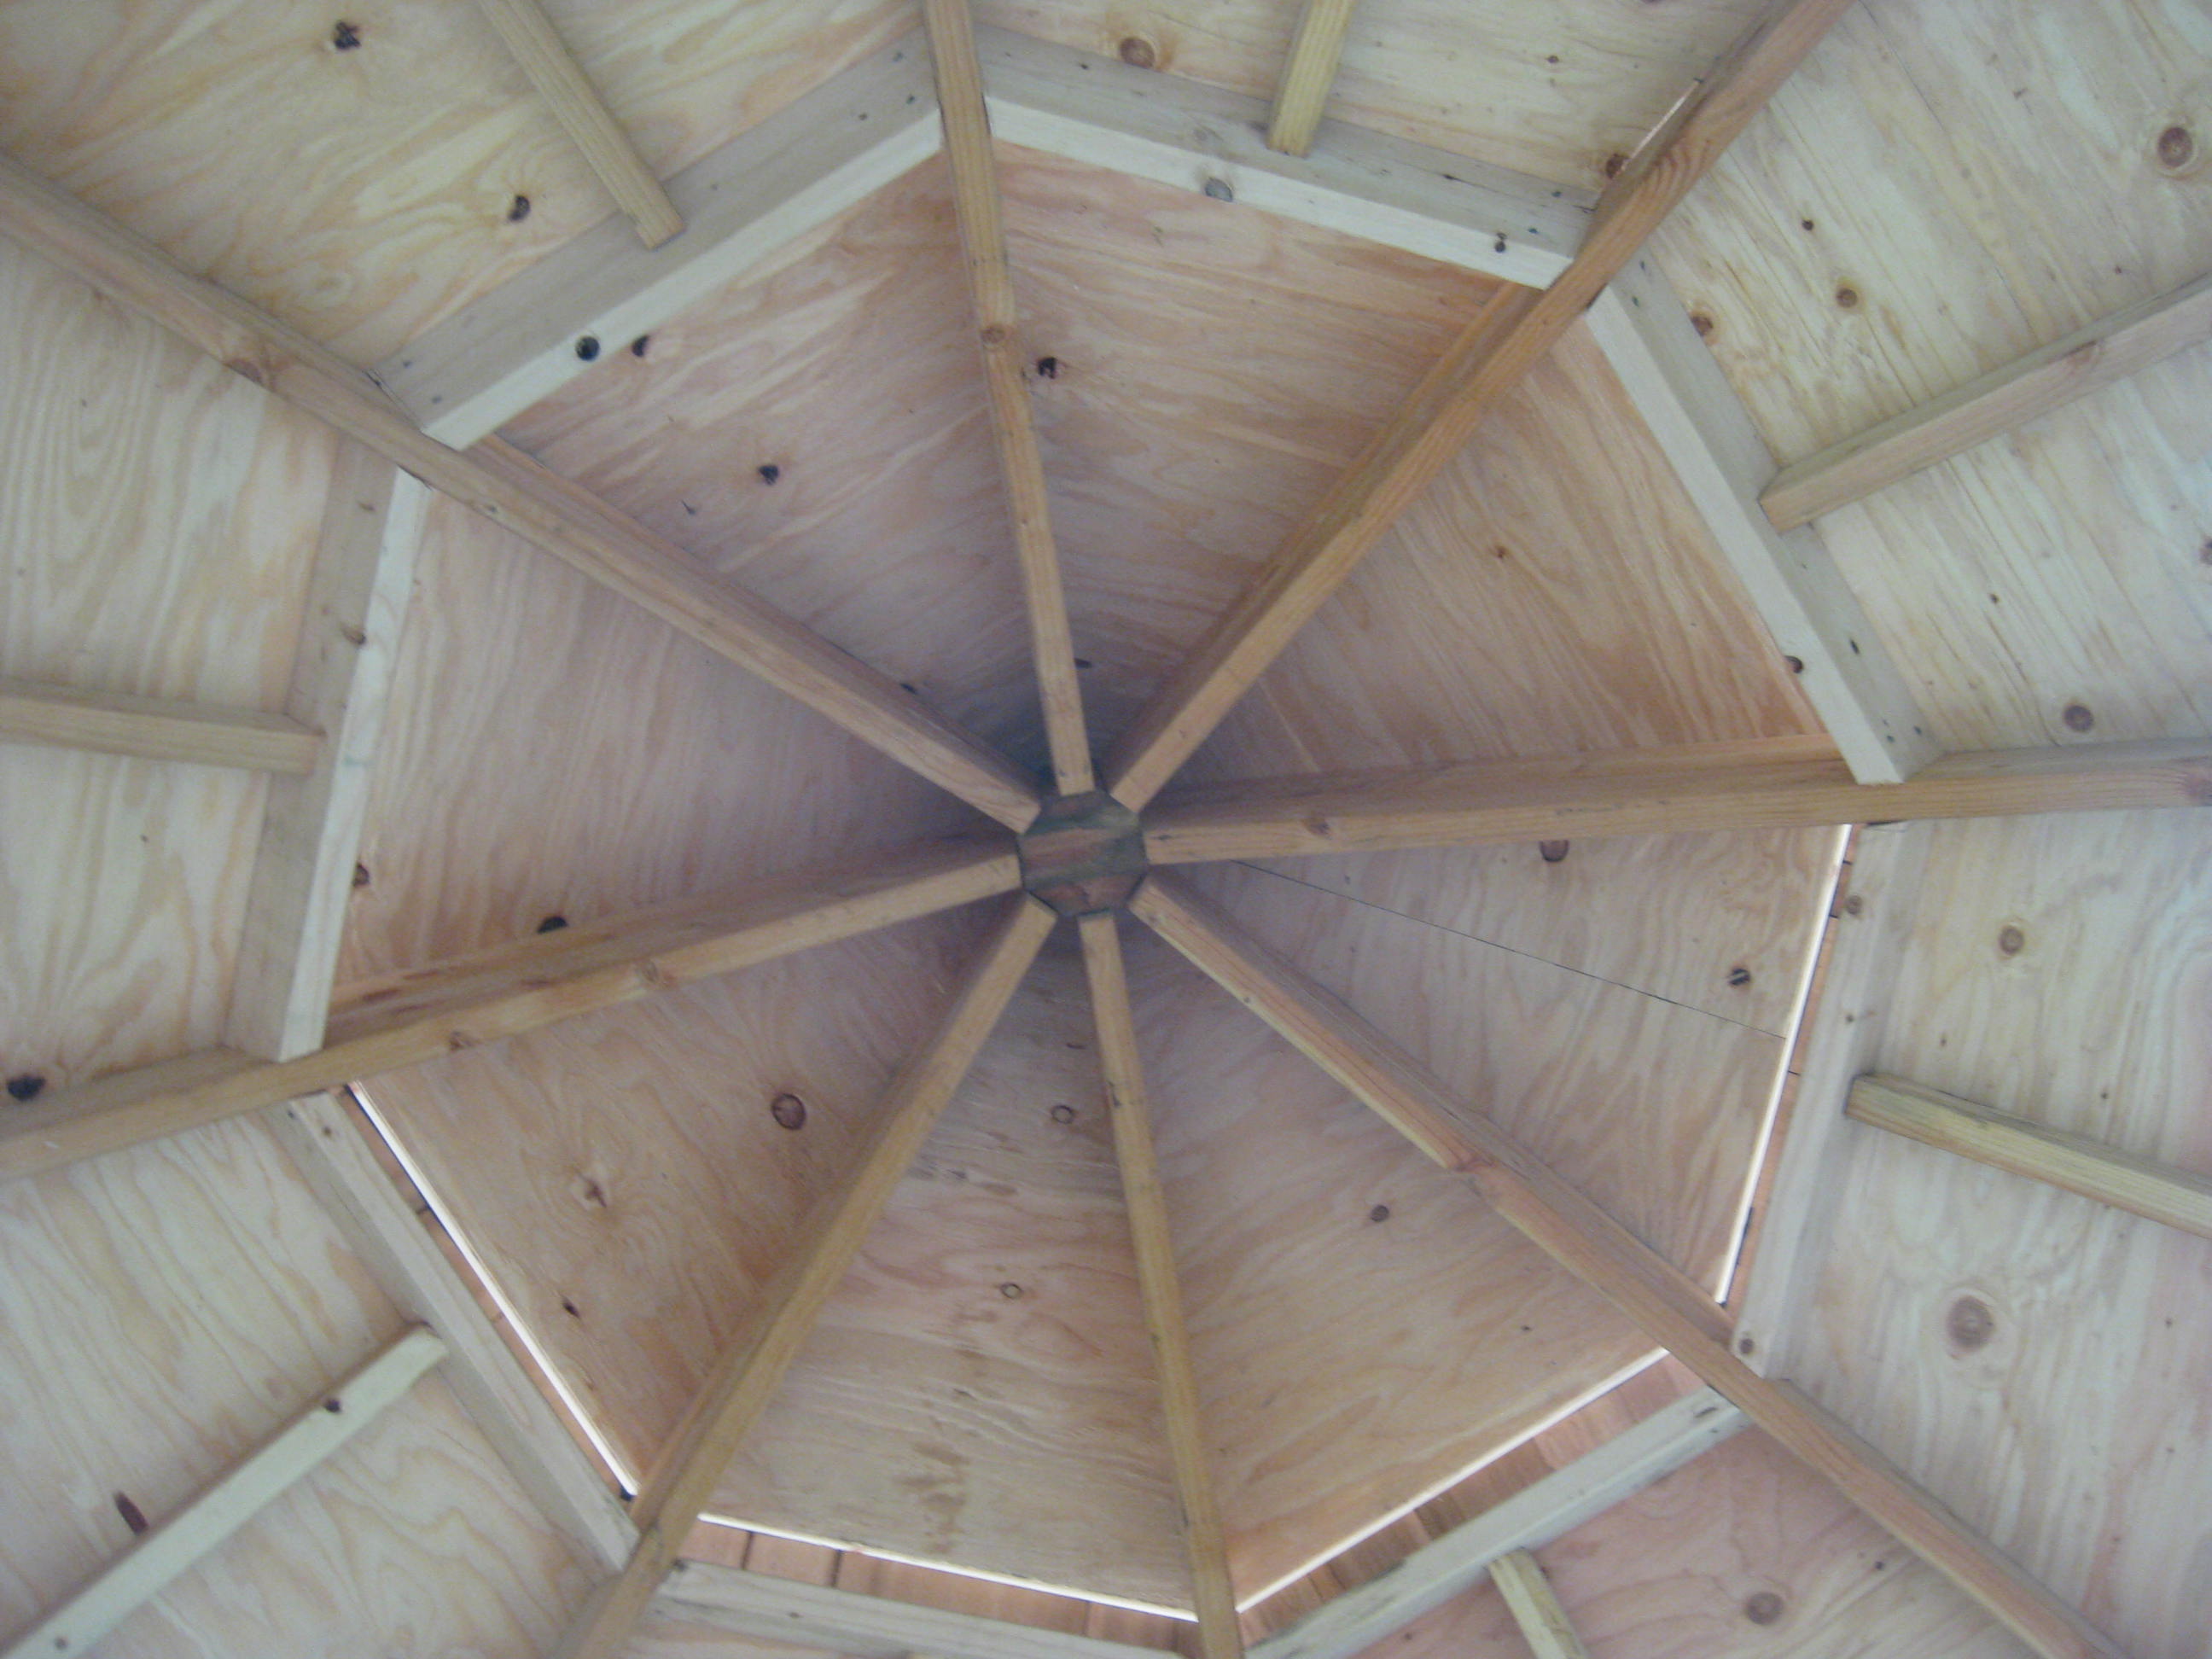 My first glimpse of what the completed ceiling would look like.
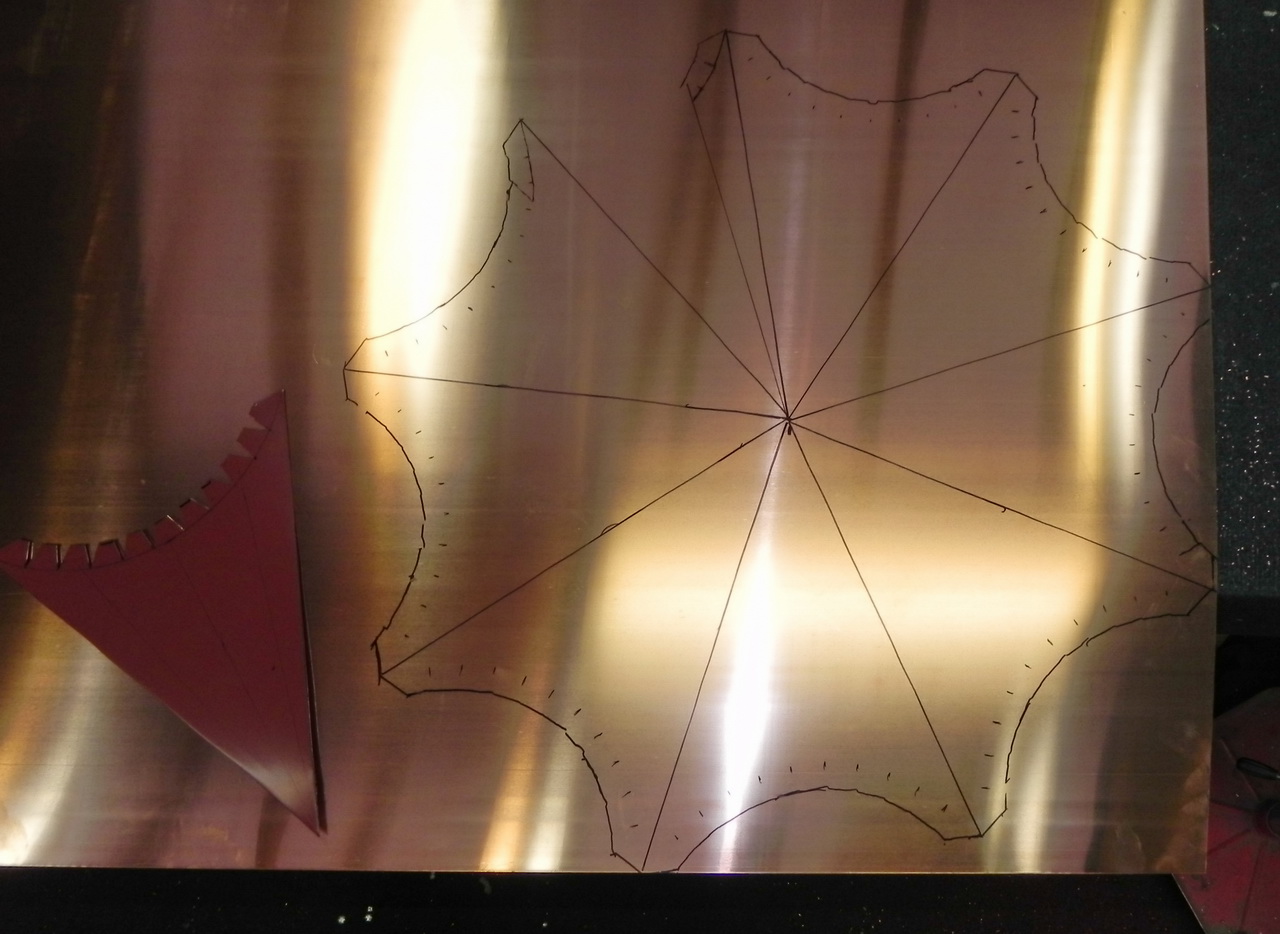
 I sent him this sketch.
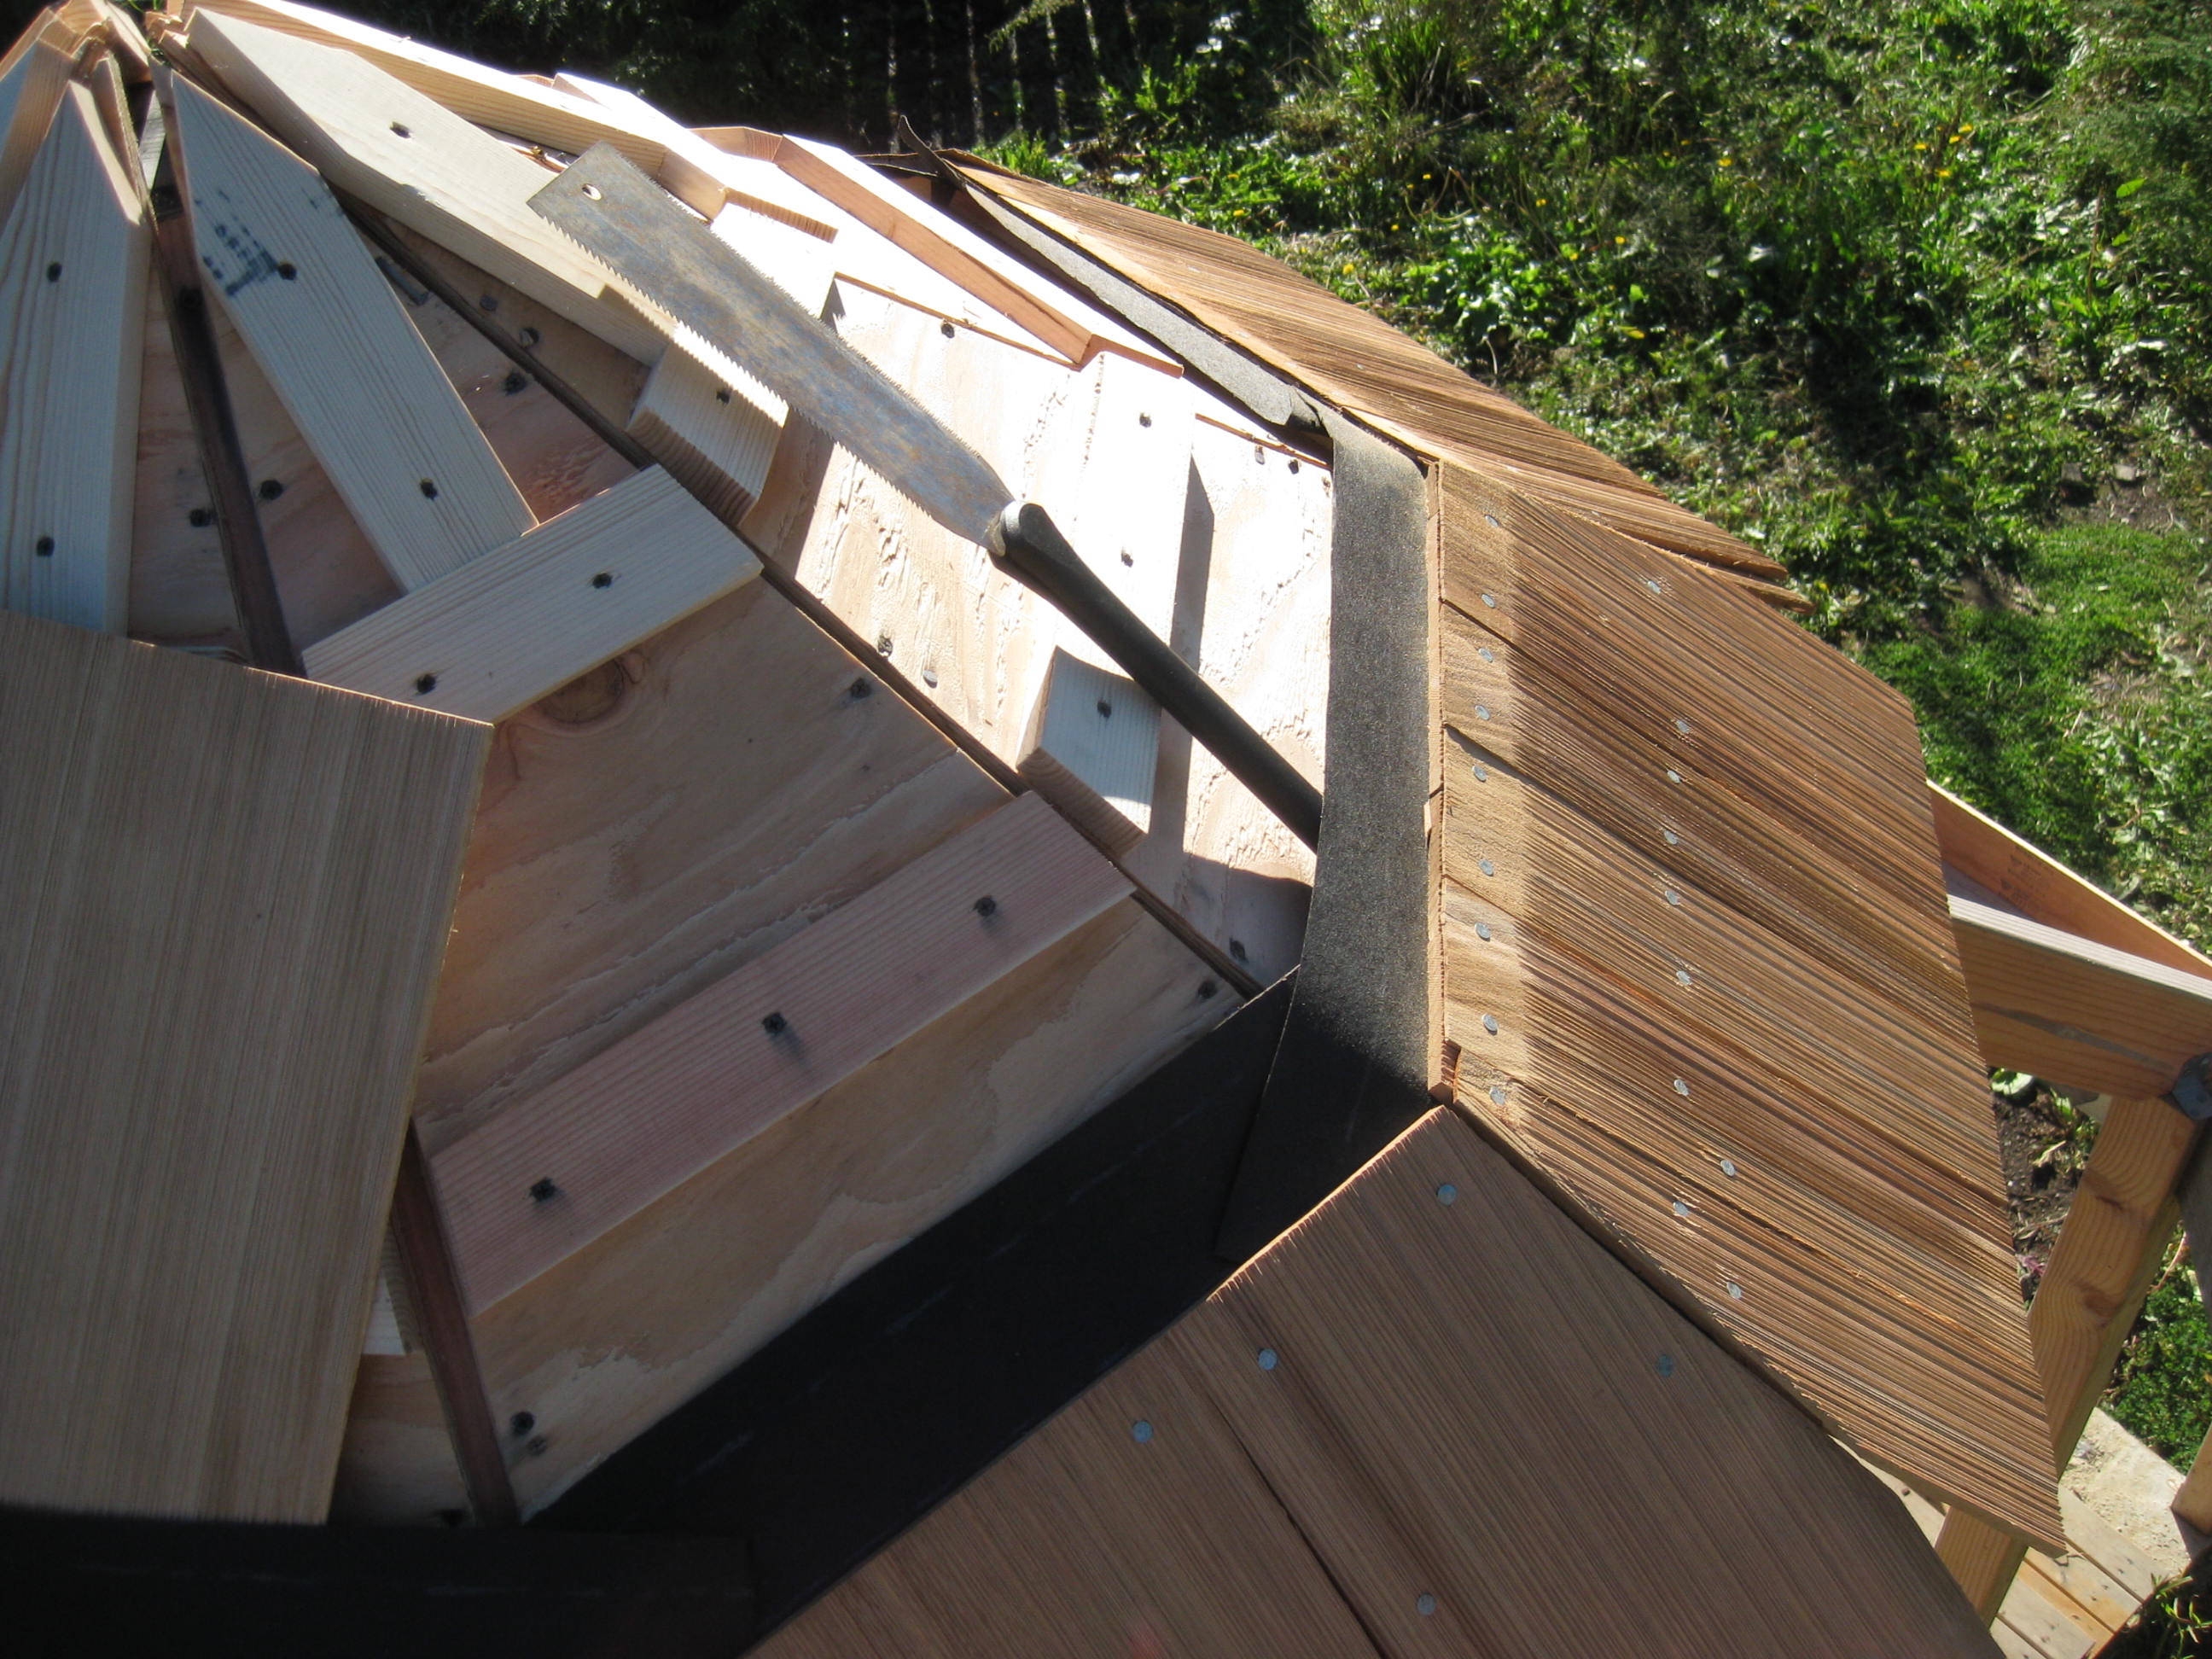
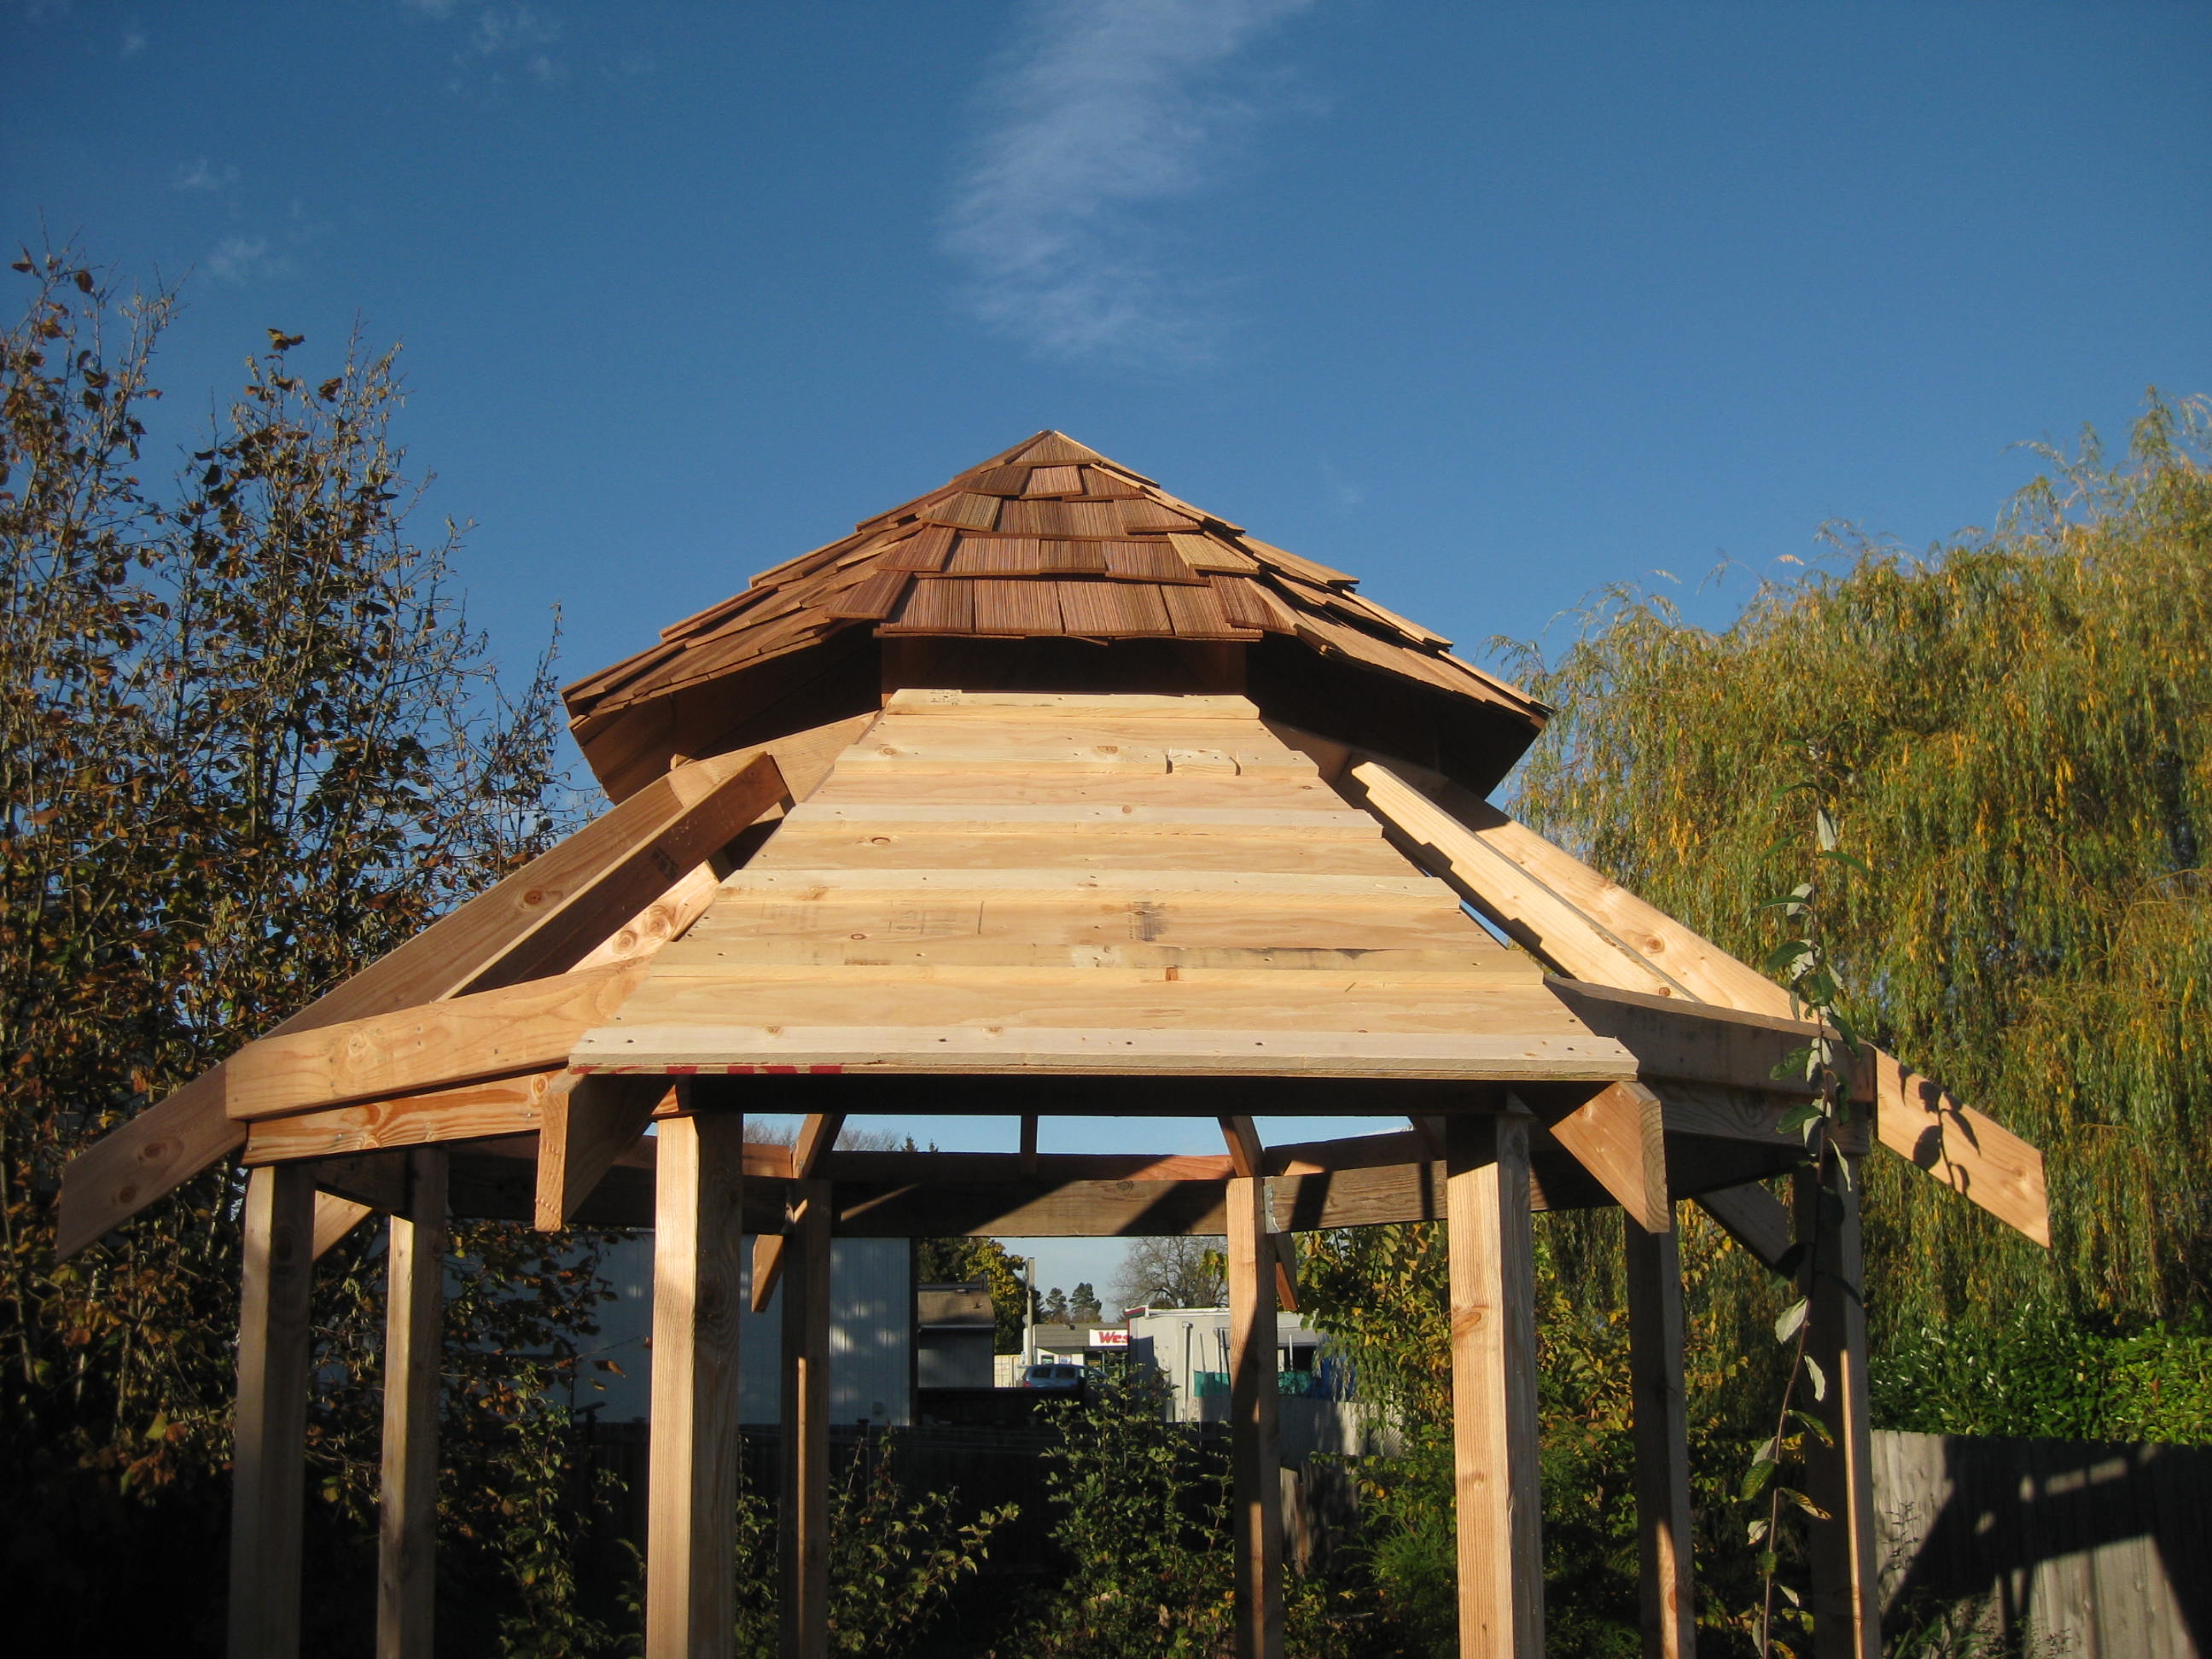
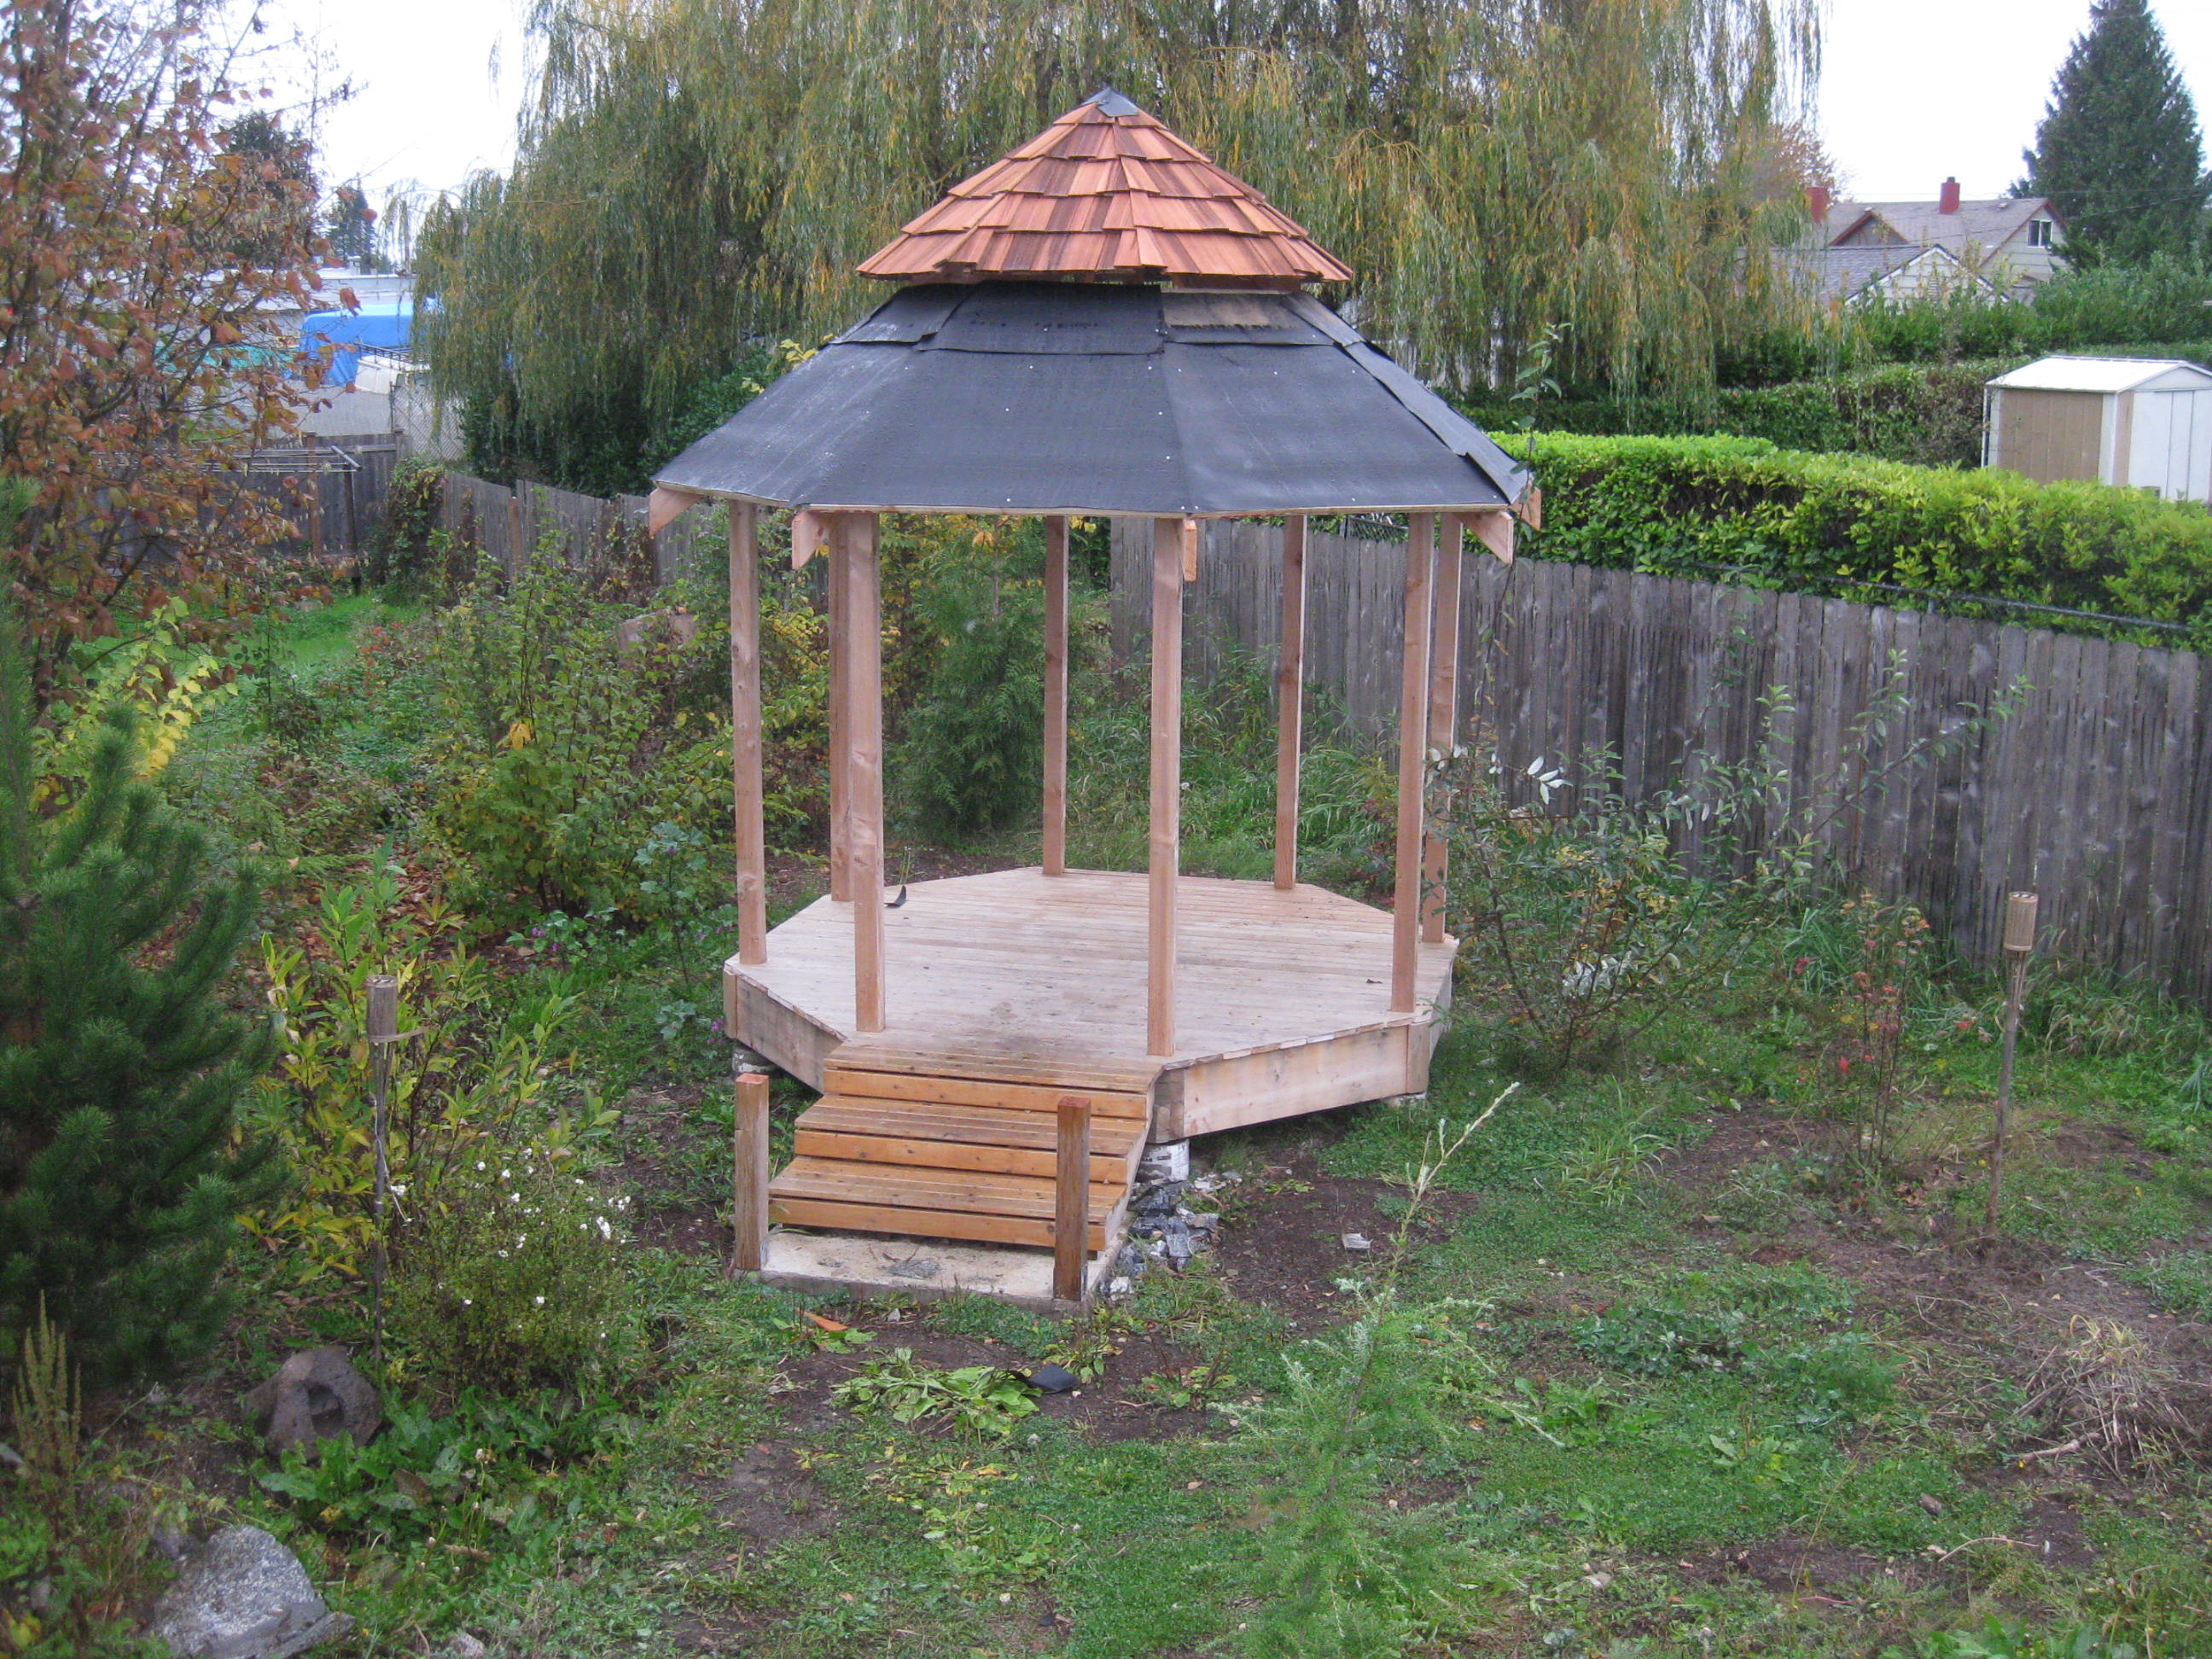
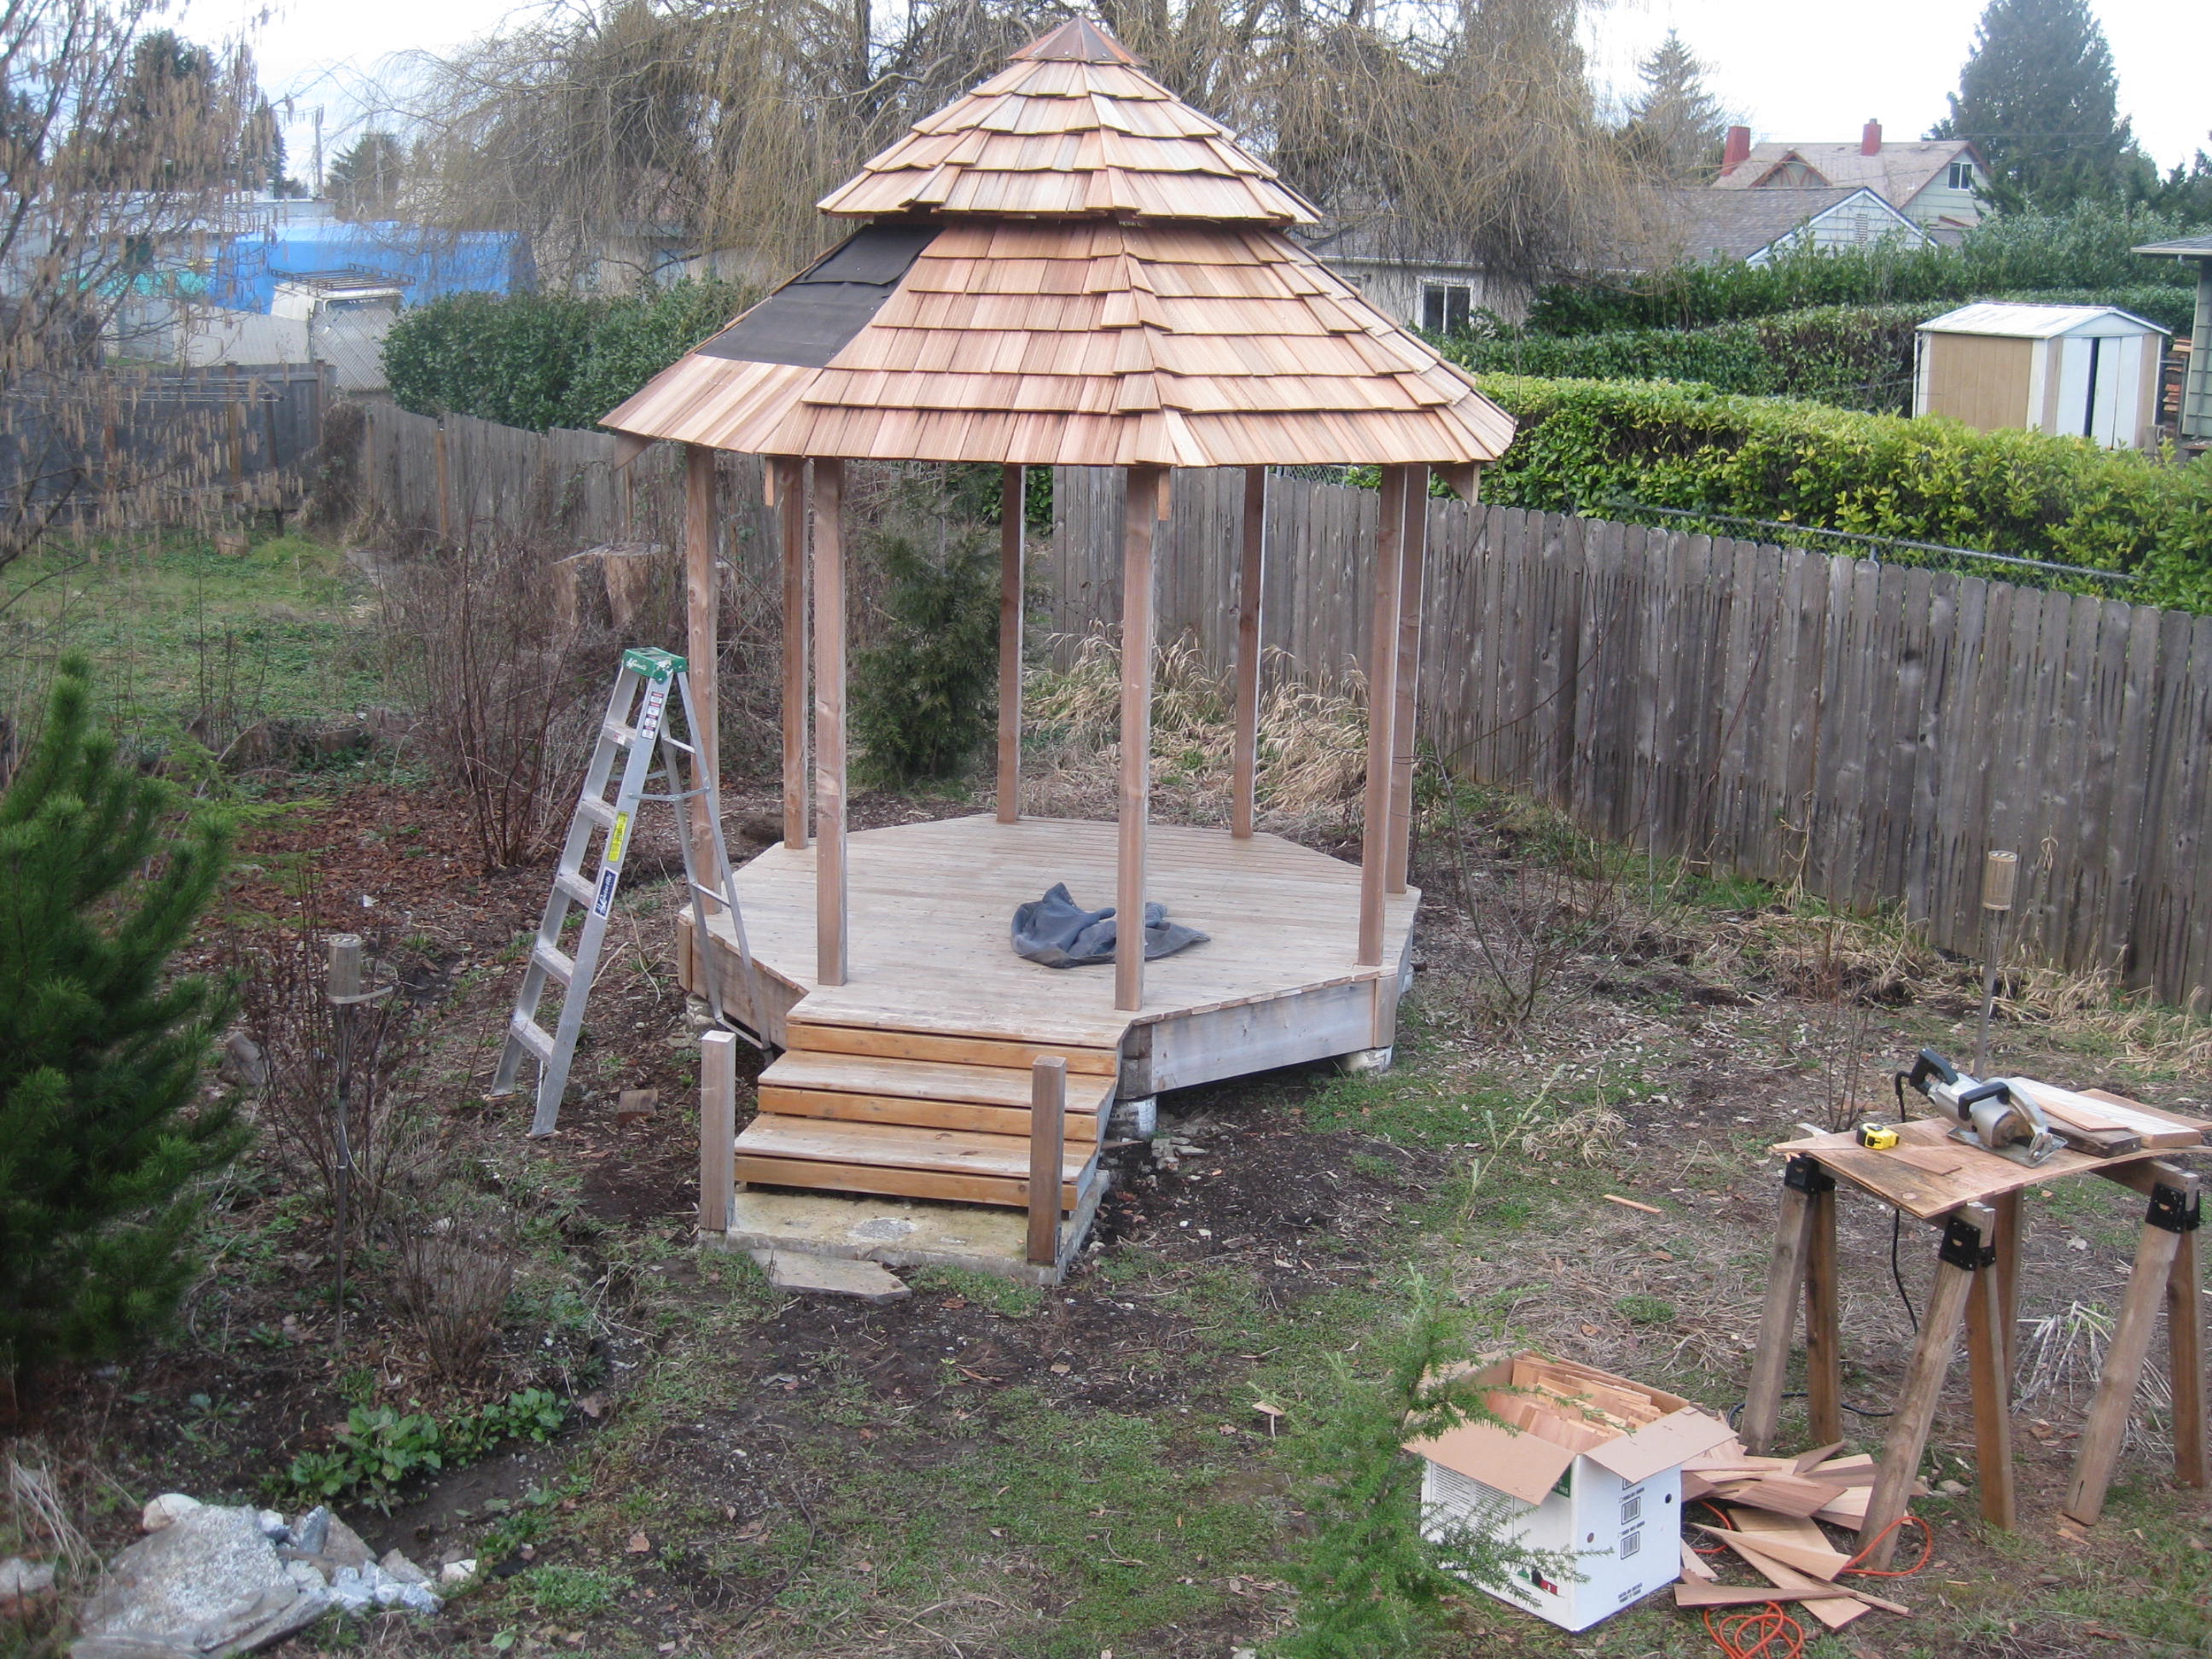
 Winter was arriving by this time, and I was nervous about my nice plywood panels getting soaked.
I covered the lower panels in roofing paper and hoped for the best.
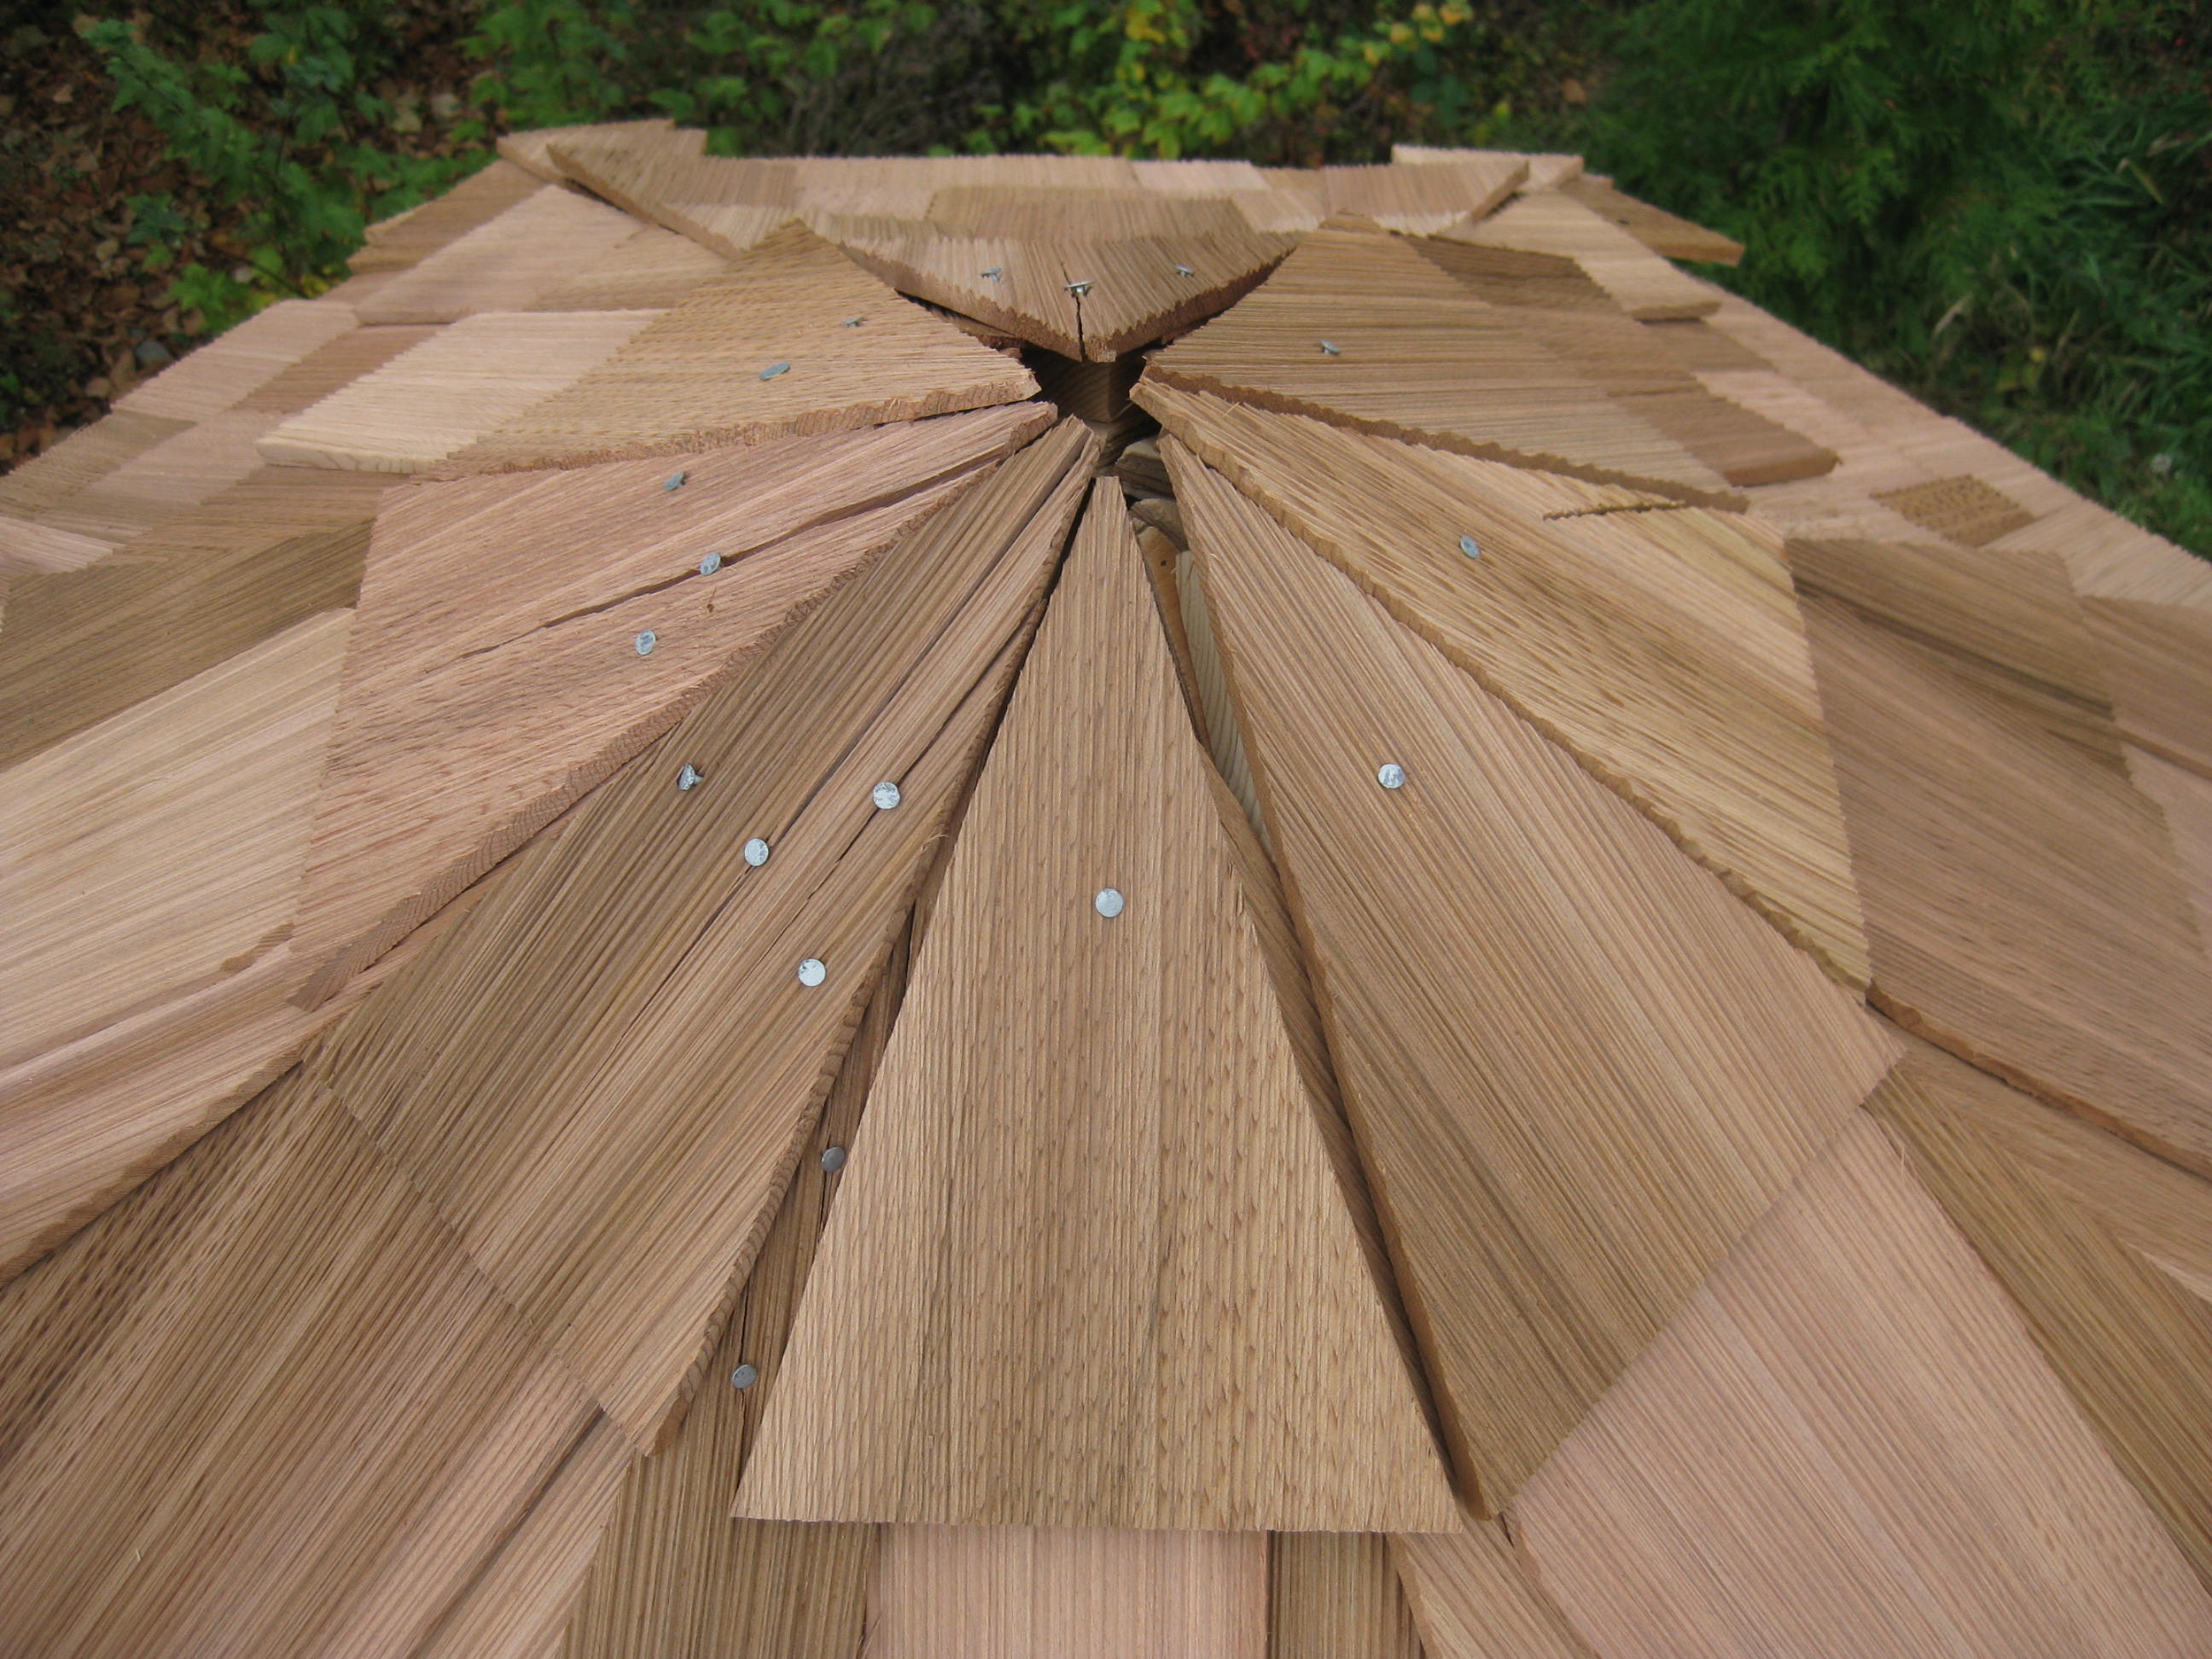
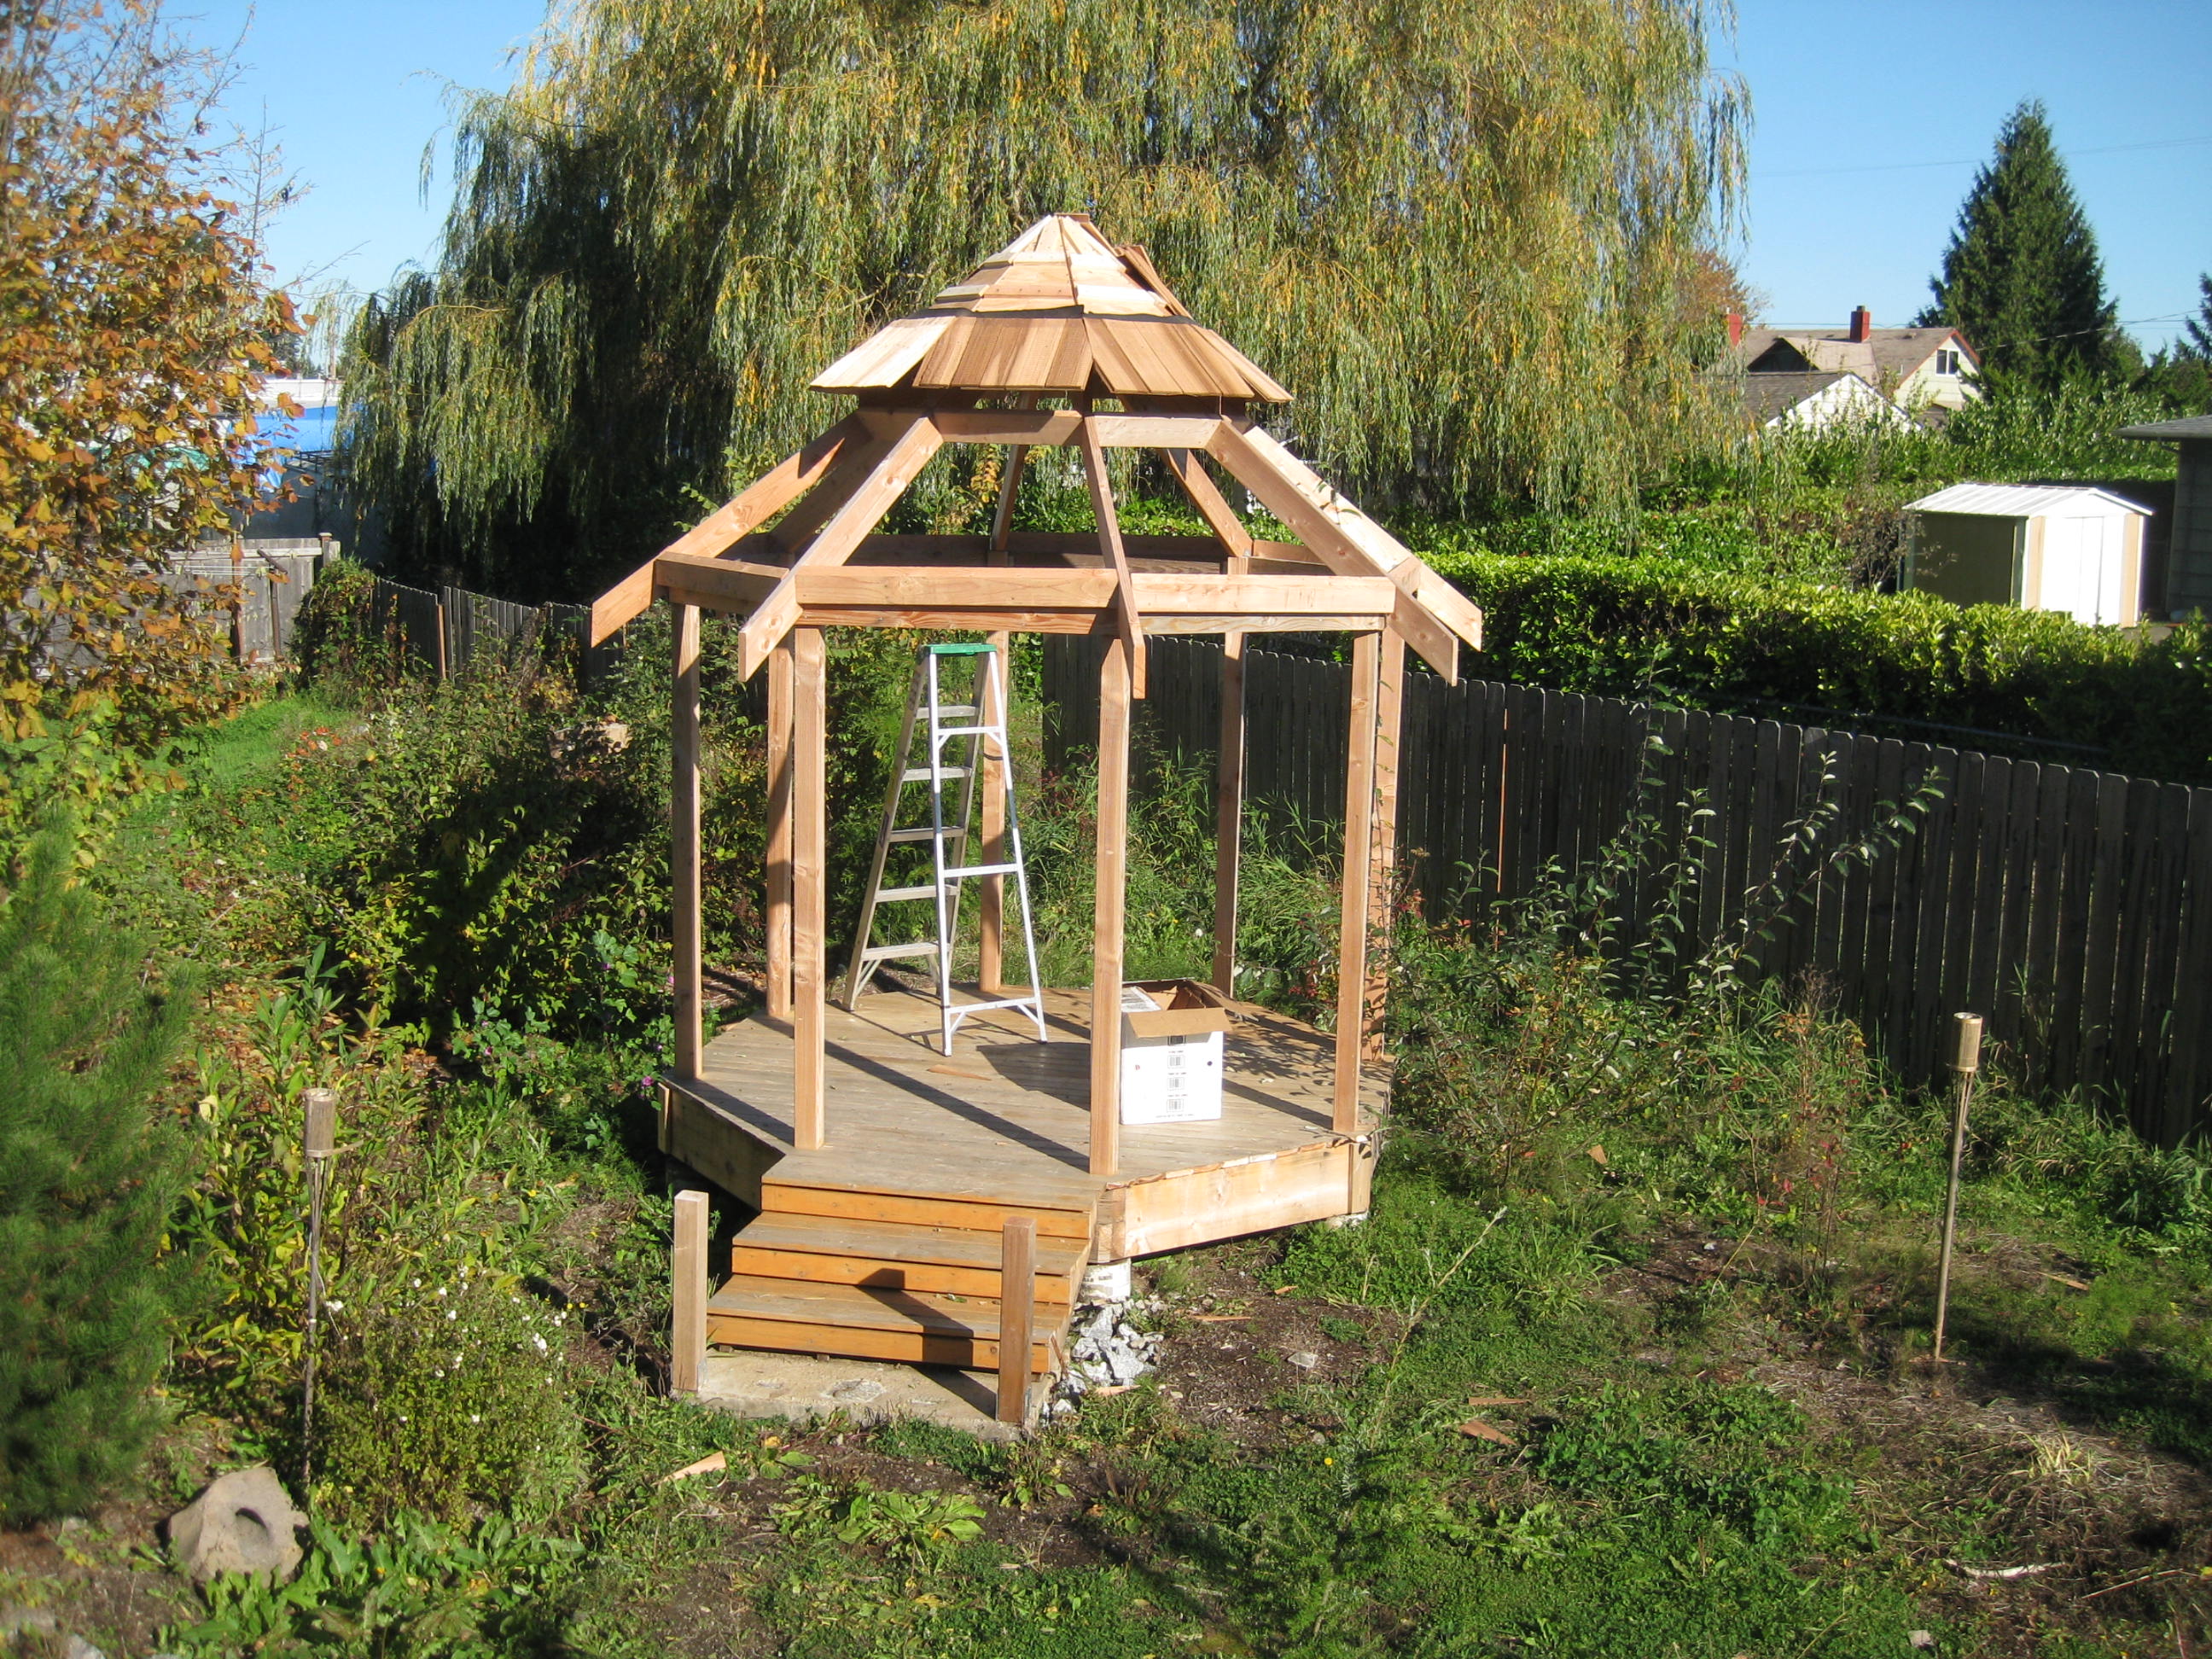
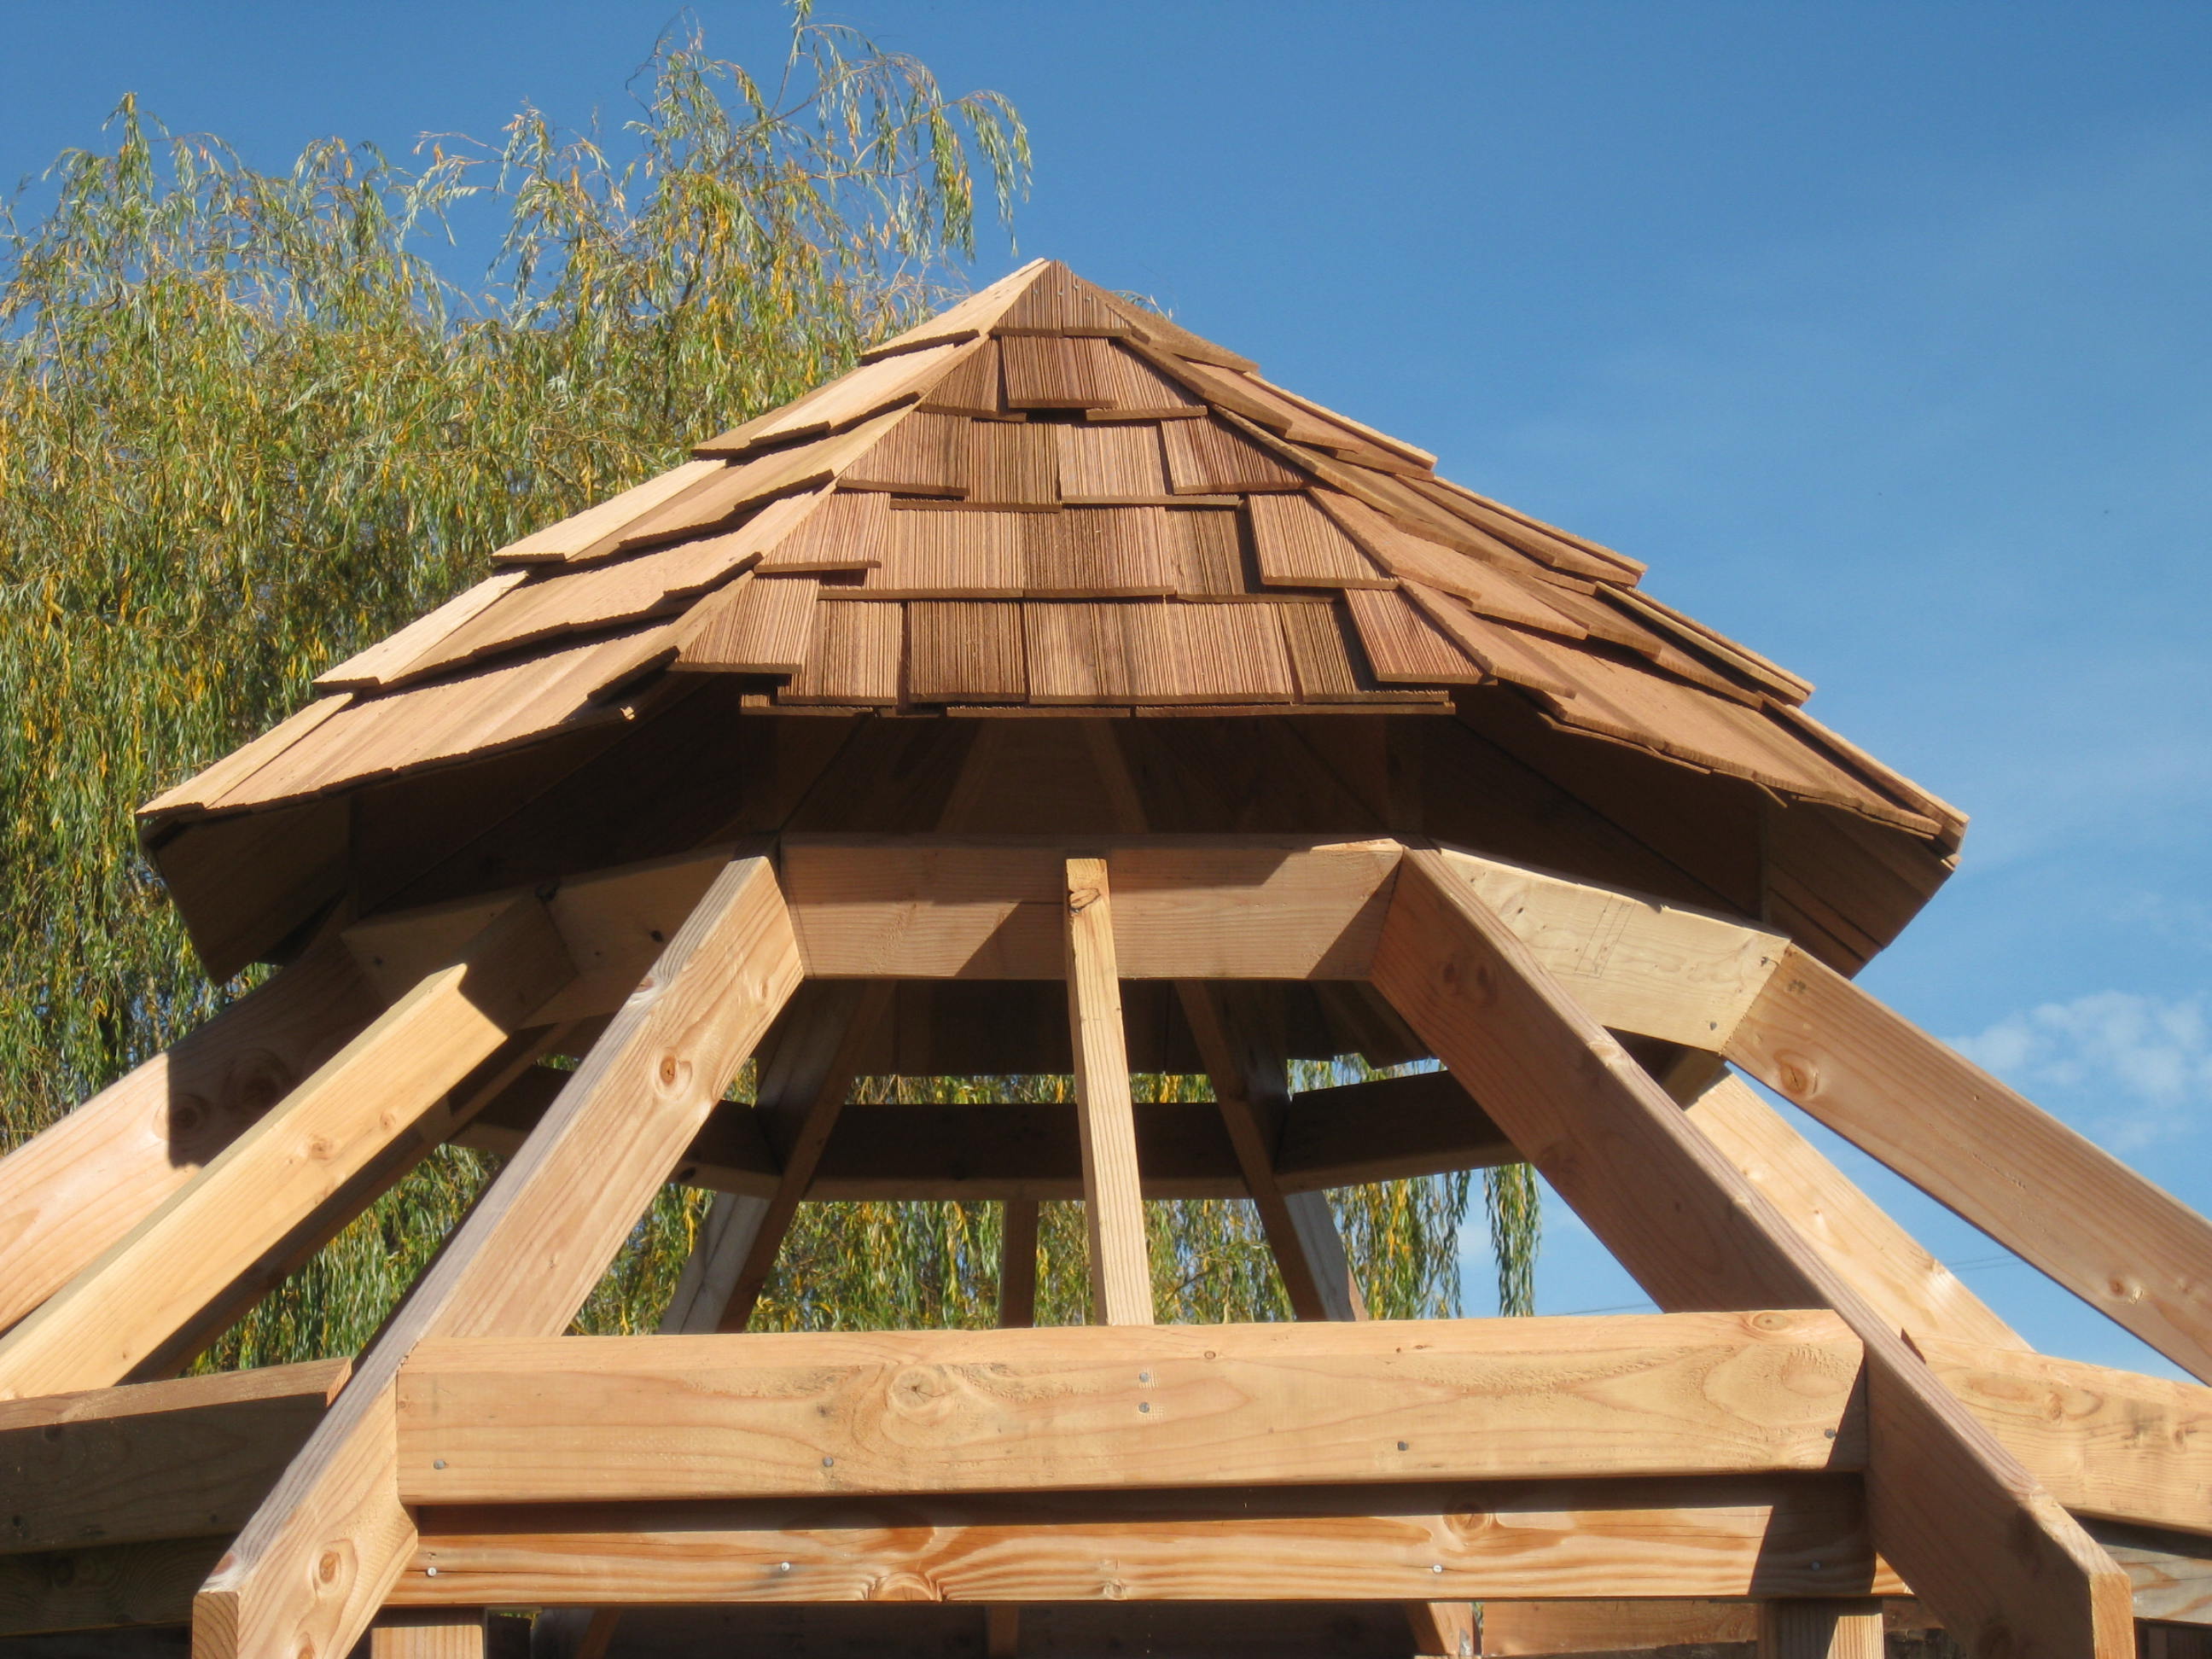
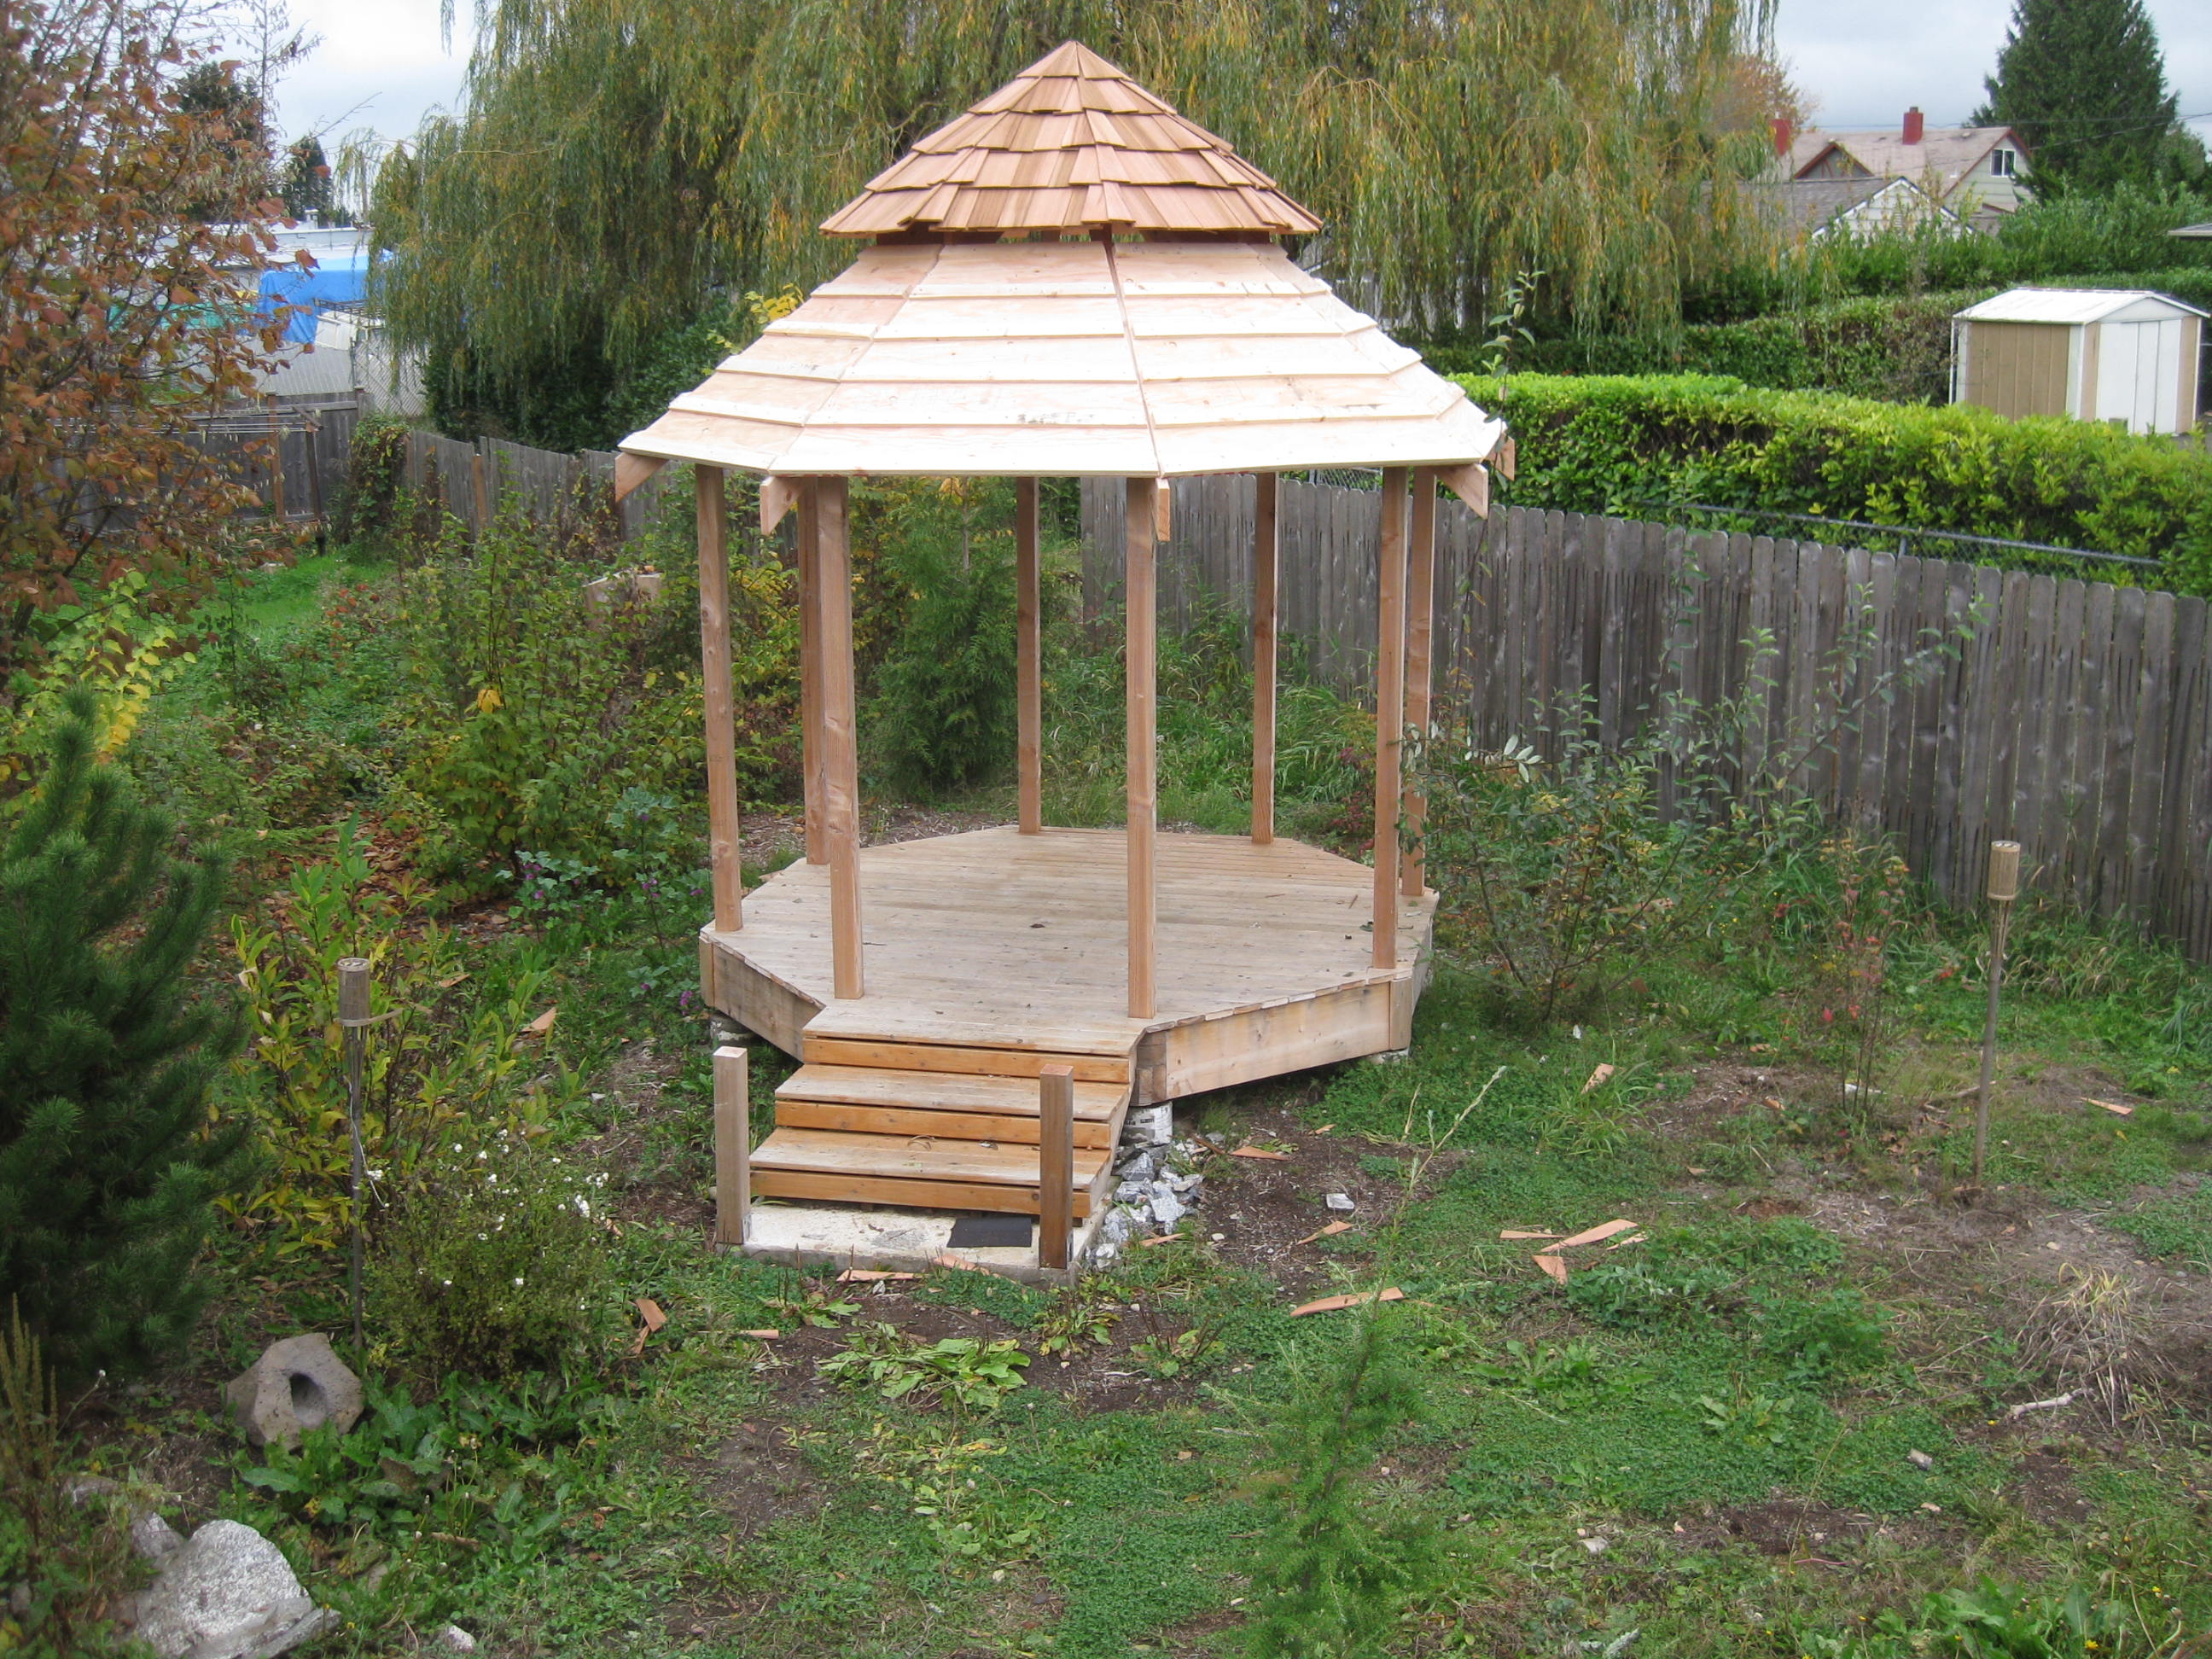
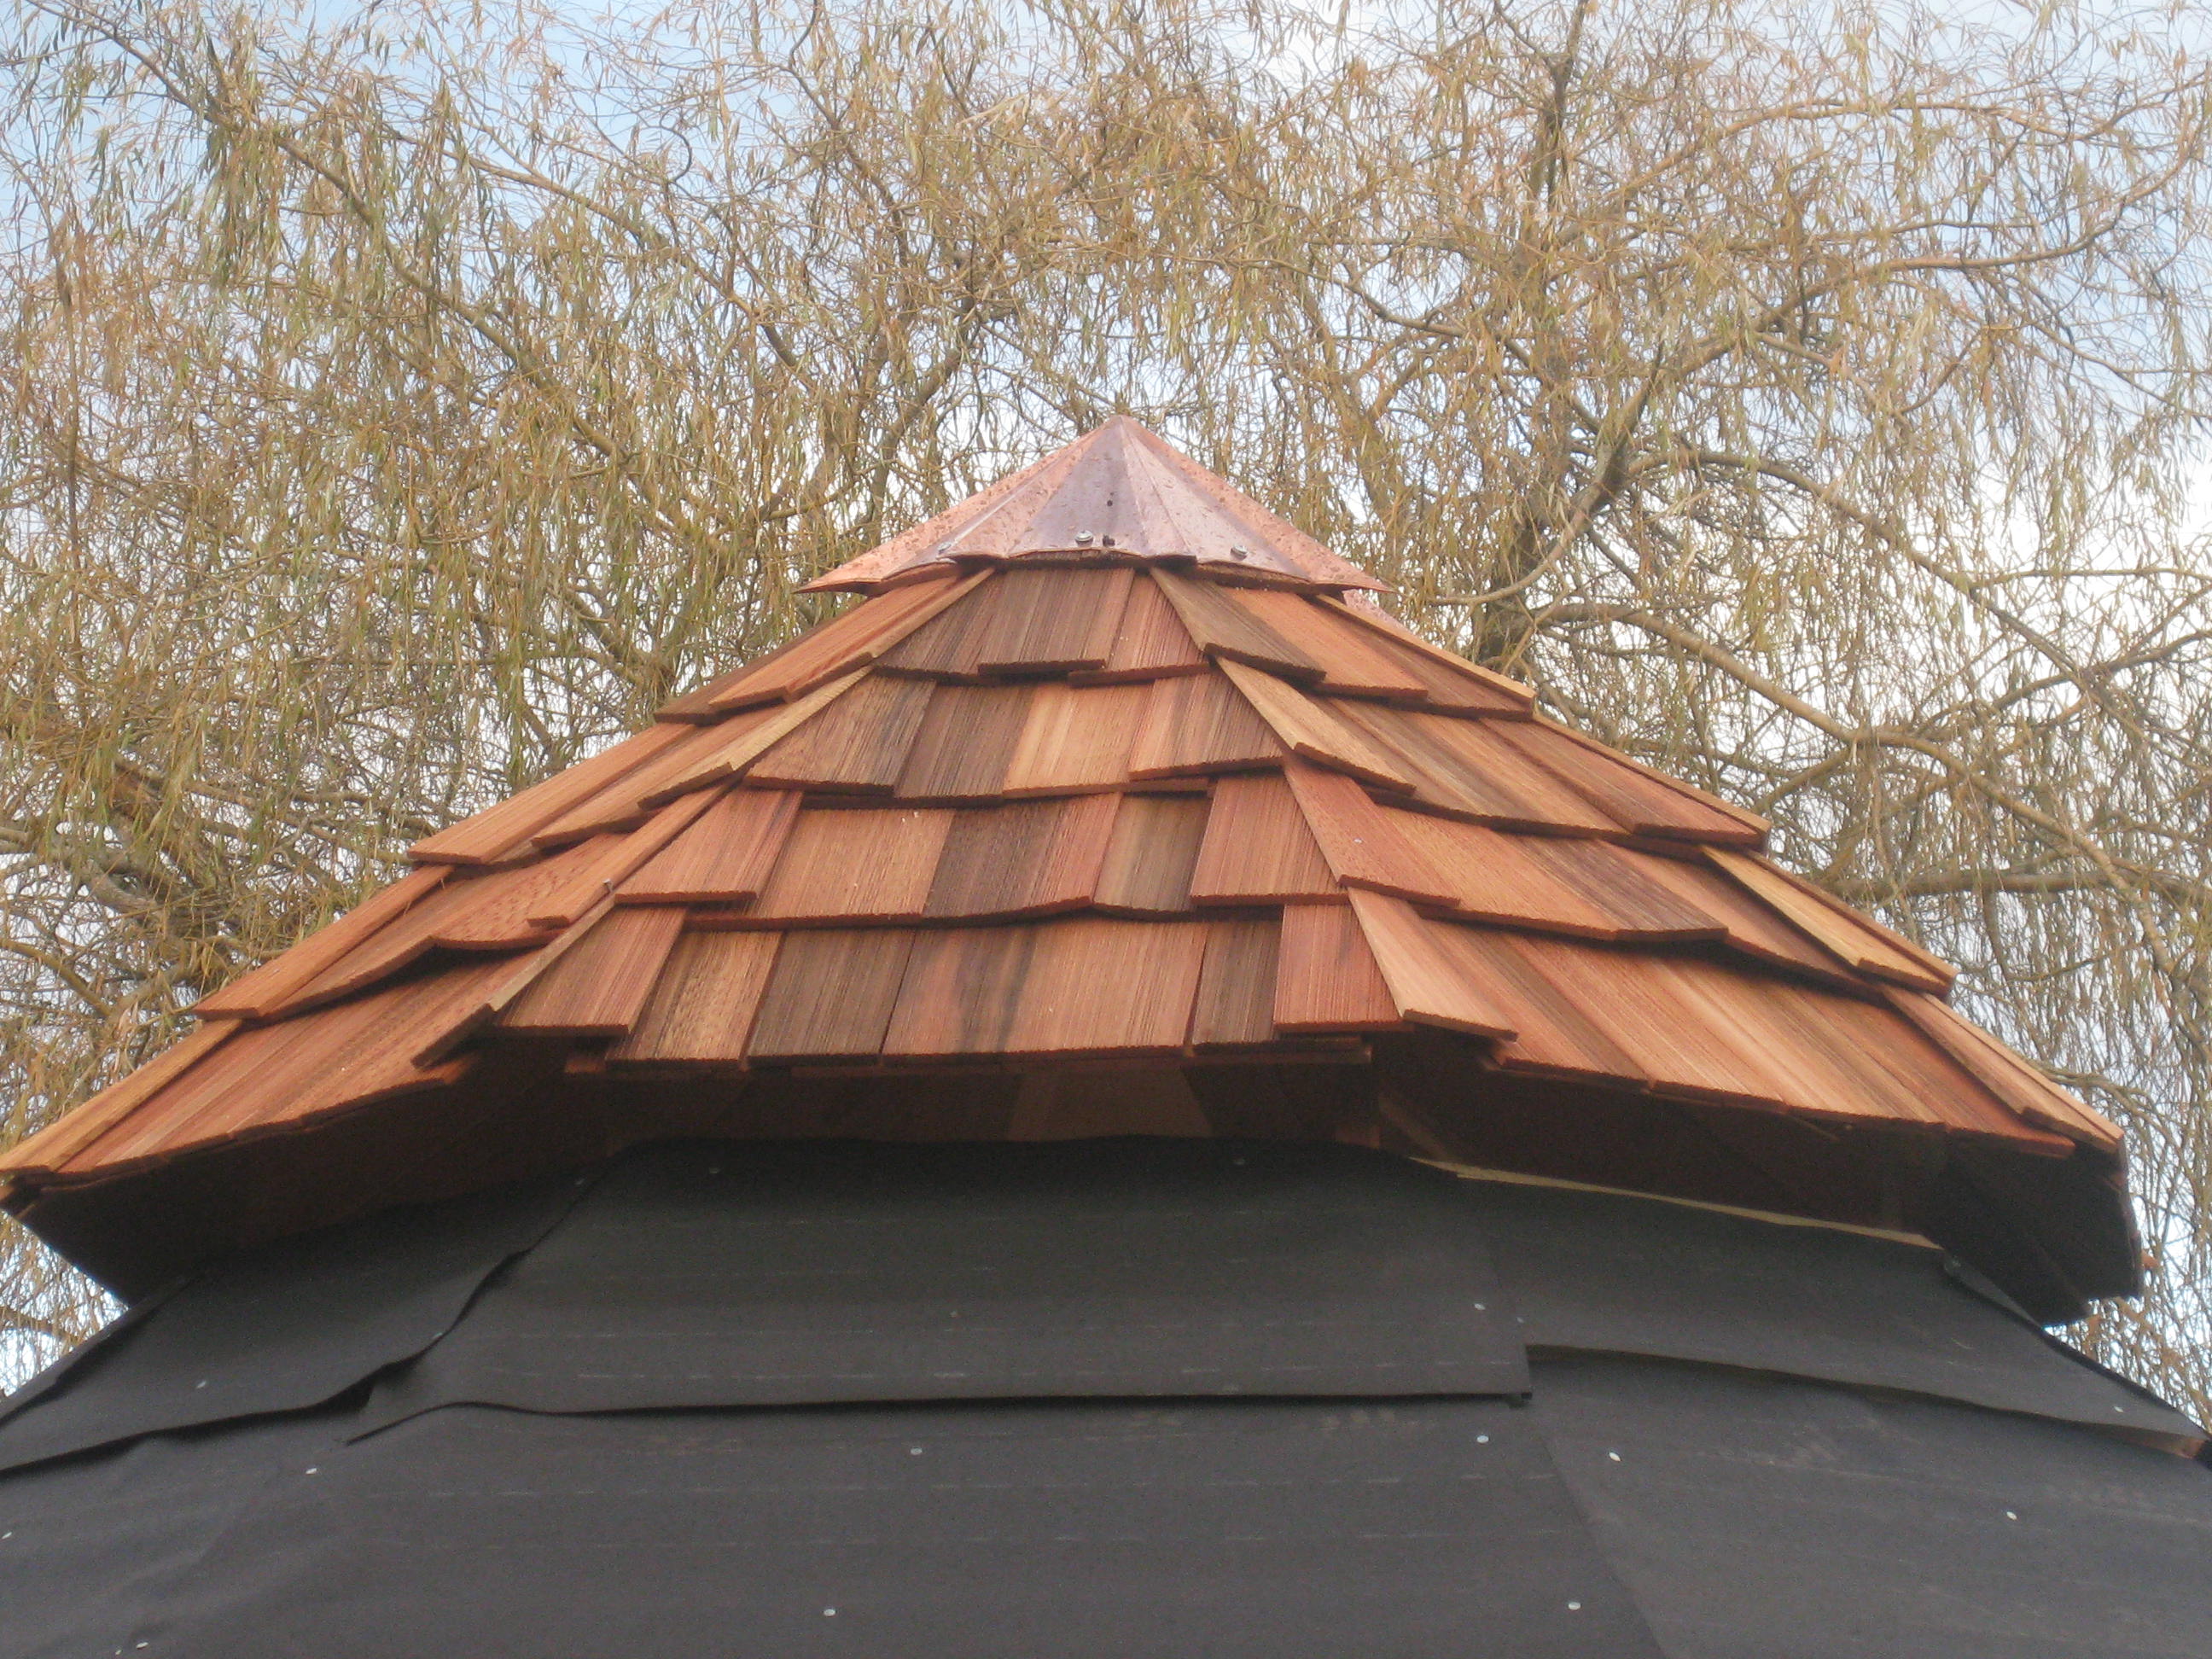
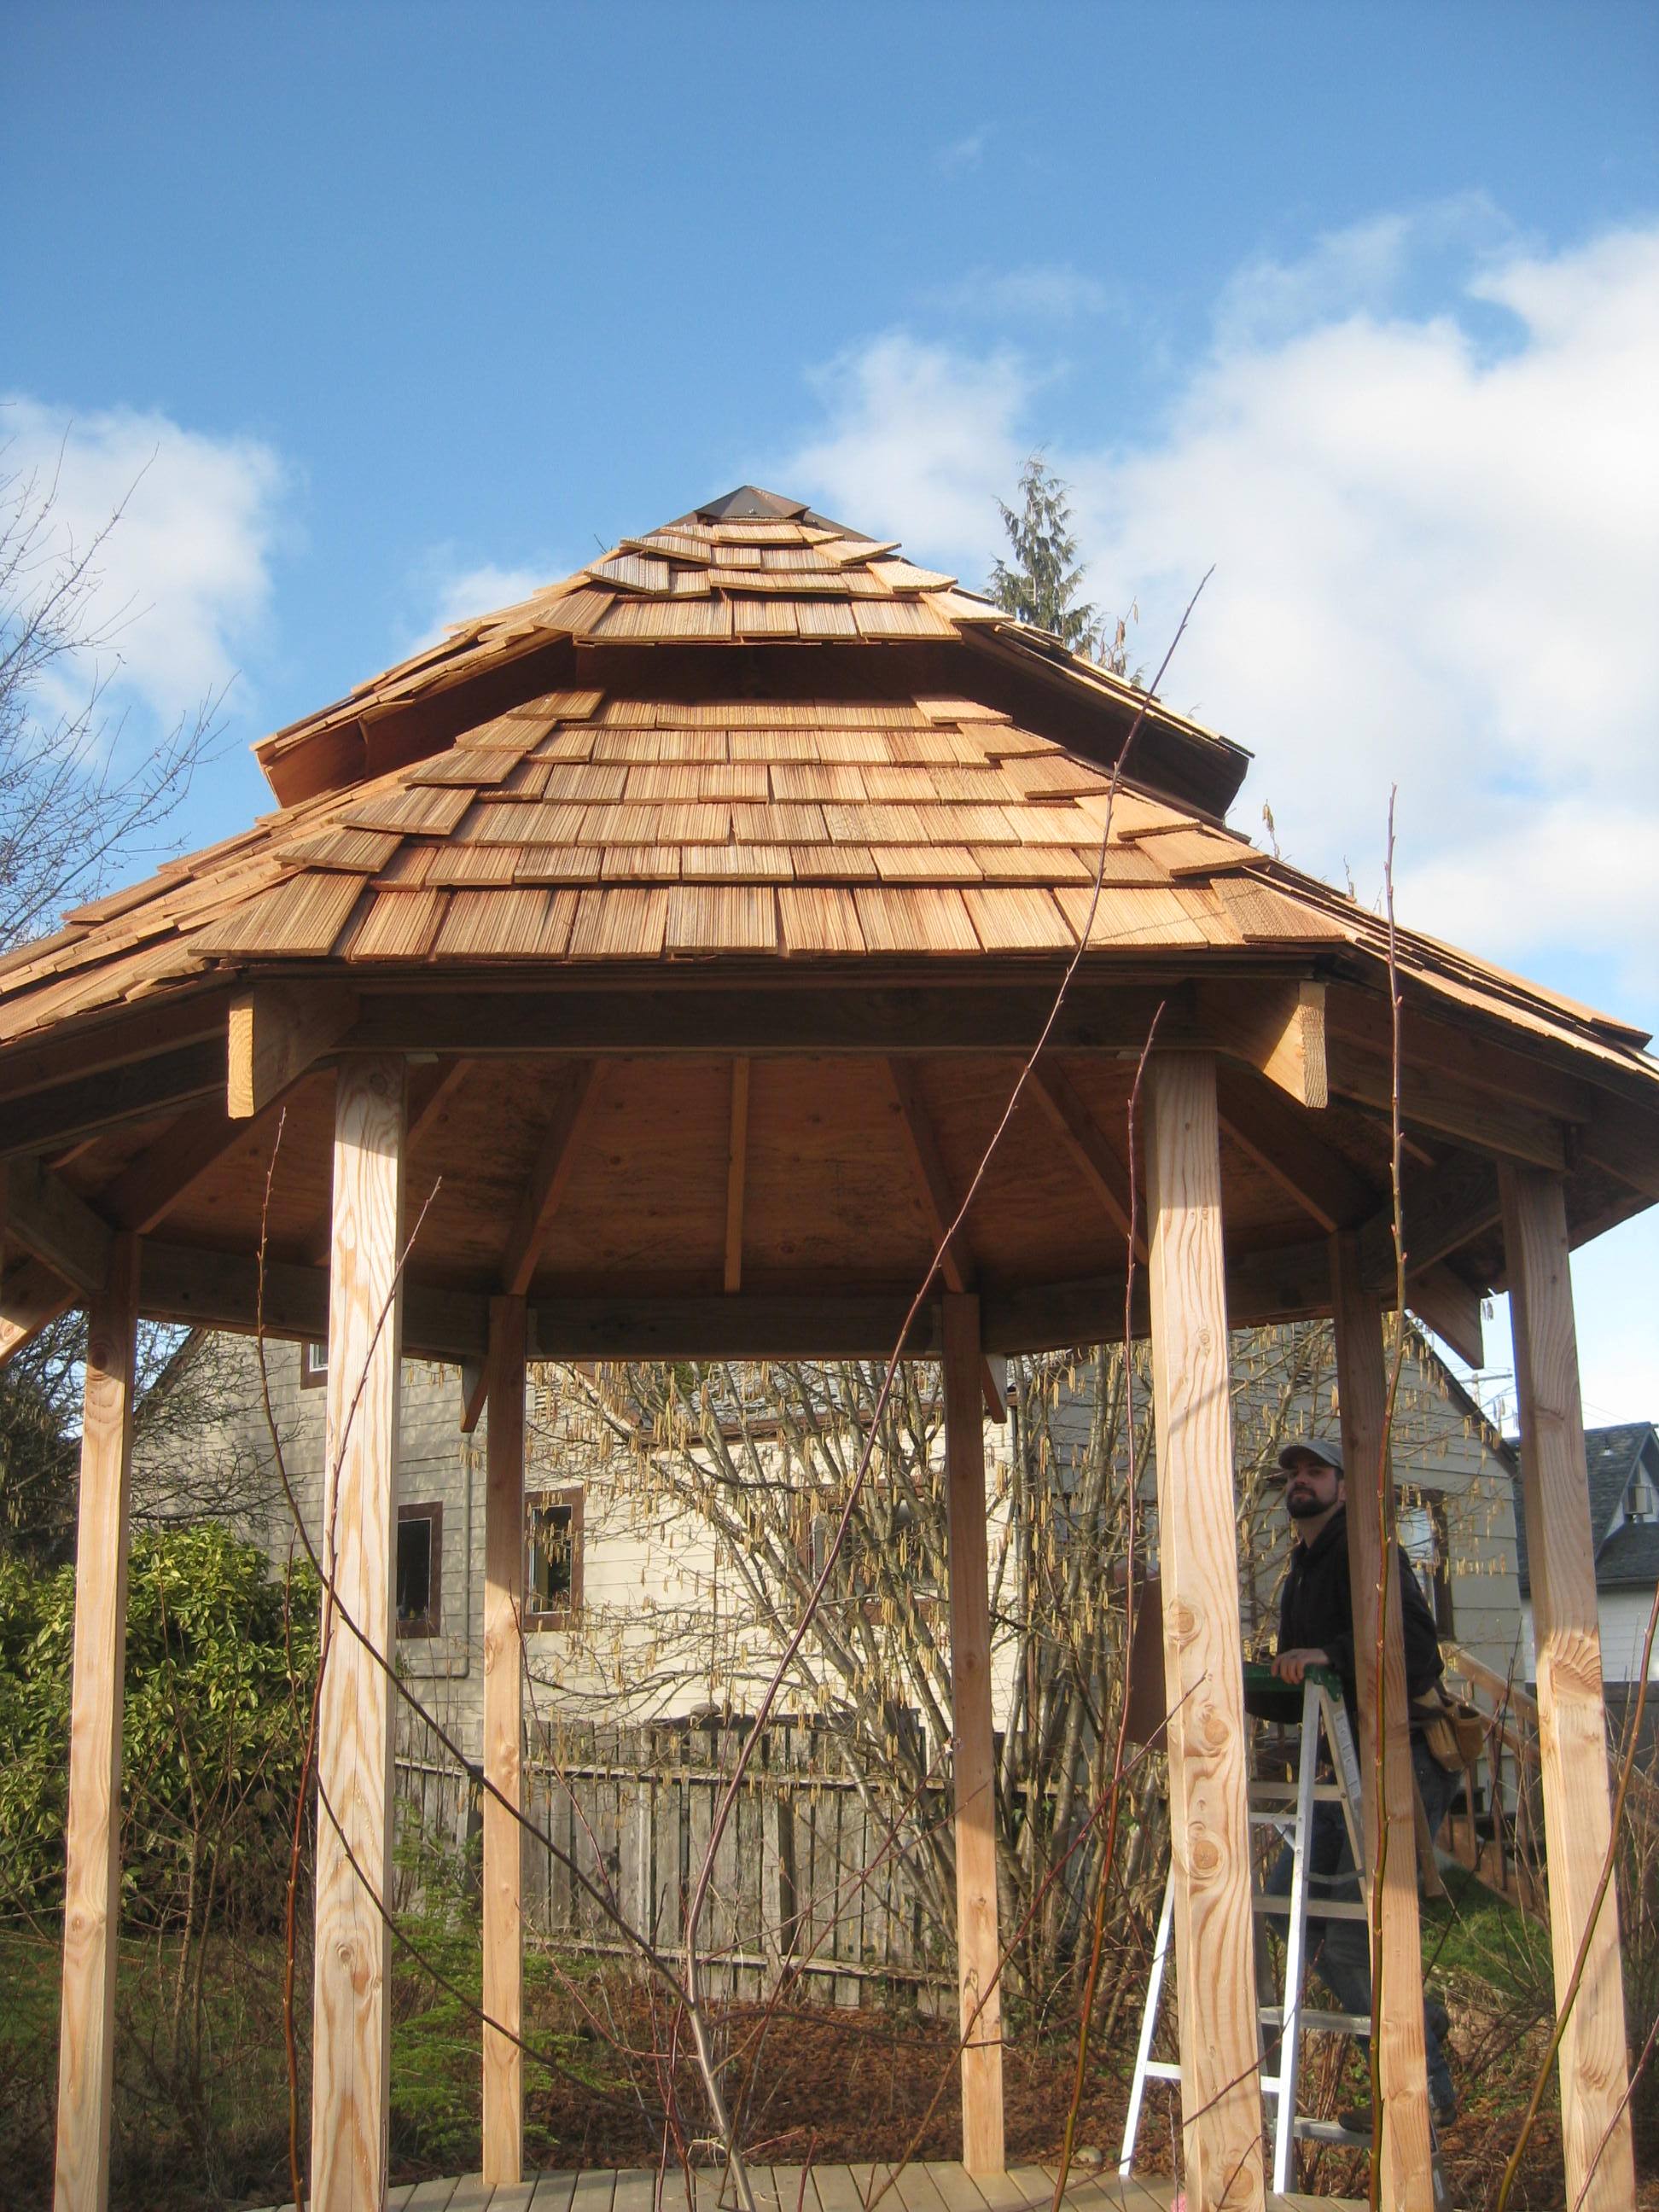
After installing the cedar shakes on the upper eight sections,
I knew that the lower eight sections were going to take some serious time to complete.
Winter was arriving by this time, and I was nervous about my nice plywood panels getting soaked.
I covered the lower panels in roofing paper and hoped for the best.
After installing the cedar shakes on the upper eight sections,
I knew that the lower eight sections were going to take some serious time to complete.
December 2010
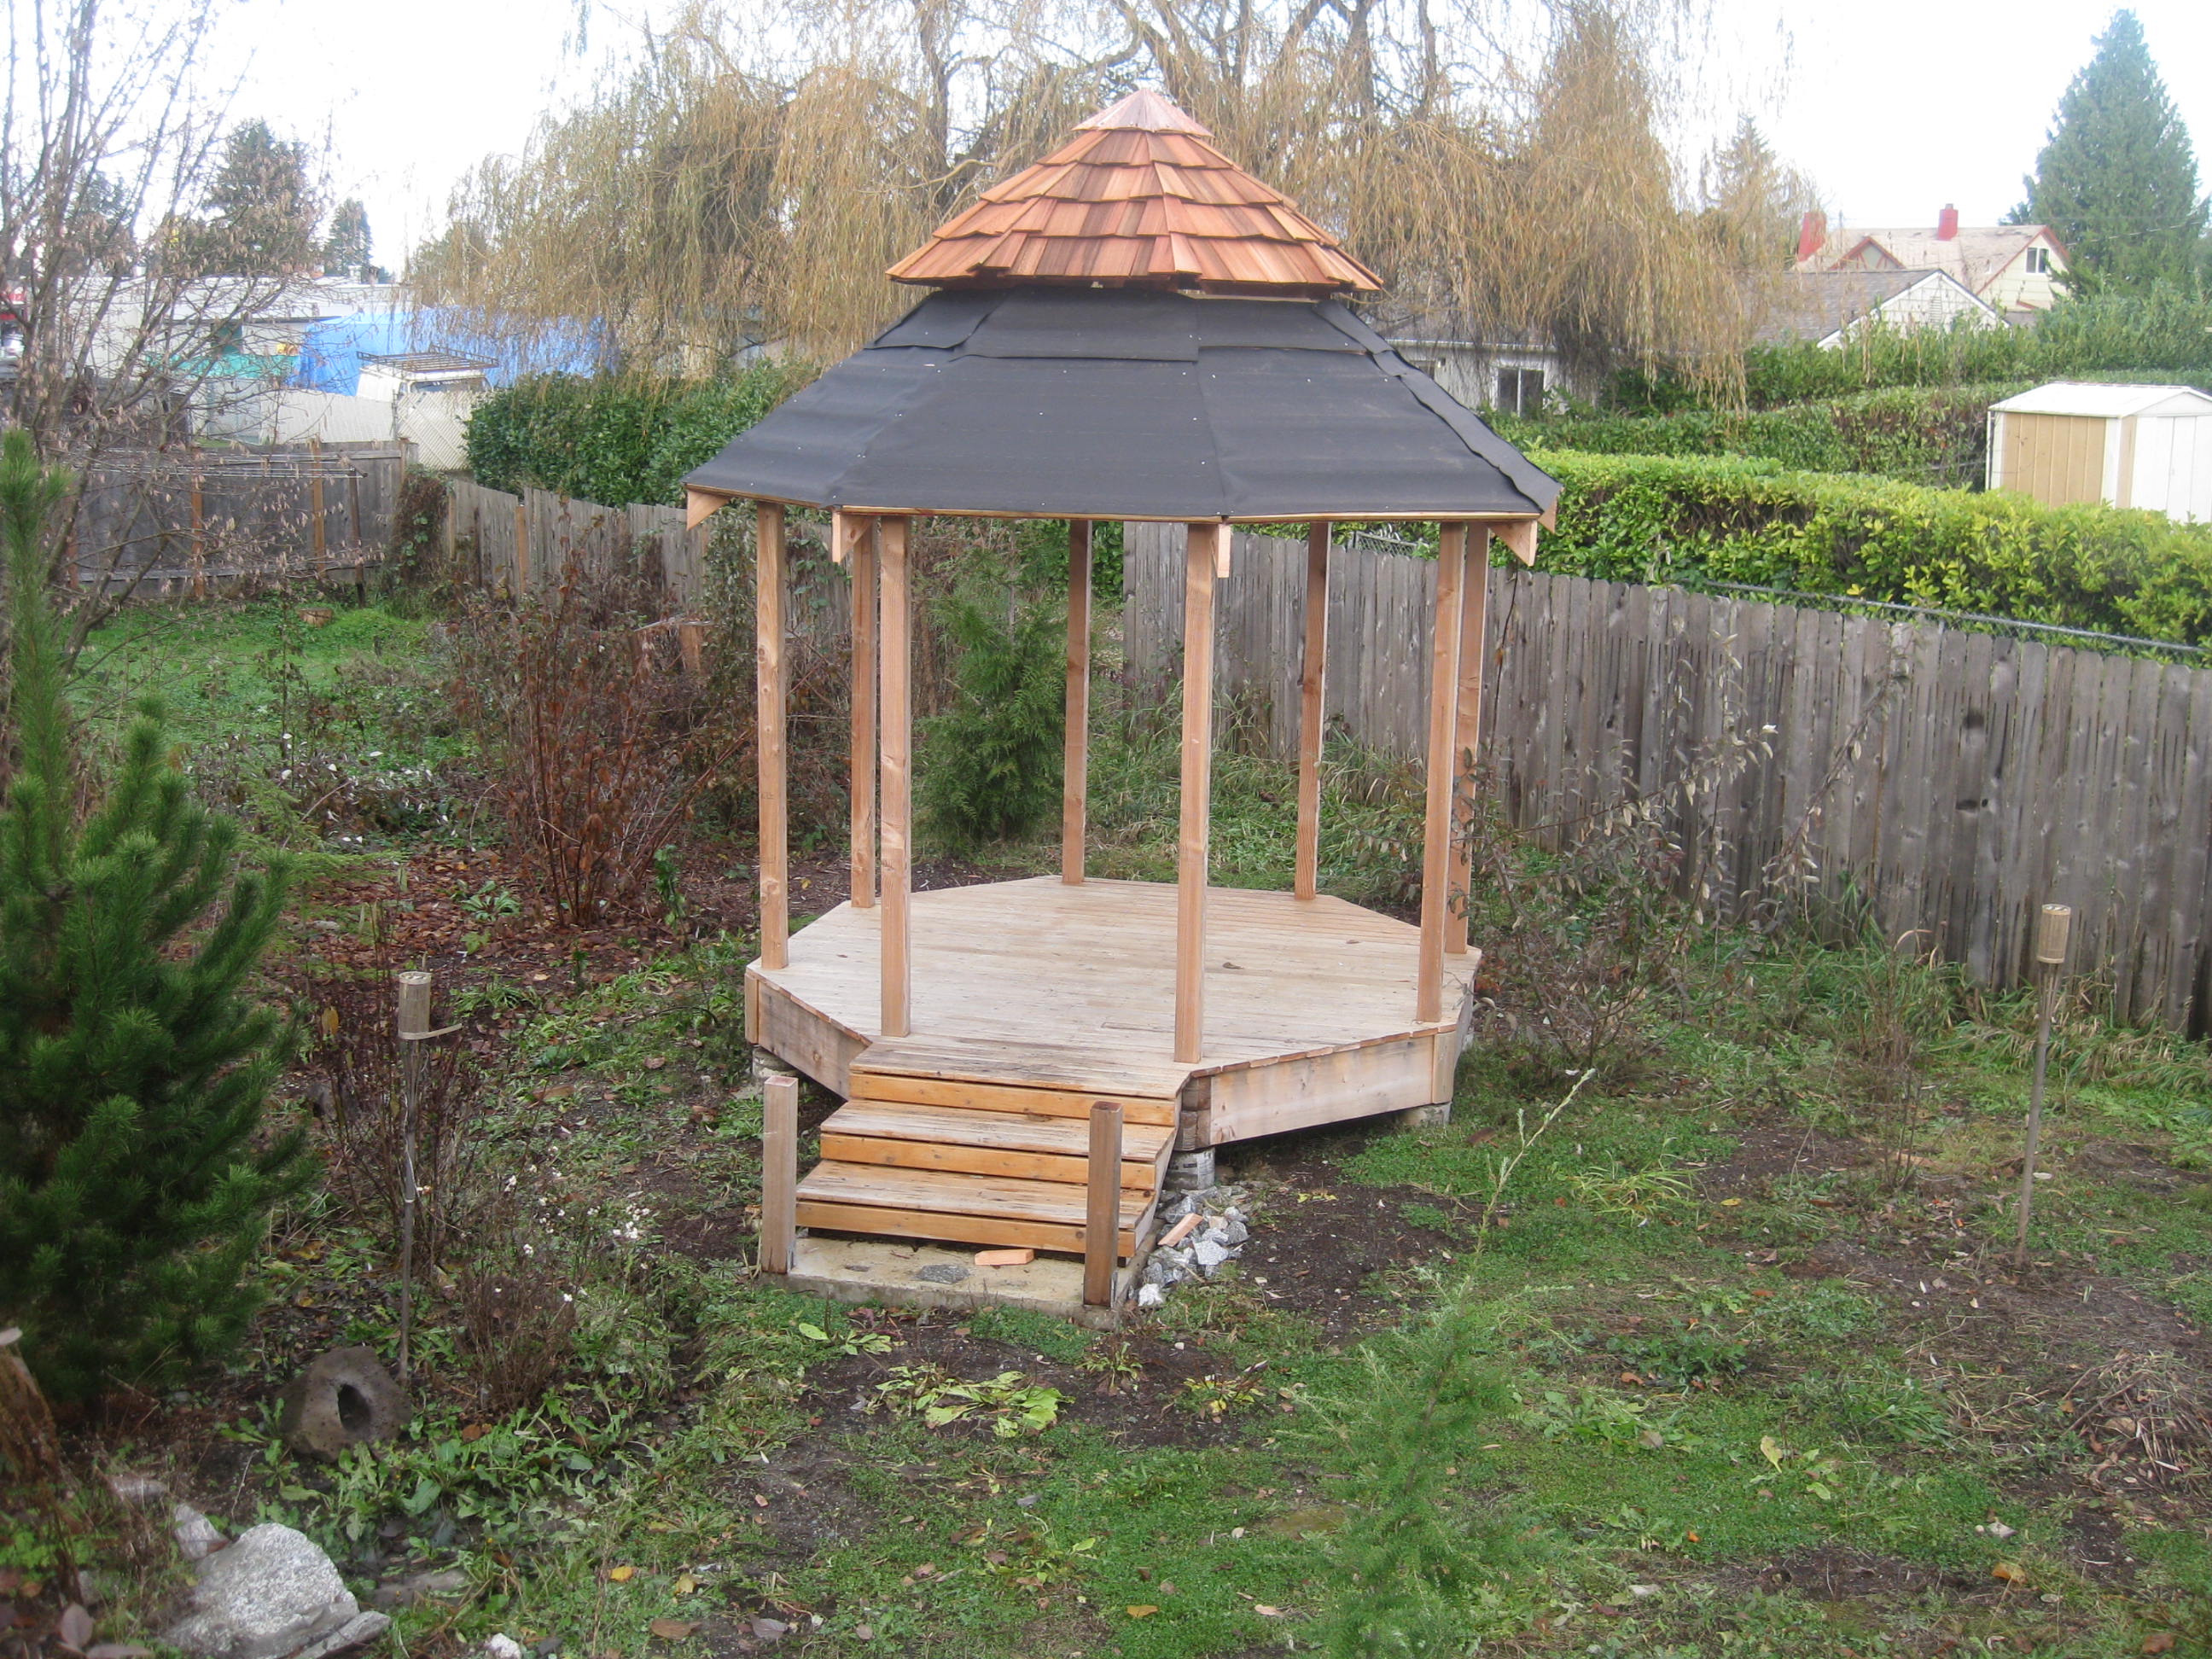
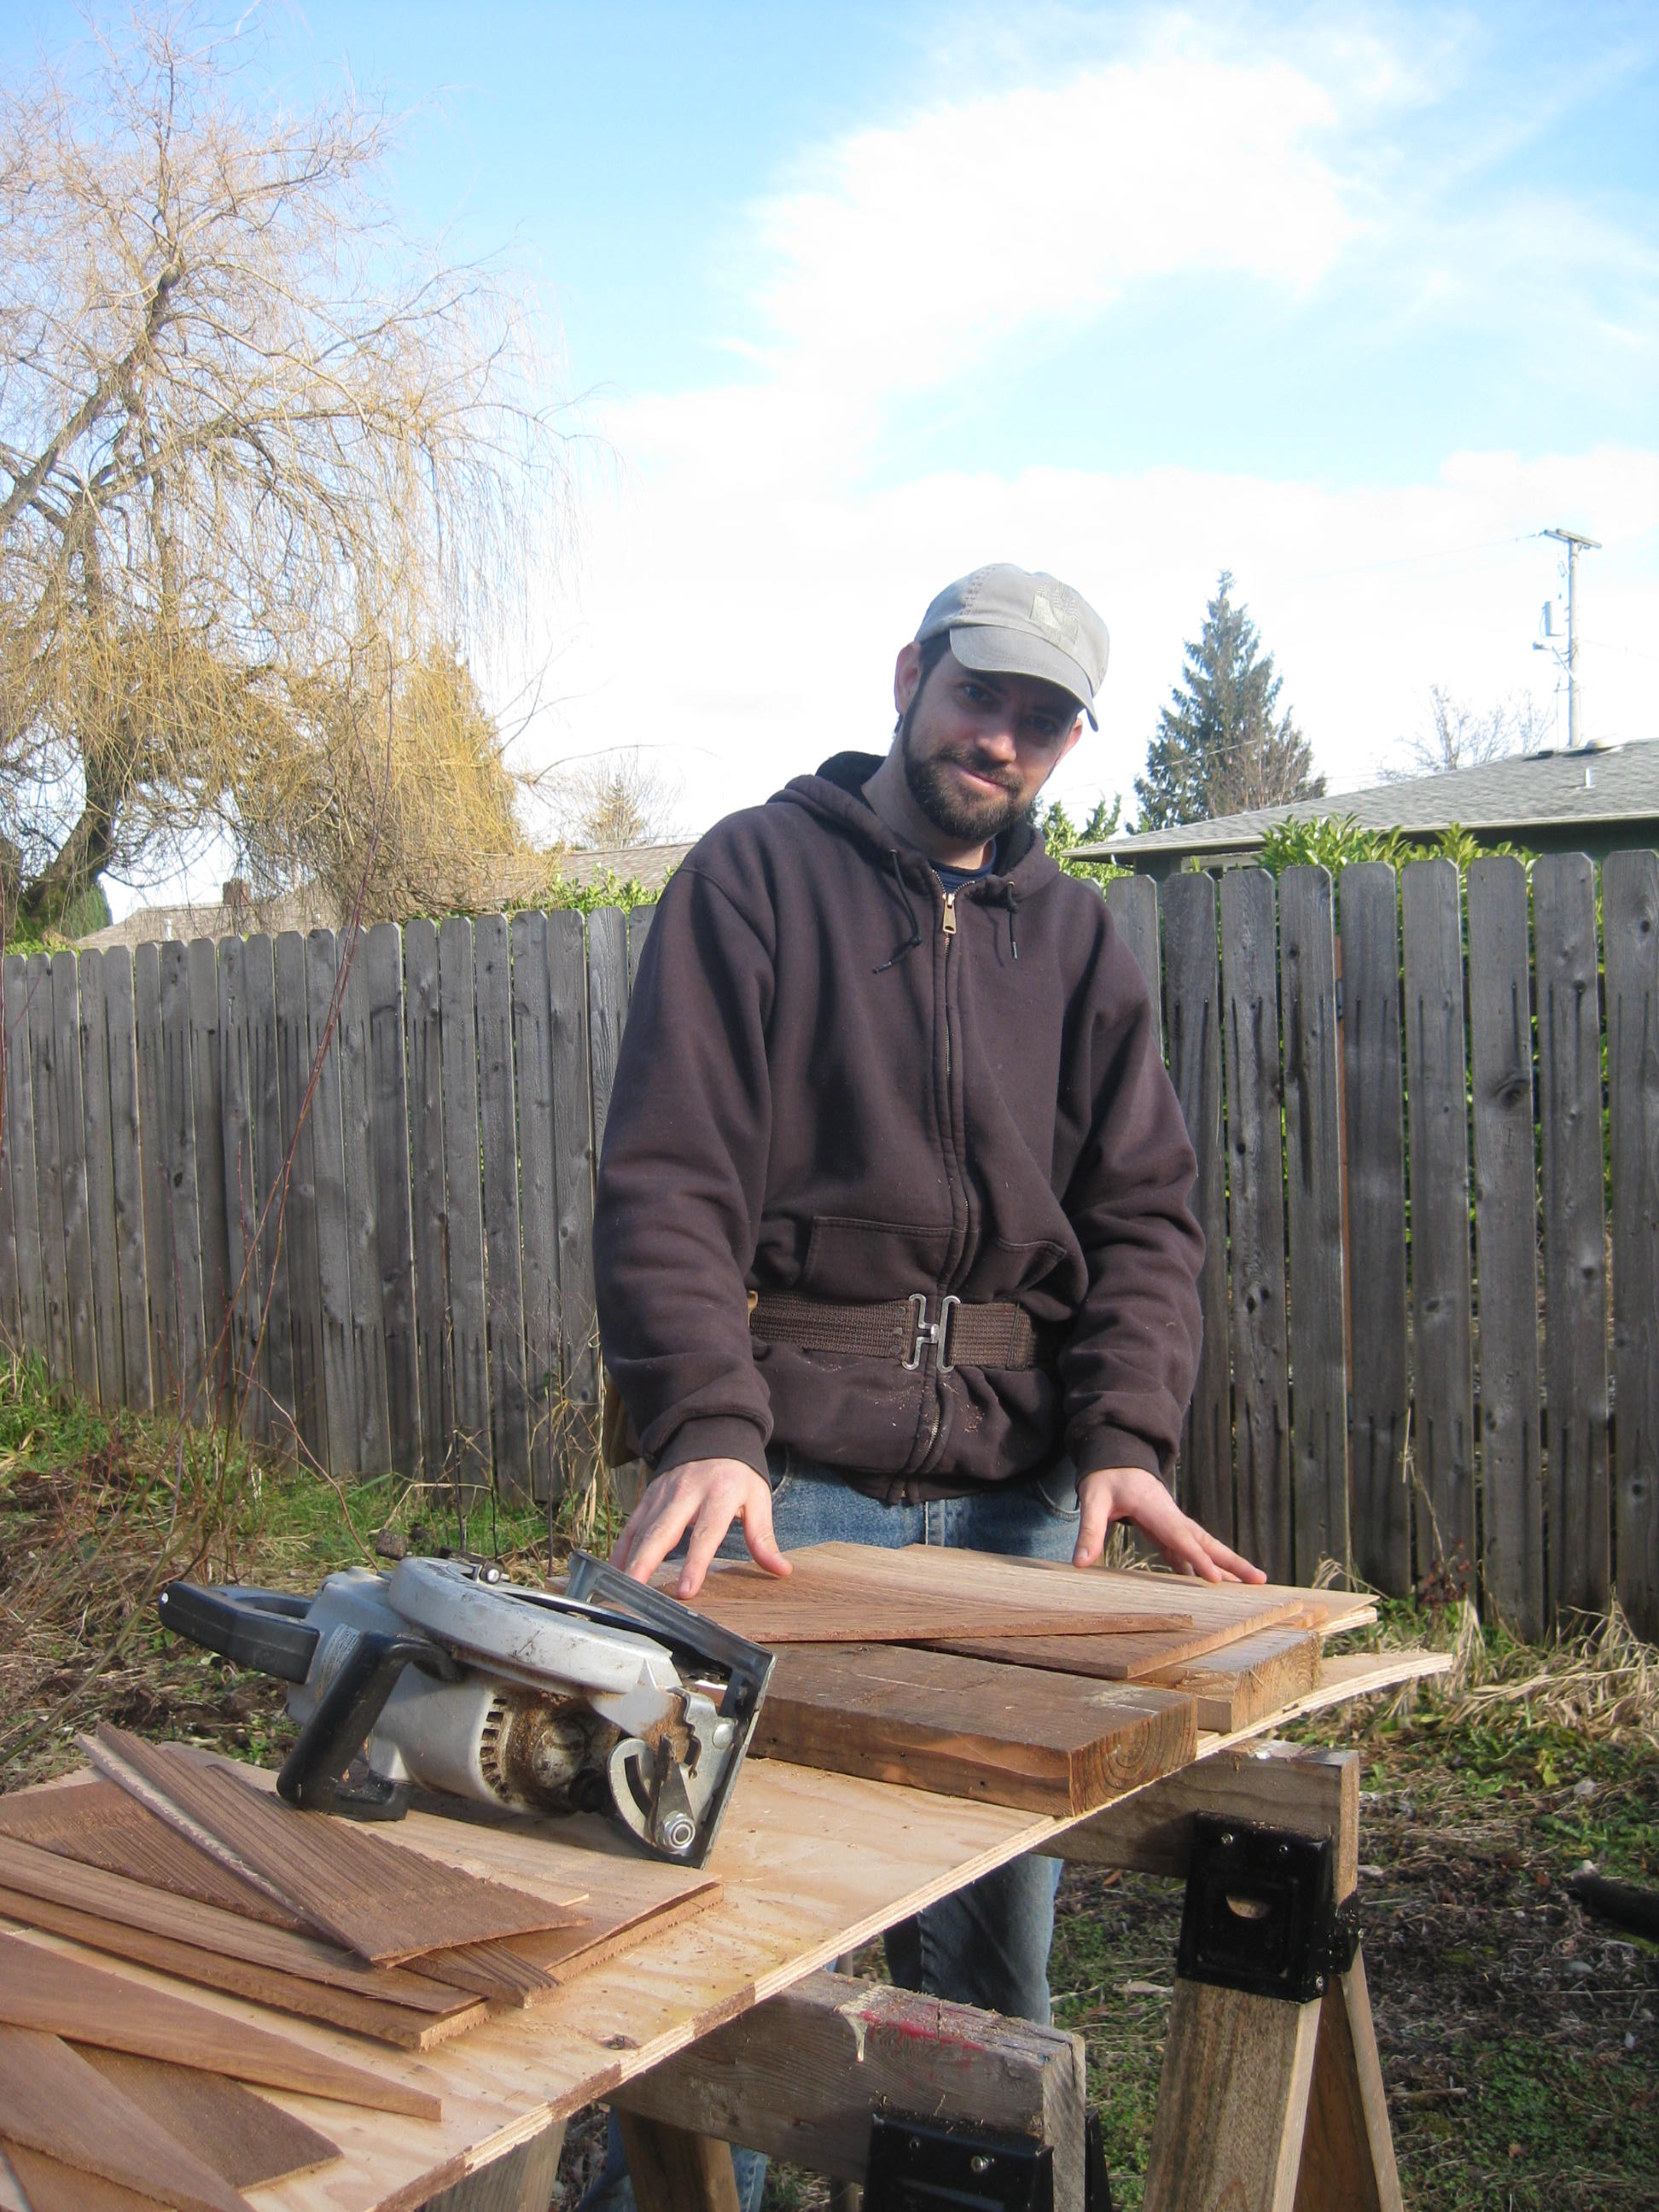
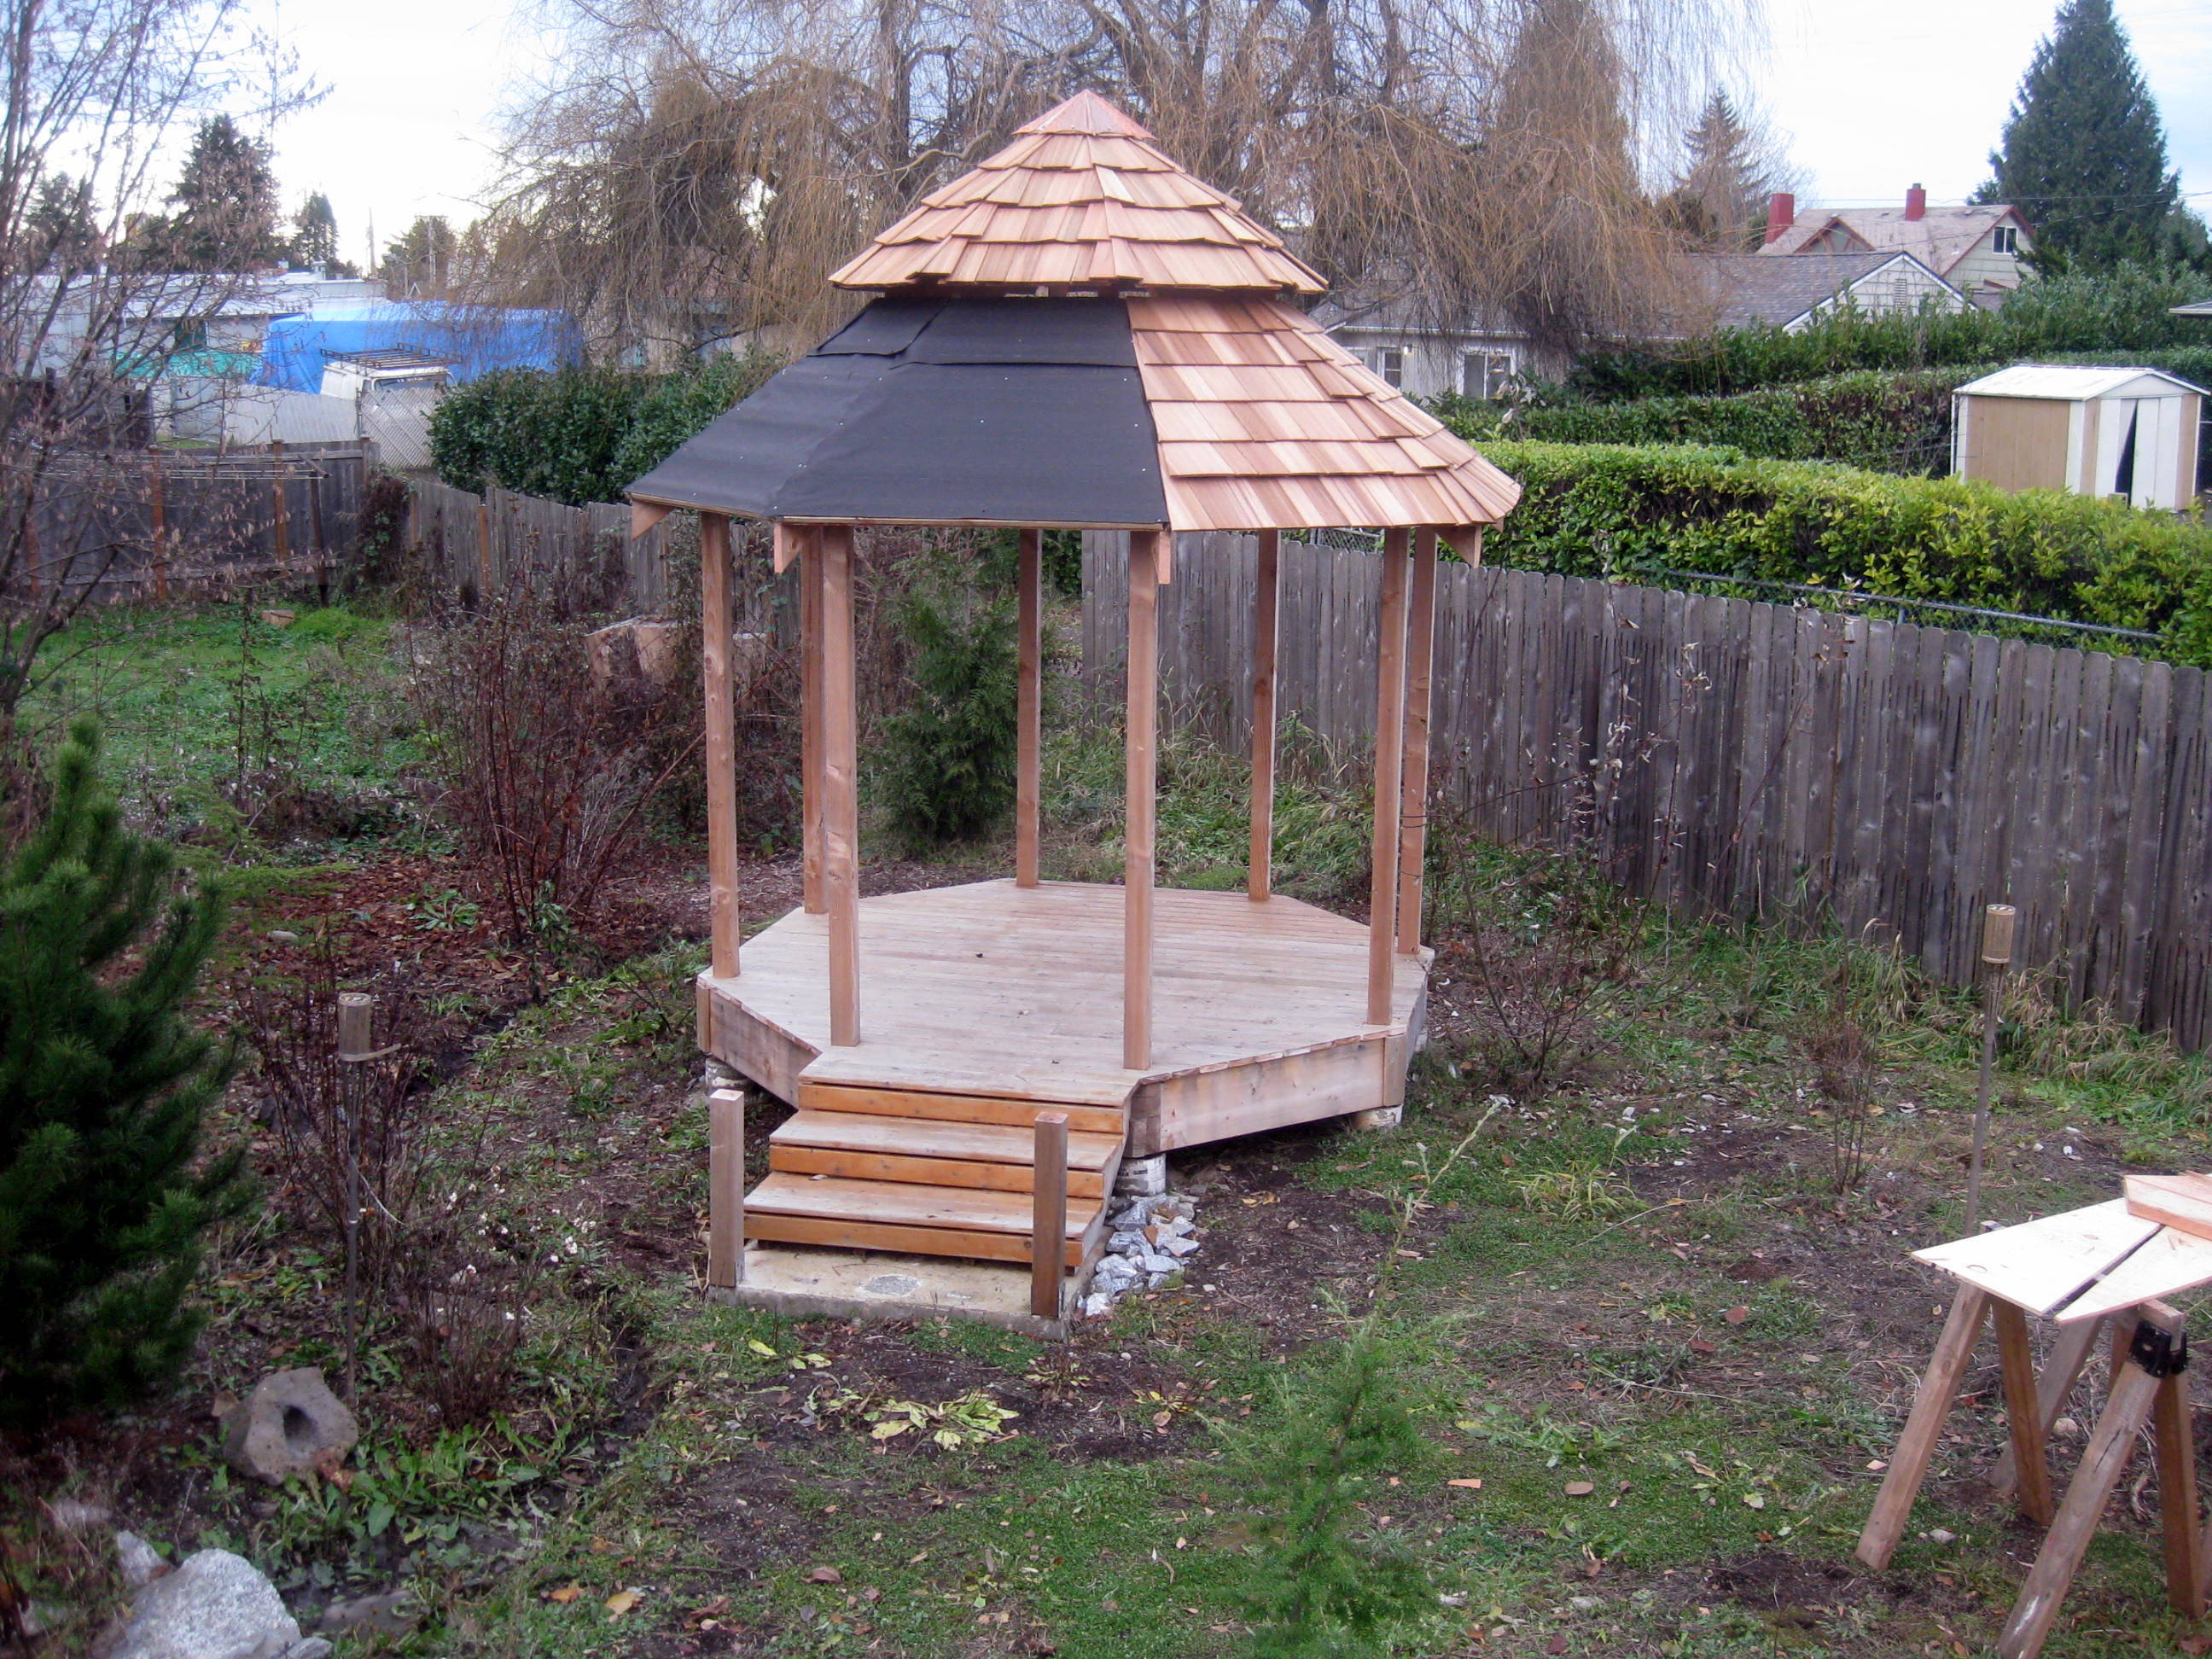 It was slow-going tedious work.
"Craftsman", I kept reminding myself, as I trimmed, hammered, and split cedar shakes in the Cascadian winter rain.
I could get one or two panels done per day (a day being only about 3-4 hours of work).
It was slow-going tedious work.
"Craftsman", I kept reminding myself, as I trimmed, hammered, and split cedar shakes in the Cascadian winter rain.
I could get one or two panels done per day (a day being only about 3-4 hours of work).
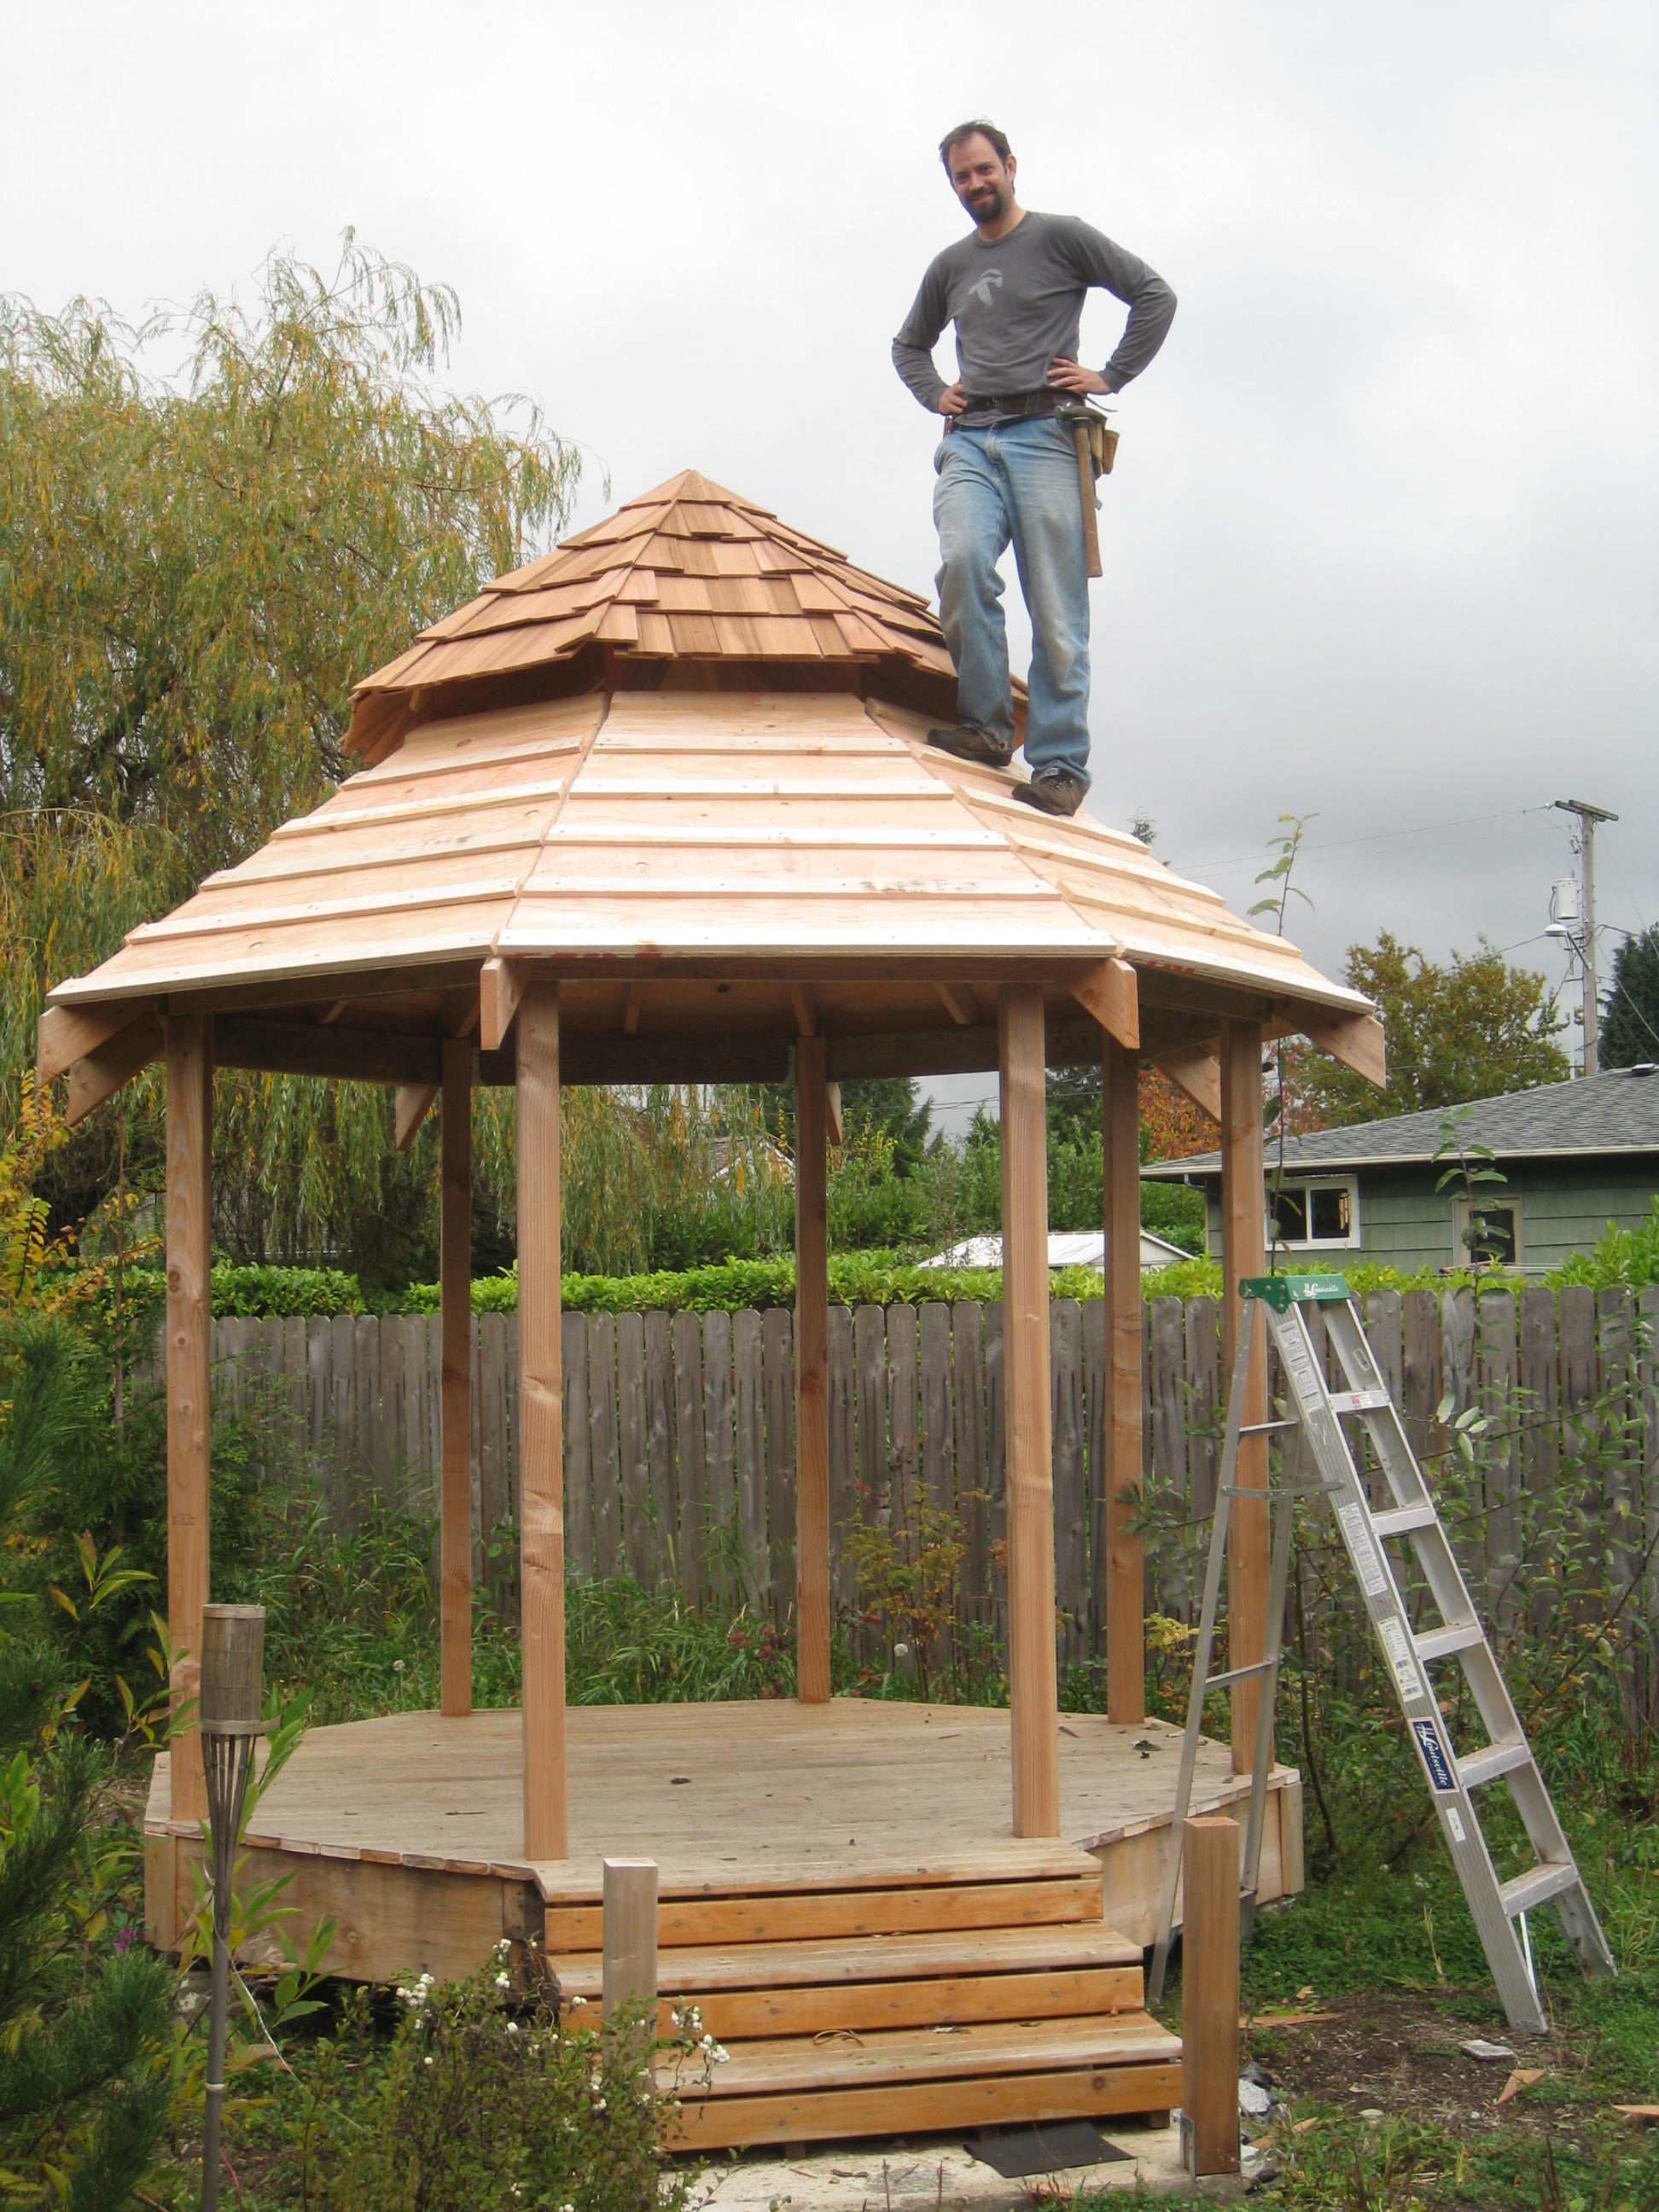
By the end of the year, I could stand back, from the right angle, squint, and imagine the finished gazebo!
January 2011
 I managed to find a few more days in January to keep roofing.
 I even got some sunshine!
 Still not done...
February 2011
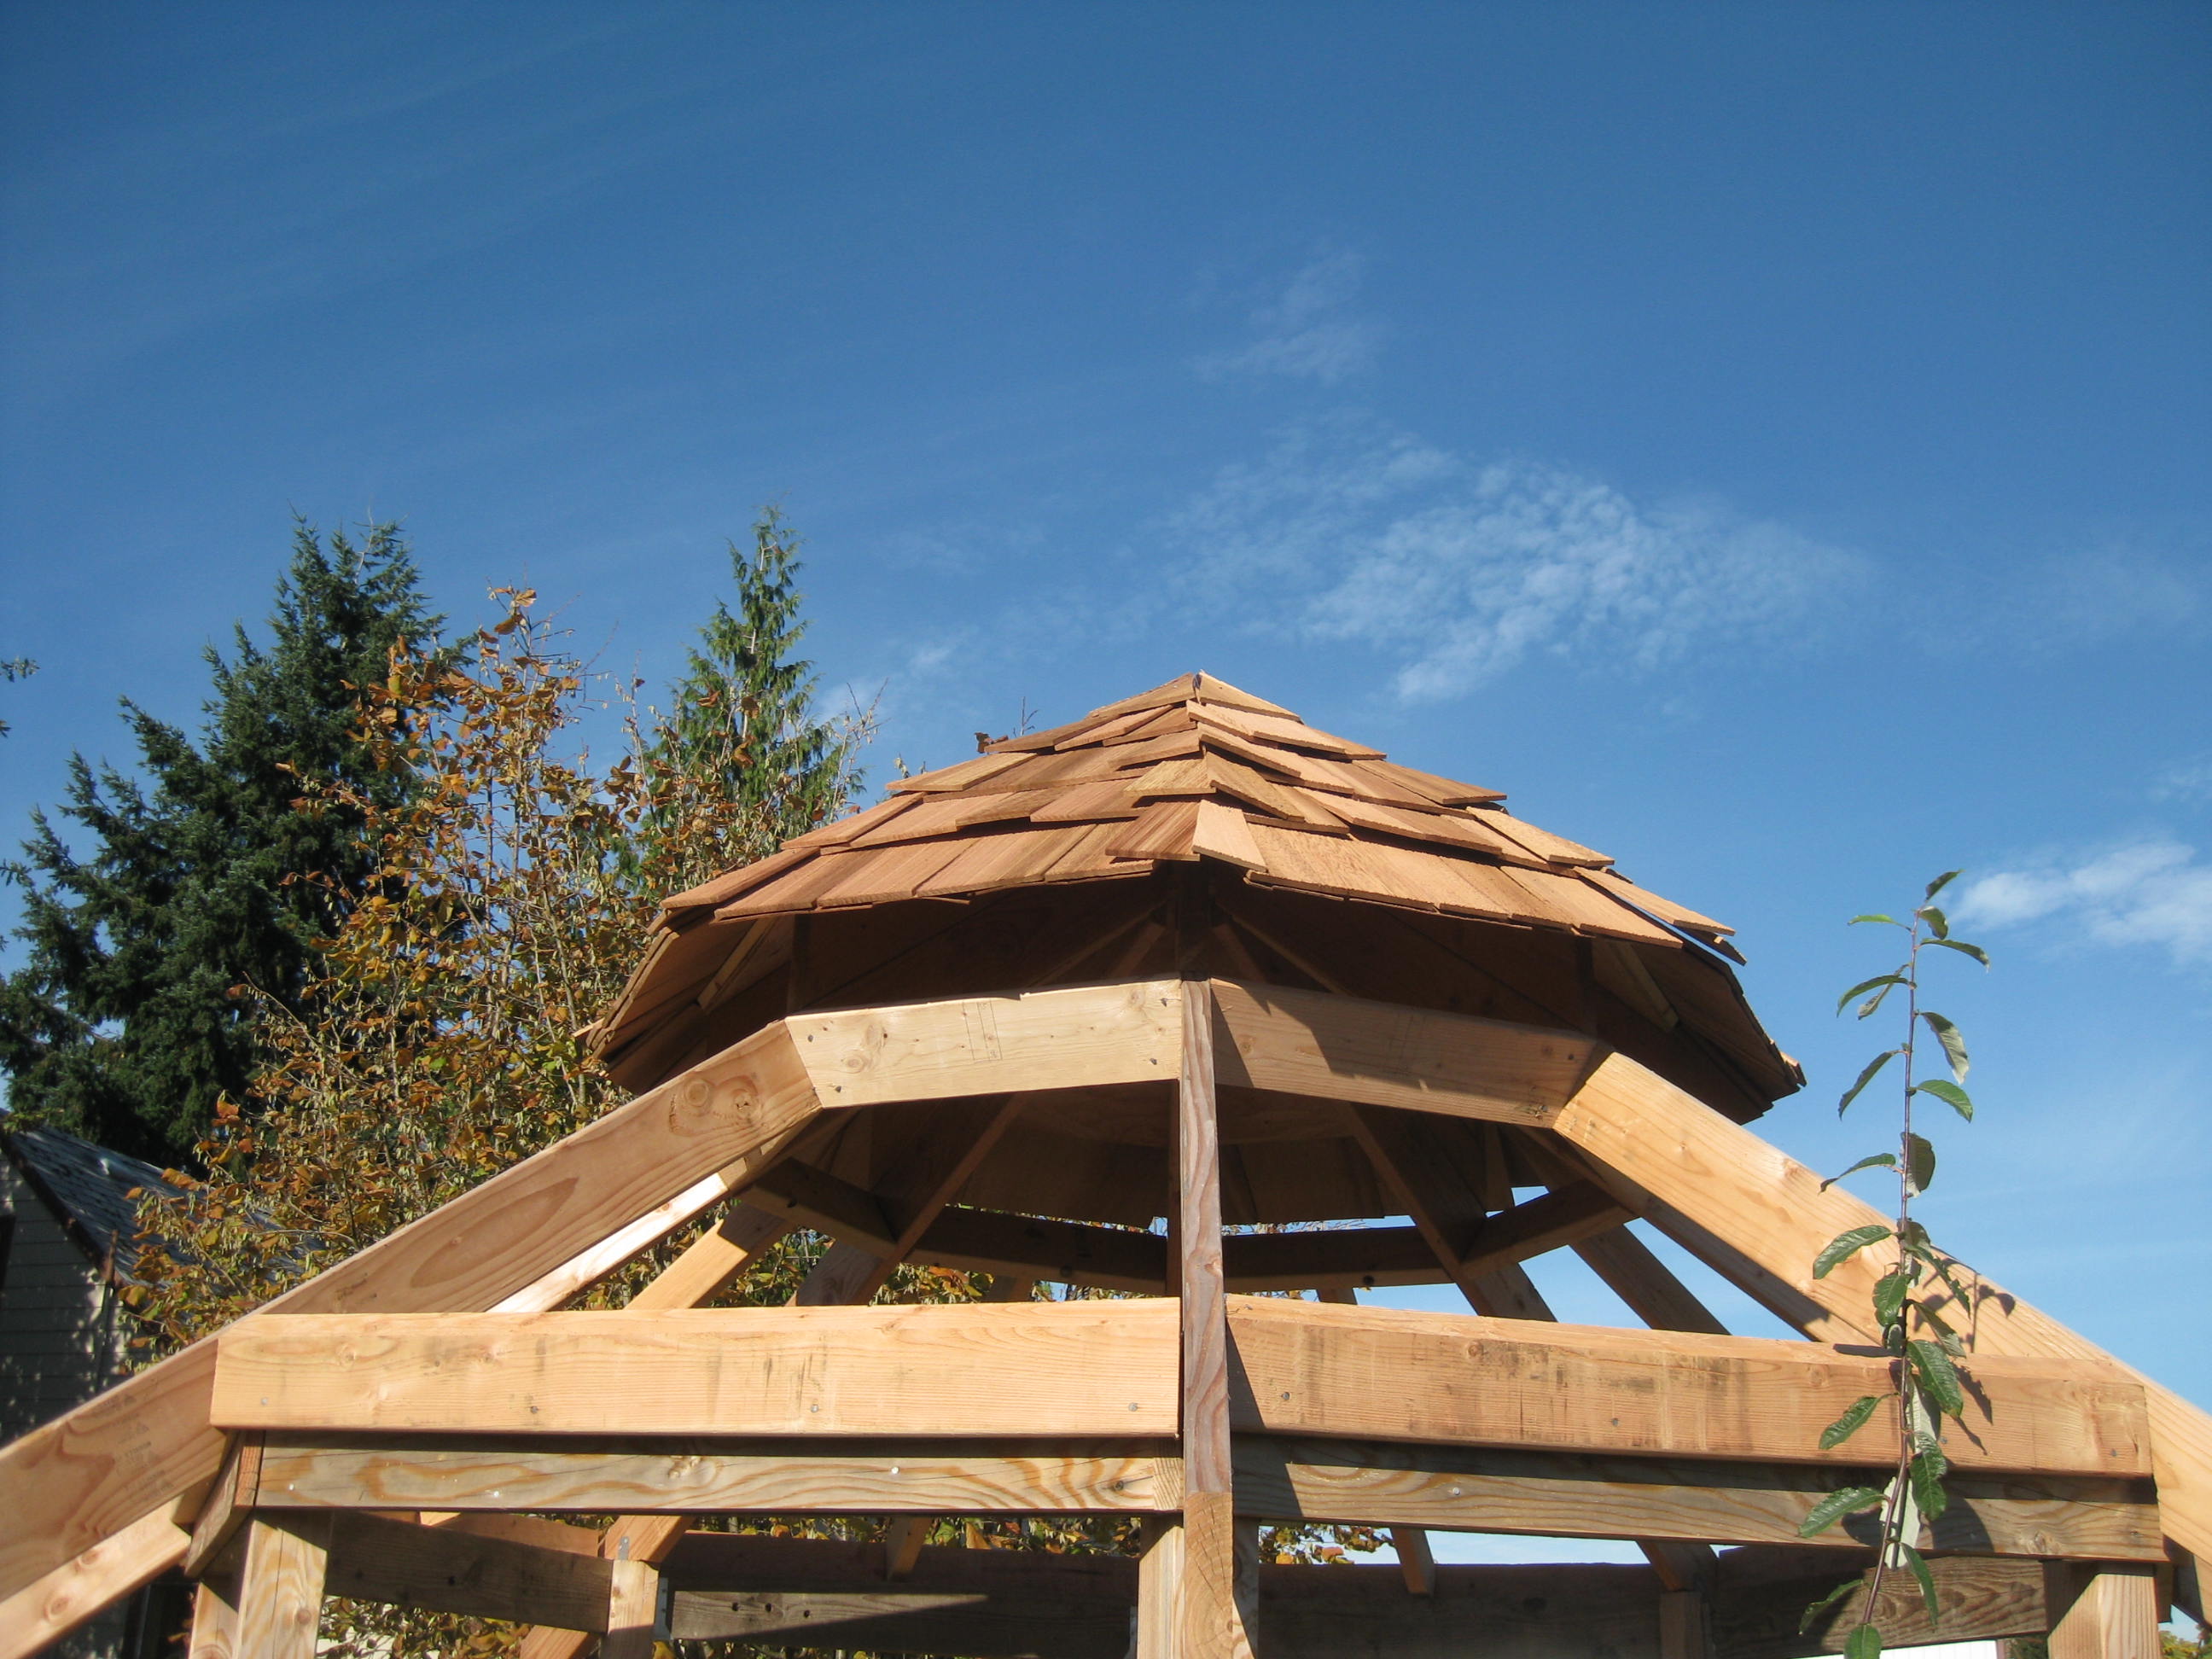
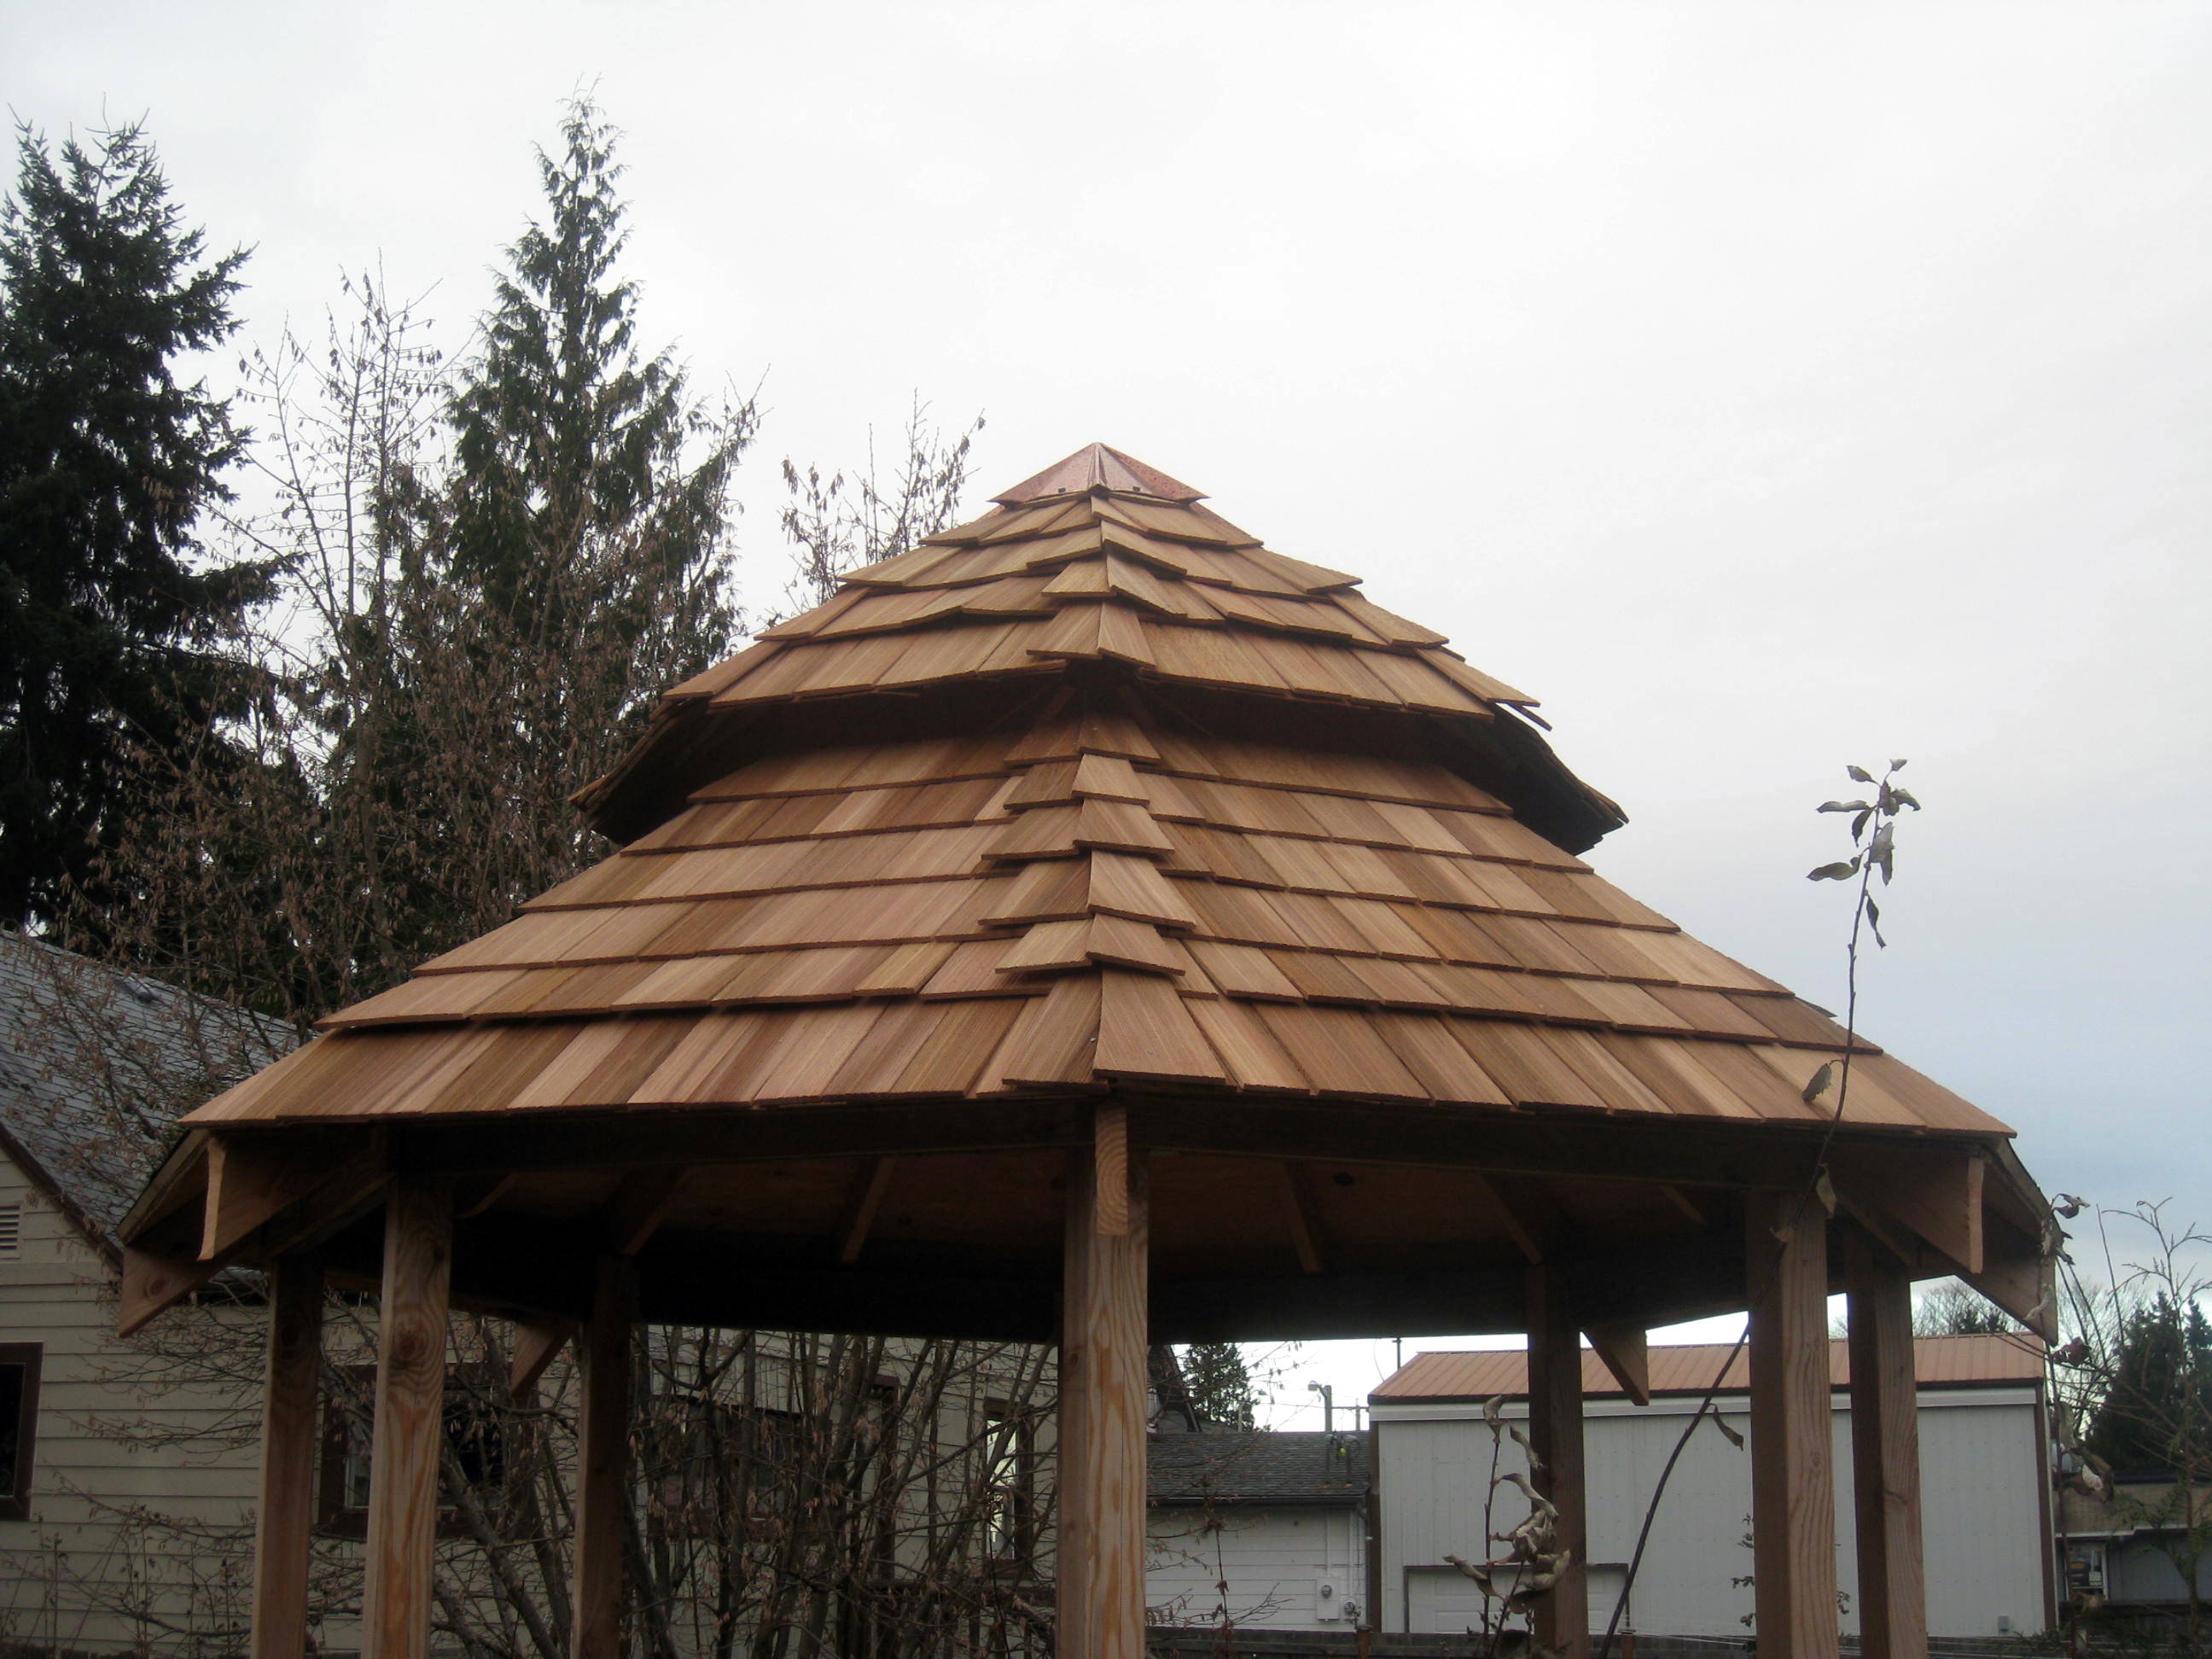
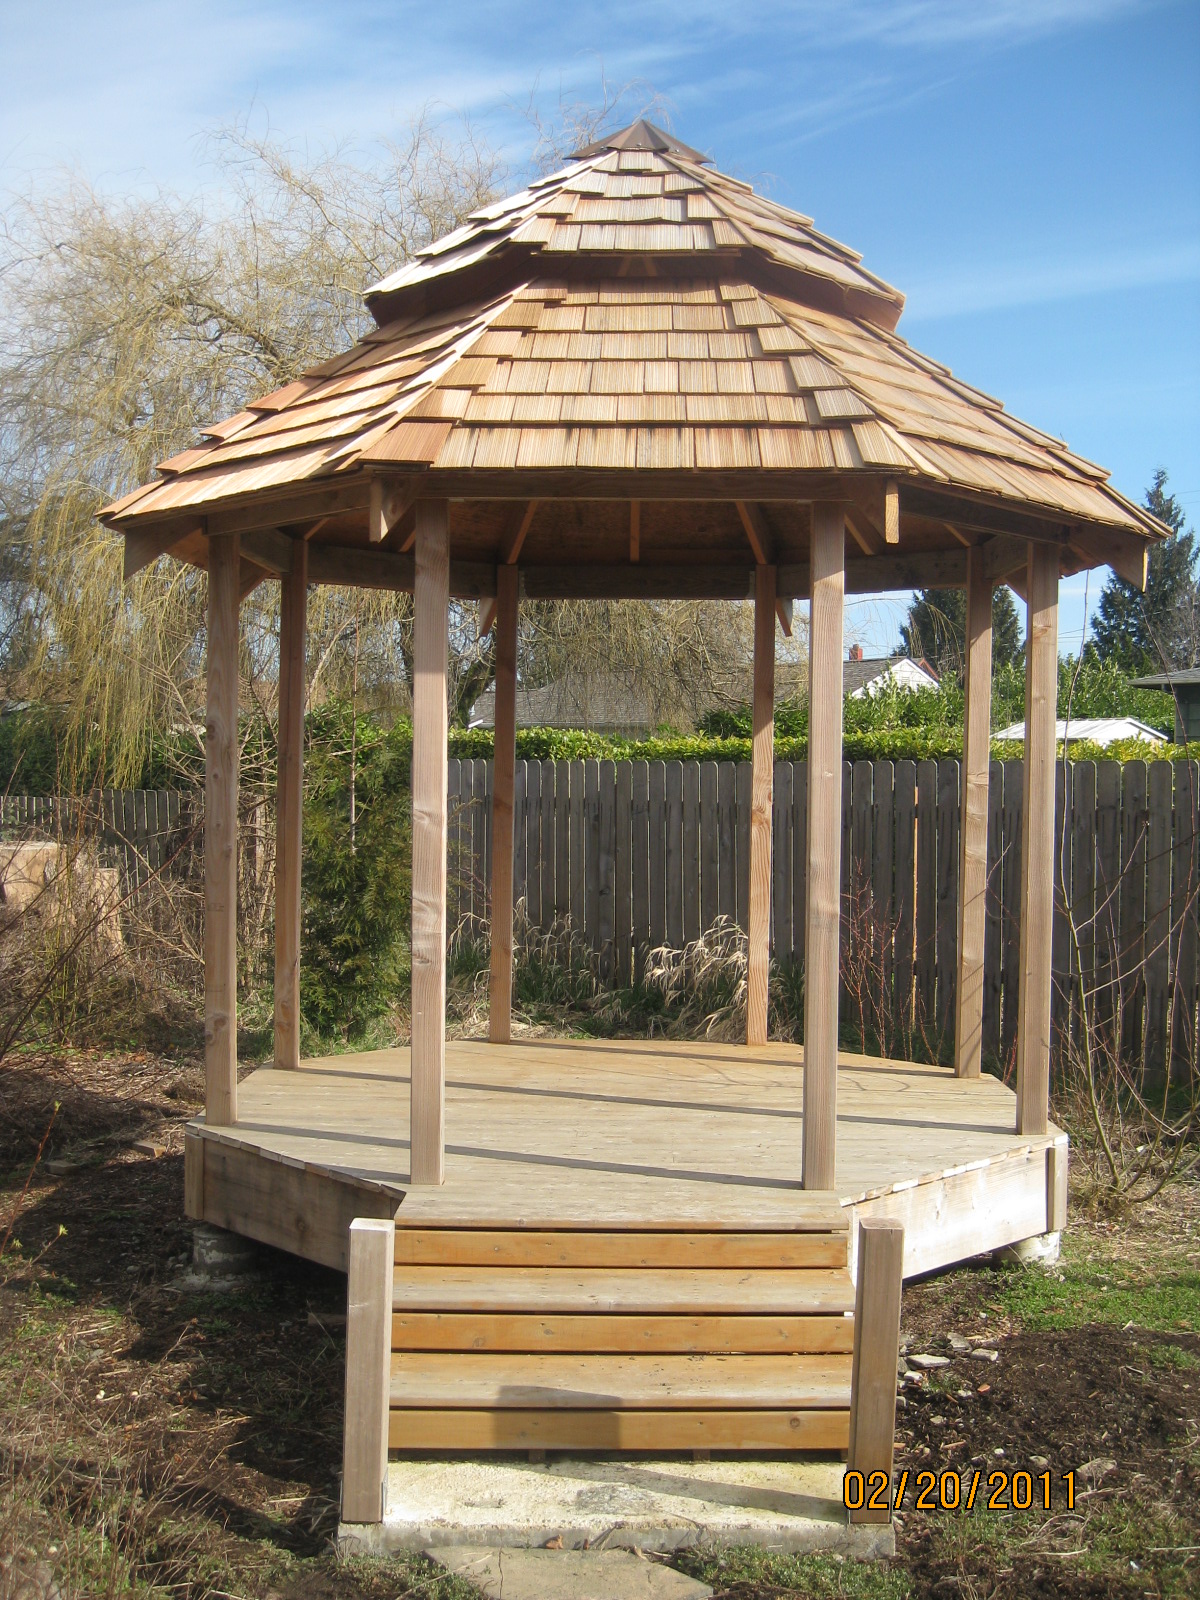 I finally finished installing the last of the cedar shakes in February!
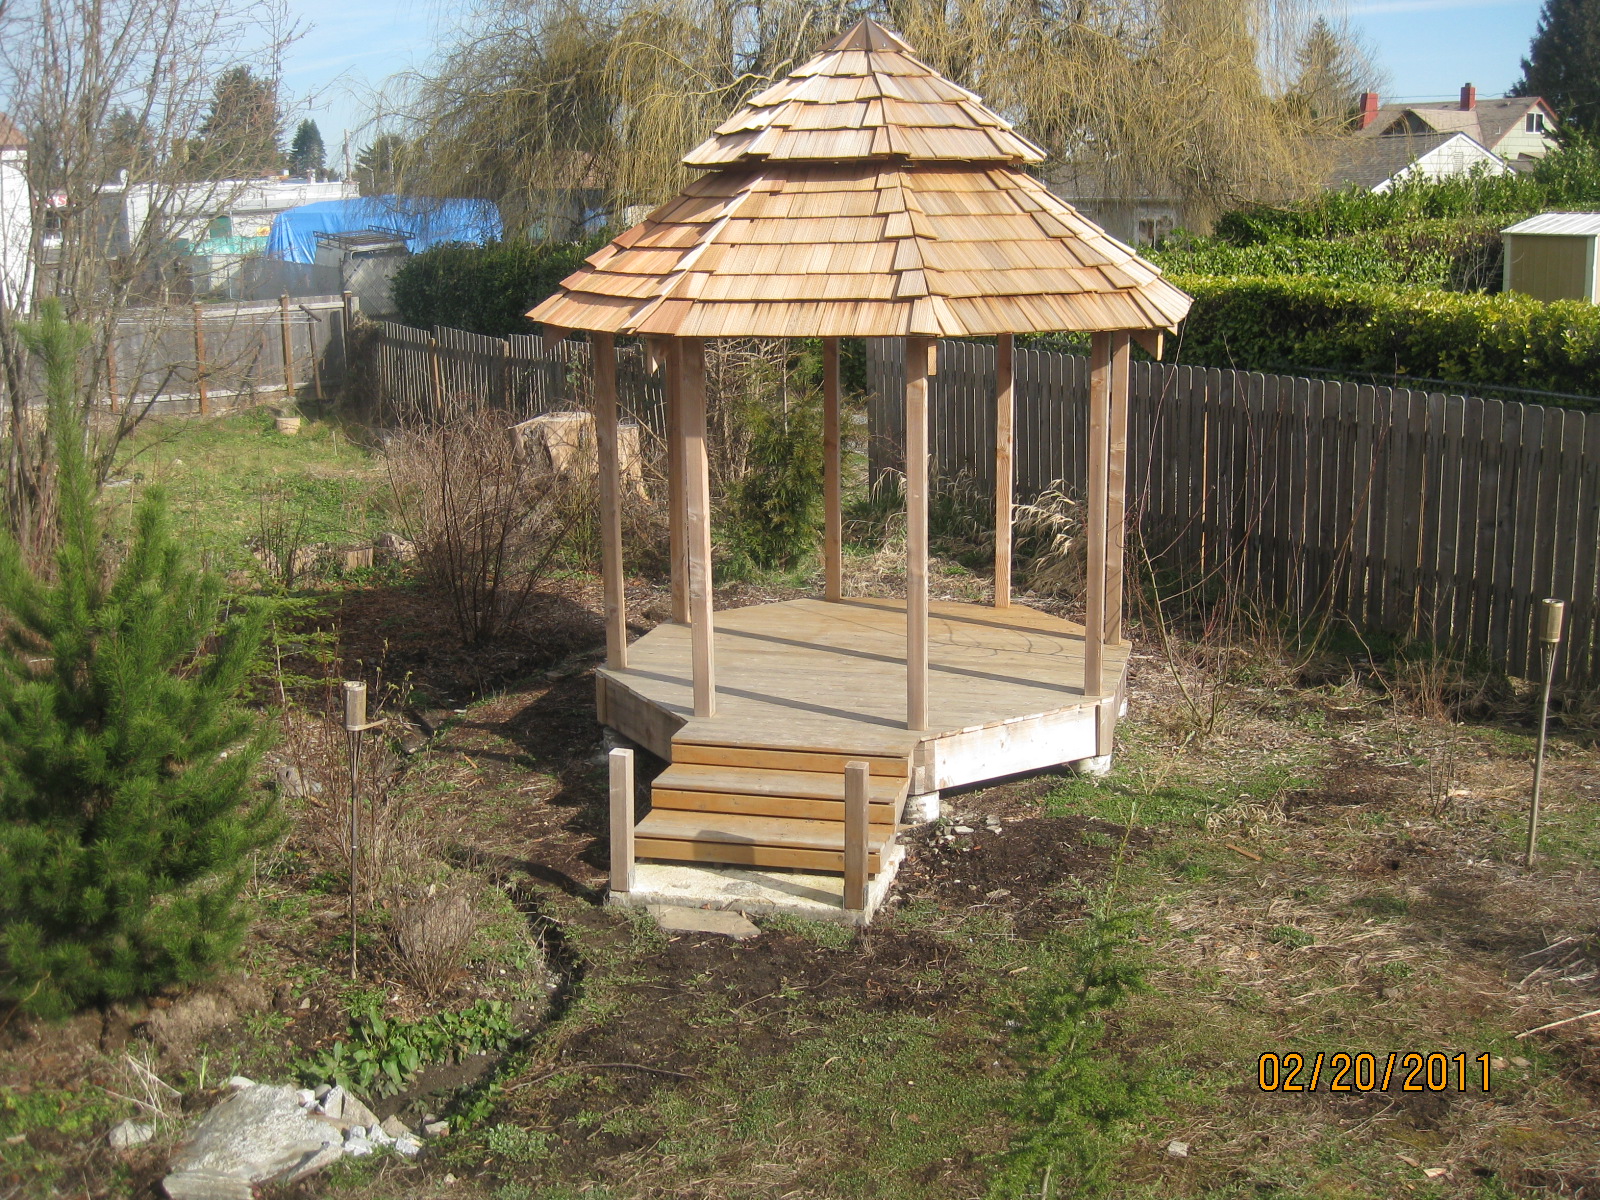
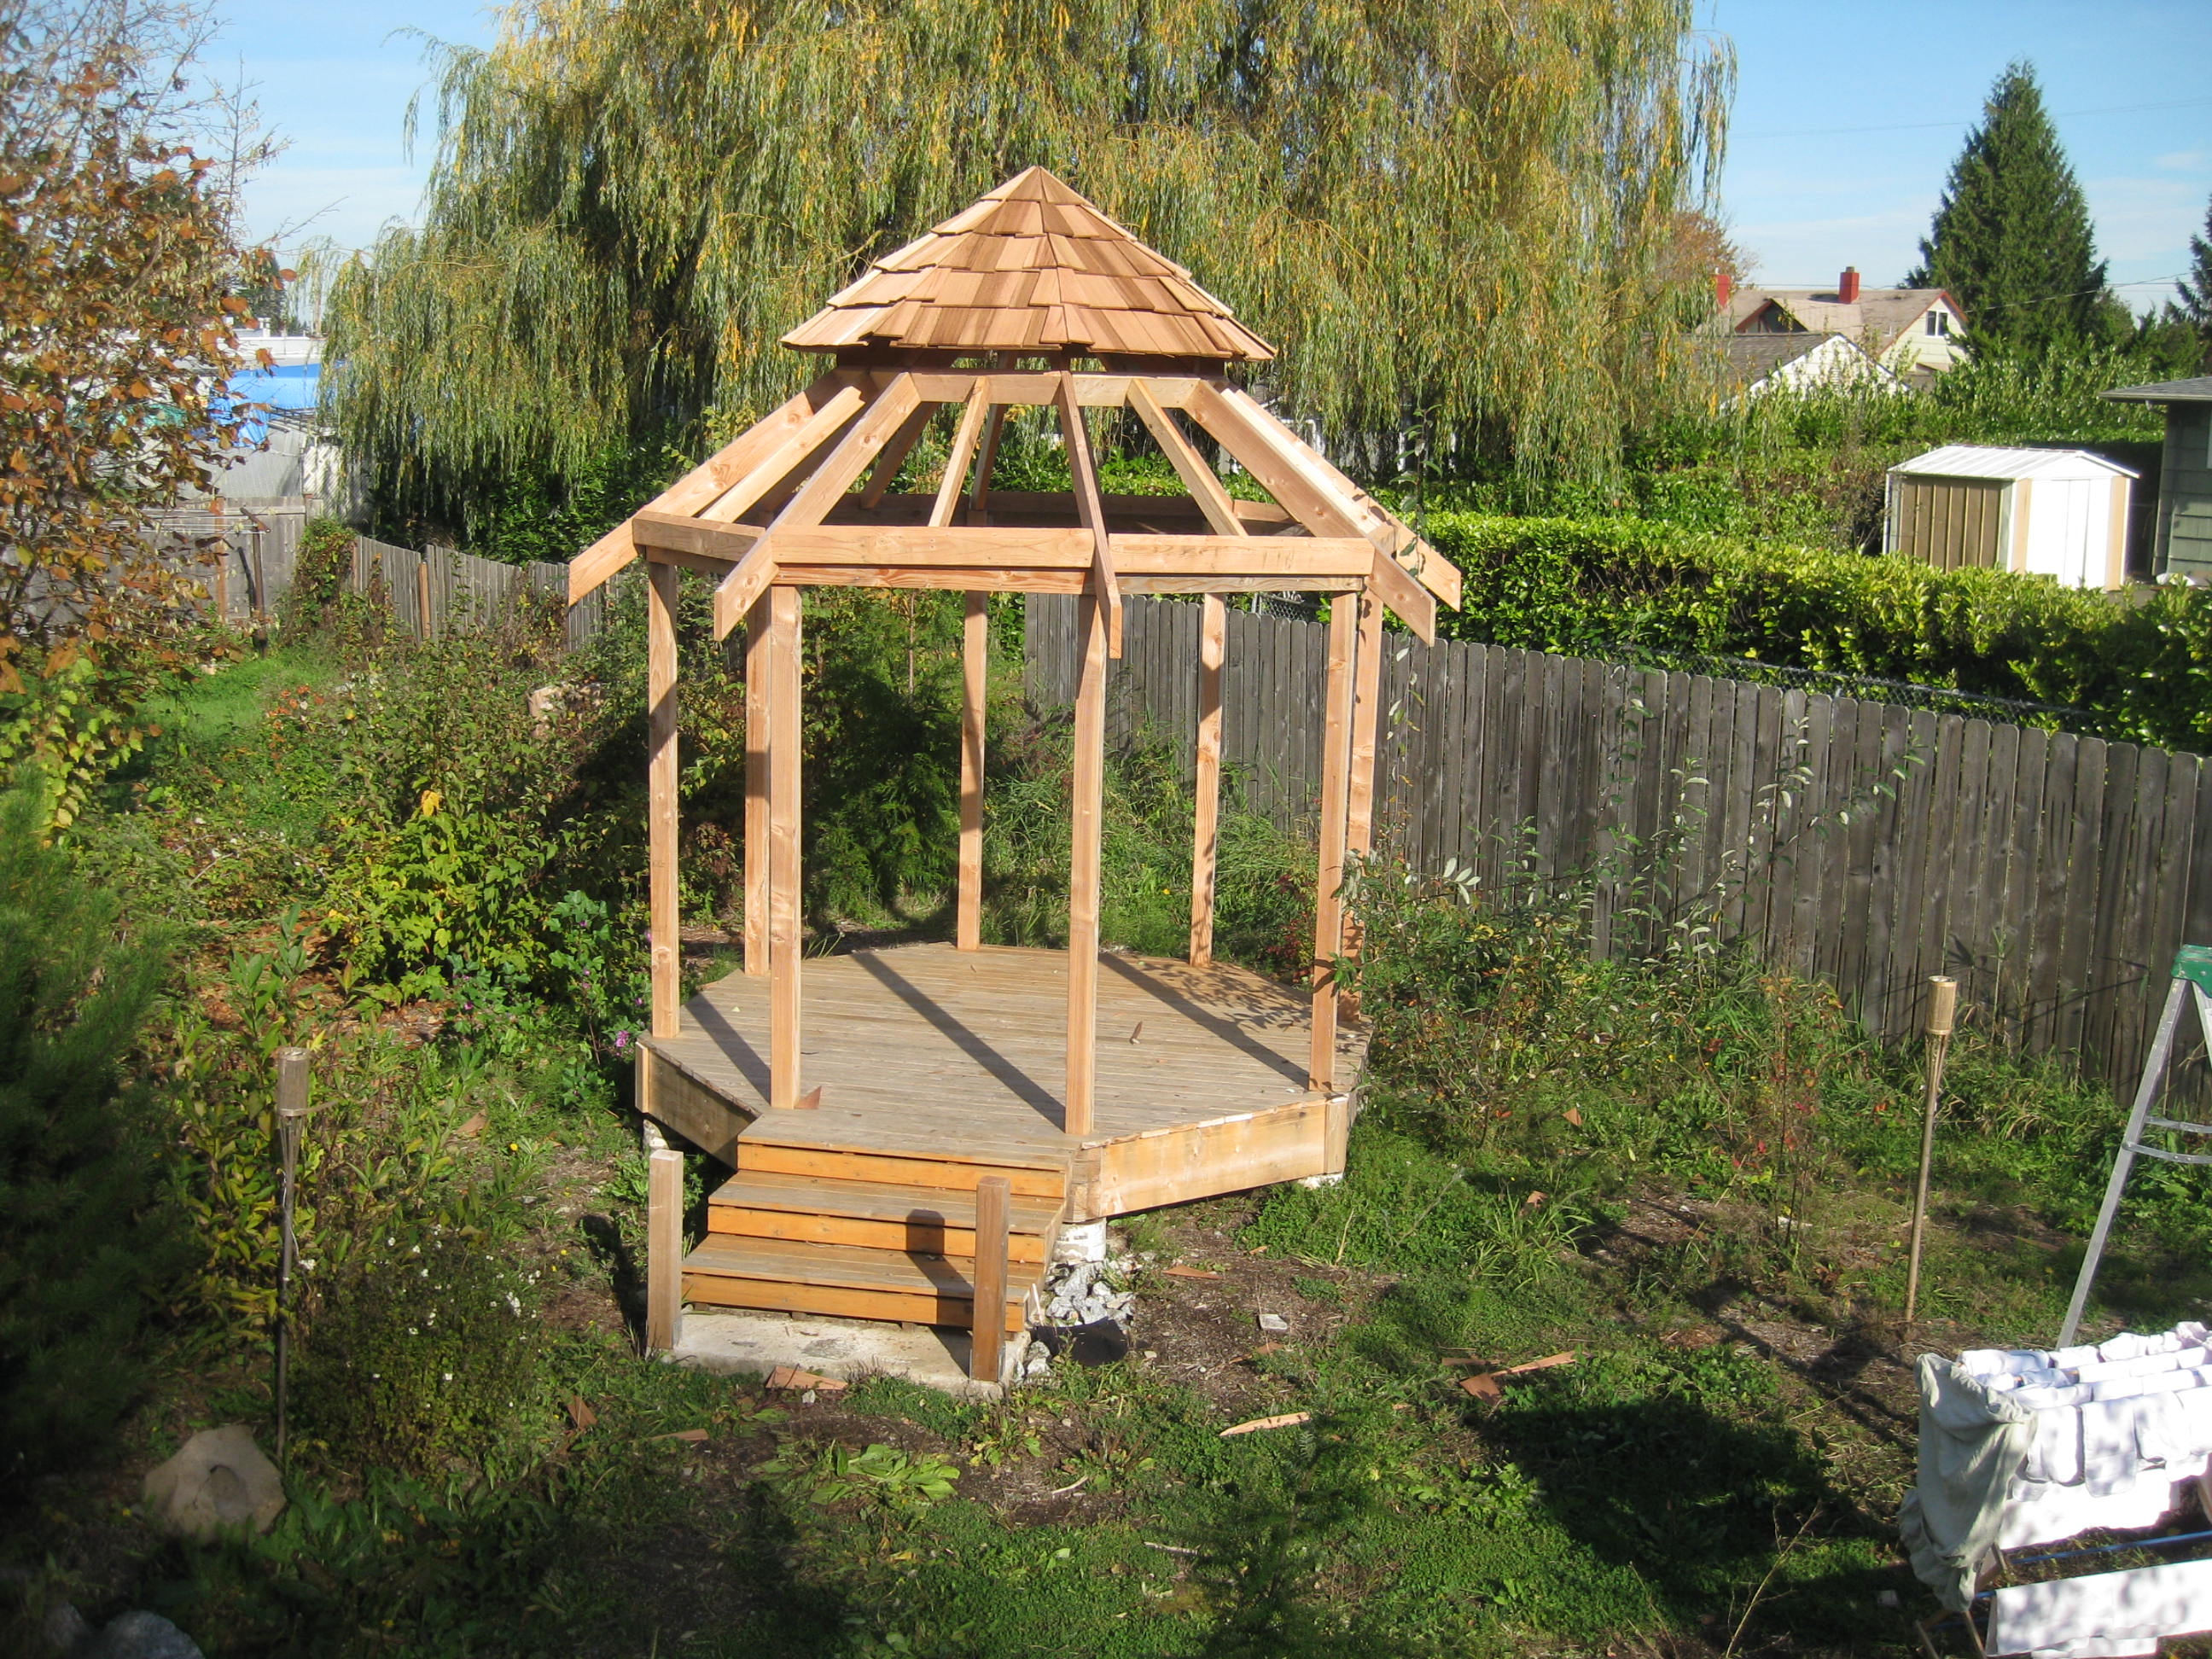
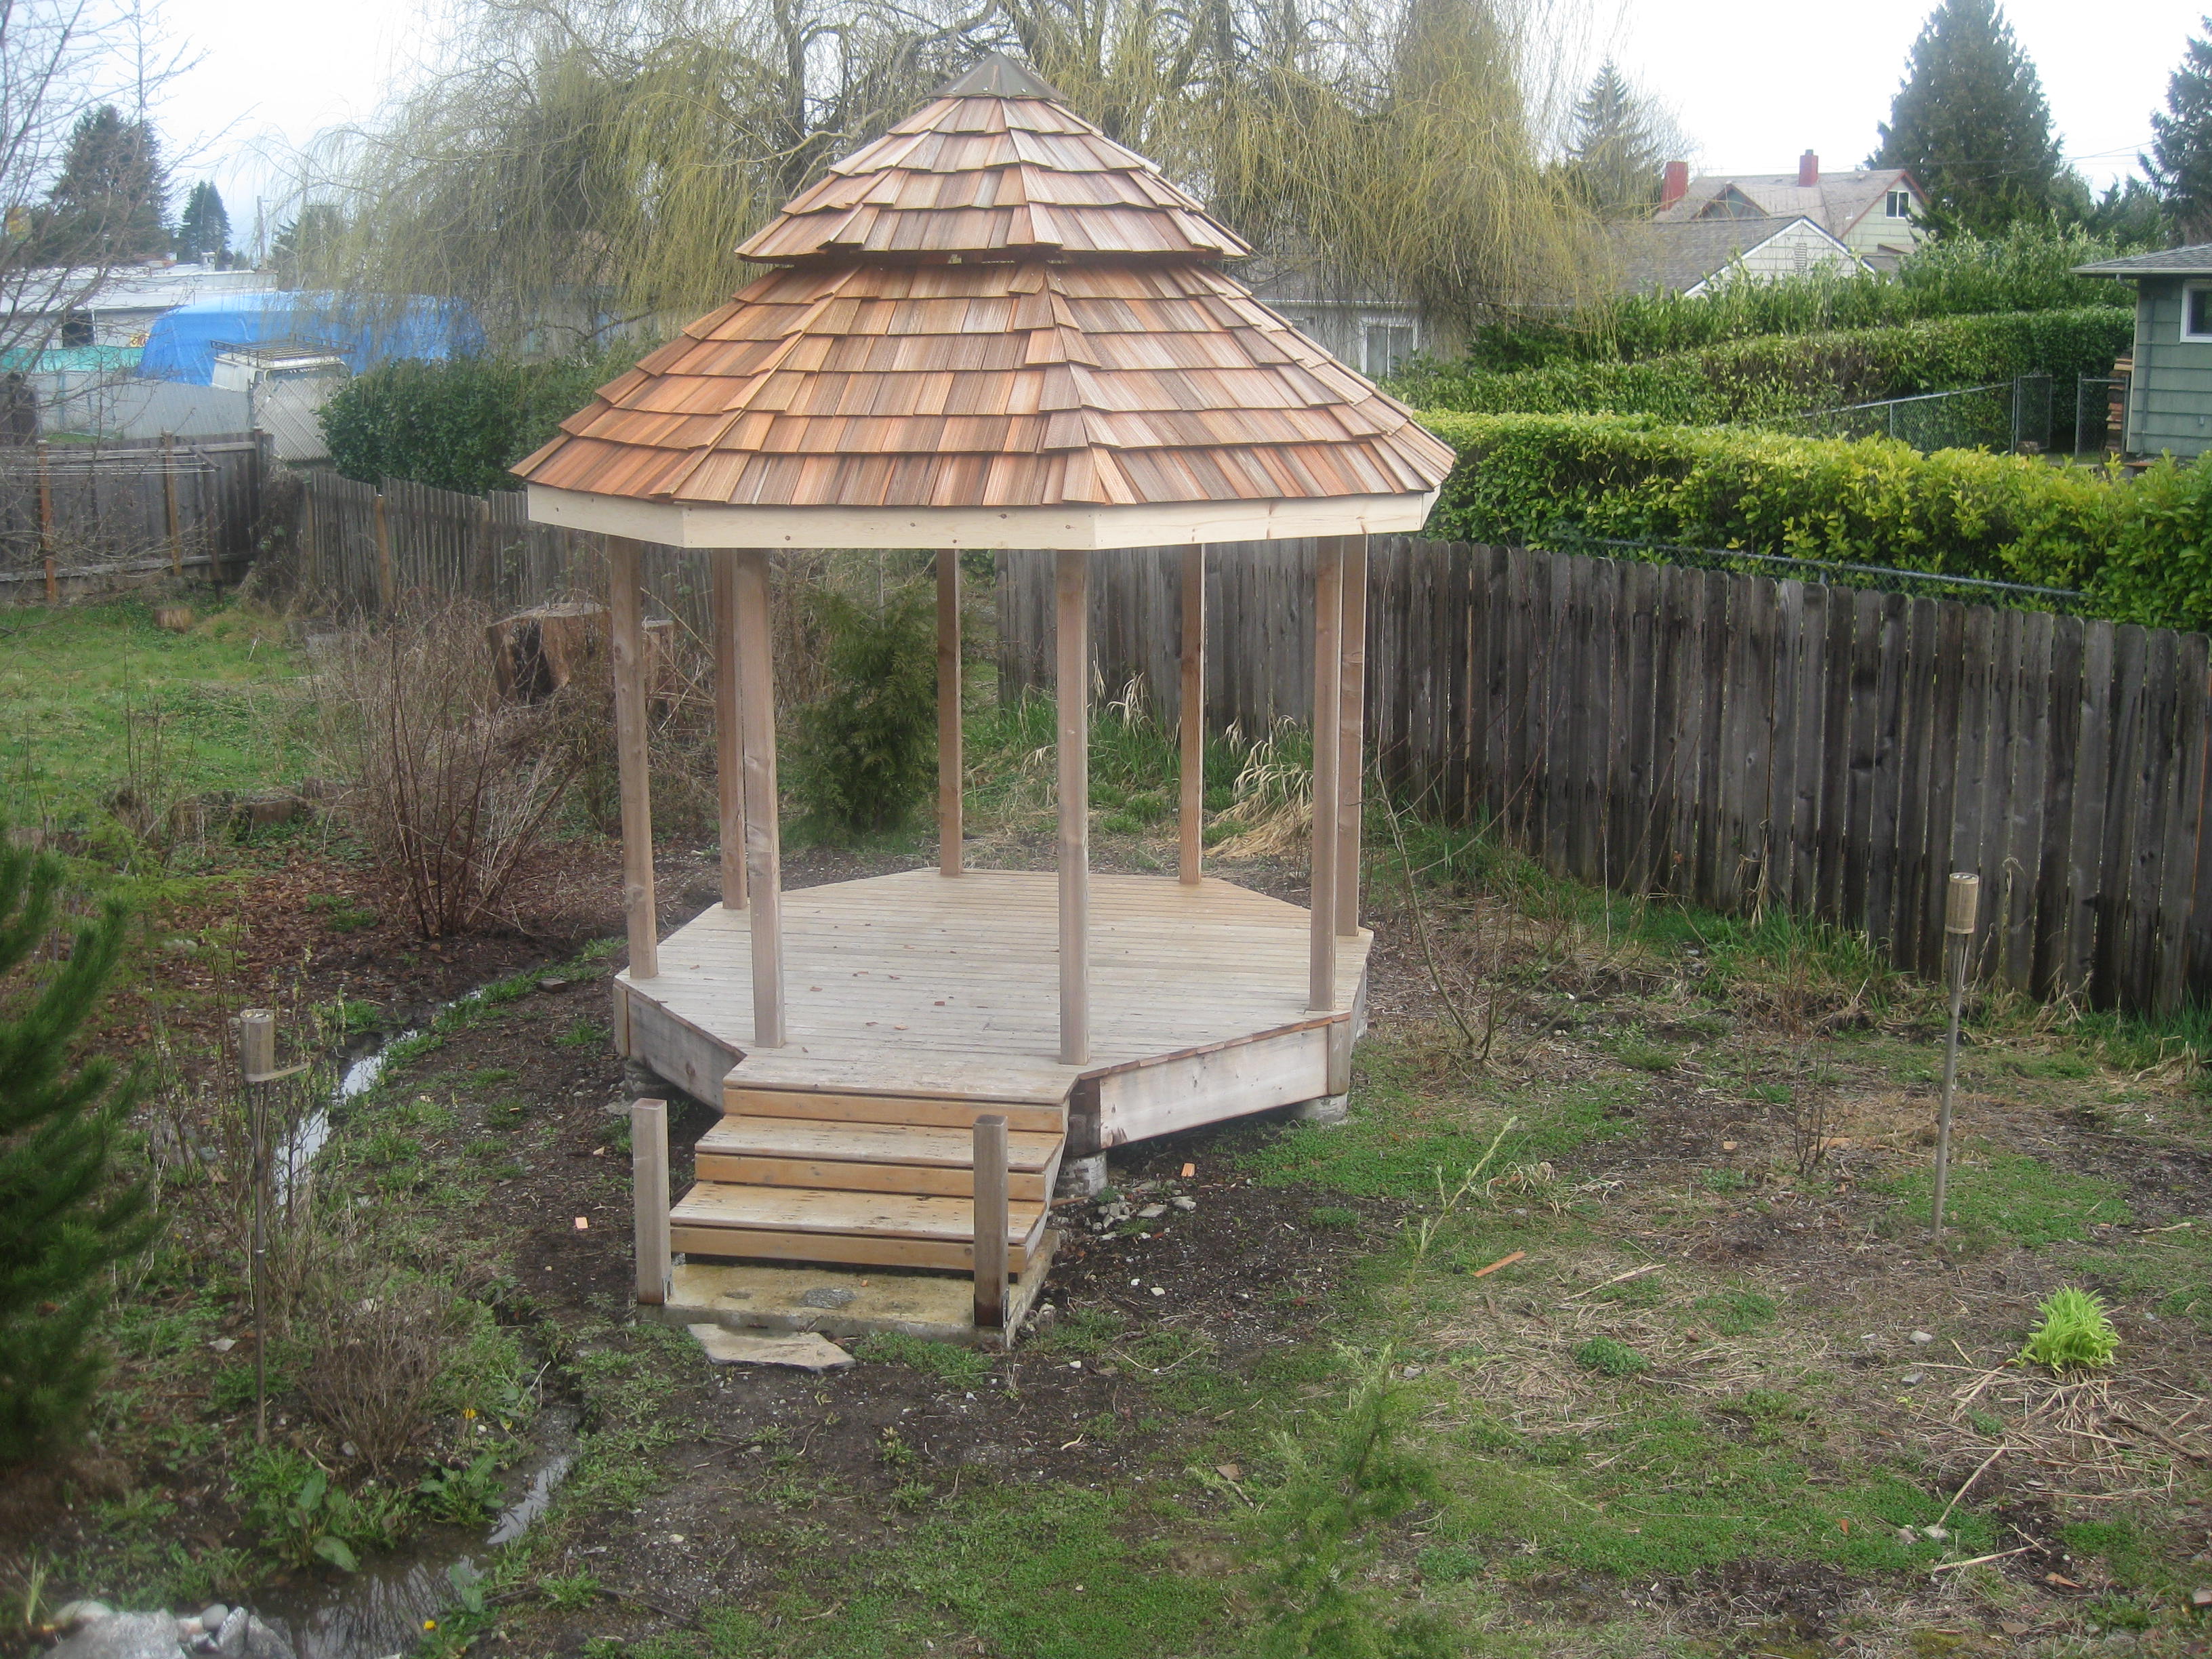
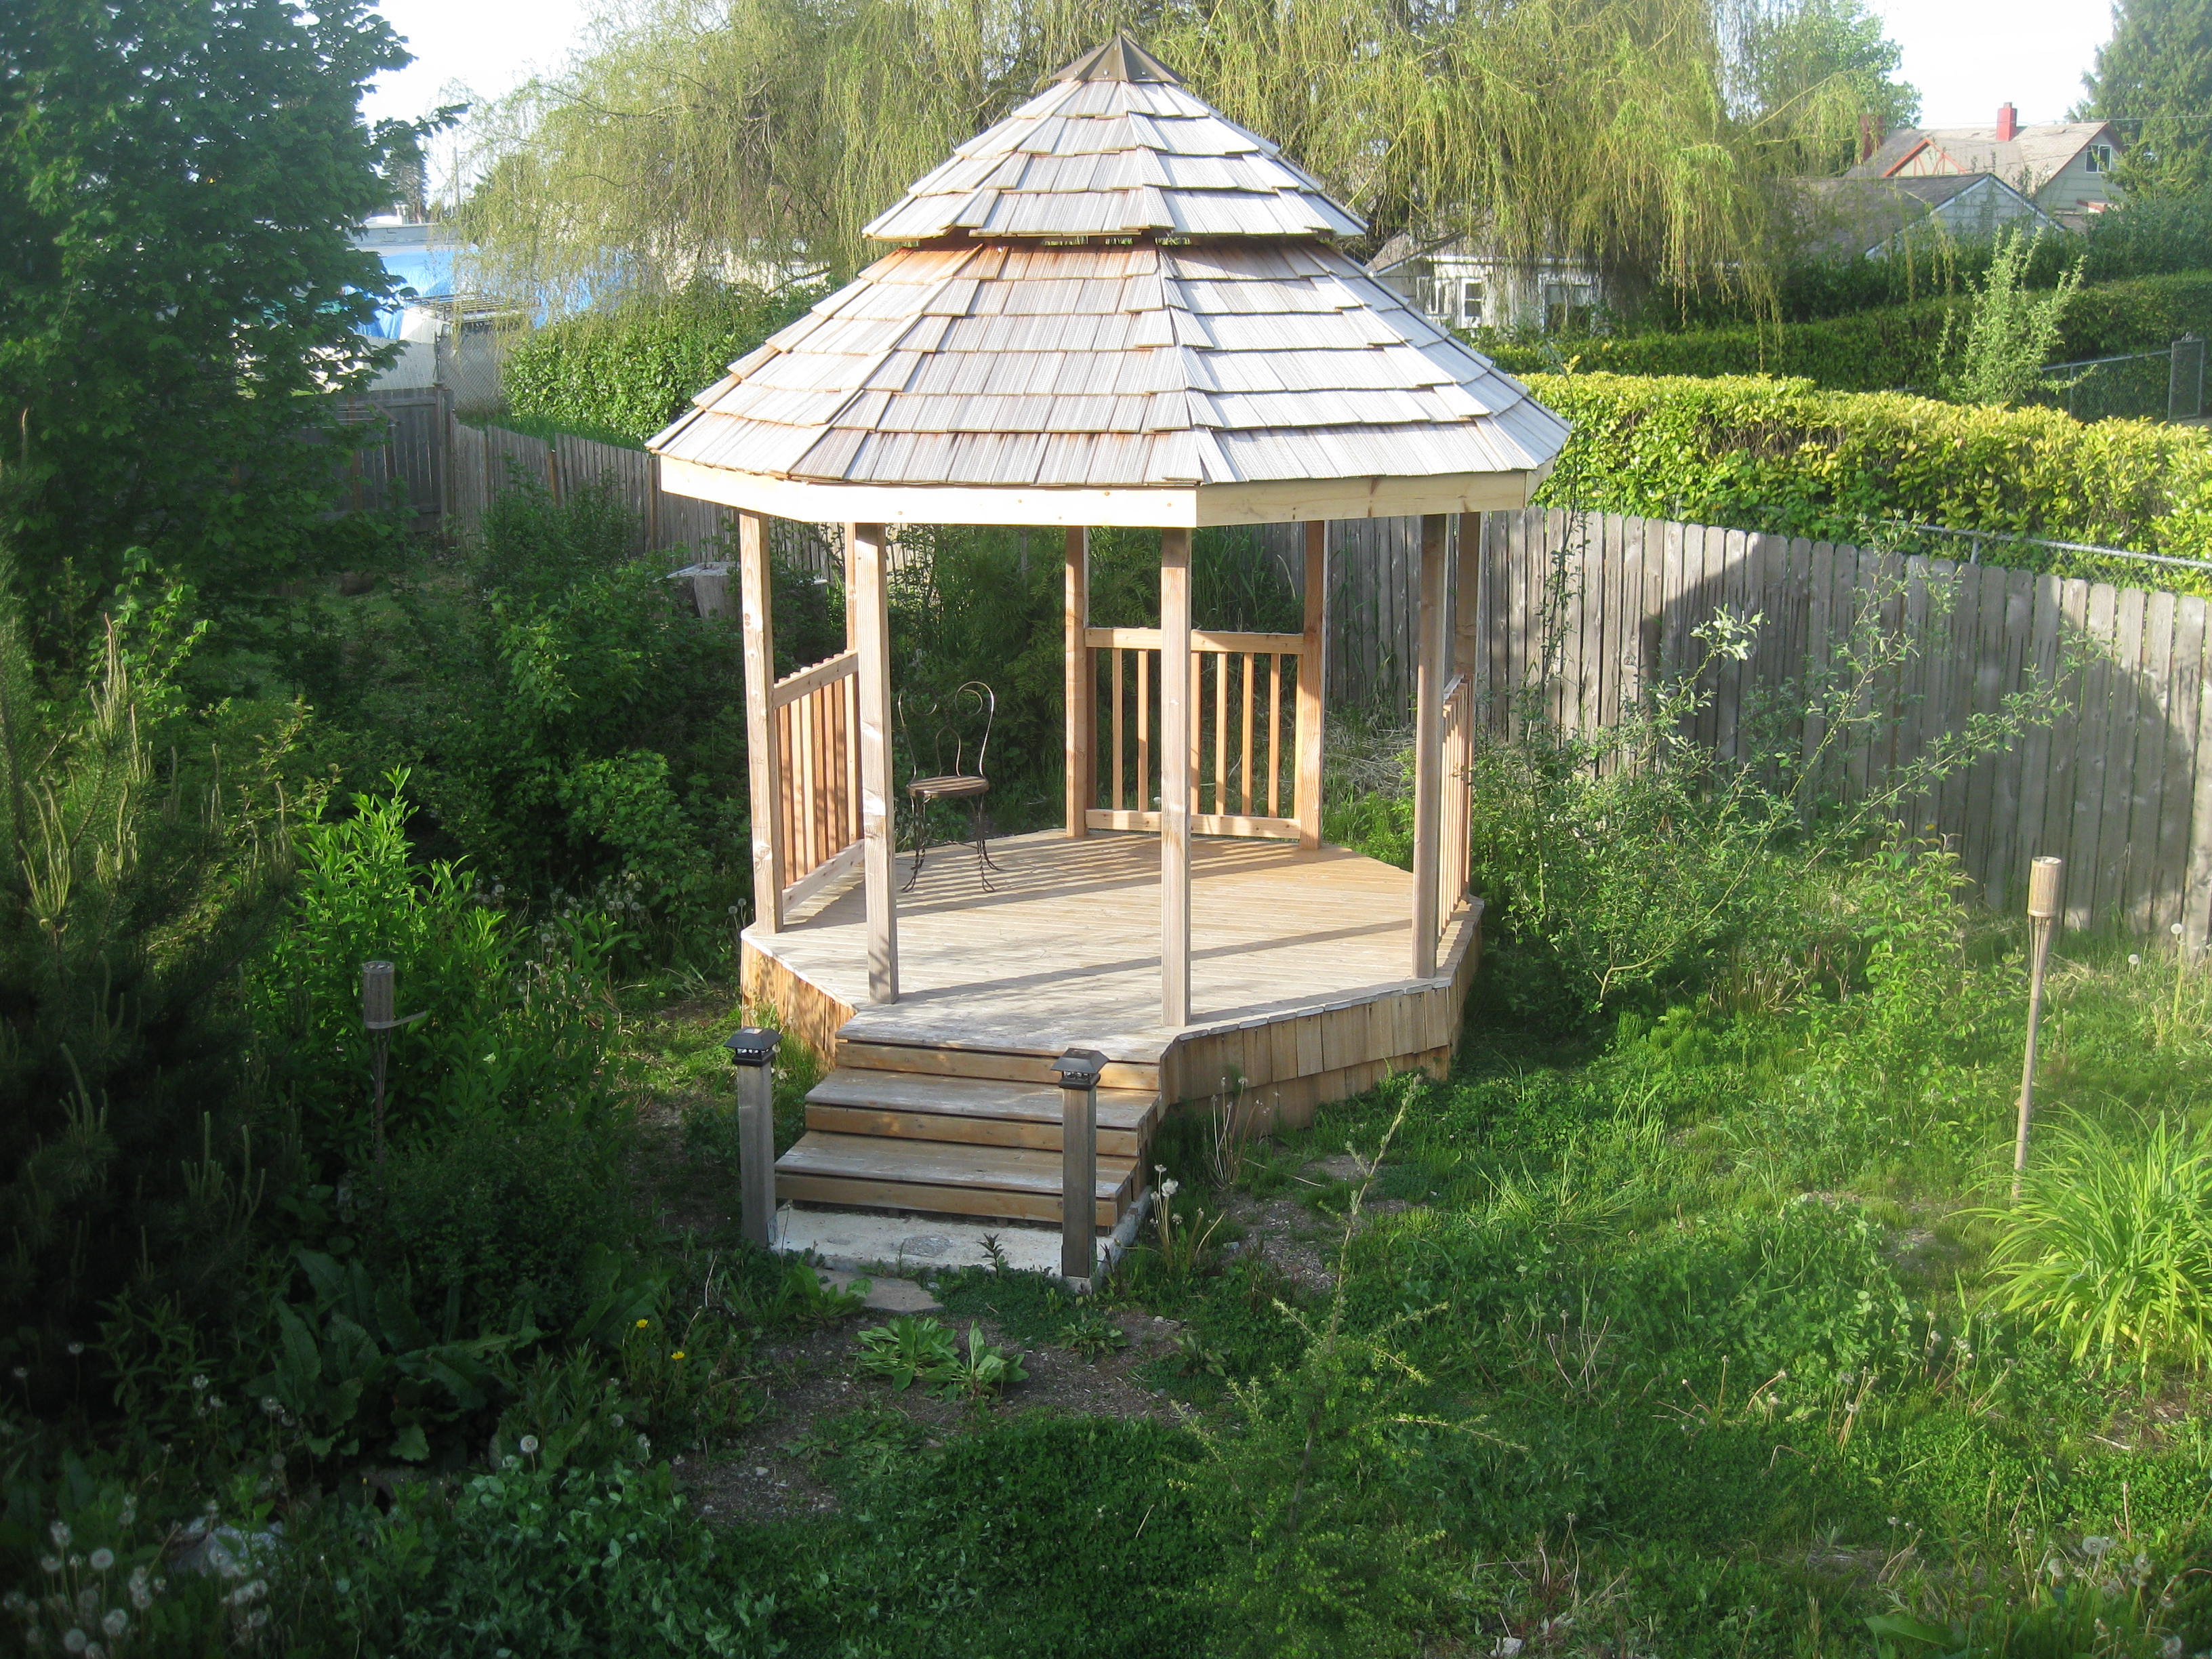
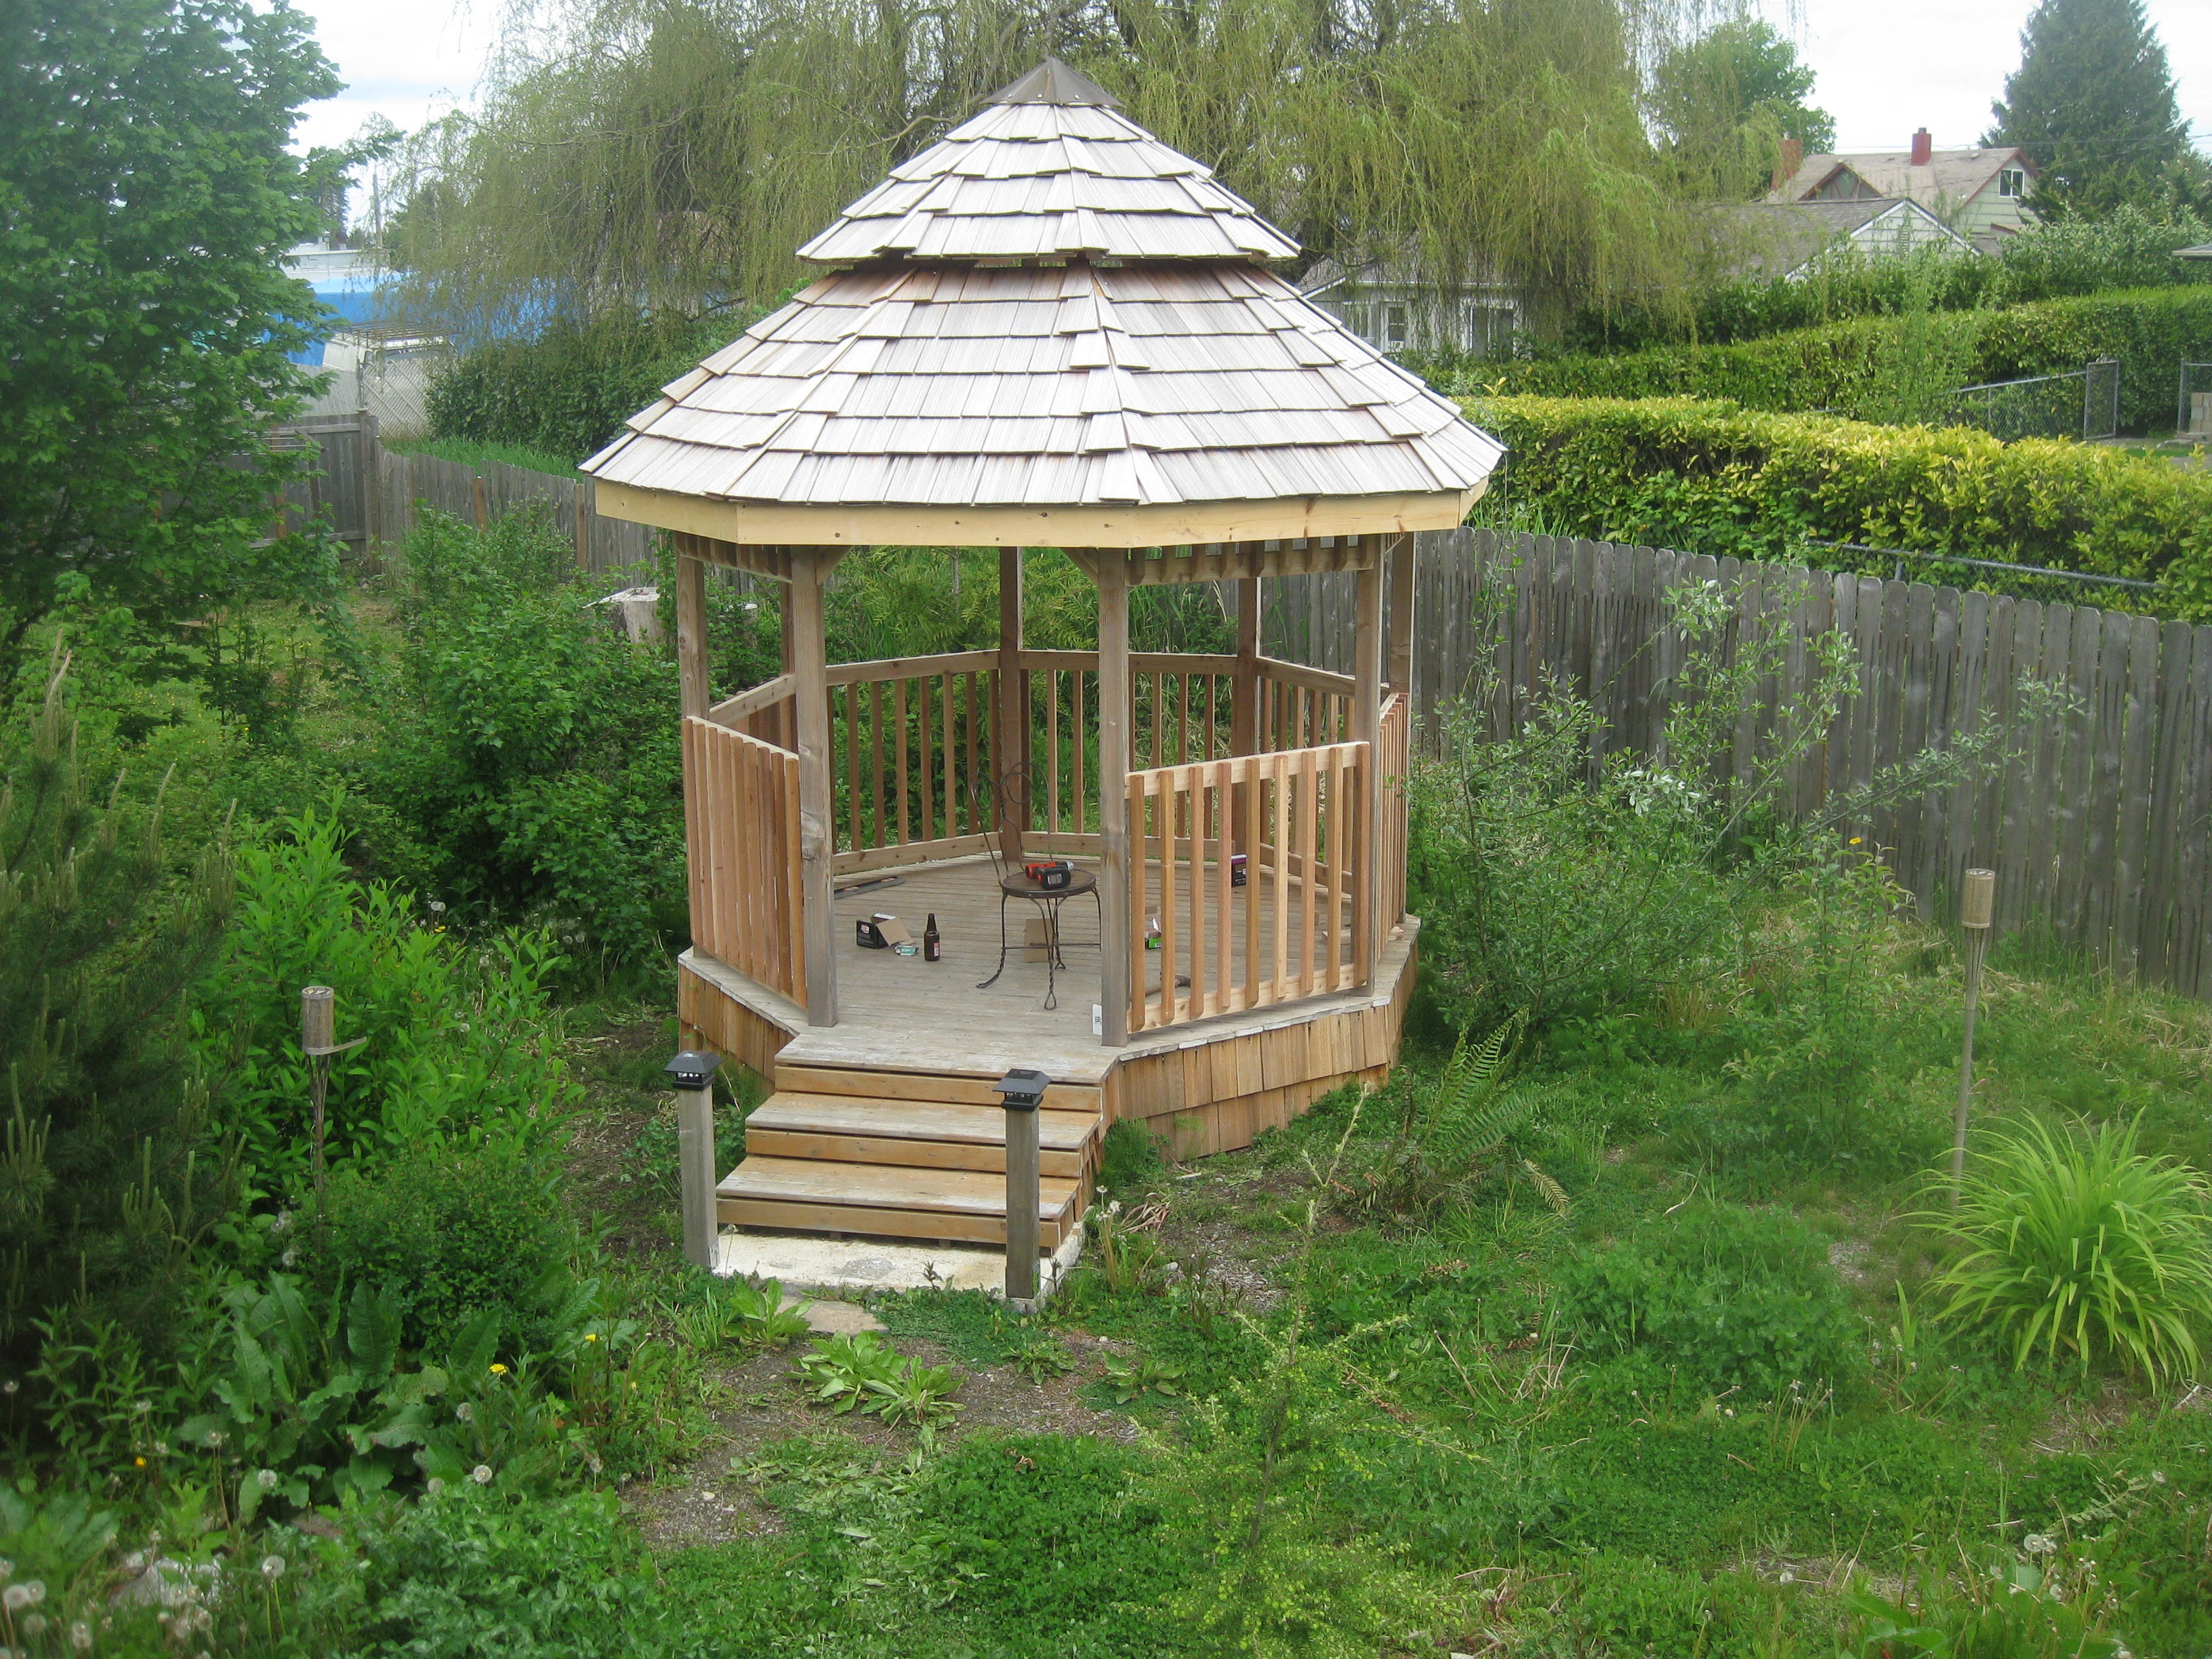
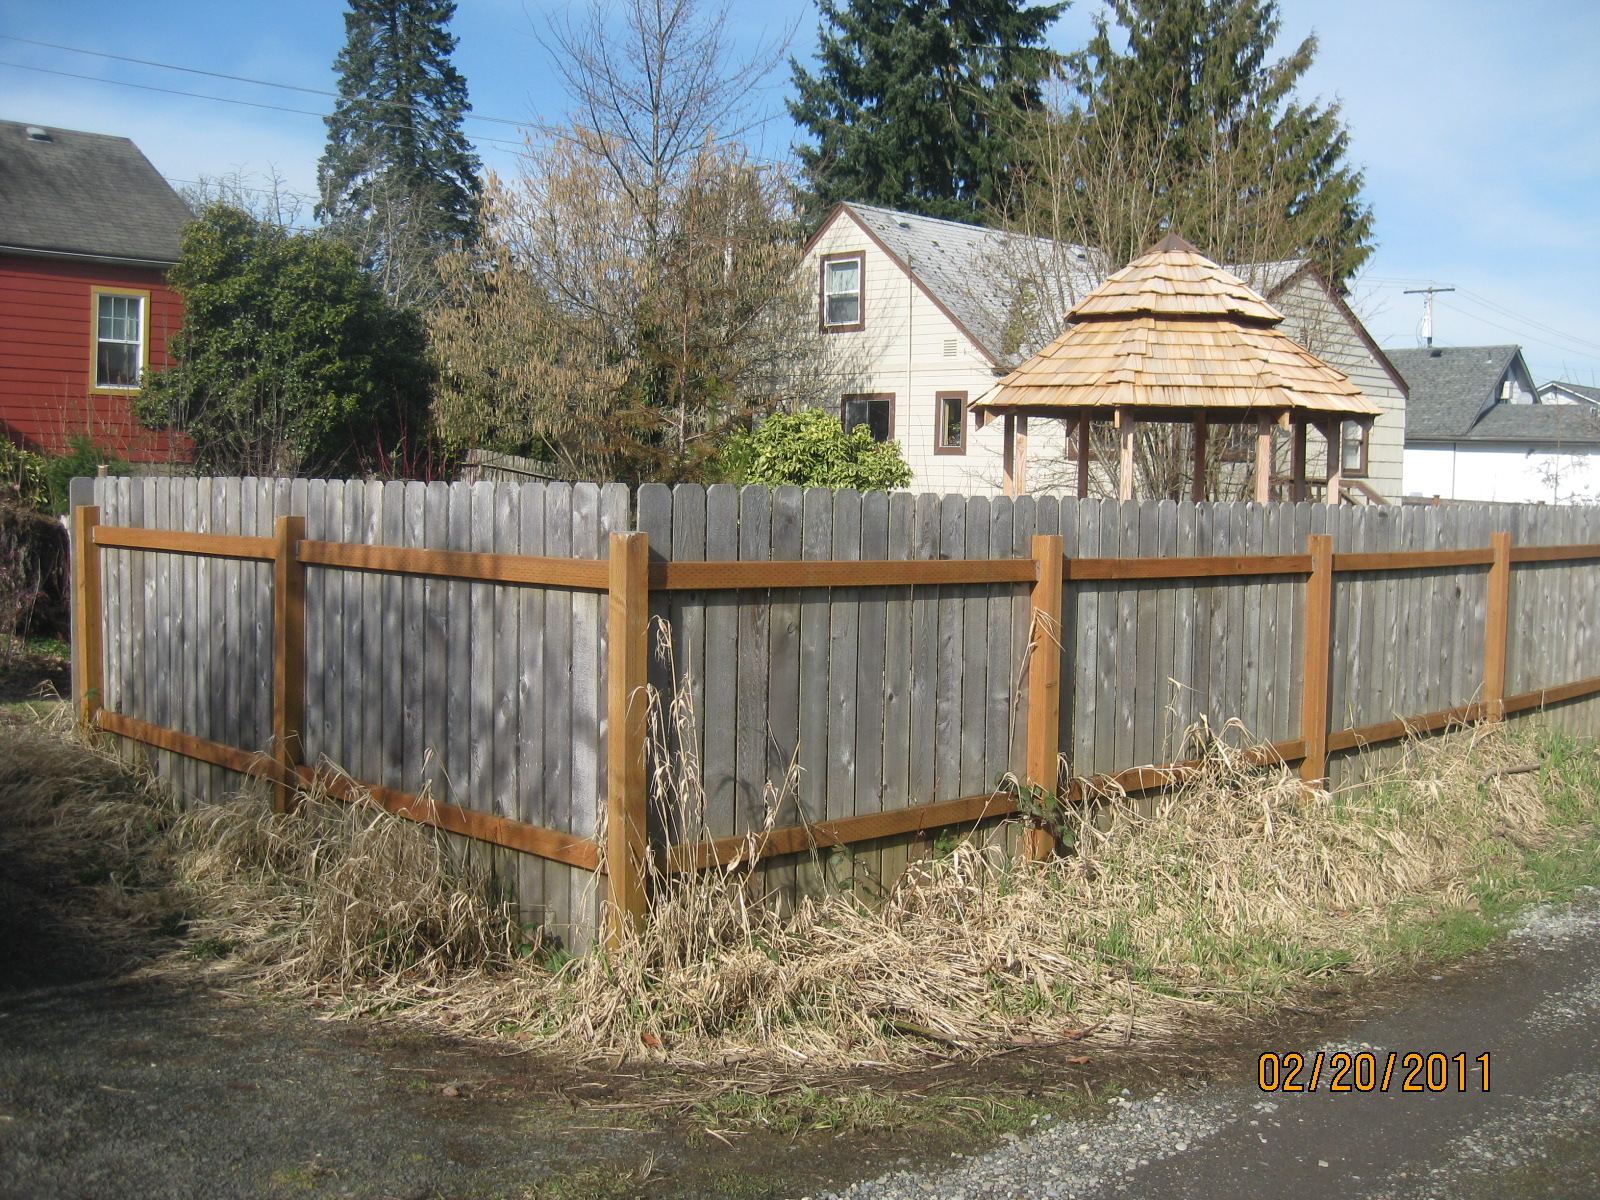 The gazebo looks cool from other nearby places in the neighborhood.
I've been getting compliments from the neighbors.
The gazebo looks cool from other nearby places in the neighborhood.
I've been getting compliments from the neighbors.
March 2011
 In March, I got the facia up around the base of the rafters. That was a day's work.
 Life was busy. That's all I did in March.
April 2011
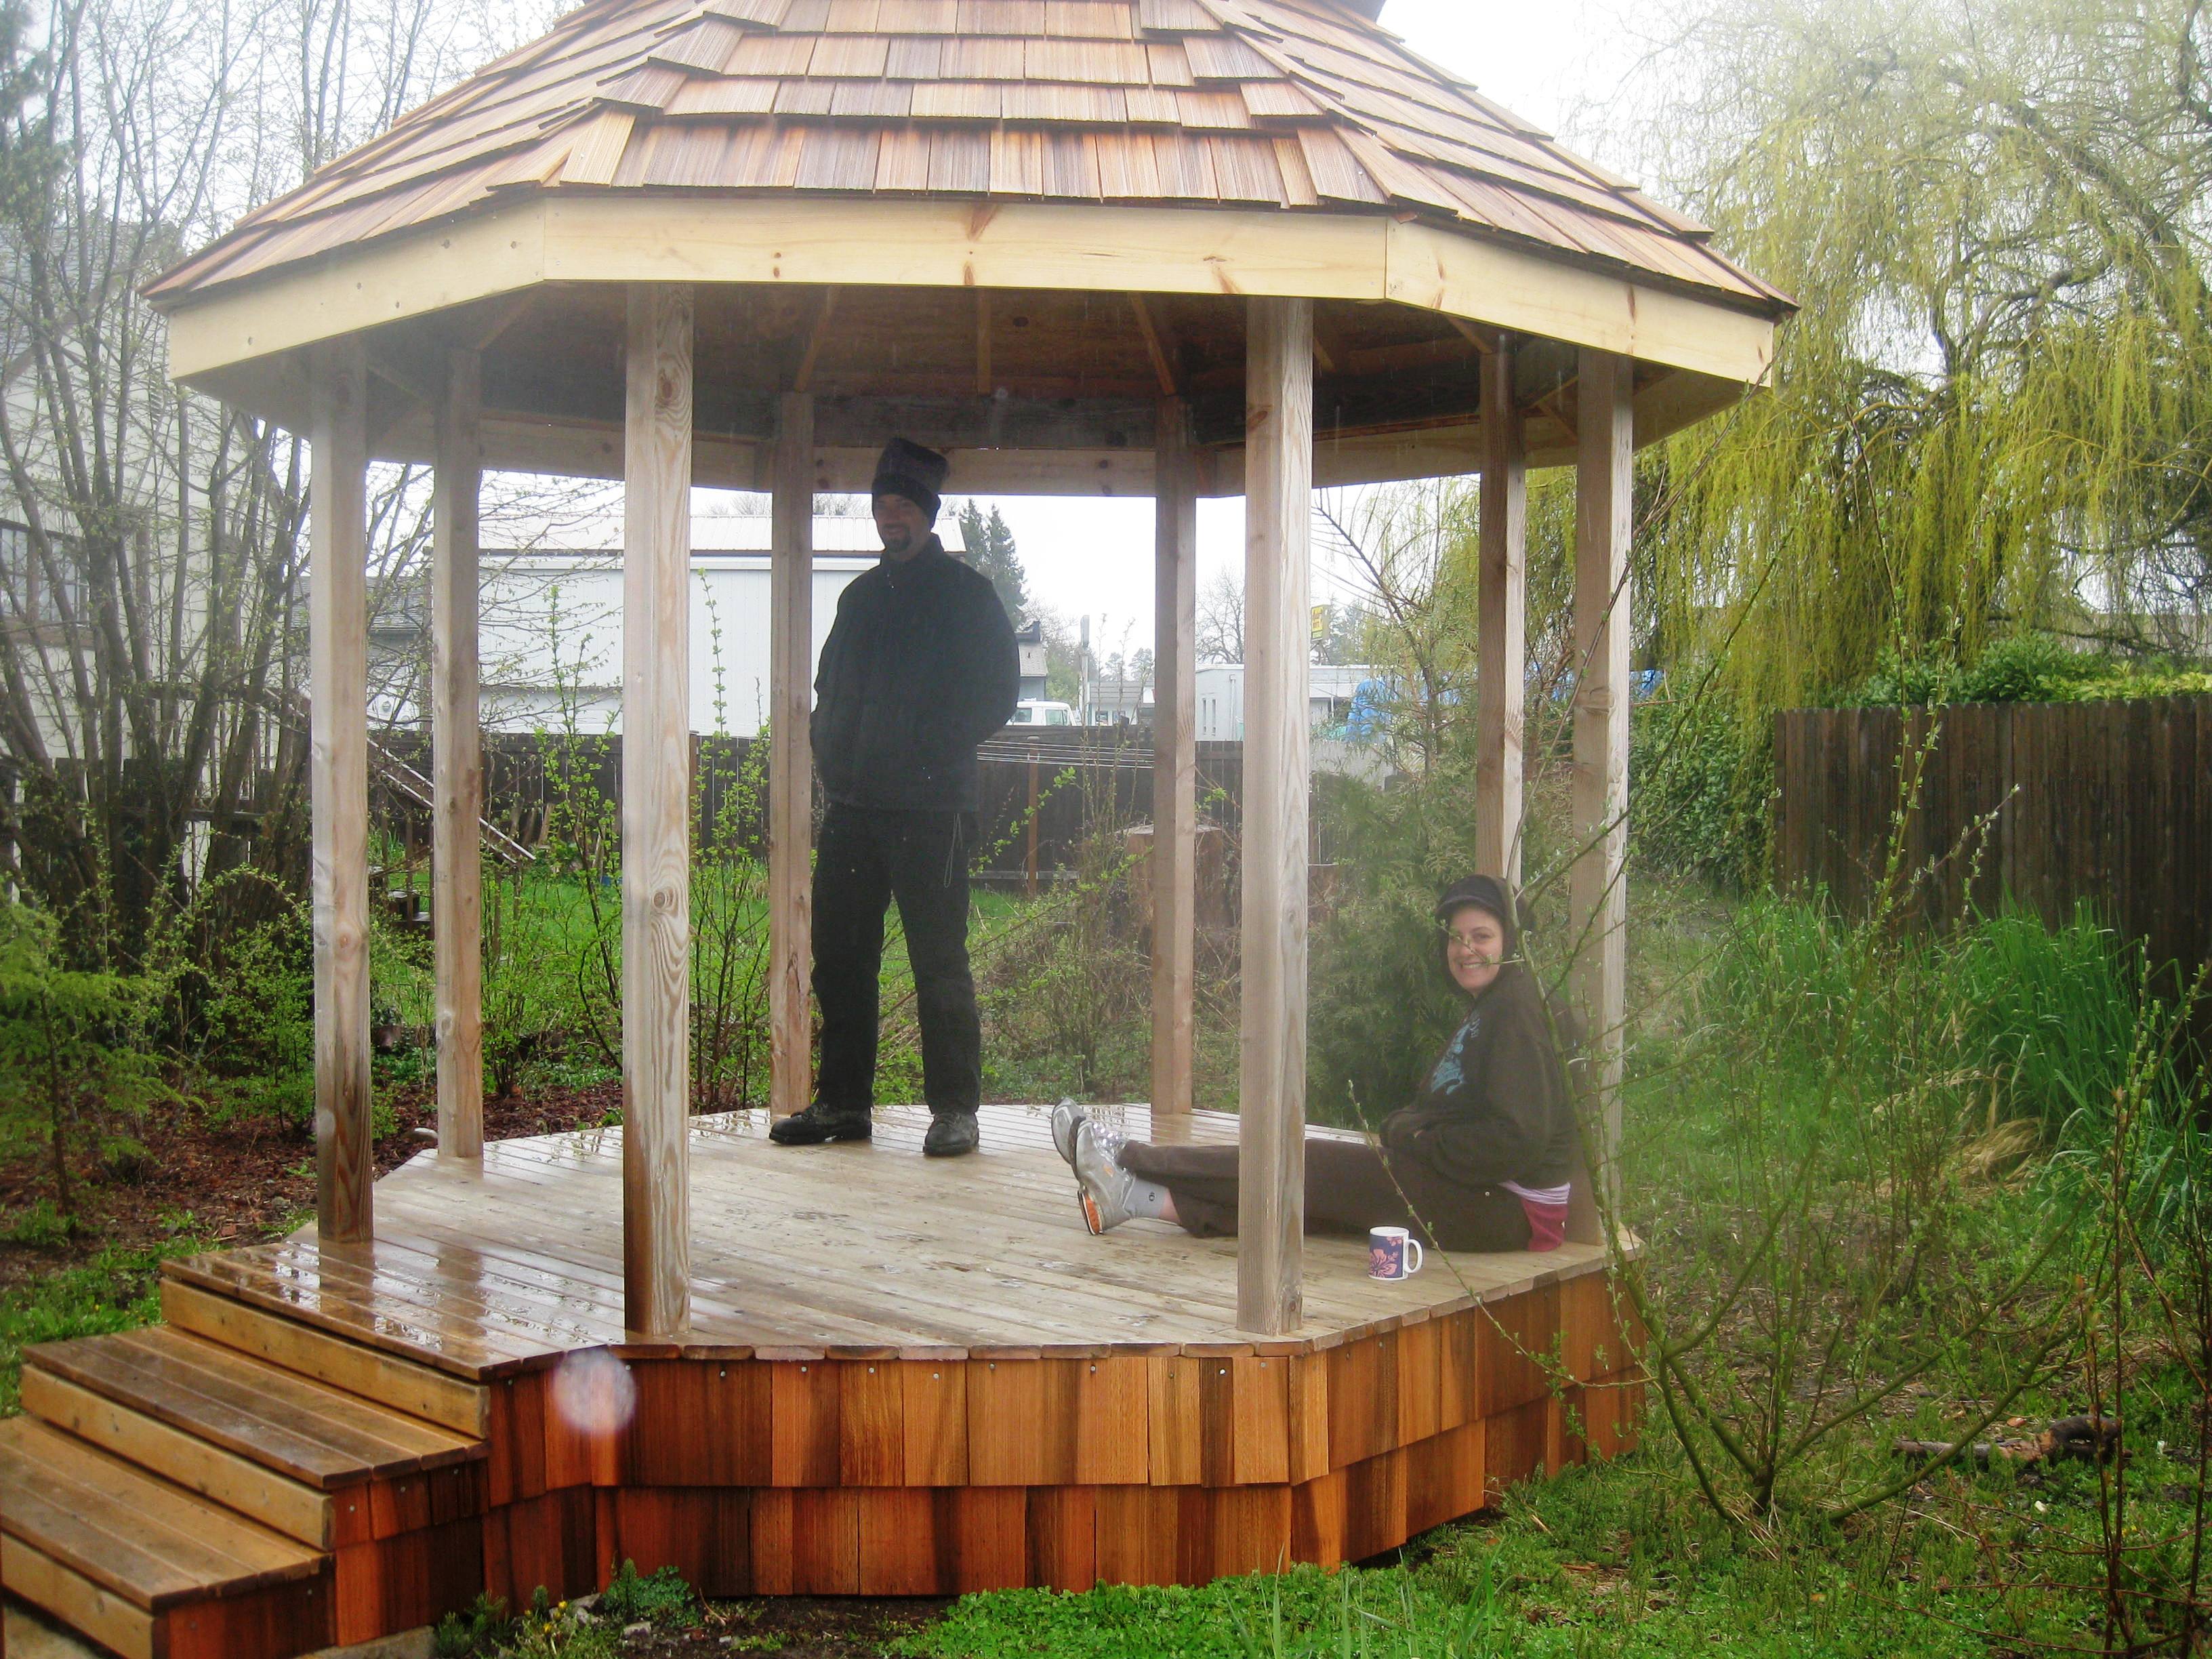 In April, I used the last of my cedar shakes to put a skirting around the base of the gazebo.
By this time, the gazebo was already a nice and mostly dry hang-out spot.
In April, I used the last of my cedar shakes to put a skirting around the base of the gazebo.
By this time, the gazebo was already a nice and mostly dry hang-out spot.
May 2011
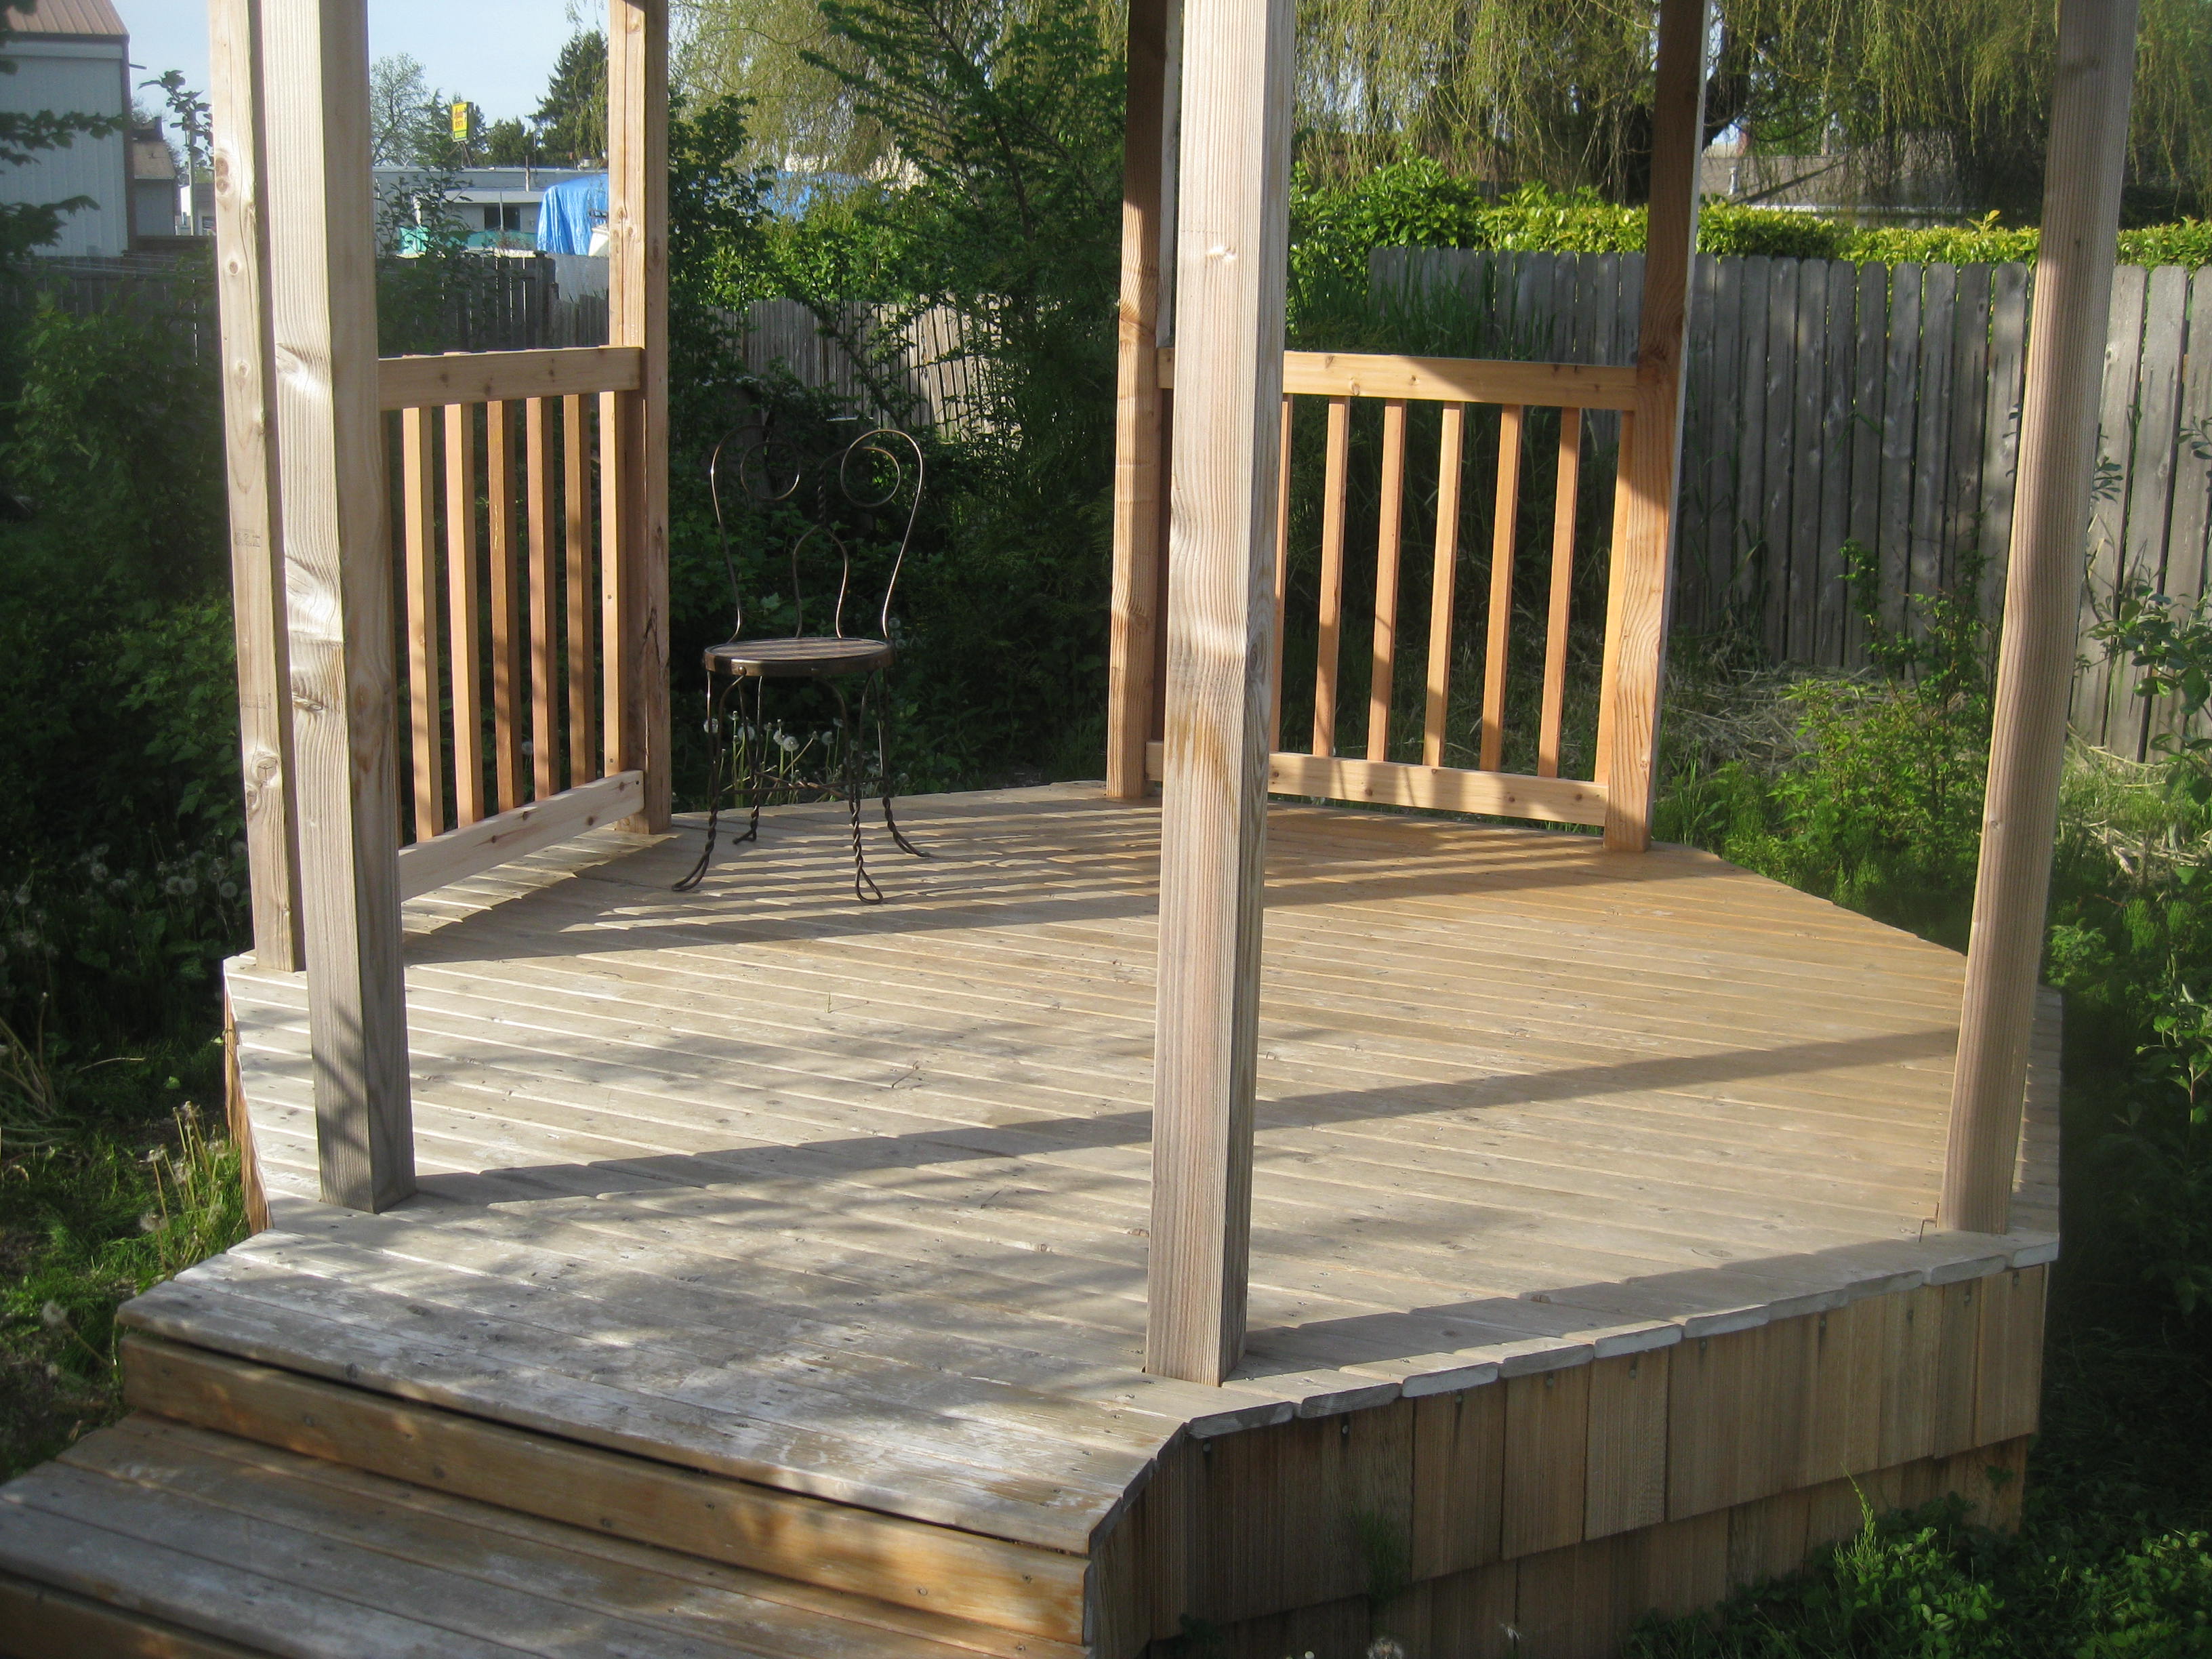 In May, I installed the railings. The last step?
 Well, there's always going to be more details...
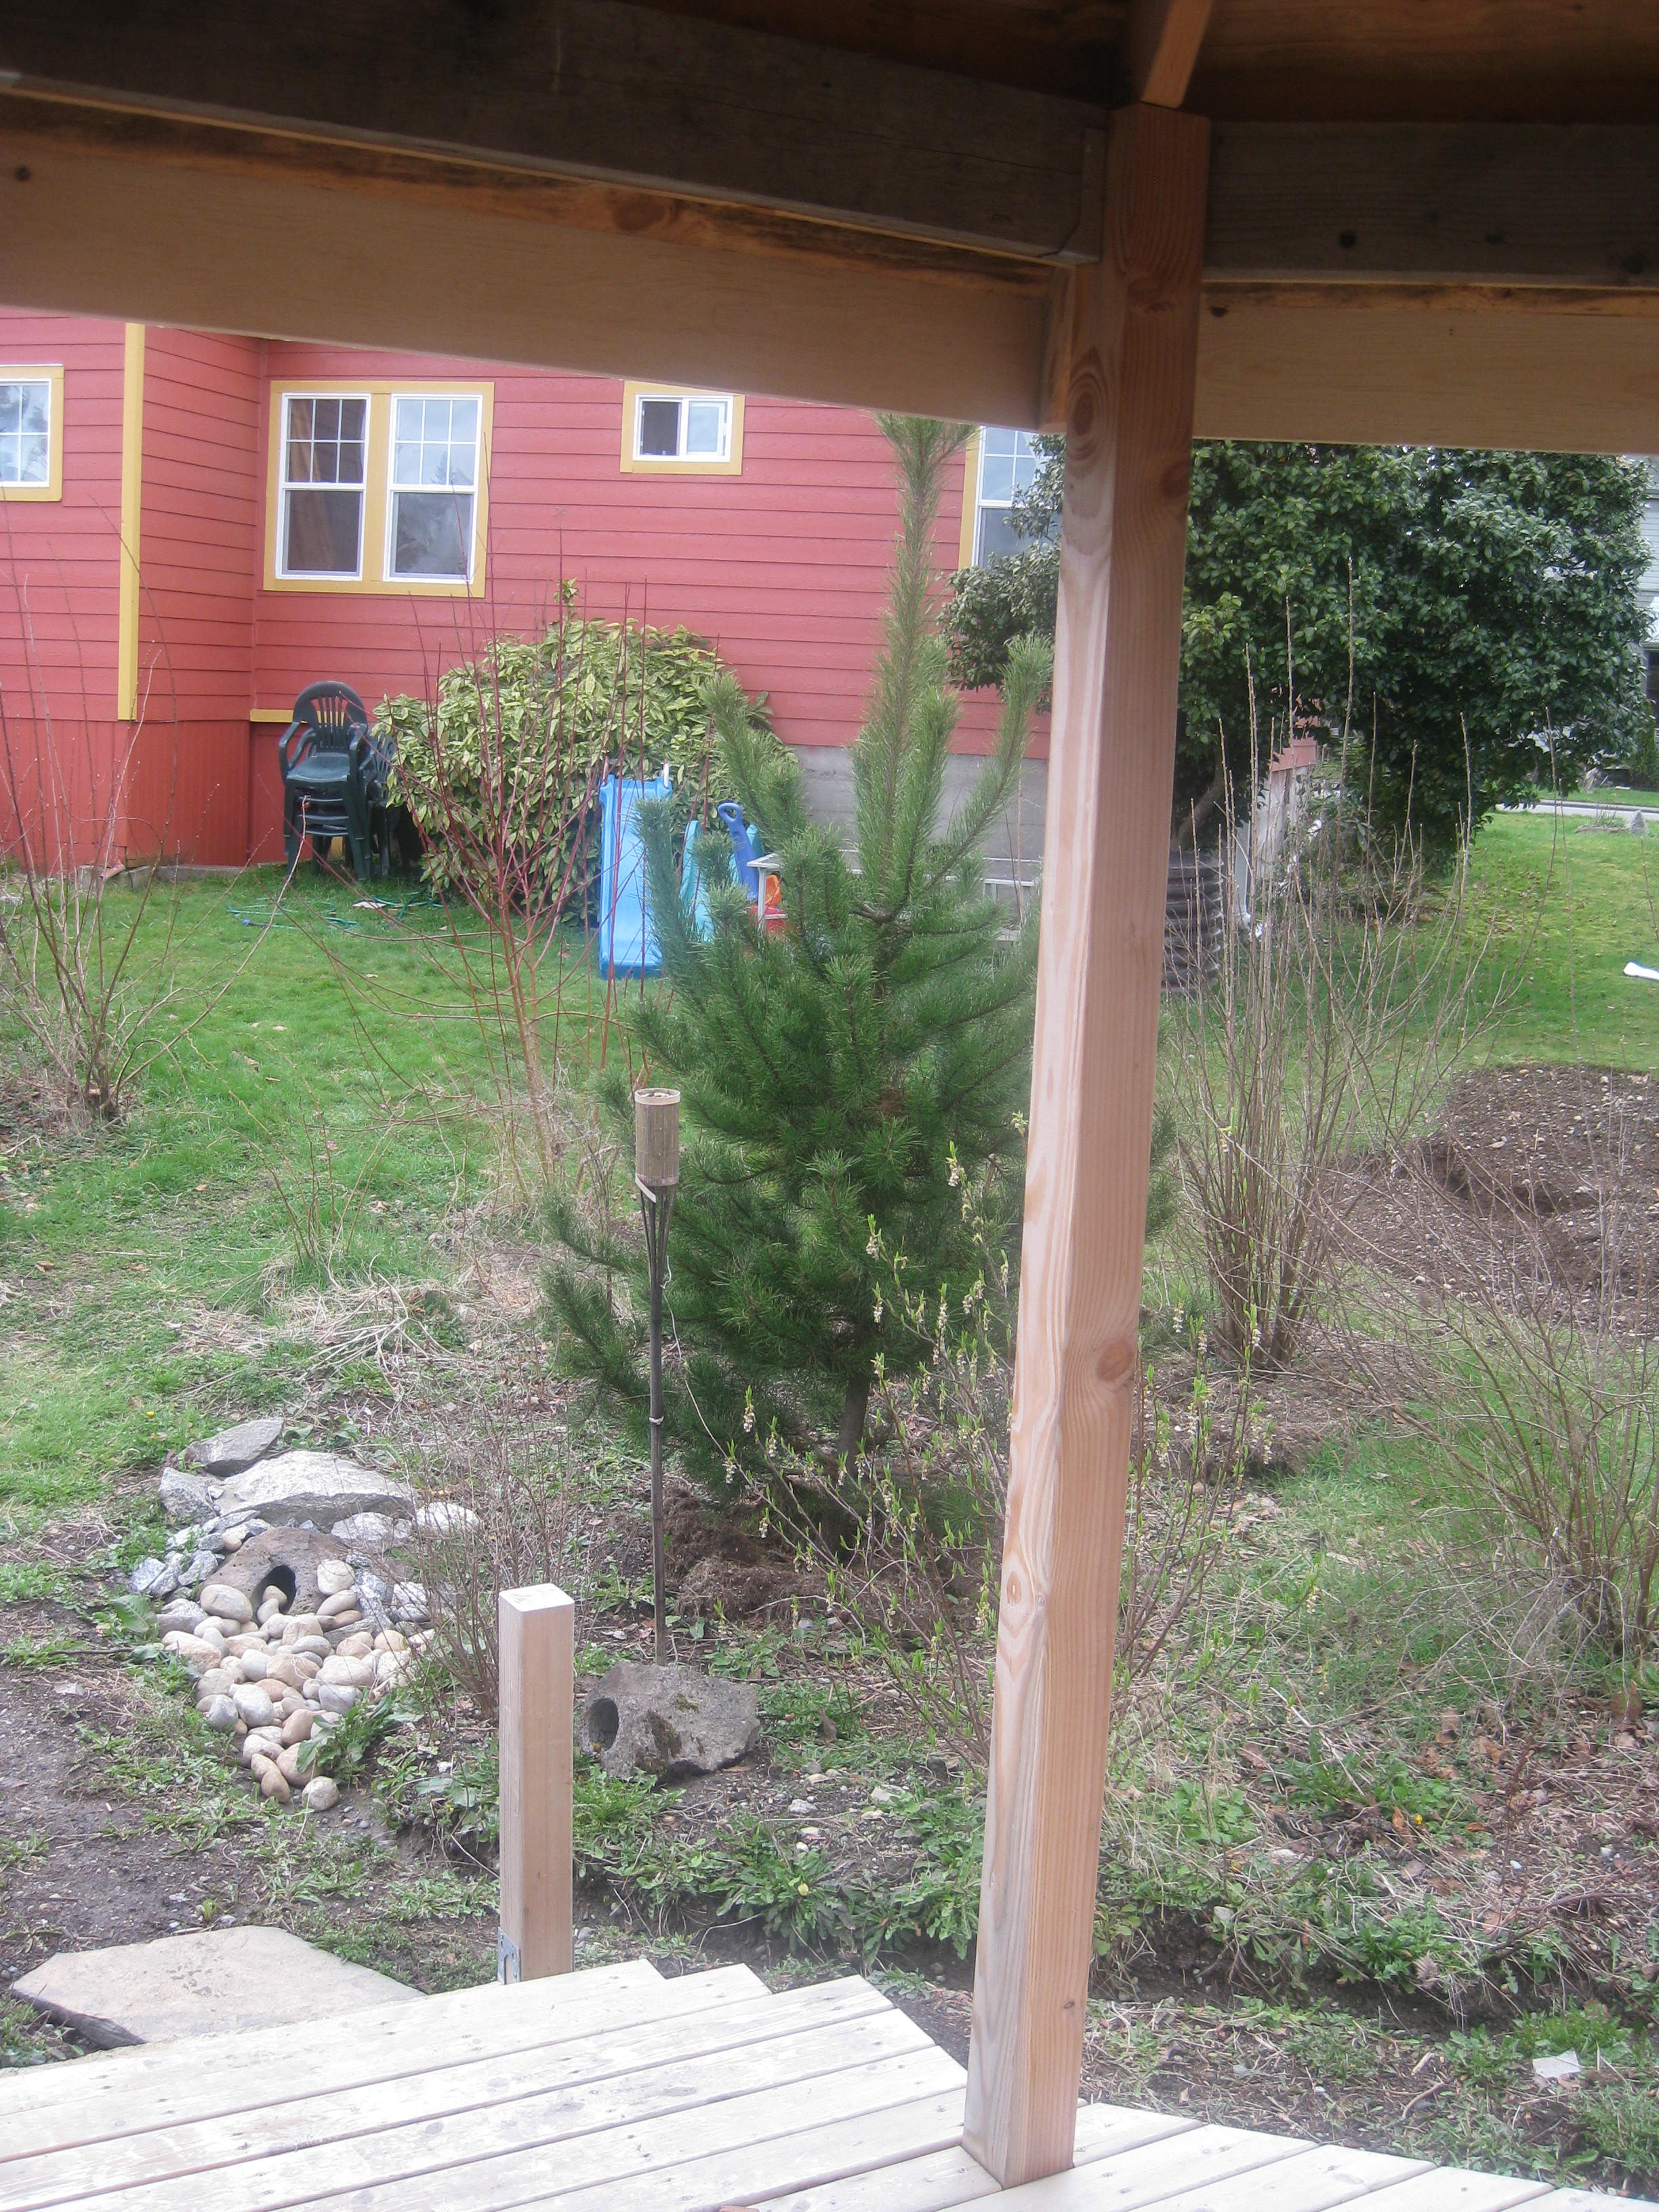
I installed little solar-powered lanterns on the posts at the base of the stairs.
Well, there's always going to be more details...
I installed little solar-powered lanterns on the posts at the base of the stairs.
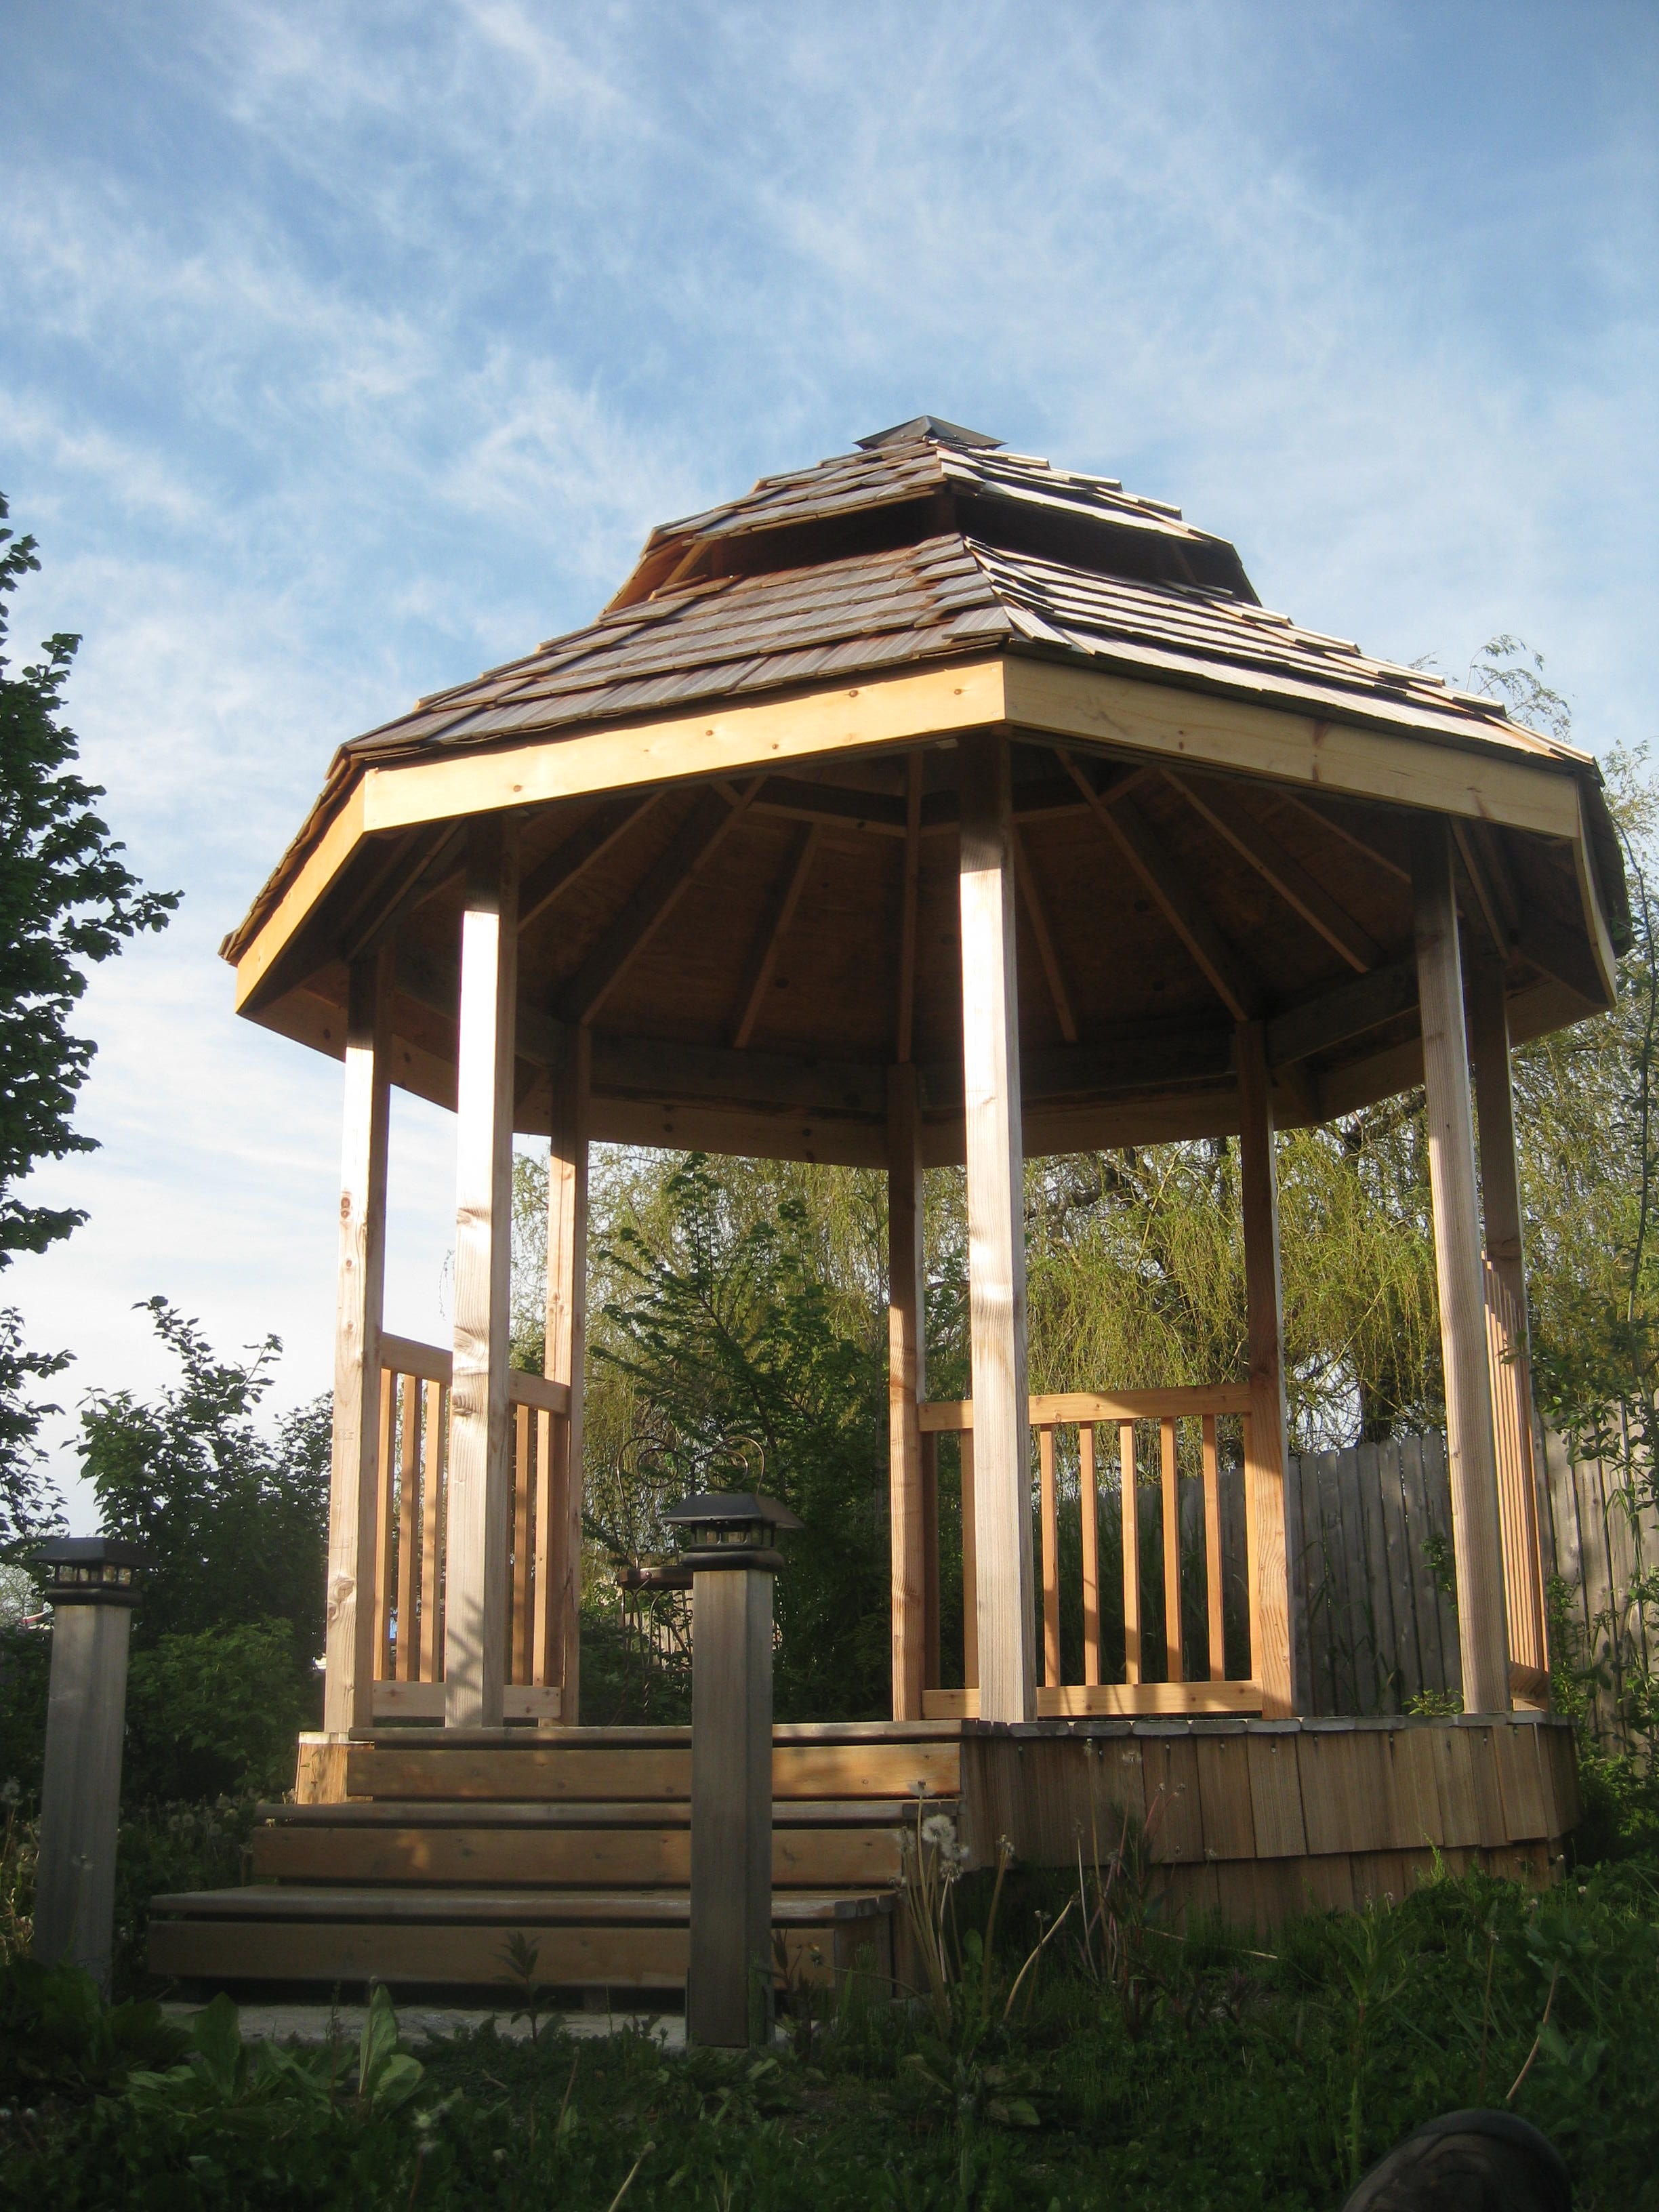
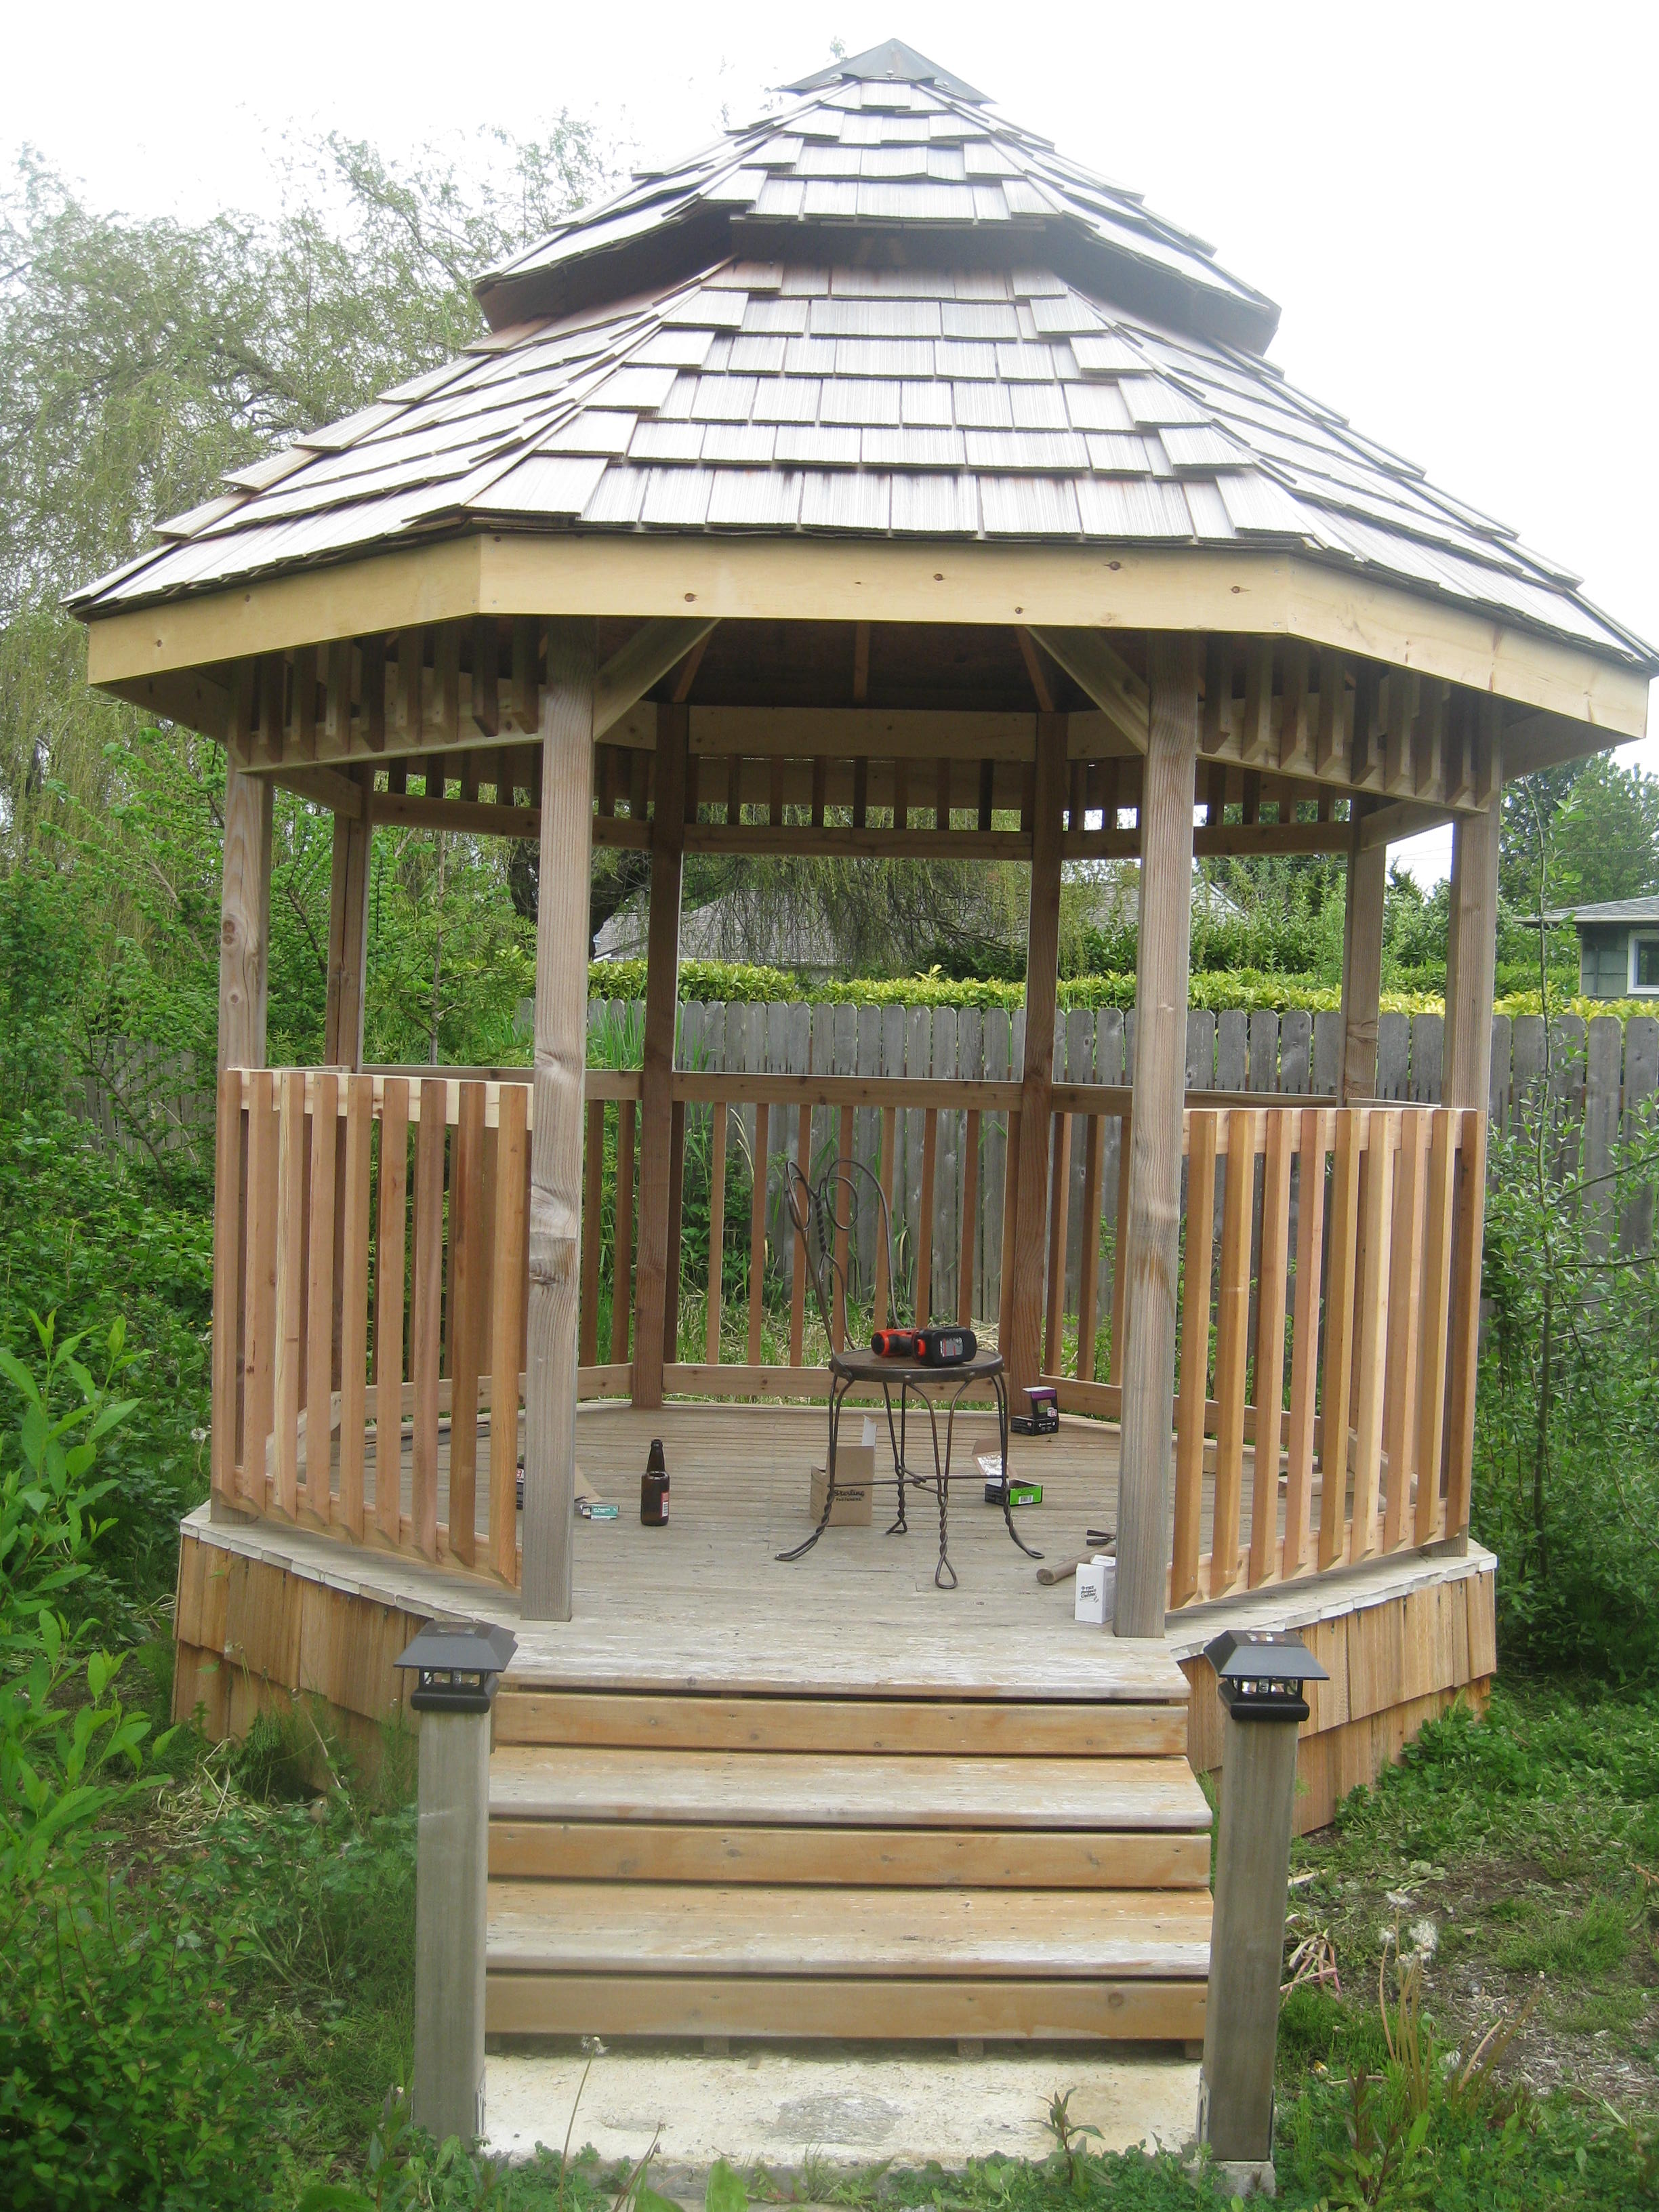 Railings and spindles complete!
Notice the fancy upper railings?
Railings and spindles complete!
Notice the fancy upper railings?
 ...And a nice cedar 2X6 rail along the top, wrapped around the posts (more tricky cuts).
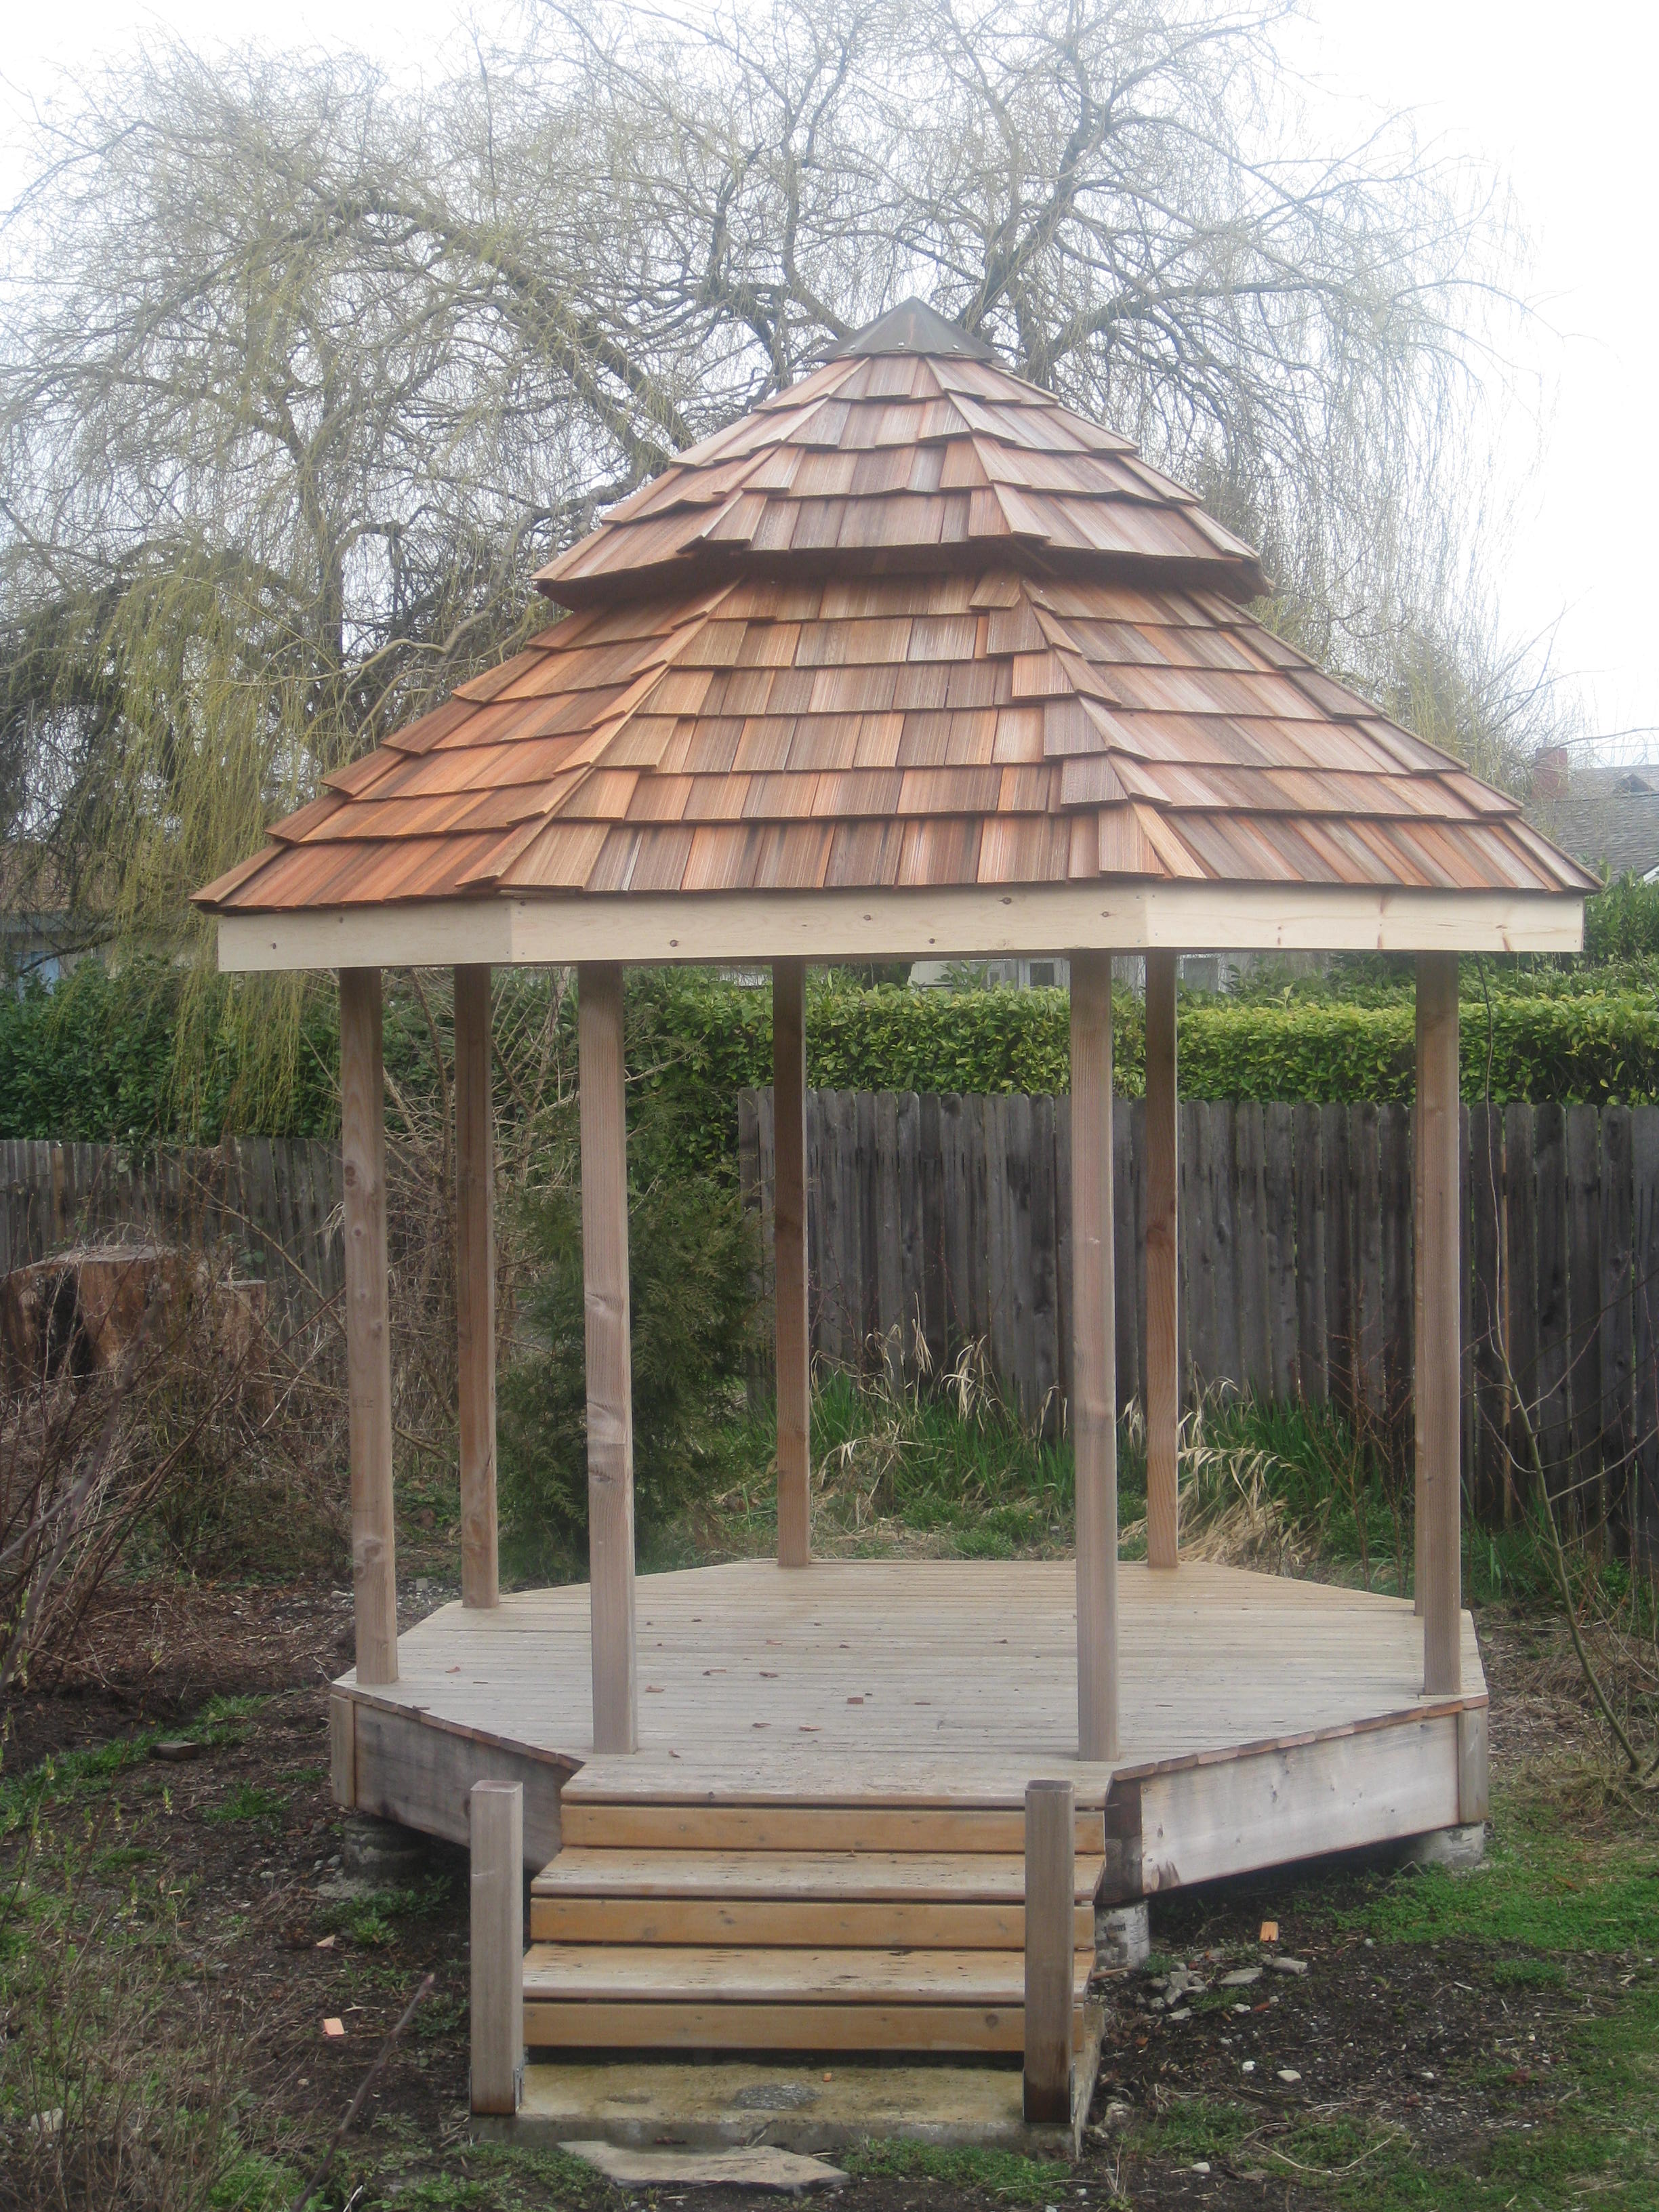
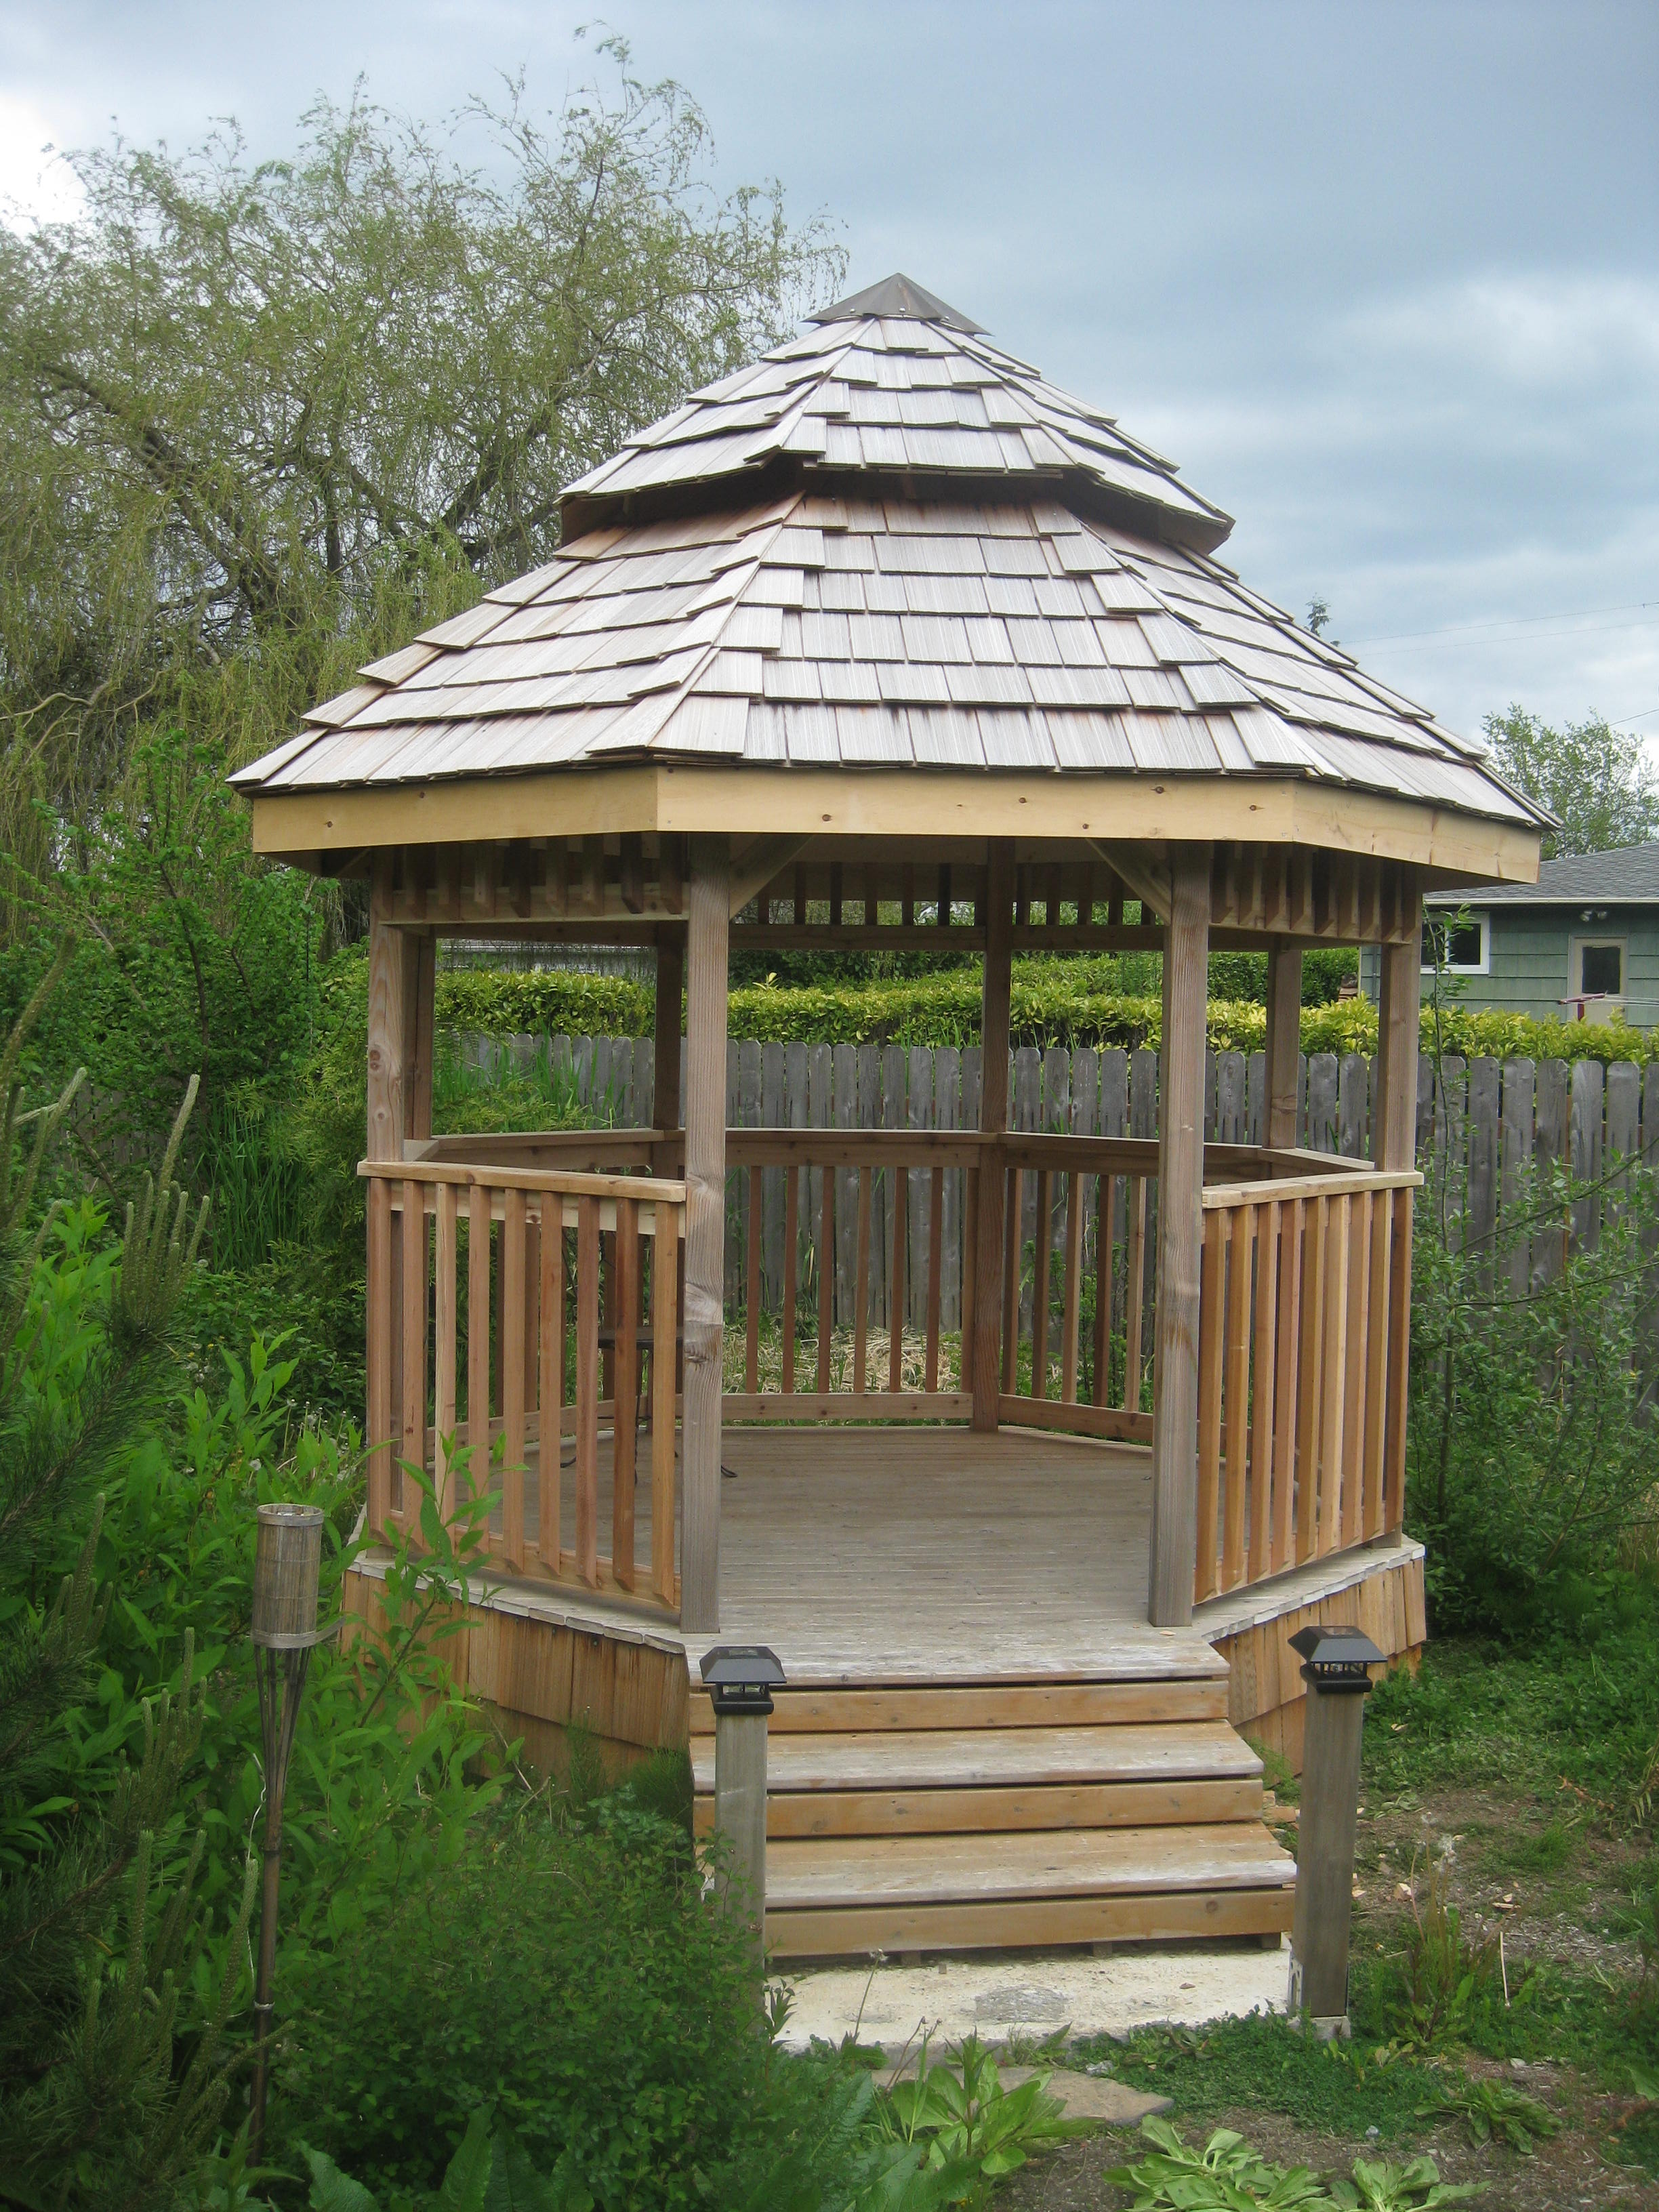
 Complete!
(Except for some little trim details and the stain)
Complete!
(Except for some little trim details and the stain)
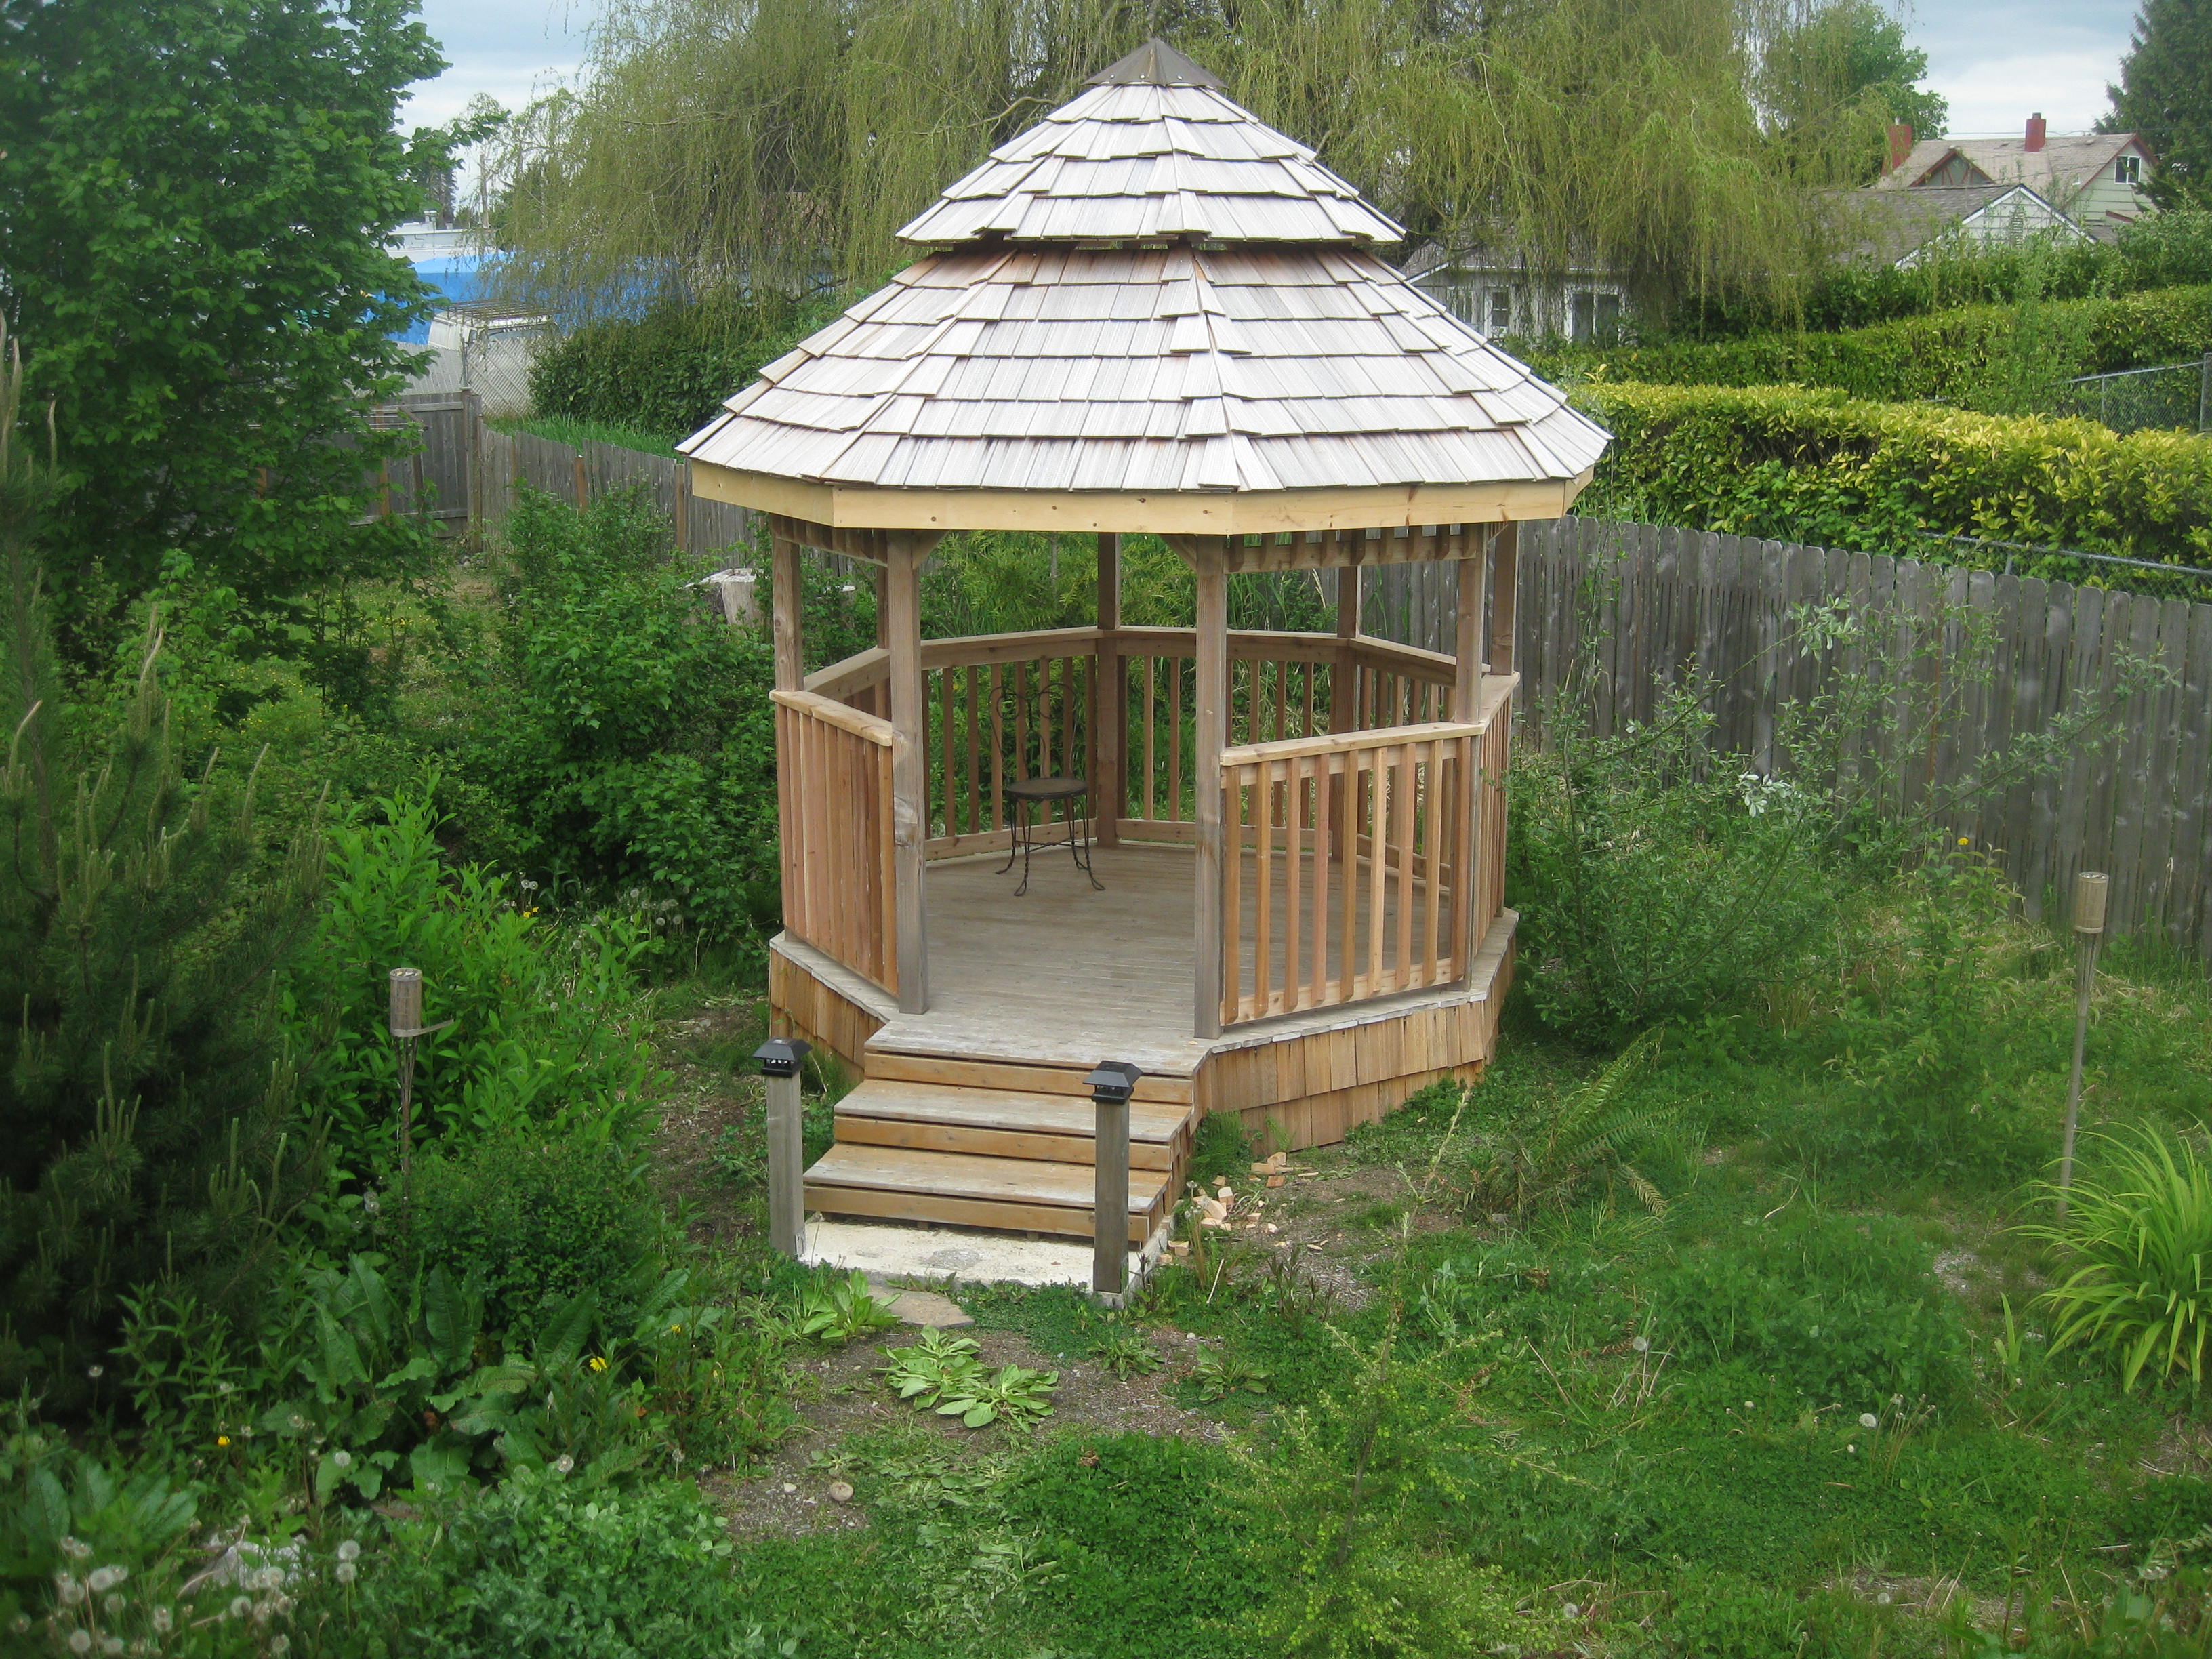
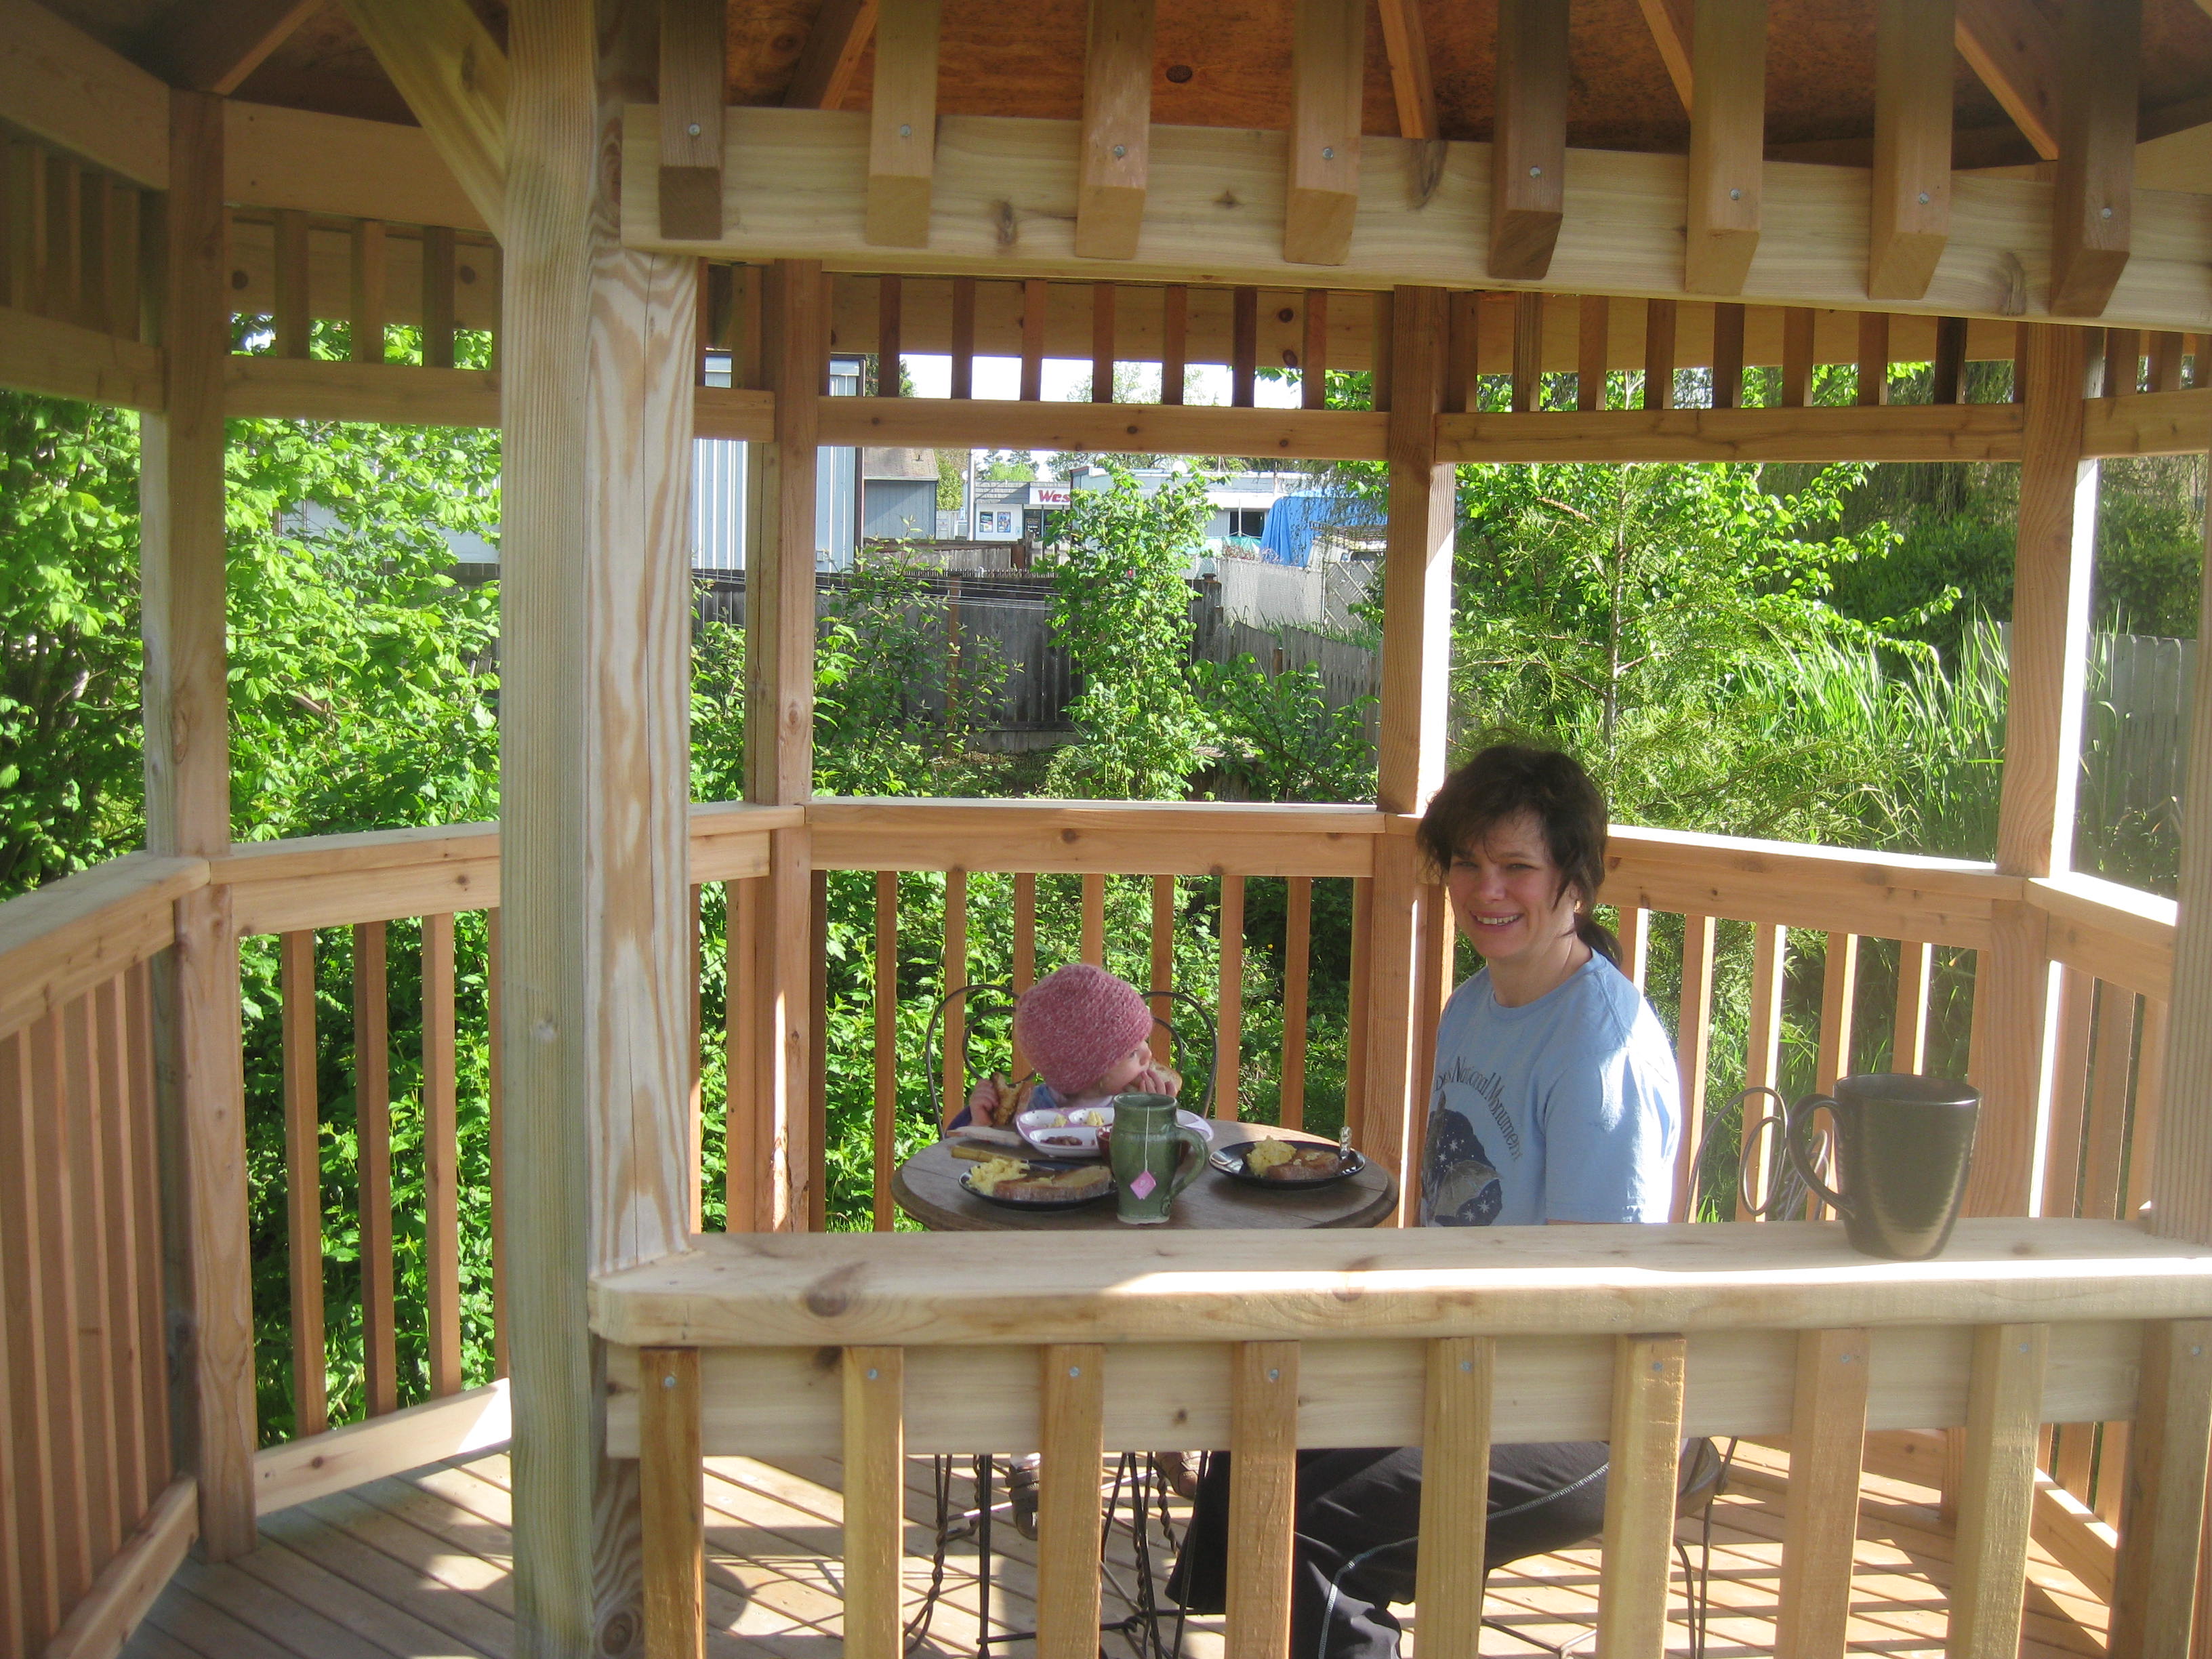 We had breakfast in the gazebo this morning (5/27), before I left for work.
Very satisfying.
We had breakfast in the gazebo this morning (5/27), before I left for work.
Very satisfying.
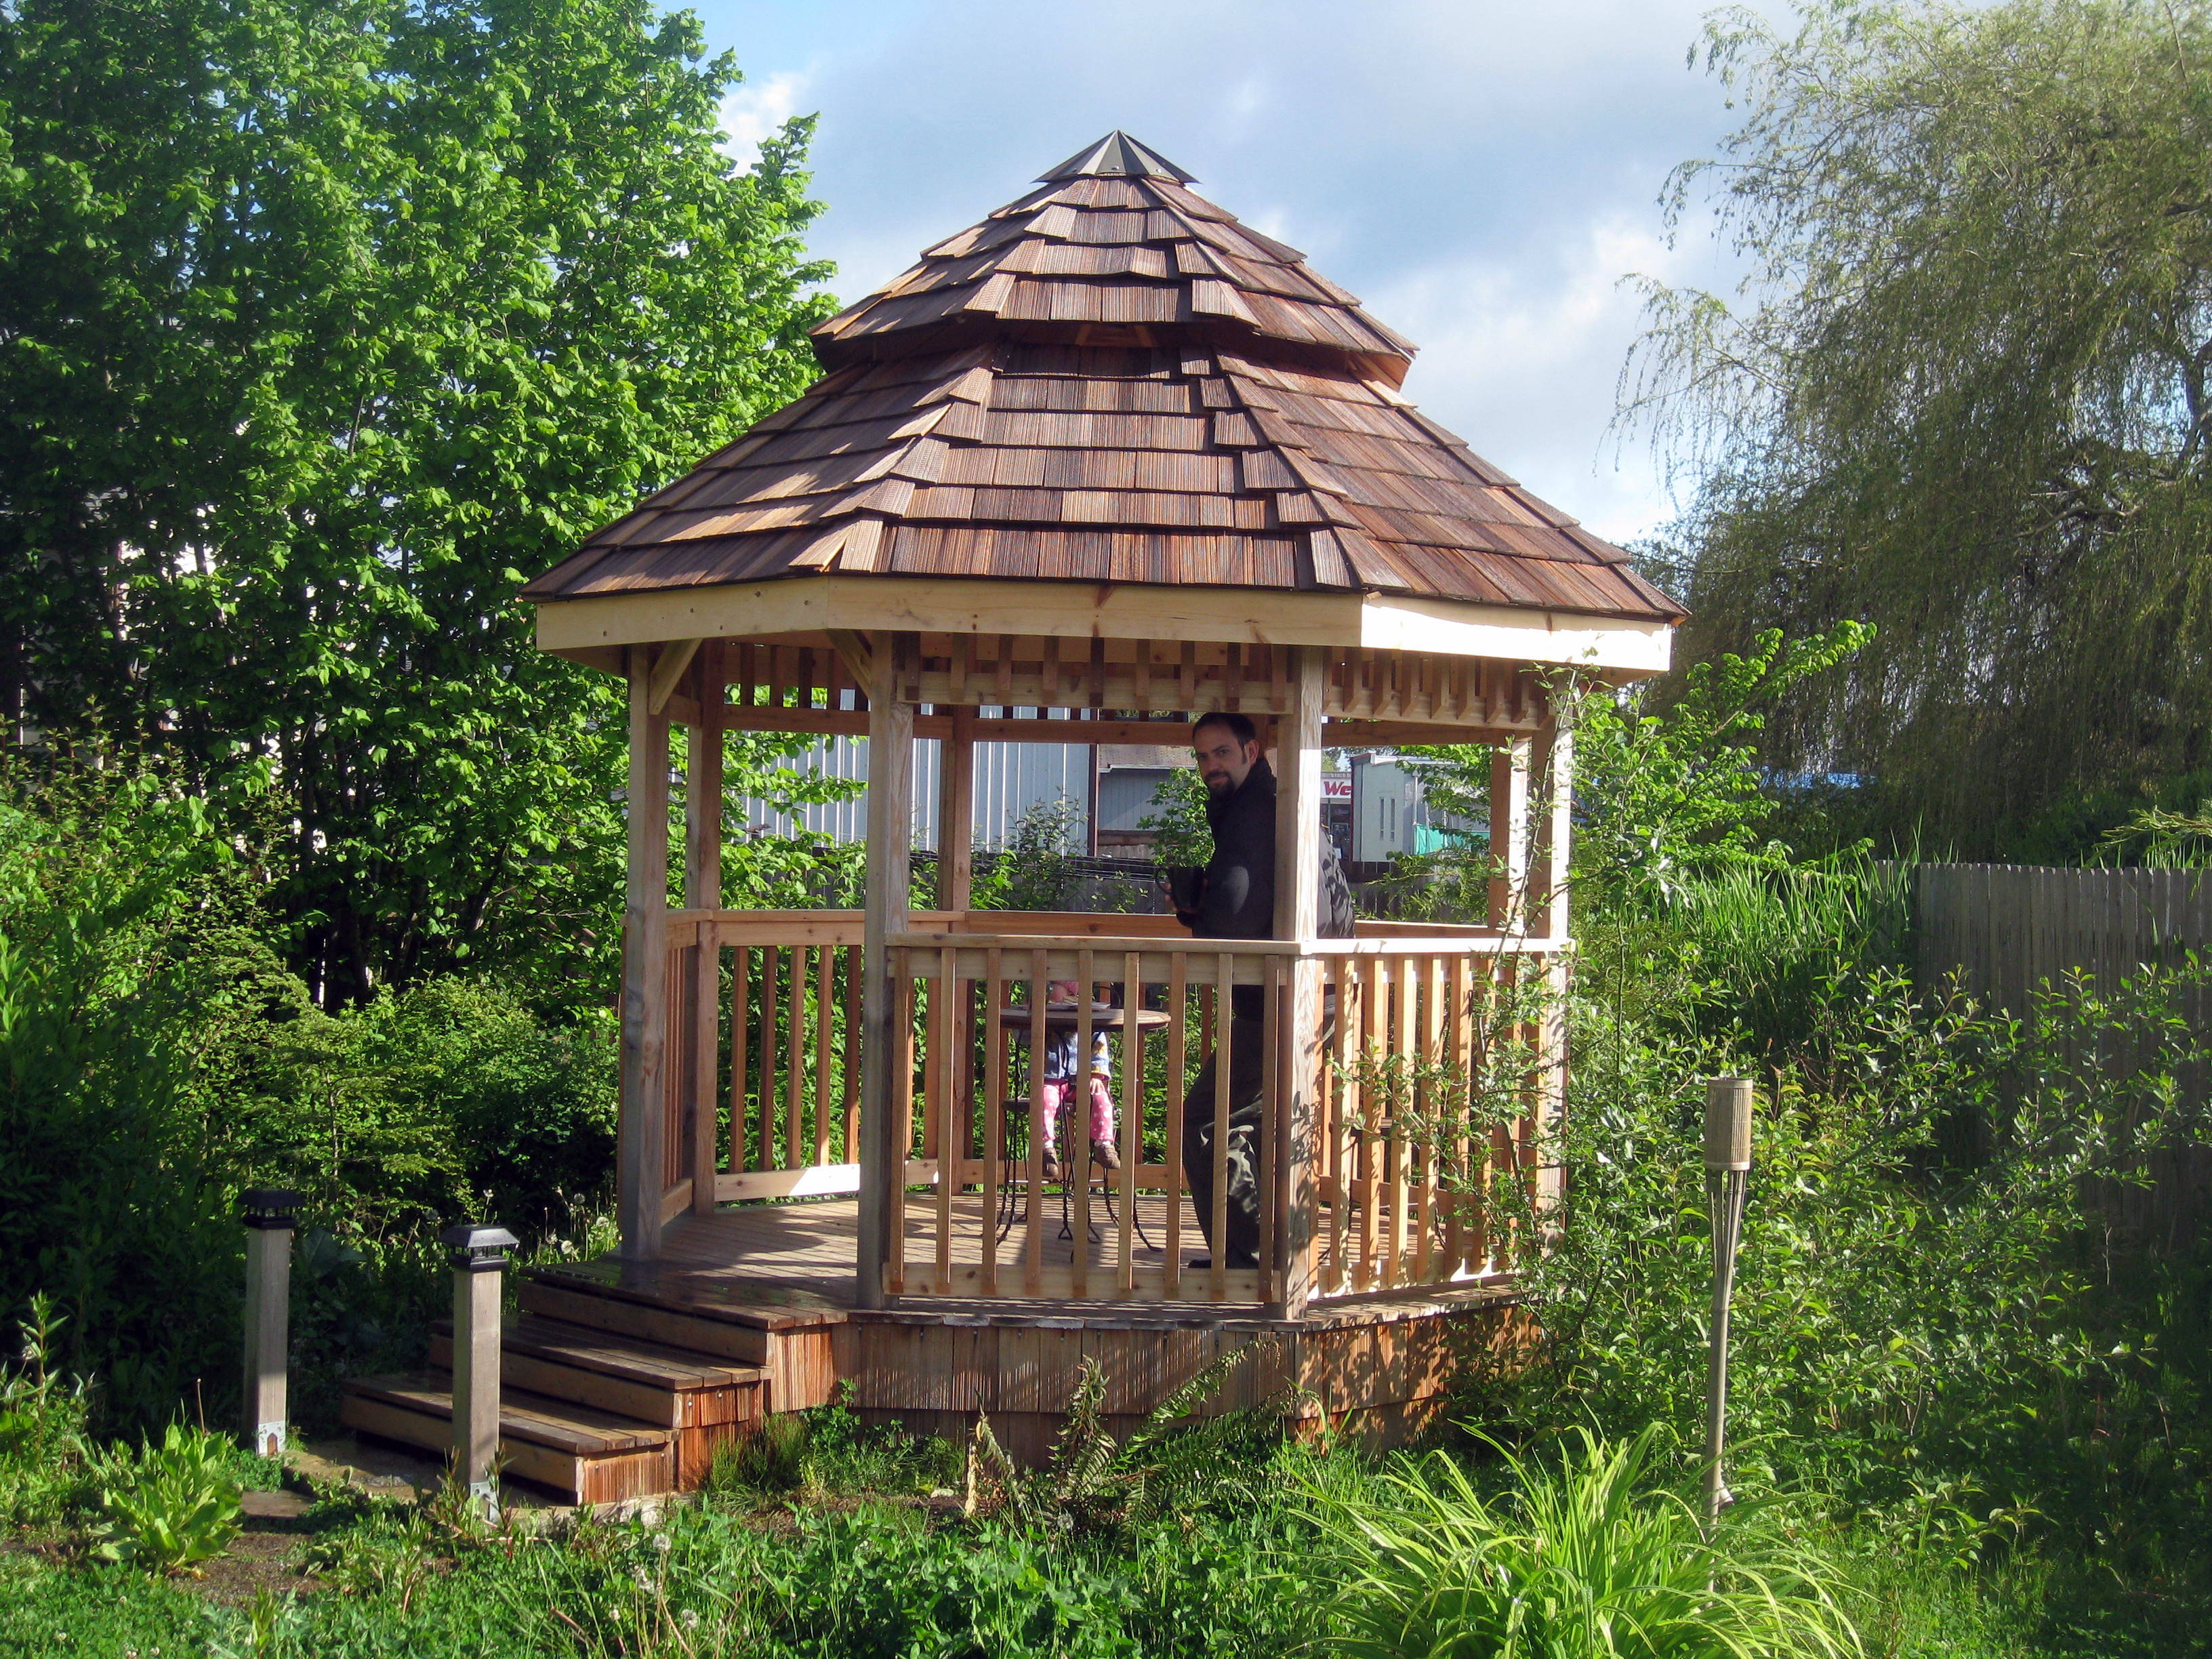 Ta-da!
That's a good cup of coffee, I tell ya.
Ta-da!
That's a good cup of coffee, I tell ya.
Video loading... Please be patient